How To Make Aioli With Immersion Blender: Quick & Easy Guide
Aioli is more than just a creamy sauce. It’s a Mediterranean classic that brings life to grilled vegetables, seafood, sandwiches, and fries. Many people think making aioli is difficult, but with an immersion blender, it’s fast and simple—even for beginners. This guide shows you exactly how to make authentic aioli at home, with clear steps, practical tips, and expert advice.
If you’ve struggled with making mayonnaise or aioli before, you’re not alone. The traditional method can be tricky, and sauces sometimes split or turn out greasy. But the immersion blender changes everything. With the right technique, you’ll create a silky, rich aioli in less than five minutes.
You’ll learn how to choose the best ingredients, how to avoid common mistakes, and how to customize aioli for your taste.
Let’s dive in and discover how to make aioli with an immersion blender, so you can enjoy this versatile sauce anytime.
What Is Aioli?
Aioli comes from Provence and Catalonia, regions famous for their food. Originally, it was just garlic and olive oil mashed together. Today, aioli often includes egg yolks, lemon juice, and sometimes mustard, which makes it smoother and easier to blend. Some people even call flavored mayonnaise “aioli,” but real aioli is all about garlic and olive oil.
The word “aioli” means garlic oil—“ai” for garlic and “oli” for oil. It’s used as a dip, spread, or sauce. Aioli is creamy, garlicky, and a little tangy. It pairs perfectly with roasted potatoes, grilled fish, vegetables, and crusty bread.
Key differences between aioli and mayonnaise:
- Aioli always includes garlic.
- Classic aioli uses only olive oil, while mayonnaise often uses neutral oils.
- Aioli has a stronger flavor, thanks to garlic and olive oil.
Why Use An Immersion Blender?
The immersion blender (also called stick blender or hand blender) is a game-changer for making aioli. It’s much easier than whisking by hand or using a food processor. Here’s why:
- Speed: Aioli comes together in seconds.
- Consistency: The sauce is smooth and thick, with no separation.
- Convenience: You can blend everything in a tall jar or cup, so there’s less mess.
- Beginner-friendly: Even if you’ve never made aioli before, the immersion blender method is almost foolproof.
Traditional aioli requires slow mixing and careful timing. The immersion blender uses fast blades to emulsify (mix oil and liquid) perfectly. This method is popular in restaurants and home kitchens alike.
Essential Ingredients For Aioli
Quality ingredients make the difference between a bland sauce and a delicious aioli. Here’s what you need:
- Garlic: Fresh, firm cloves. Avoid old or sprouting garlic.
- Egg yolk: Optional, but helps with thickening and emulsifying. Use fresh eggs.
- Oil: Extra virgin olive oil for authentic flavor. Some people mix with neutral oil (like grapeseed or canola) to balance the taste.
- Lemon juice: Adds acidity and freshness.
- Salt: Enhances flavor.
- Mustard: Optional, but helps stabilize the sauce.
Typical quantities for a small batch (about 1 cup):
- 2–3 garlic cloves
- 1 egg yolk
- 1 cup oil (extra virgin olive oil or mix)
- 1 tablespoon lemon juice
- ½ teaspoon salt
- ½ teaspoon Dijon mustard (optional)
Equipment You Need
Making aioli with an immersion blender is simple, but you need the right tools:
- Immersion blender: Any standard model works. Look for one with at least 200 watts of power.
- Tall mixing cup or jar: The cup should be just wider than the blender head. This helps the emulsification process.
- Measuring spoons and cups: For accuracy.
- Knife and cutting board: For prepping garlic and separating egg yolk.
- Small bowl: To crack the egg and check freshness.
Tip: If your blender comes with a cup, use it. The shape helps aioli emulsify quickly.
Step-by-step Guide: Making Aioli With Immersion Blender
Follow these steps for perfect aioli every time.
Step 1: Prepare Ingredients
- Peel and crush garlic cloves. Crushing releases more flavor. You can use a garlic press or smash with the side of a knife.
- Separate the egg yolk from the white. Place yolk in the mixing cup.
- Measure oil, lemon juice, salt, and mustard.
Step 2: Layer Ingredients In The Cup
- Add garlic, egg yolk, lemon juice, salt, and mustard to the cup first.
- Pour the oil gently on top. Do not mix yet.
Step 3: Position The Immersion Blender
- Place the blender head all the way to the bottom of the cup.
- Make sure the blender covers the yolk and garlic.
Step 4: Blend And Emulsify
- Turn the blender on (low or high speed).
- Hold the blender steady at the bottom for 10–15 seconds. You’ll see the mixture start to turn creamy and white.
- Slowly lift the blender up through the oil as it emulsifies.
- Blend until all oil is incorporated and the aioli is thick.
Step 5: Taste And Adjust
- Stop blending and taste the aioli.
- Add more lemon juice, salt, or garlic if needed.
- Blend briefly to mix.
Step 6: Store Or Serve
- Transfer the aioli to a bowl.
- Serve immediately, or cover and refrigerate for up to 3 days.
Cooking time: 5 minutes
Yield: About 1 cup
Serving size: 1–2 tablespoons per person
Common Mistakes And How To Avoid Them
Even with an immersion blender, aioli can go wrong. Here’s how to fix or avoid problems.
- Aioli won’t thicken:
- Check the egg yolk. Old eggs don’t emulsify well.
- Use a tall, narrow cup. Wide bowls don’t work.
- Add a little extra mustard; it helps bind oil and liquid.
- Aioli splits (looks oily or separated):
- Stop blending. Add 1 teaspoon warm water and blend again.
- Add an extra egg yolk if needed.
- Bitter taste:
- Use good quality olive oil. Some cheap oils taste harsh.
- Don’t over-blend. Heat from blending can make oil bitter.
- Too strong garlic flavor:
- Use smaller cloves or reduce garlic.
- Try roasting or blanching garlic for milder aioli.
- Too thin:
- Blend longer. Sometimes it just needs more mixing.
- Check oil measurement—too much oil makes aioli runny.
Non-obvious insight: Room temperature ingredients emulsify better. Cold eggs or oil can cause splitting.
Customizing Aioli: Flavor Variations
Aioli is flexible. You can add herbs, spices, or other flavors to make it unique. Here are some popular variations:
- Herb aioli: Add chopped fresh parsley, basil, or chives.
- Spicy aioli: Stir in cayenne pepper, smoked paprika, or sriracha.
- Lemon aioli: Add extra lemon zest for fresh citrus taste.
- Roasted garlic aioli: Use roasted garlic instead of raw for a sweeter, mellow flavor.
- Chipotle aioli: Blend in canned chipotle peppers for smoky heat.
- Truffle aioli: Add a few drops of truffle oil.
- Wasabi aioli: Mix in wasabi paste for sushi or seafood.
Example: For herb aioli, add 2 tablespoons chopped parsley or basil after blending. Stir gently.
Aioli Vs. Mayonnaise: Comparison Table
Aioli and mayonnaise are similar but not identical. Here’s a quick comparison:
| Feature | Aioli | Mayonnaise |
|---|---|---|
| Main Flavor | Garlic, olive oil | Egg yolk, neutral oil |
| Origin | Mediterranean | French |
| Texture | Thicker, stronger | Creamy, milder |
| Common Use | Dip, sauce, spread | Spread, dressing |
| Emulsifier | Egg yolk or garlic | Egg yolk |
| Oil Type | Olive oil | Canola/sunflower |
Choosing The Right Oil For Aioli
Oil is the main ingredient in aioli, so picking the right one matters. Here’s what to consider:
Extra Virgin Olive Oil
- Flavorful and authentic
- Can taste strong or bitter in large amounts
- Best for traditional aioli
Neutral Oils
- Canola, grapeseed, or sunflower
- Lighter taste, blends easily
- Good for milder aioli
Mixing Oils
Many chefs mix olive oil with neutral oil. This gives a balanced flavor and avoids bitterness.
Example mix: ½ cup olive oil + ½ cup canola oil
Oil Comparison Table
Here’s how different oils affect aioli:
| Oil Type | Flavor Strength | Texture | Recommended Use |
|---|---|---|---|
| Extra Virgin Olive Oil | Strong, fruity | Thick | Classic aioli |
| Canola Oil | Mild | Creamy | Light aioli |
| Grapeseed Oil | Neutral | Silky | Mixed aioli |
| Sunflower Oil | Neutral | Creamy | Mixed aioli |
Safety Tips: Handling Raw Eggs
Classic aioli uses raw egg yolks. While this is safe for most people, it’s good to know the risks:
- Use fresh eggs from trusted sources.
- Store eggs in the fridge until ready to use.
- Wash hands and equipment thoroughly.
- Pregnant women, young children, and people with weak immunity should avoid raw eggs.
If you prefer, you can use pasteurized eggs. These are safe and work the same as regular eggs.

Credit: theviewfromgreatisland.com
How To Store And Keep Aioli Fresh
Aioli tastes best fresh, but you can store it for later. Here’s how:
- Place aioli in a clean, airtight container.
- Keep in the refrigerator. Use within 3 days.
- Do not freeze aioli. The texture changes and it can split.
If aioli thickens in the fridge, stir in a teaspoon of warm water to loosen before serving.
Non-obvious insight: Always use a clean spoon to scoop aioli. Dirty utensils introduce bacteria.
Serving Ideas: How To Use Aioli
Aioli is versatile. Here are some ways to enjoy it:
- Dip for fries or roasted potatoes
- Spread on sandwiches or burgers
- Sauce for grilled fish or seafood
- Topping for steamed vegetables
- Drizzle over grilled chicken
- Accompaniment for tapas
- Dressing for salads (thinned with extra lemon juice)
Example: For a quick snack, serve aioli with oven-roasted potato wedges and sprinkle with fresh herbs.
Nutritional Information: Aioli Facts
Aioli is rich and flavorful, but it’s also high in calories and fat. Here’s a breakdown:
- Calories: About 100 calories per tablespoon
- Fat: 11 grams per tablespoon (mostly healthy fats from oil)
- Protein: 0.5 grams per tablespoon
- Carbs: Less than 1 gram
Aioli is gluten-free and keto-friendly. It contains vitamins E and K from olive oil. If you use egg yolks, you get extra protein and vitamin B12.
Tip: Use aioli in moderation for a healthy diet.
Troubleshooting: Fixing Broken Aioli
Sometimes aioli splits or turns runny. Here’s how to fix it:
- Pour broken aioli into a clean cup.
- Add 1 tablespoon warm water or lemon juice.
- Start blending again with the immersion blender.
- Slowly add the broken aioli back in, a spoonful at a time, while blending.
This helps re-emulsify the sauce and restore its texture.

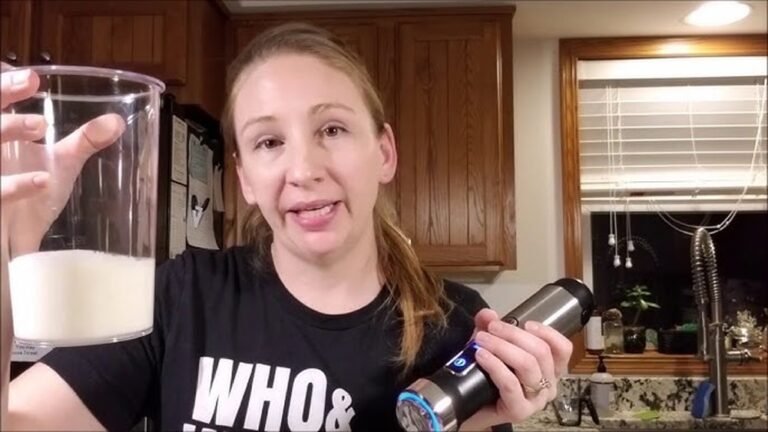
Credit: www.youtube.com
Why Homemade Aioli Is Better
Store-bought aioli often contains preservatives, stabilizers, and artificial flavors. Homemade aioli has:
- Fresh, real ingredients
- Better flavor
- No additives
Making aioli at home lets you control the taste and texture. You can adjust garlic, lemon, or salt to suit your palate. Plus, it’s cheaper and healthier.
Real-life Example: Restaurant Aioli
Many high-end restaurants use immersion blenders to make aioli. It saves time and ensures consistency. Chefs often prepare aioli before service, then add herbs or spices for different dishes. This technique is used in famous kitchens in Spain, France, and the US.
Example: In a Spanish tapas bar, aioli is served with patatas bravas (crispy potatoes), grilled octopus, and fried fish.
Immersion Blender Brands: Comparison Table
If you want to buy an immersion blender for aioli, here’s a quick look at popular models:
| Brand | Power (Watts) | Features | Price Range |
|---|---|---|---|
| Breville | 280 | Variable speed, attachments | $60–$100 |
| KitchenAid | 200 | Easy grip, blending cup | $50–$80 |
| Hamilton Beach | 175 | Budget, simple design | $30–$50 |
| Braun | 350 | Powerful, attachments | $70–$120 |
Tip: For aioli, almost any immersion blender will work. Choose a model with a comfortable grip and a tall blending cup.
Expert Tips For Better Aioli
- Use room temperature ingredients for best emulsification.
- Crush garlic well to release flavor.
- Start blending at the bottom of the cup for thick aioli.
- Add oil slowly if you’re not sure about thickness.
- For smoother aioli, strain after blending to remove garlic bits.
Non-obvious insight: If you want mild aioli, blanch garlic in boiling water for 1 minute before blending.
Aioli Around The World
Aioli isn’t just a French or Spanish sauce. It’s popular in Italy, Greece, and even the US. Each region adds its own twist:
- Italy: Aioli is called “aglio e olio.” It’s used with pasta and seafood.
- Greece: Garlic sauce is made with olive oil and lemon, sometimes with potato for thickening.
- US: Aioli is often flavored with herbs, spices, or peppers.
Health Benefits And Risks
Aioli is made mostly of olive oil, which is heart-healthy. Olive oil contains monounsaturated fats and antioxidants. Garlic has antibacterial properties and can help lower blood pressure.
But aioli is high in fat and calories. Eat it in moderation. People sensitive to eggs or garlic should avoid it.
Sustainability: Making Aioli At Home
Homemade aioli reduces packaging waste and cuts food miles. By using local eggs and oil, you support sustainable farming. Plus, you avoid plastic containers and preservatives found in store-bought sauces.
Frequently Asked Questions
Is Aioli The Same As Garlic Mayonnaise?
No. Aioli and garlic mayonnaise are similar but not identical. Aioli is traditionally made with olive oil and garlic, sometimes egg yolk. Mayonnaise uses neutral oil and egg yolk, and garlic is optional. Aioli has a stronger flavor.
Can I Make Aioli Without Eggs?
Yes. Classic aioli uses only garlic and olive oil, but it’s hard to emulsify. The immersion blender method works best with egg yolk. If you want egg-free aioli, use extra garlic and blend longer. The texture will be thinner.
How Long Does Homemade Aioli Last?
Homemade aioli lasts about 3 days in the refrigerator. Always store in a clean, airtight container. Discard if it smells sour or separates badly.
Can I Use A Regular Blender Instead Of Immersion Blender?
You can, but it’s harder to control the texture. Regular blenders may not emulsify aioli as well, and you need to scrape the sides often. The immersion blender is faster and produces thicker aioli.
Is Aioli Safe For Kids And Pregnant Women?
Aioli with raw eggs can carry a risk of salmonella. Use pasteurized eggs to reduce risk. If you’re concerned, make egg-free aioli or use cooked yolks. Always store aioli in the fridge and eat within 3 days.
If you want to read more about the origins and variations of aioli, visit Wikipedia.
Making aioli with an immersion blender is easy, fast, and gives you control over every ingredient. Whether you want classic garlic aioli or a creative twist, the method is reliable and beginner-friendly. With these tips, you’ll be able to make aioli like a pro—enjoying it with everything from fries to seafood.
Try it, experiment with flavors, and see how homemade aioli can elevate your meals.

Credit: www.youtube.com