How To Make Shaved Ice With Ninja Blender: Easy Guide
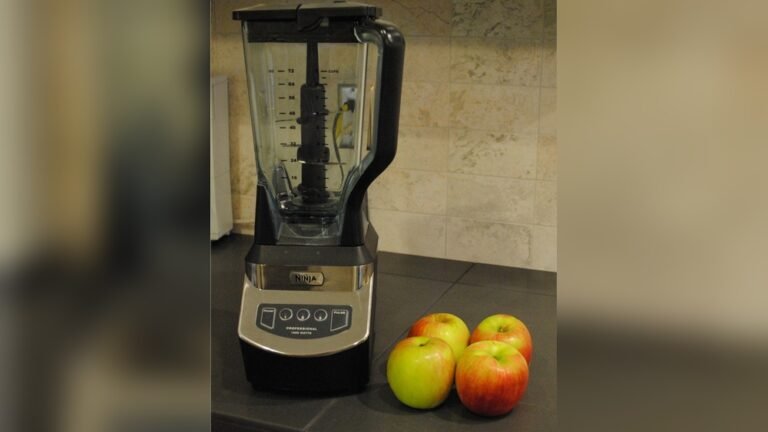
You can achieve a light, fluffy texture by using high-speed pulses with fresh ice cubes in a high-torque blender base. How to make shaved ice with Ninja blender requires a machine with at least 1,000 watts of power to properly crush the ice without leaving large, jagged chunks behind.
Your result depends heavily on the model you own and the quality of the ice you choose. If your blender has a dedicated “Ice Crush” button, use it; if not, use short, one-second pulses to avoid turning your ice into watery slush.
Who should make shaved ice this way
This guide is for home cooks who already own a Ninja blender system and want to create frozen desserts, snow cones, or chilled beverages without buying a specialized ice shaver. You likely have standard ice cube trays or a freezer with an automatic ice maker. You need a method that works quickly without damaging your blender’s blades or motor.
If you own a small, low-wattage personal blender, this page isn’t for you; those motors struggle with hard ice and may overheat. This article assumes you have a full-sized Ninja blender with a stacked blade assembly or a high-speed processor bowl. It also assumes your ice is fresh, as old ice absorbs odors from the freezer, which ruins the taste of your shaved ice. If you’re looking for professional-grade, paper-thin shaved ice, you’ll need a dedicated commercial ice shaver, as blenders naturally produce a slightly coarser, “crushed” texture rather than true “snow.” This page serves those who want the best possible result from the equipment they already have on their kitchen counter.
Factors that change your results
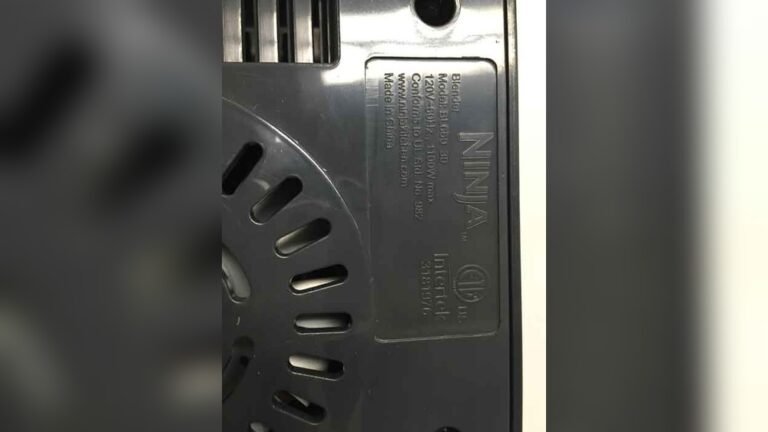
The primary factor is the power rating of your Ninja blender motor. Models rated at 1,000 watts or higher handle ice with ease, while anything below 700 watts will likely struggle to create a uniform texture. Always check your base label to confirm the wattage before you begin.
The shape and density of the ice cubes play a major role in the final consistency. Smaller, hollow, or “bullet” style ice cubes from a refrigerator dispenser crush much faster than large, solid cubes frozen in a plastic tray.
Blade sharpness is another critical variable. Ninja blenders use a stacked blade assembly; if these blades are dull, they will beat the ice into slush instead of shaving it. If they cannot, the ice will come out uneven.
People often make the mistake of overfilling the blender jar. When you pack the jar to the top, the blades at the bottom spin freely while the ice at the top stays frozen. This results in a mix of liquid water and giant chunks. Always fill the jar only halfway to ensure the ice can circulate through the blades efficiently.
How To Make Shaved Ice With Ninja Blender: Step by Step
- Remove your ice from the freezer and let it sit on the counter for 3 to 5 minutes to temper; this makes the ice brittle enough to shave easily.
- Pour 2 cups of ice cubes into the blender jar, ensuring you don’t exceed the halfway mark of the container.
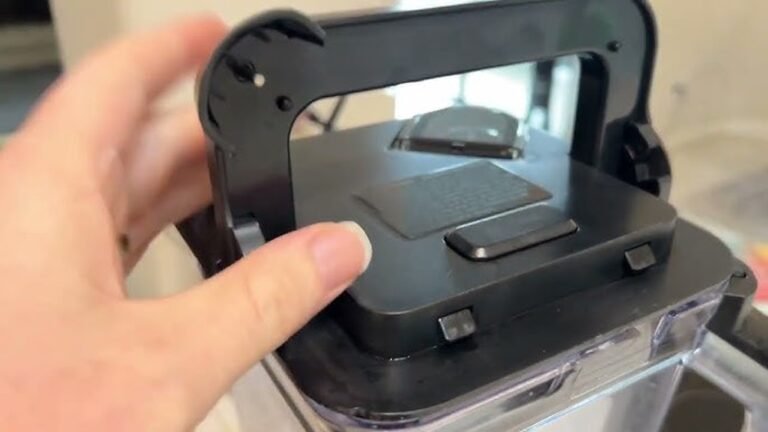
- Secure the lid tightly and place the jar onto the blender base.
- Select the “Ice Crush” setting if your model has it; if not, set the speed to “Low.”
- Pulse the motor in short, one-second bursts rather than running it continuously.
- Stop after 5 pulses to check the texture; if you see large chunks, shake the jar gently to redistribute the contents.
- Continue pulsing for another 3 to 5 seconds until the ice reaches a fine, snow-like consistency.
- Remove the lid immediately and transfer the ice to a serving bowl to prevent it from melting into a puddle.
The judgement call is knowing when to stop pulsing. You want a texture that holds together when pressed with a spoon but remains loose enough to scoop. If you pulse too long, the friction creates heat, turning your snow into a slushy liquid. If your blender begins to smell like burning rubber, turn it off immediately and unplug it; this is a sign the motor is overloaded. According to FoodSafety.gov’s chart, you should always use clean, potable water for your ice, as ice cubes can carry bacteria if the freezer or trays aren’t sanitized regularly.
The variations at a glance
The table below shows how different ice types and blender methods change your final result.
| Situation | What to do | What it takes | Watch for |
|---|---|---|---|
| Bullet ice | Use pulse mode | 10 seconds | Melting |
| Large cubes | Temper 5 mins | 20 seconds | Blade wear |
| Fluffy snow | Pulse very fast | 30 seconds | Liquid water |
| Fruit syrups | Pour over after | 5 seconds | Dilution |
| Large batch | Work in parts | 60 seconds | Motor heat |
If you use large cubes directly from a zero-degree freezer, the brittle edges will likely chip your blender blades. Always let them sit for five minutes until the surface appears slightly wet. This tempering process softens the ice just enough to prevent mechanical stress.
When working with large batches, monitor the motor base closely. If the housing feels warm to the touch, stop immediately. A motor that overheats loses torque, which turns your crushed ice into a slushy, watery mess.
If you’re unsure which category applies, check the ice density. If the ice feels heavy and solid, treat it as a large cube. If it’s already fractured or hollow, use the bullet ice method to avoid over-processing. Following these rules prevents the friction that ruins texture.
What separates a good result from a poor one
Managing the temperature and moisture
Experienced users know that temperature is the secret to perfect texture. If the ice is too cold, it shatters into jagged shards; if it’s too warm, it turns into mush. By tempering the ice for a few minutes, you reach the “sweet spot” where the ice is soft enough to shave but firm enough to hold its shape. Beginners often try to rush this by adding water to the blender, but this only speeds up the melting process and ruins the texture of your final treat.
Controlling the blade speed
Using the correct speed setting prevents the blender from creating a vortex that traps air instead of crushing ice. High-speed blending generates too much heat, which melts the ice before it finishes shaving. Experienced operators use low-speed pulses to keep the friction low. They listen to the sound of the machine; a high-pitched whine means the blades are spinning too fast with no resistance, while a deep, rhythmic thud indicates they’re successfully shearing the ice. Never try to force the ice down with a tamper while the blades are spinning, as this can cause the blades to chip or the motor to stall.
What goes wrong, and what to do
| What you notice | What it usually means | What to do first | How to stop it happening again |
|---|---|---|---|
| Large ice chunks | Overfilled jar | Remove half ice | Use less ice |
| Watery slush | Over-blended | Drain excess water | Pulse for less time |
| Stalled motor | Ice is too hard | Unplug and wait | Let ice temper longer |
| Burnt smell | Motor overheat | Stop immediately | Use shorter pulses |
| Cloudy ice | Impure water | Use filtered water | Clean ice trays |
Most users mistake a stalled motor for a broken appliance. If the blades stop mid-cycle, don’t force the pulse button. This generates heat that can melt the internal plastic gears. Instead, unplug the base and let the ice sit for five minutes.
The most common error is using ice straight from a sub-zero freezer. You want clear, tempered ice that has sat at room temperature for three minutes.
If you smell ozone or burning rubber, you have pushed the motor past its thermal limit. Stop immediately. If you ignore this, you risk permanent damage to the winding coils. Always use short, rhythmic pulses rather than holding the button down. This allows the blades to reset and prevents the motor from seizing under the sudden torque.
The rules that apply
Safety standards for household kitchen appliances are set by the Underwriters Laboratories (UL). Their guidelines for blender safety, specifically under the UL 982 standard, emphasize that users should never operate a blender with a damaged cord or a loose blade assembly. If your Ninja blender has an interlocking lid, never attempt to bypass the safety switch; doing so can cause the blades to spin while the lid is open, leading to severe injury. If the blender fails to start, check the breaker in your home’s electrical panel or the GFCI outlet reset button. Never attempt to open the motor housing yourself, as high-voltage capacitors inside can hold a lethal charge even when the unit is unplugged. If the motor is dead or the blades are stuck, contact the manufacturer’s support team directly through their official website to request a repair or replacement part.
What it costs you
The primary cost of this method is the time you spend prepping and cleaning. It takes about 2 minutes of active time to prepare the ice and clean the jar afterward. The energy cost is negligible, as a standard 1,000-watt blender uses a tiny fraction of a cent of electricity for a 30-second cycle. However, the true cost is the wear on your blender’s motor and blade assembly. Using hard ice regularly will dull the blades over time, and you’ll eventually need to purchase replacements. You can check the current price of replacement blade assemblies on the manufacturer’s official store page. Always compare the cost of replacement parts against the price of a entry-level manual ice shaver before deciding to use your blender for this purpose long-term.
Keeping it right afterwards
Once you finish, you must clean the blender jar immediately to prevent sugar or syrup residue from hardening. Rinse the jar with warm, soapy water and a soft sponge. Never put the blade assembly in the dishwasher unless the manual specifically states it’s dishwasher-safe, as the high heat can damage the rubber gaskets that keep the motor seal tight. After washing, let the jar and blades air dry completely on a rack. If the blades become dull, you’ll notice the ice takes longer to process and the texture becomes uneven. When this happens, stop using it for ice and order a new blade assembly from the manufacturer.
When this is the wrong approach
If you need to produce enough shaved ice for a large party or a commercial event, using a household blender is the wrong choice. The motor will overheat after two or three cycles, and you’ll spend more time waiting for the machine to cool down than actually serving guests. In this situation, rent or purchase a professional-grade snow cone machine, which is designed to shave large blocks of ice continuously without heat buildup.
Additionally, if you’re trying to create “bingsu” or other milk-based shaved ices, don’t use a blender. The high fat content in milk causes it to turn into a butter-like paste when hit with high-speed blades. For milk-based desserts, you need a specialized drum-style shaver that freezes the liquid onto a cold plate and shaves it off in thin ribbons. Don’t attempt to modify your blender to handle frozen milk, as the resulting mess is difficult to clean and can clog the blade seals.
Frequently asked questions
Can I use store-bought ice bags?
Yes, you can use store-bought ice, but it’s often much harder than home-frozen ice. Because store-bought ice is usually frozen at very low temperatures, you must let it sit on the counter for at least 10 minutes before pulsing to prevent it from damaging your blades.
Is it safe to shave ice with fruit?
No, don’t add fruit directly into the blender with the ice. The water content in fruit will turn the ice into a chunky smoothie or puree rather than shaved ice; always shave the ice first and then top it with fresh fruit or syrup.
Why is my shaved ice melting so fast?
Your ice is melting quickly because the blender blades are creating too much friction heat. To stop this, ensure your jar is chilled in the freezer for 15 minutes before use, and always use the shortest possible pulses to get the job done.
How long does the ice stay fluffy?
Shaved ice stays fluffy for about 3 to 5 minutes after it’s removed from the blender. Because the surface area of the ice is so high, it absorbs heat from the air very quickly, so serve it immediately in a chilled bowl.
Does the blade assembly need sharpening?
No, the blade assembly in a Ninja blender is designed to be replaced rather than sharpened. Attempting to sharpen the blades with a home tool will likely destroy the factory edge and void your manufacturer’s warranty, making the blades less effective at crushing ice.
What happens if I use too much water?
If you use too much water, the ice will clump together into a solid block rather than remaining loose and fluffy. Always drain the excess water from your ice tray or bag before putting the ice into the blender to keep the texture light.
What to do next
Start by checking your blender’s power rating on the base to confirm it’s suitable for ice. Most standard blenders require at least 500 watts to process frozen water without damaging the motor.
Once confirmed, temper your ice for five minutes. Letting the cubes sit at room temperature creates a thin film of water that acts as a lubricant for the blades.
Run a single test batch using the pulse method. You’ll know you have succeeded when the ice looks like fresh, loose snow and holds its shape in a scoop.
Stop immediately if you hear a grinding noise or smell heat. This indicates the blades are stuck or the motor is straining.
Final Thoughts
Once your bowl is filled with that perfect, snow-like texture, don’t hold back on the toppings. Drizzle your favorite fruit syrups or a splash of sweetened condensed milk over the top to make it truly refreshing. You’ll love how simple it’s to create a cool treat whenever you’re craving one.