How To Clean Ninja Blender Power Base: Quick & Easy Guide
Cleaning your Ninja blender power base is more important than most people realize. It’s not just about appearance. A dirty blender base can lead to unpleasant odors, unsafe bacteria, and even reduced machine performance. If you use your Ninja blender often, you probably wipe the pitcher and blades after each smoothie.
But the base—the heart of the machine—often gets ignored. Over time, crumbs, spills, and sticky residue build up inside and around the base, making your blender less reliable and less safe. Learning to clean your Ninja blender power base thoroughly will keep your kitchen healthy, extend your blender’s life, and ensure your drinks taste fresh every time.
Understanding The Ninja Blender Power Base
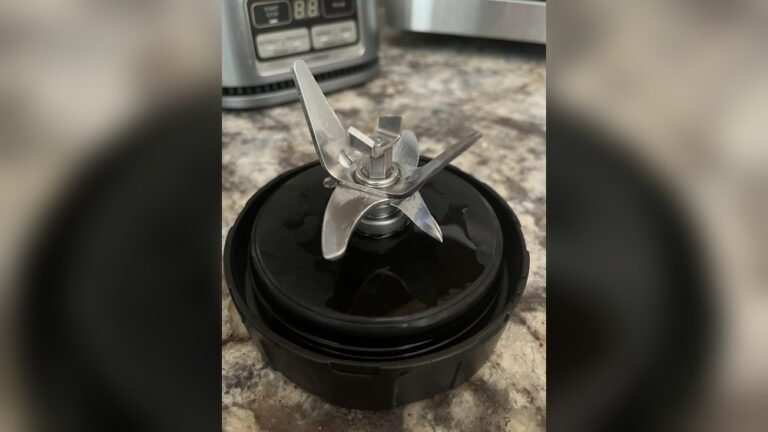
Before jumping into cleaning, it’s helpful to know what the power base actually is. On a Ninja blender, the power base is the bottom unit that houses the motor and controls. This part powers the blades and connects to the pitcher. Unlike the pitcher and blades, which are designed to be washed easily, the base contains electrical parts and must be cleaned carefully.
When you look at your Ninja blender, the base is often the heaviest part. It’s designed to stay stable during blending, but also to keep the motor safe from spills and kitchen messes. Many users don’t realize that even though the base feels solid, crumbs and liquid can still get inside through small openings.
Key Components Of The Power Base
- Motor Housing: The main part that holds the motor. It is usually made from tough plastic or metal and protects the motor from outside damage.
- Control Panel: Where you press buttons or turn dials. This area sometimes has a digital screen or simple push buttons, depending on your model.
- Gasket Area: The rubber ring that seals the pitcher to the base. This is critical for preventing leaks during blending.
- Vents and Openings: For air circulation to prevent overheating. These vents are often hidden underneath or on the sides.
- Power Cord: Usually attached or stored underneath. Sometimes the cord wraps around hooks for easy storage.
Each of these areas can collect dirt, dust, and food particles. The control panel is especially vulnerable to sticky fingerprints and splashes, while the gasket area can trap crumbs and liquids. Small spills can seep into the crevices, and over time, these build up to create sticky or even moldy spots.
Why Regular Cleaning Matters
A clean power base improves the blender’s performance and safety. Food particles can get inside the vents, causing the motor to overheat or short out. Liquids spilled near buttons may make controls sticky or unresponsive. If bacteria builds up, your kitchen can become less sanitary. According to the National Sanitation Foundation, kitchen appliances like blenders are among the top sources of hidden bacteria in homes.
Even if your blender looks clean on the outside, bacteria can hide inside buttons, under the gasket, or in vent openings. This can make your drinks taste strange or even unsafe. Regular cleaning also prevents dust from collecting inside, which can cause the motor to run less smoothly.
If you ignore cleaning, you may notice your blender smells bad, works slower, or stops working altogether.
Preparing To Clean Your Ninja Blender Power Base
Proper preparation makes cleaning easier and safer. Never clean the base the same way you clean the pitcher or blades, since water and electrical parts don’t mix.
Safety Steps Before Cleaning
- Unplug the Blender: Always disconnect from power first. This keeps you safe from shocks and prevents accidental starts.
- Remove the Pitcher and Blades: Take off all detachable parts to expose the base. This gives you full access to clean around and under the connection area.
- Check the Manual: Look for any specific cleaning instructions for your model. Some models have unique features or extra parts that need special attention.
Most Ninja models have similar cleaning steps, but some advanced models may have extra features or different layouts. If you lost your manual, you can usually find it online.
It’s also smart to clear your workspace before you start. Place the base on a towel or mat to prevent it from sliding. Make sure the blender is cool if you used it recently—this avoids accidental burns.
Gathering Cleaning Supplies
You don’t need fancy tools to clean the blender base, but the right supplies make a big difference:
- Soft cloths (microfiber preferred) for gentle cleaning without scratching
- Cotton swabs or soft toothbrush for corners and buttons
- Mild dish soap for safe cleaning
- Small bowl of warm water for dipping your cloths or swabs
- Compressed air (optional, for vents) to blow out dust and crumbs
- White vinegar (for stubborn stains) cuts grease and stickiness
- Paper towels for drying and quick wipe-ups
- Toothpicks (for tight crevices) wrapped with a cloth for extra reach
Avoid harsh chemicals or abrasive pads, since they can scratch the surface or damage controls. If you want to use natural cleaners, baking soda paste can help with tough stains, but be sure to wipe away all residue.
Step-by-step Guide: Cleaning The Ninja Blender Power Base
Cleaning the power base is simple if you follow these steps. Each part needs slightly different care.
1. Wipe Down The Exterior
Start with the outside. Dip a soft cloth in warm, soapy water and wring it out well. The cloth should be damp, not dripping.
- Gently wipe the motor housing and sides. Move in slow circles to lift dirt without pushing water into openings.
- Clean the control panel with special care—avoid pressing too hard on buttons. If you notice sticky spots, spend a few extra seconds rubbing gently.
- Use a dry cloth to remove extra moisture.
If you see dried spills or sticky spots, add a drop of dish soap to your cloth, rub gently, then wipe with a clean damp cloth. For greasy fingerprints, a mix of water and a little vinegar helps cut through residue.
2. Clean The Control Panel And Buttons
Buttons and displays can collect grime and bacteria. For deep cleaning:
- Dip a cotton swab in soapy water (squeeze out extra moisture). Use it to clean around each button, dial, and edge.
- For tight spaces, use a toothpick wrapped in the cloth. This gets inside crevices where crumbs and sticky bits hide.
- For touch screens, use a dry microfiber cloth. If needed, lightly dampen the cloth with water only—avoid soap.
If your blender has digital controls, avoid getting water inside the screen. For sticky residues, a mix of water and white vinegar helps. You can also use a soft toothbrush for buttons, moving gently to avoid dislodging any parts.
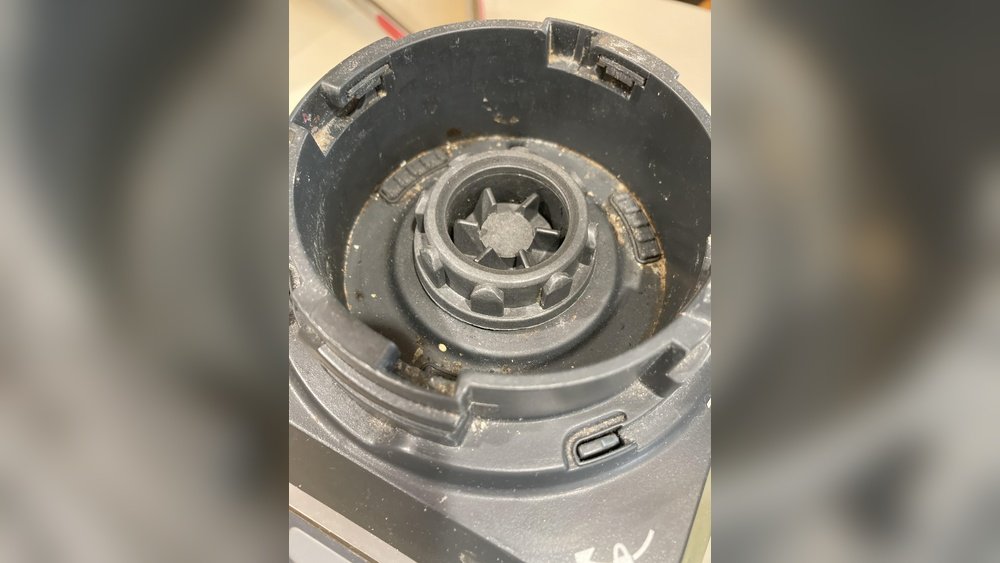
3. Remove Debris From Vents And Crevices
The air vents are often ignored but are crucial for motor cooling. Dirt here can cause overheating.
- Use compressed air to blow out dust from vents. Hold the can upright, and use short bursts to avoid moisture buildup.
- Alternatively, use a dry toothbrush to loosen debris. Brush lightly to avoid pushing crumbs deeper.
- Wipe around the vents with a damp cloth. Clean both the outside and inside edges if accessible.
If you see crumbs inside, tilt the base gently to let them fall out. For stubborn buildup, repeat with compressed air or use a vacuum with a small nozzle.
4. Clean The Gasket Area
The gasket is where the pitcher connects to the base. This area can trap food and liquid.
- Wipe the gasket area with a damp cloth. Move in small circles to lift sticky residue.
- Use a cotton swab or toothpick for small spaces. If you notice mold or strong odors, dip the swab in vinegar for extra cleaning.
- Dry with a clean paper towel. Make sure no moisture is left, since this area connects directly to the motor.
For tough buildup, make a paste of baking soda and water. Rub gently, rinse, and dry.
5. Polish The Power Cord
The cord often sits under the base and can get dusty.
- Wipe the cord with a damp cloth. If the cord is sticky, use a little dish soap.
- Dry it fully before plugging back in. Check for any fraying or damage—replace the cord if needed for safety.
If your cord has hooks for storage, clean those as well.
6. Deep Clean For Tough Stains
Sometimes, spills dry and leave marks that regular cleaning won’t remove.
- Mix equal parts water and white vinegar.
- Dip a cloth in the mixture, wring out, and rub stains. For sticky sugar or juice spills, let the cloth rest on the spot for a minute before wiping.
- Rinse with a damp cloth and dry.
If stains persist, repeat the process or use a soft toothbrush. Avoid scrubbing too hard.
7. Let Everything Dry
Never plug the blender back in until all parts are dry. Dampness can cause electrical problems.
- Allow the base to air dry for at least 30 minutes. Place it in a well-ventilated area, not in direct sunlight.
- If needed, use a hair dryer on cool (not hot) to speed up drying. Hot air can warp plastic or damage internal parts.
Double-check all buttons, vents, and the cord for moisture before use.
Tips For Cleaning Different Ninja Blender Models
Ninja blenders come in several shapes and sizes. While cleaning steps are similar, a few details can vary.
| Model | Special Features | Cleaning Advice |
|---|---|---|
| Nutri Ninja | Small base, single-serve | Extra care for small crevices |
| Ninja Professional | Larger base, more controls | Use more cotton swabs for buttons |
| Ninja Foodi | Advanced functions, digital display | Wipe display gently with dry cloth |
| Ninja Auto-iQ | Preset programs, touch controls | Do not use wet cloth on touch screen |
Always check your model’s manual for unique cleaning instructions. Some newer models have removable panels or extra sealing rings—clean these separately and dry fully before reattaching.
If your model has smart sensors, avoid cleaning around sensor areas with anything but a dry cloth.
Common Mistakes When Cleaning Ninja Blender Power Base
Even experienced users make mistakes that can damage their blender or reduce its lifespan.
1. Using Too Much Water
Water and electricity don’t mix. Excess moisture can seep into the motor, causing permanent damage.
- Always wring out cloths well.
- Never immerse the base in water. Even a splash can cause electrical failure.
2. Scrubbing With Abrasive Pads
Harsh pads scratch the surface and can remove paint or markings. Use only soft cloths or brushes.
If you accidentally scratch your base, it may become harder to clean in the future, as dirt sticks more easily.
3. Ignoring The Vents
Blocked vents can cause overheating. Clean them regularly with compressed air or a dry brush.
If vents become clogged, the motor can run hot and wear out faster. Make vent cleaning part of your weekly routine.
4. Plugging In Before Fully Dry
Even a small amount of moisture can cause short circuits. Wait until every part is dry.
Touch the base and buttons to check for dampness. If unsure, wait another 10 minutes.
5. Using Strong Chemicals
Bleach or heavy cleaners can damage the base and controls. Stick to mild soap and vinegar.
Strong chemicals may cause colors to fade, plastic to crack, or even make buttons sticky.
How Often Should You Clean The Power Base?
The right cleaning schedule depends on how often you use your blender and how messy your kitchen gets.
| Usage Frequency | Recommended Cleaning | Deep Clean Interval |
|---|---|---|
| Daily | Quick wipe after each use | Once per week |
| Few times a week | Wipe after spills | Once every 2 weeks |
| Rarely | Wipe before use | Monthly |
A regular cleaning routine keeps your blender safe and efficient. Deep cleaning once a week is ideal for heavy users.
If you make sticky drinks like protein shakes or fruit smoothies, clean the base more often. Sticky spills can dry quickly, making them harder to clean later.

Credit: www.reddit.com
Signs Your Power Base Needs Cleaning
Sometimes, you don’t realize your base is dirty until problems appear. Look for these signs:
- Sticky buttons or controls. This means liquid or sugar residue has built up under the panel.
- Unpleasant smells from the base. Odors signal bacteria or mold growth inside crevices.
- Visible crumbs or spills. If you see dirt around the base, clean right away.
- Reduced blending power. If your blender works slower or struggles, vents may be clogged.
- Error messages on digital models. Sometimes, sensors detect dirt or moisture and show warnings.
If you notice any of these, clean the base immediately. Ignoring these signs can lead to machine failure.
Sometimes, you may hear strange noises or notice the base feels warm after short use. These are signs that vents need cleaning.
Troubleshooting After Cleaning
Sometimes, cleaning brings up new issues. Here’s how to handle common problems after cleaning your Ninja blender power base.
Blender Won’t Turn On
If your blender doesn’t work after cleaning, check:
- The power cord is fully dry and plugged in.
- The base is dry.
- No water got inside the vents.
If you suspect water inside, let the base dry for several hours before trying again. Place it upside down on a towel to help moisture escape.
Buttons Not Responding
Buttons may be sticky if you missed a spot or used too much liquid.
- Clean again with a dry cloth and cotton swab.
- Avoid pressing hard on buttons.
If the problem continues, check your manual for resetting instructions.
Unusual Noises
If the blender makes strange sounds, check for debris in the vent or gasket area. Remove with a brush or compressed air.
If noises persist, unplug and inspect for loose parts. Contact support if unsure.
Keeping Your Ninja Blender Power Base Cleaner, Longer
It’s easier to prevent messes than to clean them up later. Try these tips:
- Use a drip tray or towel under the blender during use. This catches spills before they reach the base.
- Wipe up spills immediately after they happen.
- Don’t overload the pitcher to avoid overflow.
- Keep the blender away from busy kitchen areas.
- Store your blender base in a clean, dry spot, away from the stove or sink.
A clean environment keeps your blender running smoothly. Consider storing the cord wrapped up and covered to prevent dust buildup.
Ninja Blender Power Base: Maintenance Checklist
Regular maintenance saves money and time. Here’s a simple checklist:
- Daily: Wipe exterior and control panel.
- Weekly: Clean vents, gasket, and deep stains.
- Monthly: Inspect cord and deep clean all parts.
- Yearly: Check for wear and tear, replace gasket if needed.
Tick these off to keep your blender in top shape. If you notice fading or cracks, consider replacing parts or contacting Ninja for support.

Credit: www.ebay.com
Comparing Ninja Blender Base Cleaning With Other Brands
Ninja blenders are popular, but how does their base cleaning compare to other brands?
| Brand | Cleaning Difficulty | Special Concerns |
|---|---|---|
| Ninja | Easy/Medium | Multiple buttons, deep vents |
| Vitamix | Medium | Fewer controls, larger vents |
| NutriBullet | Easy | Simple controls, small base |
| Hamilton Beach | Medium | Removable panels, cord storage |
Ninja’s power base is generally easy to clean, but its multiple controls and deep vents require more attention than simpler brands.
For example, Vitamix bases have fewer buttons, making them easier to wipe, but their large vents collect dust quickly. NutriBullet bases are small and simple, but crumbs can get trapped under the pitcher connection. Hamilton Beach blenders have removable panels, so cleaning inside is easier but requires extra steps.
Non-obvious Insights For Better Cleaning
Most users miss these clever cleaning tricks:
- Compressed air isn’t just for computers. It’s perfect for blender vents, especially if you don’t want to use a brush.
- Toothpicks wrapped in cloth clean tight crevices better than cotton swabs alone. This lets you reach hidden dirt without scratching the surface.
- White vinegar cuts through sticky stains without damaging surfaces. For dried sugar or juice spills, vinegar dissolves residue quickly.
Another overlooked tip: use a flashlight to spot crumbs and spills in dark crevices. This helps you clean more thoroughly.
Try these for a cleaner, fresher power base.

Credit: www.amazon.com
Environmental Impact Of Cleaning Products
The cleaners you use on your Ninja blender base can affect the environment. Avoid single-use wipes and harsh chemicals. Choose microfiber cloths (washable) and natural cleaners like vinegar. According to the Environmental Protection Agency, using eco-friendly products reduces household waste and exposure to toxins.
When you use reusable cloths and natural cleaners, you help protect your family and the planet. Vinegar and baking soda are safe and effective, and you can wash microfiber cloths hundreds of times. If you must use wipes, choose biodegradable options.
When To Seek Professional Help
If your Ninja blender power base smells bad even after cleaning, or if the motor struggles, it may need professional service. Don’t open the base yourself—this can void the warranty and expose you to electrical risks. Contact Ninja’s customer support or take your blender to a certified repair center.
If you notice sparks, smoke, or strange sounds after cleaning, stop using the blender immediately. Professional help is the safest choice. Ninja’s website has support options for repairs, replacement parts, and troubleshooting.
Frequently Asked Questions
What’s The Safest Way To Clean The Ninja Blender Power Base?
Always unplug the blender before cleaning. Use a soft, damp cloth for the exterior and a cotton swab for buttons. Avoid water near electrical parts.
Can I Use Disinfectant Wipes On The Power Base?
Yes, but make sure they are not too wet. Wipe gently and dry the area afterward. Avoid wiping inside vents or around the power cord.
How Do I Clean Sticky Buttons?
Use a cotton swab dipped in mild soapy water (squeeze out extra moisture). Clean around the buttons, then wipe dry. For tough stickiness, use a vinegar solution.
What Should I Do If Water Gets Inside The Base?
Unplug immediately. Let the base air dry for several hours before using it again. Never turn on the blender if you suspect moisture inside.
Is It Okay To Use Compressed Air For Cleaning Vents?
Yes, compressed air is safe and effective for removing dust and crumbs from vents. Hold the can upright and use short bursts.
Cleaning your Ninja blender power base is simple but crucial for performance and safety. Regular care prevents odors, bacteria, and machine damage. With these easy steps and smart tips, your blender will stay fresh, reliable, and ready for action. If you want more guidance, check the official Ninja website or trusted resources like EPA Safer Choice for cleaning product recommendations. Your kitchen—and your health—will thank you.