How To Put Together Ninja Blender Components Safely
You can successfully how to put together ninja blender components by aligning the blade assembly with the central post of the pitcher before locking the lid securely in place. The process is simple if you follow the order of operations, but it changes slightly depending on whether you’re using the large pitcher, a personal cup, or a food processor bowl.
The assembly steps depend on your specific model’s locking mechanism and the container type you have chosen. This guide focuses on the standard full-size pitcher setup, which is the most common configuration for these machines.
Who should assemble a Ninja blender
This article is for owners who have recently purchased a new Ninja blender or those who struggle to get the machine to start because the safety sensors aren’t engaged. If you’re curious about the reasons your motor base won’t turn on despite the container looking “in place,” you’re in the right spot. We assume you have the base unit, the main blending pitcher, the stacked blade assembly, and the locking lid.
This content serves users who prefer clear, mechanical instructions over technical jargon. If you have an older model with a different power button layout, the core assembly logic remains the same, but you should refer to your specific manual for exact button functions.
We don’t cover commercial-grade units, as those often feature complex digital interfaces and unique safety interlocks that differ from the consumer-grade blenders we address here. If you’re missing parts or have a cracked pitcher, this guide isn’t for you; please contact customer support to order replacements before attempting to assemble the unit.
Factors that change your assembly
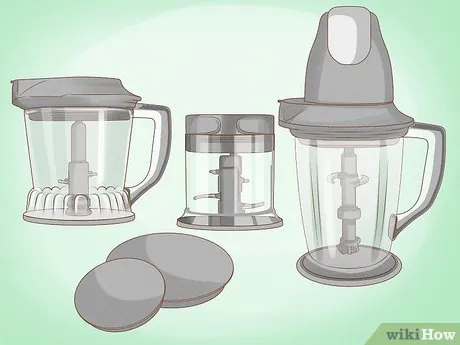
Three primary factors change how you put your system together: the container type, the blade configuration, and the safety sensor location. The container type is the most important; a personal blending cup requires a different blade base than the large pitcher. Always ensure you’re using the correct blade assembly that came with your specific container, as mixing these parts can cause damage or poor blending performance.
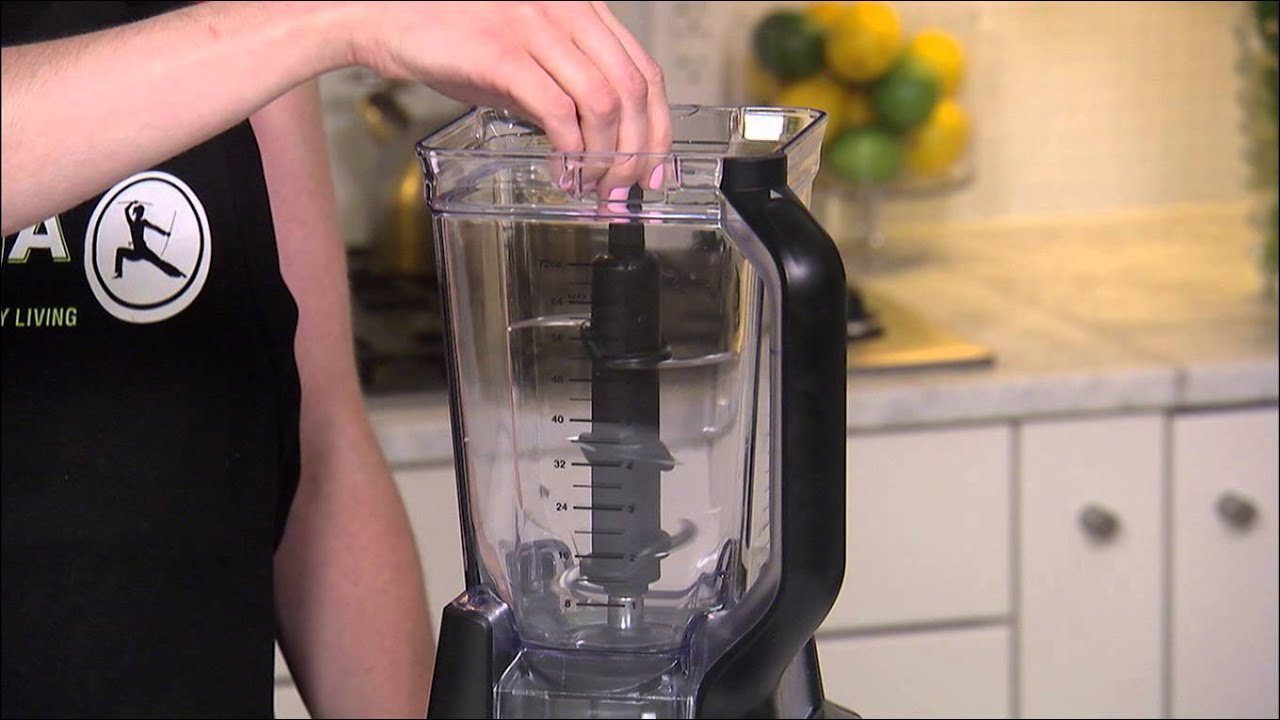
The blade configuration is a common area where users make mistakes. In full-size pitchers, the blade assembly is removable and must be seated fully on the central post. If the blades aren’t pushed all the way down, the lid won’t lock, and the motor won’t engage. You should be able to see the blades sit flush against the bottom of the pitcher.
Safety sensors are the final piece of the puzzle. Most modern units have a physical switch on the base that detects when the pitcher is locked. If you don’t hear a distinct “click” when turning the pitcher handle, the unit isn’t ready.
You can test this by looking at the alignment arrows on the side of the pitcher and the motor base; they must line up perfectly before you rotate the handle to the locked position. People often force the handle when the base is slightly misaligned, which can lead to premature wear on the locking tabs.
Steps to secure your blender
- Place the motor base on a clean, dry, level surface like a countertop.
- Lower the empty pitcher onto the motor base, lining up the handle with the arrow icon on the base.
- Rotate the pitcher handle clockwise until you hear a audible click, which indicates the safety switch is engaged.
- Carefully lower the stacked blade assembly onto the central gear post inside the pitcher.
- Push down on the blade assembly to ensure it’s seated firmly; it shouldn’t wobble or tilt.
- Add your ingredients, ensuring you don’t exceed the “Max Liquid” line marked on the side of the pitcher.
- Place the lid on top of the pitcher, aligning the tab with the handle.
- Push the lid handle down until it clicks into the locked position.
- Plug the power cord into the wall outlet and select your desired speed or program.
The judgement call that separates a professional result from a poor one is the final check of the lid. If the lid handle isn’t pushed all the way down until it clicks, the motor won’t receive power, and the controls won’t light up.
Always verify this click before pressing any buttons. If you feel extreme resistance while locking the lid, stop immediately and check for food debris caught in the seal or rim. Forcing the handle can break the plastic locking mechanism, which isn’t covered under most standard manufacturer warranties.
Assembly variations at a glance
| Situation | Action | Effort | Watch for |
|---|---|---|---|
| Large Pitcher | Slide blades onto post | Low | Seated blades |
| Personal Cup | Screw blade base on | Medium | Tight seal |
| Food Processor | Insert dough/chopping blade | Low | Shaft alignment |
| Travel Lid | Snap onto cup rim | Low | Secure gasket |
| Nutrient Extractor | Tighten blade base fully | Medium | No leaks |
When assembling the pitcher, ensure the blade assembly clicks audibly into the base. If you feel resistance, don’t force it; pull it out and realign the splines. A failure to seat the blades fully causes the motor to grind, which risks stripping the plastic drive coupling.
For personal cups, the most common mistake is cross-threading the blade base. If the base feels gritty or stops halfway, back it off immediately. A cross-threaded seal will leak under pressure, forcing liquid directly into the motor housing and causing permanent electrical failure.
When using the food processor, verify the central shaft is flush with the bowl floor. If the shaft sits high, the lid won’t lock, preventing the safety switch from engaging. Finally, always inspect the rubber gasket on travel lids. If the gasket is pinched or loose, the vacuum seal will fail, leading to messy spills during transport. If you see liquid pooling at the base, stop the motor instantly to prevent internal damage.
Details that matter for performance
Proper blade seating
The most common mistake people make is failing to seat the stacked blade assembly completely before adding food. If the blades are resting on top of a chunk of frozen fruit or ice, they won’t engage the drive gear properly. This leads to the motor spinning without moving the blades, which can overheat the unit. Always place the blade assembly on the post first, then add your ingredients around it.
Lid and handle alignment
The safety interlock system relies on the lid handle being perfectly aligned with the pitcher handle. If the lid is slightly crooked, the sensor will prevent the machine from starting to protect the motor from uneven loads. Beginners often try to start the machine by holding the lid down with their hand, which is unnecessary and unsafe. If the unit doesn’t start, release the lid handle and re-seat the entire pitcher on the base.
Troubleshooting common assembly issues
| What you notice | What it usually means | What to do first | How to stop it |
|---|---|---|---|
| Unit won’t start | Lid not locked | Re-click lid handle | Check for debris |
| Pitcher wobbles | Not fully rotated | Rotate until click | Clear base area |
| Blades won’t turn | Not seated on post | Remove and reset | Add liquid first |
| Lid is stuck | Food in seal | Clean the rim | Don’t overfill |
| Leaking at base | Bad gasket seal | Check rubber ring | Hand wash only |
If the unit fails to start despite a locked lid, check the safety pin inside the base. Debris often lodges here, preventing the sensor from engaging. Use a cotton swab to clear the area before forcing the handle.
When blades stall during operation, the issue is almost always a vacuum lock from frozen ingredients. You must add at least four ounces of liquid to create a vortex. If the blades remain motionless, stop immediately to prevent motor burnout.
Leaking at the base usually indicates a worn silicone gasket. If the ring appears flattened or brittle, replace it immediately to avoid fluid damage to the motor housing. Never place the base unit in a dishwasher, as high heat permanently warps the seal.
The most common mistake is overfilling past the max line. This creates excessive pressure, which forces food into the locking mechanism and causes the lid to jam. If you see liquid rising near the rim, stop and remove two inches of contents.
The rules of safe operation
Safety rules for using a blender are set by the manufacturer to prevent injury and damage to the motor. Ninja specifies that you should never operate the blender without the lid and the blade assembly correctly locked in place. You can find the specific safety warnings for your model on the first few pages of your user manual or on the manufacturer’s official support website.
Never attempt to bypass the safety interlock switches by using tools or objects to hold the sensors down. These sensors exist to keep the high-speed blades contained, and overriding them poses a risk of severe laceration. If your blender base or lid shows signs of cracks, stop using the appliance immediately. A damaged pitcher can shatter under the pressure of high-speed blending.
Most users make the mistake of blending hot liquids without venting the lid. This creates a pressure buildup that can blow the top off, causing severe thermal burns. Always remove the center cap or ensure the steam vent is clear before starting.
Follow this decision rule: if the mixture is above 120 degrees Fahrenheit, use half the capacity of the pitcher to allow for expansion. If the motor emits a burning smell or the pitch changes to a strained whine, stop immediately. These are signs of an impending motor burnout, which often costs more to repair than purchasing a new unit.
The real cost of assembly
The cost of assembling your blender is primarily measured in time and attention rather than money. Taking 10 extra seconds to ensure the blades are seated and the lid is clicked prevents a potential clean-up mess that could take 15 minutes to resolve. If you force the locking mechanisms, the cost changes from time to money, as replacement pitchers for these units are relatively inexpensive compared to the frustration of a broken machine.
The effort required fluctuates based on how often you clean the parts. If you allow food to dry on the locking tabs or the base of the blade assembly, the friction increases, making it harder to lock the pitcher into the base.
To keep costs low, rinse all components immediately after use. This simple habit keeps the plastic parts moving smoothly and prevents the need for replacement components due to buildup or forced usage. If you notice the pitcher is becoming difficult to rotate, check for small particles in the base tracks and clean them with a soft brush.
Keeping the system running
To keep your blender working correctly, you should hand wash the pitcher and blade assembly using warm water and mild dish soap after every use. The manufacturer recommends avoiding the dishwasher for the blade assembly, as the high heat can damage the seals over time. Inspect the rubber gasket on the blade base once a month to ensure it isn’t cracked or missing.
The sign that your blender needs attention is a change in the sound of the motor or a feeling of “grittiness” when you turn the pitcher handle. If the unit starts making a louder, grinding noise, stop and inspect the drive gear on the motor base for wear.
If the plastic teeth are worn down, the blender will struggle to turn the blades even when assembled correctly. You can’t repair these gears yourself; this is a technician-only job. If the motor base itself is the issue, contact the manufacturer’s customer service department to see if your unit is still under the standard limited warranty period.
When to seek professional help
If your blender refuses to turn on even after verifying that the pitcher and lid are locked, the issue may be a faulty internal safety switch. Don’t attempt to open the motor base housing, as the internal capacitors can hold a lethal electrical charge even when the unit is unplugged. This is a job for a qualified service technician.
If you smell ozone or see smoke, pull the plug immediately. This indicates a motor failure or a blocked ventilation port that has caused internal overheating. Don’t try to “fix” it by forcing the unit to run again.
If the blender is under warranty, contact the manufacturer to start a claim. If it’s out of warranty, it’s often safer and more cost-effective to replace the motor base rather than attempting a repair. A repair technician’s hourly rate often exceeds the cost of a new base unit.
Use this decision rule: if the blender makes a grinding noise but the blades don’t spin, you likely have a stripped drive coupling, which is a simple, inexpensive DIY fix. If the unit is silent, dead, or burning, the failure is electrical or structural. In those cases, professional intervention or full replacement is your only path forward.
Frequently asked questions
Can I put the blade assembly in the dishwasher?
The manufacturer recommends hand washing the blade assembly to protect the integrity of the seals and the sharpness of the edges. While some plastic pitchers are labeled top-rack dishwasher safe, the high heat and harsh detergents in a dishwasher can degrade the rubber gaskets in the blade base, leading to leaks over time.
Why does my blender not turn on?
The blender won’t start if the safety interlock sensors aren’t fully engaged by the lid and pitcher. Ensure the pitcher is rotated clockwise until it clicks into the base, and then ensure the lid handle is pushed down firmly until it clicks into the locking position on the pitcher handle.
How long should the blades last?
The blade assembly typically lasts for many years with proper care and regular hand washing. If you notice the blades are becoming dull or the central post feels loose, you should check the manufacturer’s website for a replacement part that matches your specific model number, as blade sharpness varies by the type of food processed.
Is it safe to blend hot liquids?
You should never blend hot liquids in a standard Ninja pitcher unless your specific model is explicitly rated for thermal processing. The heat can cause pressure to build up inside the sealed container, which may cause the lid to pop off or the plastic to crack, creating a serious burn risk for the user.
What happens if I overfill the pitcher?
Overfilling the pitcher above the “Max Liquid” line can cause ingredients to leak into the lid mechanism and the safety sensors. This buildup prevents the lid from locking properly and can eventually seep into the motor base, causing electrical failure or permanent damage to the internal locking components that require professional repair.
Does it matter which blade I use?
It’s critical to use only the blade assembly designed for your specific container, as using the wrong one can cause the blades to hit the side of the pitcher. Always match the blade assembly to the container size indicated in your user manual to avoid damaging the plastic walls of the pitcher.
Conclusion
Start by placing your motor base on a flat, stable surface before you attempt to lock any components into place. You should expect the unit to run smoothly and quietly once the pitcher and lid are correctly clicked into position. If you hear a grinding noise or the motor fails to engage, stop immediately and check for misaligned parts, as forcing the mechanism can cause damage that requires professional service.