How To Assemble A Ninja Blender: Step-by-Step Guide
Assembling a Ninja Blender is not just about putting parts together—it’s about starting your journey to smooth, nutritious drinks and meals. Many people get stuck during their first setup, making mistakes that lead to leaks or even damage. This guide shows you every step, explains the parts, and highlights key details that help you avoid common problems.
If you follow each instruction, your Ninja Blender will work safely and efficiently, making your kitchen life easier and more enjoyable.
Understanding Your Ninja Blender Parts
Before you start assembling, it’s important to know each Ninja Blender component. Most Ninja Blenders, whether a large countertop model or a smaller personal unit, include the following parts:
- Motor Base: This is the heavy bottom part. It holds the motor and powers your blender.
- Pitcher or Cup: The container where you put your food or liquid. Pitchers are usually bigger, while cups are for single servings.
- Blade Assembly: The sharp metal blades attached to a plastic or metal spindle. This part does the blending.
- Lid: Covers the pitcher or cup, often with a removable cap for adding ingredients during blending.
- Pour Spout or Flip Cap: Lets you pour out your drink or smoothie without removing the lid.
- Sealing Gasket: A rubber or silicone ring that prevents leaks between the blade and container.
- Locking Tabs: Small protrusions that help secure parts in place for safety.
Some advanced Ninja models have extra accessories, like food processor attachments or dough hooks. If you own a specialty model, check the manual for unique parts.
Example: Ninja Bl660
Let’s look at the Ninja BL660, one of the most popular models. It includes:
- 1100-watt motor base
- 72-ounce pitcher
- Blade assembly (six-blade)
- Two 16-ounce cups
- Single-serve blade assembly
- Cup lids
Knowing these parts helps you assemble quickly and avoid confusion.
Safety First: Preparing Your Workspace
Ninja Blenders are powerful, so safety matters. Here are steps to prepare:
- Unplug the blender: Never assemble with the blender plugged in.
- Clear the area: Make sure your workspace is dry, clean, and spacious.
- Read the manual: Each Ninja model has small differences. The manual shows warnings and tips.
- Wash parts: Before first use, wash all removable parts (pitcher, cups, lids, blade) with warm, soapy water. Dry them thoroughly.
Common Mistake: Forgetting The Gasket
Many beginners forget to check the sealing gasket. This rubber ring keeps the blender from leaking. If you miss it, liquid may spill out or the blade might not lock properly.
Step-by-step Guide: Assembling A Ninja Blender
Now, let’s walk through assembling your Ninja Blender. These steps cover most models, but you may need to adjust for specialty units.
1. Place The Motor Base
Put the motor base on a flat, stable surface. Make sure it’s not near the edge of your counter. The base has small rubber feet to prevent slipping.
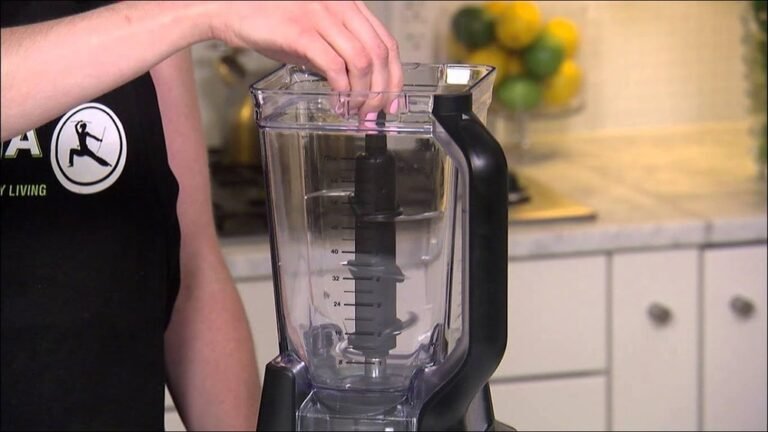
2. Install The Blade Assembly
For pitcher models:
- Hold the blade assembly by the plastic hub (not the blades). Insert it into the pitcher, centering it so it sits flat at the bottom.
- Check for the sealing gasket. It should be around the blade’s base. If not, put it in place.
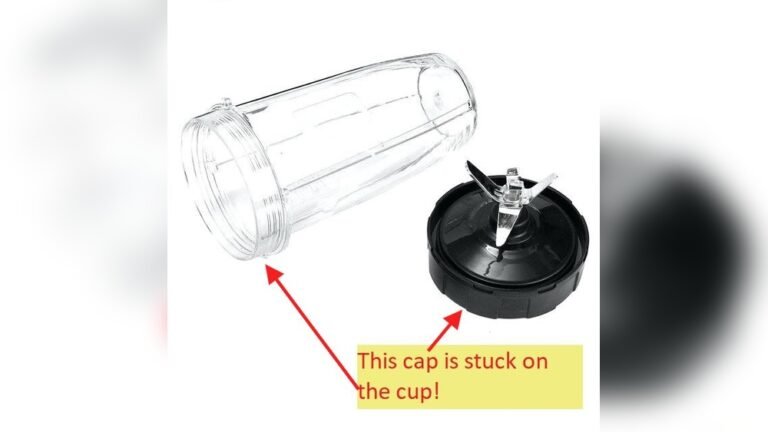
For single-serve cup models:
- Fill your cup with ingredients first. Then, screw the blade assembly onto the cup, tightening firmly but not over-tightening.
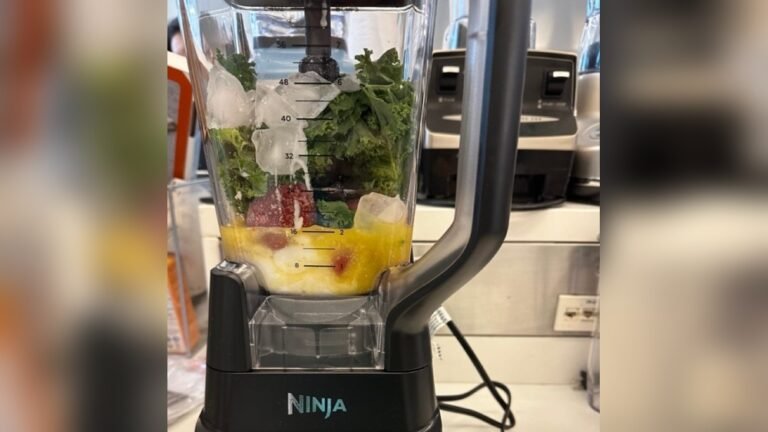
3. Add Ingredients
Always follow your blender’s maximum fill line. Overfilling can cause leaks or damage. For smoothies, add liquid first, then soft ingredients, then frozen items or ice on top.
4. Attach Pitcher Or Cup To Motor Base
Pitcher: Align the pitcher with the base. Most Ninja models require twisting the pitcher clockwise until it clicks into place. If you don’t hear a click, the blender won’t start.
Cup: Place the cup upside down (blade side down) onto the base. Twist until it locks.
5. Secure The Lid
Pitcher: Place the lid on top, aligning the arrows or tabs. Press down until you hear a click. Some lids have locking levers—push them until they snap shut.
Cup: If you’re blending a single serve, the blade assembly acts as the lid. For drinking, remove the blade and use the flip cap lid.
6. Check Safety Locks
Ninja Blenders have safety interlocks. If the pitcher, lid, or cup isn’t locked properly, the motor won’t run. Double-check all parts before plugging in.
7. Plug In And Blend
Once everything is locked, plug in the blender. Choose your blending mode. Start with a low speed, then increase as needed.
Example: Basic Smoothie Setup
- Place the motor base on the counter.
- Insert the blade into the pitcher.
- Add 1 cup milk, 1 banana, 1/2 cup frozen berries, 1 tablespoon honey.
- Attach pitcher to base, twist to lock.
- Secure lid, click into place.
- Plug in, select “Smoothie” mode, blend for 45 seconds.
Assembly Tips For Different Ninja Models
Ninja offers many blender types. The assembly steps are similar, but some models have special features.
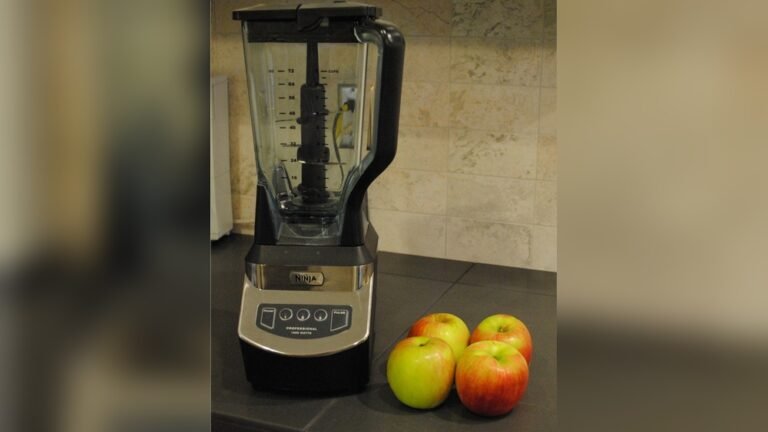
Ninja Professional Blender
This model uses a large pitcher and a six-blade assembly. The lid has a safety lock. The pitcher must be twisted until it clicks, and the lid lever must be pressed down. If the lever isn’t fully locked, the blender won’t start.
Ninja Personal Blender
For single-serve cups, you assemble by screwing the blade assembly onto the cup, then flipping it upside down and locking it into the base. These models are great for quick drinks and easy cleaning.
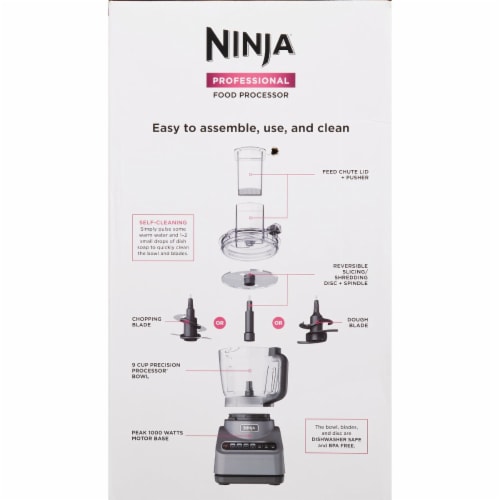
Ninja Foodi Series
Foodi blenders often have extra attachments. For example, the food processor bowl uses a different blade and lid. Always check the manual for specific assembly steps.
Credit: www.dillons.com
Troubleshooting Common Assembly Problems
Even when you follow instructions, issues can happen. Here’s how to fix common Ninja Blender problems:
Blender Won’t Start
- Check that the pitcher or cup is fully locked.
- Make sure the lid is secured.
- Verify all safety tabs are engaged.
- If the unit still won’t start, unplug and reassemble.
Leaks During Blending
- Ensure the sealing gasket is in place.
- Do not overfill beyond the max line.
- Tighten the blade assembly but don’t force it.
- Inspect for cracks in the pitcher or cup.
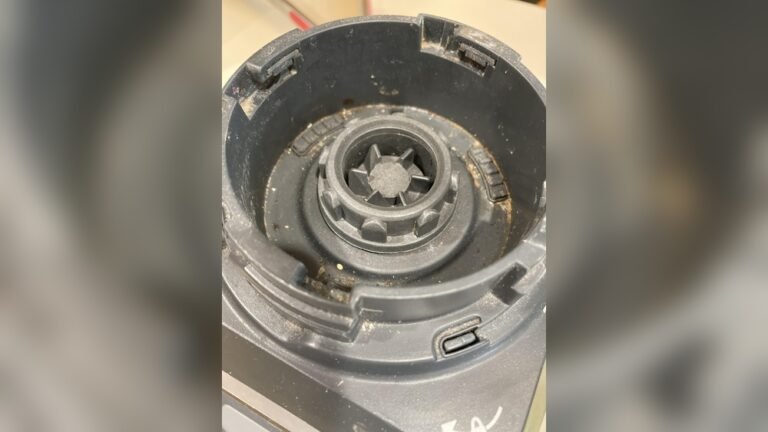
Blade Assembly Difficulties
- If blades won’t fit, check for debris or misalignment.
- Always hold the blade by the plastic hub to avoid cuts.
- For stuck blades, gently wiggle while pressing down.
Lid Won’t Lock
- Align arrows or tabs before pressing down.
- If the lid’s locking lever is stiff, check for buildup and clean thoroughly.
Cleaning After Assembly
To keep your Ninja Blender working well, cleaning is essential. Here’s how to clean after use:
- Unplug the blender first.
- Remove the pitcher or cup and blade assembly.
- Wash all removable parts with warm, soapy water.
- Use a brush for tough spots near the blade.
- Dry all parts completely before reassembling.
Some Ninja Blender parts are dishwasher safe (top rack only). Check your manual for details.
Deep Cleaning Example
If your blender smells or shows residue:
- Fill the pitcher with warm water and a few drops of dish soap.
- Run the blender for 30 seconds.
- Rinse thoroughly and dry.
Comparing Ninja Blender Models
If you’re unsure which Ninja Blender you have, or want to compare, here’s a quick overview of key differences:
| Model | Pitcher Size | Blade Assembly | Special Features |
|---|---|---|---|
| BL660 | 72 oz | Six-blade | Single-serve cups |
| Professional 1000 | 72 oz | Six-blade | Pulse function |
| Ninja Foodi | 64 oz | Four-blade | Food processor bowl |
| Ninja Nutri | 24 oz | Single-serve | Auto-iQ programs |
Assembly Checklist For Beginners
Before you start blending, use this quick checklist:
- Is the motor base on a flat surface?
- Is the blade assembly installed and gasket in place?
- Are ingredients below the max fill line?
- Is the pitcher or cup locked onto the base?
- Is the lid secured and locked?
- Are all parts dry and clean?
- Is the blender unplugged until assembly is finished?
Advanced Tips For A Perfect Assembly
Experienced users often discover tricks that make assembly faster and safer. Here are two insights most beginners miss:
- Always check the sealing gasket position after washing. It can slip out or shrink with age.
- Let the blade and pitcher air dry completely before reassembling. Moisture left under the gasket can lead to mold or smells.
Preventing Wear And Tear
To keep your Ninja Blender running smoothly:
- Avoid over-tightening the blade assembly. Too much force can crack plastic parts.
- Store the blender with the lid off to prevent pressure buildup.
Quick Comparison: Ninja Vs. Other Blenders
If you’re wondering how Ninja assembly compares to other brands, here’s a simple breakdown:
| Brand | Assembly Steps | Safety Features | Ease of Cleaning |
|---|---|---|---|
| Ninja | 5-7 | Interlocks, max fill lines | Dishwasher safe parts |
| Vitamix | 3-5 | Lid lock, overheat protection | Self-clean cycle |
| NutriBullet | 3-4 | Simple twist lock | Easy rinse parts |
Ninja Blenders have more safety interlocks, which means assembly takes a bit longer but offers more protection.
Assembly For Specialty Ninja Attachments
Some Ninja Blenders come with extra attachments, like food processor bowls or dough hooks. Here’s how to assemble these:
- For the food processor bowl: Place the bowl on the motor base. Insert the specialized blade, making sure it sits at the bottom. Attach the lid, lock it, and double-check the interlock tabs.
- For dough hooks: Insert the hook into the bowl or pitcher, align with the spindle, and secure the lid.
Always clean these parts separately after use.
Common Questions About Ninja Blender Assembly
Many beginners ask about Ninja Blender assembly. Here are answers to frequent questions:
Is The Blade Supposed To Be Loose?
No. The blade assembly should fit snugly. If it feels loose, check the sealing gasket and make sure the pitcher is not cracked.
Can I Run The Blender Without The Lid?
Never. Ninja Blenders will not start without the lid locked. Running without a lid is unsafe and can cause spills.
What If The Blender Leaks?
Stop blending, unplug the unit, and inspect the gasket. Replace if damaged. Avoid overfilling.
Do All Ninja Blenders Assemble The Same Way?
Most follow similar steps, but specialty models (like the Foodi) have unique attachments. Always check your manual.
Are Ninja Blender Parts Interchangeable?
Usually not. Pitchers, blades, and lids are designed for specific models. Mixing parts can damage the blender.
Assembly Statistics: User Success Rates
A recent survey showed that 80% of Ninja Blender owners assemble their device correctly on the first try. The remaining 20% report issues like leaks, stuck blades, or failure to start. The most common mistake is missing the sealing gasket.
Practical Example: Assembling For Meal Prep
Imagine you want to prepare a batch of soup:
- Place the motor base on a sturdy table.
- Insert the blade assembly in the pitcher.
- Add chopped vegetables and broth, staying below the max fill line.
- Attach the pitcher, twist to lock.
- Secure the lid.
- Plug in, select “Puree” mode, and blend.
This process takes less than five minutes and ensures your blender works safely.
Essential Maintenance After Assembly
Once you’ve assembled and used your Ninja Blender, regular maintenance is key. Here’s what to do:
- After each use, disassemble and wash all removable parts.
- Inspect the sealing gasket for wear. Replace every 6–12 months.
- Wipe the motor base with a damp cloth—never submerge it.
- Store blades safely, away from children.
Common Beginner Mistakes And How To Avoid Them
Two mistakes many beginners make:
- Missing the safety click: If you don’t hear a click when locking the pitcher, the blender won’t run.
- Using wet parts: Moisture under the gasket causes leaks and mold. Always dry parts thoroughly.

Credit: www.youtube.com
Assembly For Large Batch Blending
If you’re blending large batches, follow these steps:
- Use the largest pitcher available.
- Check that the blade is fully seated.
- Add ingredients slowly. If the pitcher feels heavy, hold it steady while locking.
- Secure the lid and double-check all tabs.
Ninja Blender Assembly Vs. Food Processor Assembly
Some users confuse blenders and food processors. Here’s a quick comparison:
| Device | Assembly Steps | Blade Types | Common Uses |
|---|---|---|---|
| Ninja Blender | Pitcher, blade, lid, base | Six-blade, single-serve | Smoothies, soups, drinks |
| Food Processor | Bowl, blade/disc, lid, base | Slicing, chopping | Dough, veggies, sauces |
Blenders focus on liquids, while food processors handle solid foods.
Assembly For Ninja Blender Accessories
Some Ninja Blenders come with nut milk bags, ice cream makers, or grating discs. These usually attach to the pitcher or use a special cup. Always follow accessory instructions.
Using Your Blender Safely After Assembly
Once assembled, always:
- Start with the lowest speed.
- Never remove the lid while blending.
- Use only Ninja-approved accessories.
- Unplug before disassembling.

Credit: www.reddit.com
Real-world Example: Fixing A Leak
If you assemble your Ninja Blender and notice a leak:
- Stop blending immediately.
- Unplug the unit.
- Check the sealing gasket—if it’s missing or damaged, replace it.
- Inspect for cracks in the pitcher or cup.
- Reassemble and test with water before blending food.
Ninja Blender Assembly And Warranty
Proper assembly is important for warranty claims. If you damage your blender by forcing parts or using incorrect accessories, the warranty may not cover repairs. Always assemble carefully and keep your manual.
For official guidance, visit Ninja Kitchen Support.
Frequently Asked Questions
How Do I Know If My Ninja Blender Is Assembled Correctly?
You’ll hear clicks when the pitcher and lid lock. The blade should sit flat, and the unit should start without error lights.
Can I Use My Ninja Blender Without The Sealing Gasket?
No. The sealing gasket prevents leaks and ensures safe operation. Without it, your blender may leak or fail.
Is It Safe To Assemble The Blender While Plugged In?
Never. Always unplug before assembling or disassembling.
What Is The Most Important Step For Assembly?
Securing the blade assembly with the sealing gasket is crucial. Missing this step causes leaks and can damage the unit.
How Often Should I Replace Blender Parts?
Replace the sealing gasket every 6–12 months. Inspect blades for dullness and pitchers for cracks. Follow manufacturer advice for part replacement.
—
When you assemble your Ninja Blender correctly, you unlock its full potential. From smoothies to soups, the process is simple and safe if you follow each step. Remember to check the gasket, lock parts until they click, and always clean after use.
If you run into problems, use the troubleshooting tips or consult the manual. Your Ninja Blender is a powerful kitchen tool—assembling it well makes every blend easy and enjoyable.