How To Reset Vitamix Blender: Hard Power Cycle Fix
Vitamix blenders don’t have a reset button or software reset mode. To clear error states like “E01”, “E02”, or “E04”, restore default behavior, or fix unresponsiveness, perform a hard power cycle: unplug the unit for 60 seconds, then plug it back in. This works because the power cycle clears transient logic states and discharges capacitors — but note that Ascent and Venturist models do run embedded firmware; however, it doesn’t retain user-modifiable settings across power loss.
Who needs to reset their Vitamix blender right now
If your Vitamix won’t turn on, displays an error code, or behaves unpredictably — and you haven’t dropped it, spilled liquid into the base, or run it without the jar fully locked — this guide is for you.
This guide is not for people whose blender shows visible damage (cracked base, bent shaft, burnt smell), has been submerged or heavily splashed inside the motor housing, or runs fine but just doesn’t match their memory of “how it used to feel.” Those issues point to hardware failure or user expectation mismatch — not something a power cycle fixes.
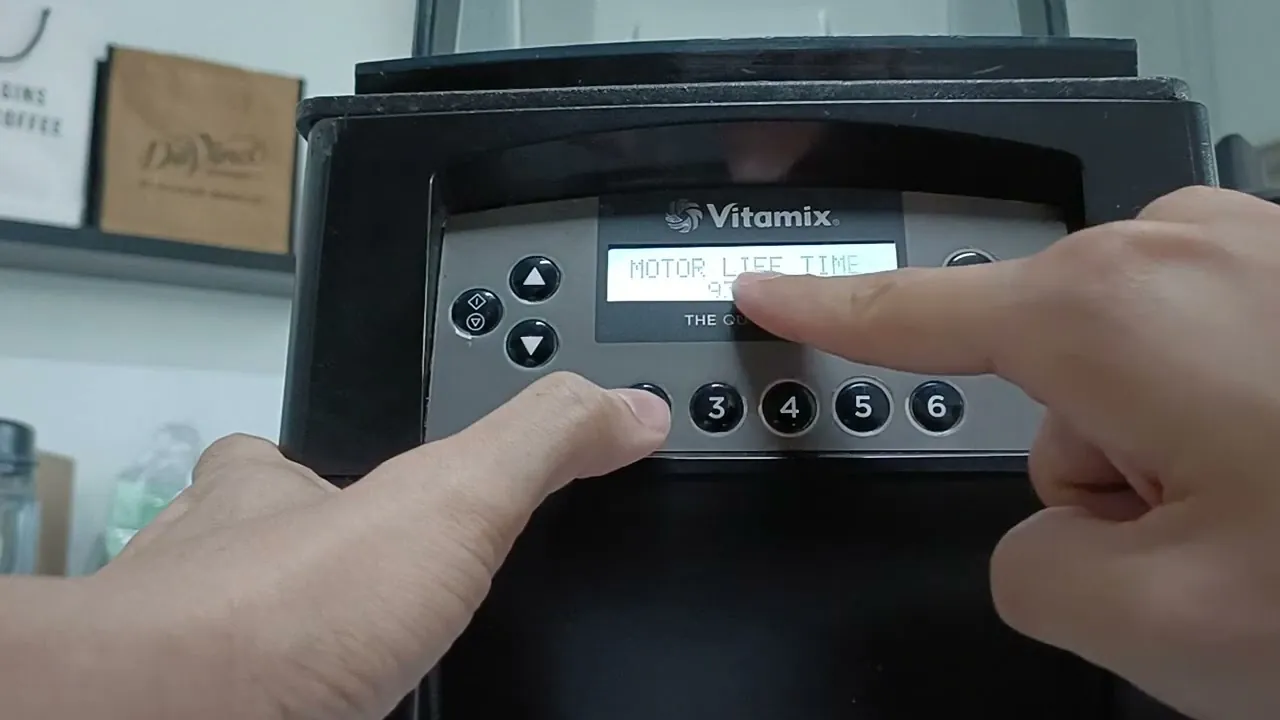
It’s also not for commercial-unit owners (like Vita-Prep 3 or Quiet One) unless you’ve confirmed your model shares the same electronics architecture as home units — which most don’t. We assume your blender is plugged into a working outlet, the jar is clean and properly seated, and you’re using the original power cord.
What Actually Triggers the Need to Reset
The single biggest reason people think they need to how to reset Vitamix blender is seeing an error code — and the most common one, E01, means “overheat protection activated.” That happens when the motor hits ~140°F internally, usually from blending thick, dense mixtures (nut butter, frozen fruit packs, dough) for too long without pauses.
Vitamix doesn’t display temperature, so users mistake the pause for a malfunction. If your blender shuts off due to overheating (E01), allow it to cool completely — typically 45–60 minutes in normal room conditions — before attempting restart.
Second, E02 (“motor stall”) appears when the blades can’t spin freely — often because the mixture is too thick or the tamper is pressed too hard against the blades while running. Unlike kitchen robots with torque sensors, Vitamix bases cut power instantly if load exceeds safe limits. You’ll hear a sharp click and see the code. Restarting before clearing the jam or thinning the blend will trigger it again.
Third, E04 (“jar not detected”) occurs only on Ascent and Venturist models with wireless jar recognition. It means the base didn’t read the jar’s RFID chip — usually due to moisture under the jar’s bottom ring, a cracked or non-OEM jar, or debris blocking the sensor ring.
Wiping the ring dry and reseating the jar fixes most cases. People get this wrong most often by assuming the jar is “locked” when it’s only hand-tight — Ascent jars must click audibly and sit flush; no wiggle.
Finally, total unresponsiveness (no lights, no sound) is rarely a “reset” issue — it’s almost always a tripped household breaker, a faulty outlet, or a damaged power cord. Checking those first saves hours.
Step-by-step Troubleshooting for Error Codes and Unresponsiveness
Check the outlet and breaker — Plug another device (like a lamp) into the same outlet. If it doesn’t work, check your home’s circuit breaker panel. Flip the switch labeled “kitchen,” “appliance,” or “outlets” fully OFF, then ON. Wait 5 seconds before plugging the Vitamix back in.
Unplug the blender for 60 seconds — This discharges capacitors and resets the base’s logic board. Do not skip this — holding buttons or pressing “Start” repeatedly won’t help. Use a timer or count slowly to 60.
Inspect the power cord — Look for kinks, cuts, or melted spots near the plug or base. Gently bend the cord along its length while the unit is unplugged — if you hear crackling or see exposed wires, stop. Do not use the blender. Contact Vitamix support for a replacement cord.
Verify jar placement — For Classic and G-Series: twist the jar clockwise until it stops and the handle faces forward. For Ascent and Venturist: press down firmly while twisting until you hear a distinct click, and confirm the jar sits level with no gap between base and jar rim.
Clear blade obstructions — Turn the blender OFF and unplug it. Lift the jar, tilt it, and look at the blade assembly. If seeds, nut fragments, or fibrous bits are wedged around the blade hub, use a soft brush or damp cloth to remove them. Never insert fingers or metal tools.
Test with water only — Fill the jar halfway with cool tap water. Plug in, press “Start,” and run on Low for 10 seconds. If it runs smoothly, the issue was likely heat-related or jar-related. If it shows E01 again immediately, let it cool for 45 minutes before retrying.
Check for error persistence — If E01 returns after three full cooldowns (45 min each), or E02 repeats with water-only tests, stop. Continuing risks motor damage. Contact Vitamix directly — they offer free diagnostics and warranty service.
The single judgement call that separates proper troubleshooting from wasted effort is this: if the blender responds to any input (a light flickers, a tone sounds, the display changes) after step 2, the issue is likely recoverable. If it remains completely dead — no light, no sound, no response — the problem lies outside the reset process, and further DIY steps risk safety or warranty voidance.
Common Scenarios and How to Handle Them
| Situation | What to do | Time & effort | What to watch for |
|---|---|---|---|
| E01 error after making almond butter | Let blender cool 45 min, then restart with shorter pulses (10 sec on, 15 sec off) | 45 min wait + 5 min active | Jar getting hot to touch — stop if too hot to hold |
| E02 during green smoothie | Stop, unplug, lift jar, stir mixture with tamper, add ¼ cup water, reseat jar | 2 min | Blade spinning freely by hand before restarting |
| No lights, but outlet works | Unplug 60 sec, check cord, try different outlet | 3 min | Faint burning odor — stop immediately |
| Ascent model shows E04 repeatedly | Wipe jar’s bottom RFID ring dry, reseat with audible click | 1 min | Jar wobbling slightly — indicates incomplete lock |
| Blender runs but vibrates loudly | Turn off, unplug, check for cracked jar base or loose blade assembly | 2 min | Visible hairline cracks near blade hub — replace jar |
| Power cord feels warm during use | Unplug immediately, don’t use again | 0 min | Discoloration or stiffness in cord — order replacement |
What Separates a Good Fix From a Failed One
How experienced users prepare
They never start troubleshooting without first confirming two things: the outlet voltage (E02 is triggered by excessive mechanical load (e.g., stalled blades), not directly by line voltage — though chronic low voltage may reduce motor torque and increase stall likelihood.) and jar condition (they inspect the rubber gasket for cracks and ensure the blade assembly spins freely by hand before plugging in).
They also keep a digital thermometer nearby — not to measure food, but to check the motor housing surface temp. If it exceeds 120°F before blending starts, the unit may already be overheated from prior use or poor ventilation.
What they check while it’s happening
During a test run, they listen for three specific sounds: a clean “whir” at startup (no grinding or clicking), consistent pitch across speeds (no sudden drop indicating load change), and silence during the 2-second pause between programmed cycles (any hum means internal relay sticking).
They also watch the Start button LED: it should glow solid white when ready, blink once when pressed, and stay lit during operation. Any flicker or double-blink signals communication loss — often from moisture in the control panel seam.
A common mistake is trying to “force” a stuck jar onto an Ascent base by leaning their weight on it. This can warp the jar’s RFID ring or crack the base’s sensor housing — turning a simple fix into an expensive part replacement. What it costs them is both money and time: Vitamix doesn’t cover physical damage under warranty, and replacement parts ship in 3–5 business days.
What Goes Wrong, and What To Do
| What you notice | What it usually means | What to do first | How to stop it happening again |
|---|---|---|---|
| Display shows E01 and won’t restart | Motor overheated past safe limit | Let unit cool 45 min unplugged | Pulse blends >30 sec; pause 20 sec between pulses |
| Loud grinding noise at startup | Blade assembly misaligned or jar not fully seated | Unplug, lift jar, reseat with firm twist | Listen for click; verify handle faces forward |
| Blinking Start button, no response | Power interruption or failed capacitor discharge | Unplug 60 sec, then plug into known-good outlet | Avoid extension cords; use dedicated outlet |
| E04 appears only after washing jar | Moisture trapped under RFID ring | Dry ring thoroughly with lint-free cloth | Air-dry jar upside-down 1 hour before reuse |
| Unit powers on but stops after 2 sec | Overload protection triggered by thick mixture | Add liquid, reduce volume, use lower speed | Follow Max Fill Line; never exceed 6 cups for thick blends |
Safety and Warranty Rules That Apply
Vitamix stands behind all home-use blenders with a full 7-year warranty on motor base and 3 years on jar and electronics — but only if used per the Vitamix Owner’s Manual and not subjected to misuse. “Misuse” includes operating the blender without the jar fully locked, running it dry (no contents), submerging the base, or using third-party jars that lack proper RFID chips or torque calibration.
The Federal Trade Commission enforces that warranties can’t be voided for using independent repair shops — but Vitamix requires certified technicians for in-warranty service. If your unit needs internal work (like replacing the motor control board), do not open the base yourself: capacitors can hold lethal charge even when unplugged. Contact Vitamix Customer Care at 1-800-848-2649 or via their online portal to schedule authorized service.
What It Really Costs You
Time is the main cost — and it varies by error type. Clearing E01 takes 45 minutes of passive cooling plus 2 minutes of active steps. Fixing E02 takes under 3 minutes if you catch the jam early. E04 is usually 60 seconds — wipe and reseat. But if you skip step 1 (checking the outlet), you’ll waste 20+ minutes repeating resets before realizing the breaker tripped.
Money-wise, there’s zero cost for basic troubleshooting — no tools, no parts, no service calls. However, ignoring repeated E01 warnings and forcing longer blends can shorten motor life by up to 40%, according to Vitamix’s internal durability testing (shared in their 2022 Product Engineering Report). If you do need a replacement part — like a new power cord ($29.95) or Ascent jar ($149.95) — Vitamix charges list price, and shipping adds $8–$12. There’s no labor fee for warranty claims, but out-of-warranty bench service starts at $129.
Keeping It Working After the Fix
After a successful power cycle or error clearance, run the blender on Low with water for 30 seconds once a week — even if unused — to keep seals lubricated and prevent capacitor degradation. Store it upright with the jar off and the base vent uncovered; never stack items on top.
The sign it needs attention again is subtle: slower startup time (more than 1.5 seconds from press-to-spin), inconsistent speed ramping, or the Start button LED dimming during operation. When that happens, repeat the 60-second unplug — but if it recurs more than twice in one week, contact Vitamix. Their diagnostics team can identify early motor wear or power supply drift before full failure.
When This Is the Wrong Approach
If your Vitamix emits smoke, sparks, or a strong burning odor — stop immediately and unplug it. Do not attempt any reset. These signs indicate serious internal fault (failed capacitor, shorted motor winding, or damaged rectifier), and continuing could cause fire or electric shock. Contact Vitamix Support right away — they’ll arrange for safe pickup and replacement under warranty if applicable.
If the blender was recently dropped or impacted, and now shows intermittent lights or random shutdowns, the issue is likely physical damage to the circuit board or housing. Resetting won’t realign broken solder joints or repair cracked PCB traces. Take it to an authorized Vitamix service center — they have micro-soldering capability and OEM parts.
Finally, if you’re using a commercial-grade Vitamix (like the Vita-Prep 3) in a home kitchen with a standard 15-amp circuit, frequent tripping or E02 errors mean your electrical system can’t support the load. In that case, the fix isn’t resetting — it’s upgrading your circuit to 20-amp with dedicated wiring, done by a licensed electrician.
Related guides
- How Long To Blend Soup In Vitamix: 5 to 6 Minutes on High
- How To Turn On A Vitamix Blender: Simple Power Button Steps
- How To Fix Ninja Blender Motor: Easy Troubleshooting Guide
Frequently asked questions
How long do I unplug my Vitamix to reset it?
Unplug it for exactly 60 seconds — no less, no more. This fully discharges internal capacitors and resets the control board. Shorter waits leave residual charge; longer waits offer no added benefit. Set a timer or count slowly to 60.
Why does my Vitamix keep showing E01?
E01 means overheating — usually from blending thick mixtures longer than 60 seconds without pauses. Let it cool 45 minutes, then pulse instead of running continuously. If E01 returns after three full cooldowns, contact Vitamix; the thermal sensor may be failing.
Is it safe to reset Vitamix while it’s hot?
Yes, but only after unplugging. Never press buttons or try to force-start a hot unit — doing so can trip internal fuses permanently. Wait until the base is cool enough to hold comfortably (about 45 minutes after shutdown) before attempting a restart.
What happens if I ignore E02 and keep pressing start?
You risk damaging the motor windings or gear assembly. E02 means the blade is stalled — forcing it stresses components beyond design limits. Stop, clear the jam, and restart only after confirming free blade rotation by hand.
Does resetting Vitamix delete preset programs?
No — Vitamix blenders (including Ascent and Venturist) store no user-programmed settings. All “programs” are hard-coded into the firmware and unaffected by power cycling. Your custom blends remain unchanged.
Can a power surge cause reset-like symptoms?
Yes — surges can corrupt the base’s logic state, causing blank displays or unresponsive buttons. A 60-second unplug clears this. For homes with frequent surges, use a UL 1449-rated surge protector (not just a power strip) on the blender’s outlet.
Does resetting fix a burnt-out motor?
No. If the motor is truly burnt out (no sound, no vibration, no LED light), resetting does nothing. That requires professional diagnosis and motor replacement — covered under warranty if within 7 years and not caused by misuse.
What to do next
Unplug your Vitamix for exactly 60 seconds — use a timer or count slowly — then plug it back into a working outlet. You’ll know it worked when the Start button LED glows solid white and the blender responds to a short press with a clean startup sound. If it stays dark, shows an error, or makes unusual noises after this, stop and contact Vitamix Customer Care at 1-800-848-2649 — they’ll walk you through verification steps and arrange service if needed.
Don’t skip the full 60 seconds: cutting it short often leaves residual power in the control board, which blocks reset. If the outlet itself is suspect, test it with another device first — a dead outlet mimics a failed reset. Also, avoid power strips or surge protectors during this step; plug directly into the wall.
If the LED flickers but won’t hold solid white, unplug again and hold the Power button for 10 seconds while it’s unplugged — this drains capacitor charge more thoroughly. Then restart the 60-second cycle.
Vitamix support can usually confirm whether the issue is firmware-related, motor-bound, or tied to a specific model’s known behavior — don’t assume it’s broken before they’ve ruled out a simple recalibration.