How to Use Vitamix Blender: Simple Steps for Smooth Blends Every Time
How to use Vitamix blender is simple: fill the container, secure the lid, pick a speed, and press start. Most blends take 30–60 seconds on high, but thicker mixes like nut butter need 2–4 minutes. The result is smooth, even, and hot if blending hot soup. What changes the outcome? The model you own (some have preset programs), the amount you put in (never below the minimum line), and whether you use the tamper for thick blends.
Who should use the Vitamix blender
This guide helps owners who bought a Vitamix but aren’t sure how to use it beyond basic blending, especially those who’ve read the manual but still feel uncertain about what their machine can do.
What decides the outcome
The container size matters most. If you use less than 16 oz in a 64-oz jar, the blades won’t pull ingredients down. Result? Uneven blending or motor strain. Check the minimum fill line on the side — it’s stamped in both ounces and milliliters. The blend type changes time. Thin liquids like smoothies finish in 30 seconds. Thick mixes like hummus or almond butter need 2–4 minutes on high. If you stop too soon, you get chunks. The lid seal is critical. A loose lid leaks, and a cracked one can fly off. Always twist it until it clicks — no guesswork. Most people get the tamper wrong. They use it like a spoon, poking randomly. It only works when you push down gently while blending thick mixtures. The motor cools faster if you blend in short bursts. Running it nonstop for 5+ minutes risks overheating. Let it rest 10 minutes if it shuts off.
Step by step
- Start with clean, dry parts. Wash the container, lid, and lid plug with warm soapy water — even if new. Dry them fully to avoid slipping.
- Add ingredients in order. Liquids first (water, milk, oil), then soft items (fruit, yogurt), then hard or frozen (ice, nuts, oats), then powders (protein, spices). This helps the blades pull everything down.
- Fill within the lines. Never go below the “MIN” mark (16 oz / 475 ml) or above the “MAX” line. Overfilling causes leaks.
- Secure the lid. Twist the lid until it clicks — no wiggle room. If using the tamper, insert it through the lid plug hole.
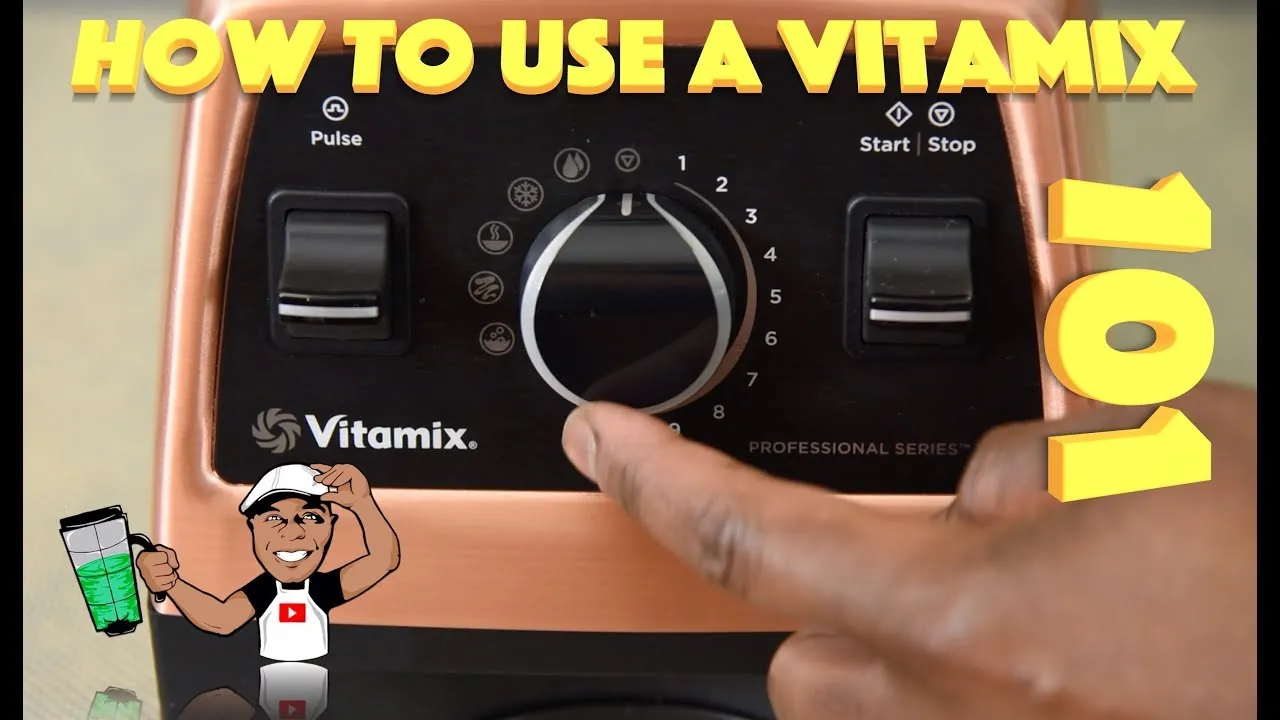
- Start on low, then go high. Turn the dial to 1 or tap “Low.” Let it run 5 seconds, then increase to 10 (high) or “High.” For preset models, choose “Smoothie” or “Hot Soup.”
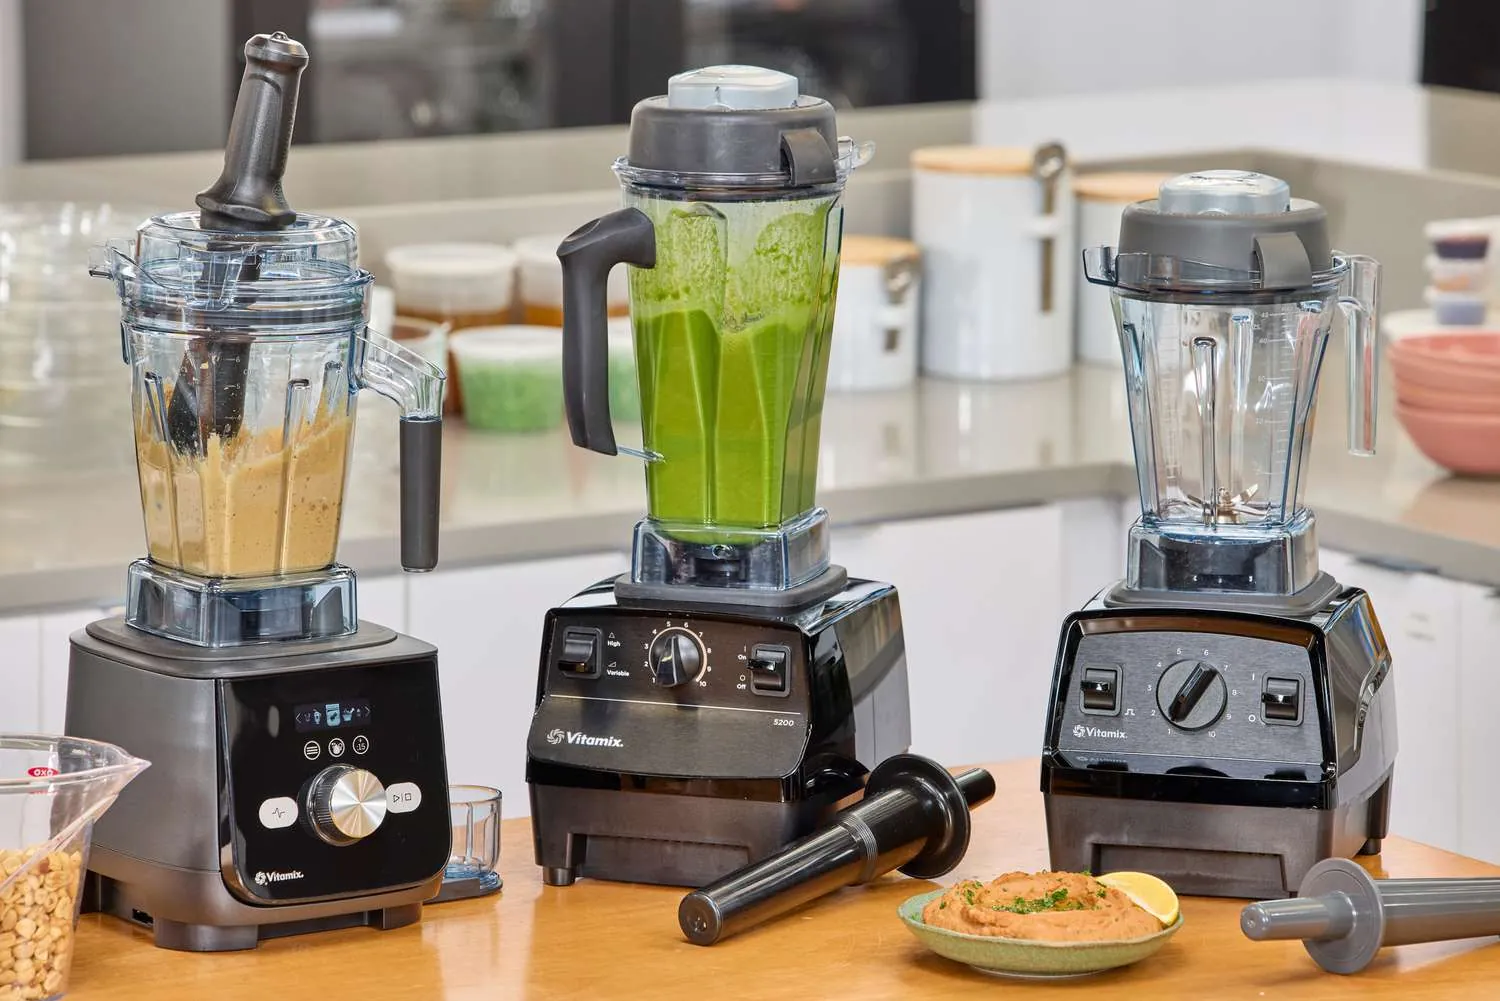
- Use the tamper only for thick blends. For nut butter, hummus, or dough, push ingredients down gently with the tamper every 10–15 seconds. Never reach in with your hand.
- Blend until smooth. Stop when the texture is even — no chunks, no graininess. For hot soup, it should steam lightly.
- Turn off and remove the lid. Wait 2 seconds after the motor stops before lifting the lid. Hot steam rises — open slowly.
- Pour immediately. Don’t let blended food sit — it keeps cooking in the container.
- Clean right away. Rinse with warm water and a drop of soap, then blend 1 cup water + 1 drop soap for 10 seconds.
The key judgment: when to stop blending. If it looks smooth but still feels gritty on your tongue, keep going. Texture, not time, is the real test.
The variations at a glance
| Situation | What to do | What it takes | What to watch for |
|---|---|---|---|
| Making a smoothie | Use high speed 30–45 sec | 1 min total | Ice chunks if under-blended |
| Blending nut butter | Use high speed 2–4 min with tamper | 5 min total | Motor may pause — let it cool 5 min |
| Making hot soup | Use “Hot Soup” setting or high 6 min | 10 min total | Container gets very hot — handle with care |
| Grinding coffee beans | Use dry container, pulse 10x | 2 min total | Over-grind makes powder dust — stop when coarse |
| Making dough | Use low speed 1–2 min | 3 min total | Dough sticks to sides — stop and scrape if needed |
| Frozen desserts | Blend frozen fruit 1–2 min | 3 min total | Too thick? Add 1 tbsp liquid |
| Cleaning after oily blends | Blend soapy water 15 sec | 2 min total | Oil residue leaves film — wipe with cloth |
What separates a good result from a poor one
Preparation
Experienced users pre-chop hard items like carrots or sweet potatoes into 1-inch cubes. Beginners toss in whole chunks — the blades stall, and the motor overheats. Cut before you blend.
Timing and order
They add liquids first, then soft, then hard, then powders. This creates a vortex that pulls everything down. Beginners dump everything in randomly — ingredients pile up, blades spin in air, and nothing blends.
What they check mid-blend
They watch for steam, listen for motor strain, and use the tamper only when the mix is too thick to swirl. Beginners keep pressing “high” even when the container rattles — that’s a sign to stop and scrape.
What they leave alone
They never open the lid mid-blend, even to add more. They never use metal utensils inside. They know the tamper is only for thick blends — not for stirring.
What goes wrong, and what to do
| What you notice | What it usually means | What to do first | How to stop it happening again |
|---|---|---|---|
| Blender won’t start | Lid not locked | Twist lid until it clicks | Always check for the click |
| Mix is chunky | Too little volume | Add 4–8 oz more liquid | Never go below MIN line |
| Motor shuts off | Overheated | Wait 10–15 min | Blend in 2-min bursts, not 5+ |
| Leaking from lid | Damaged seal or wrong lid | Replace lid or gasket | Use only Vitamix lids for your model |
| Loud grinding noise | Hard item stuck | Stop, unplug, remove item | Chop large items smaller |
| Blends too slowly | Worn blades | Contact Vitamix support | |
| Container cloudy | Hard water minerals | Soak in vinegar water | Clean weekly with vinegar rinse |
The rules that apply
Vitamix containers aren’t microwave-safe. Never heat food in the container on the stove or in the oven — it can warp or crack. Even a few seconds of microwave exposure can weaken the plastic’s structure, leading to microfractures you can’t see until the container splits mid-blend. That’s not just a mess — it’s a hazard.
Blades are sharp enough to cut skin. Never reach inside while plugged in — even if off. Capacitors hold charge after unplugging. Always wait two full minutes after shutting off, then unplug before cleaning. Use the tamper or a long-handled brush — never your fingers.
Only use Vitamix lids and tamper. Third-party parts may not seal properly and could pose a safety risk. Vitamix’s locking mechanism is designed to work precisely with the motor’s power, and no other lid matches that engineering.
In the U.S., the CPSC requires blender lids to lock — Vitamix meets this. In the EU, EN 60335-2-14 applies. Always check your model’s manual for local standards. Ignoring regional specs voids your warranty and risks burns or ejection.
What it costs you
Time is the real cost — 1–5 minutes per blend, plus cleanup. Most users spend 2–3 minutes daily. But that adds up: 1,000 blends over five years means 40 hours of your life, not counting the minutes lost hunting for the right lid or waiting for the motor to cool. If you’re rushing in the morning, that’s 10 minutes you’ll never get back — and you’ll start dreading it.
The blender lasts many years, and while replacement parts are needed eventually, they cost far less than buying a new machine.
Effort is low if you clean right after use. Waiting 12 hours means scrubbing stuck-on paste — that’s 10 extra minutes. That paste hardens like cement. A quick rinse while it’s warm takes 30 seconds. Delay it, and you’ll spend five minutes with a brush, vinegar, and frustration.
Risk? Very low if you follow the lid and tamper rules. Injury risk rises if you use metal tools or ignore overheating. A metal spoon can crack the jar. Overheating kills the motor — and you won’t know until it stops mid-blend.
Adding extra containers increases upfront cost, but using one container for everything means spending more time cleaning. Having two containers saves considerable time, especially when switching between tasks like making smoothies and grinding coffee.
Keeping it right afterwards
Clean the container, lid, and tamper soon after use to prevent residue from hardening. Rinse with warm water, add a drop of dish soap, fill halfway, blend briefly, then rinse again. Dry the container upside down to avoid moisture pooling at the base, which can weaken the seal over time. Store the lid separately to prevent rubber gasket damage.
Check the blade base periodically — if it feels loose or makes unusual noise when turned by hand, the bearings may be failing. Replace blades when blends become grainy, and inspect the tamper’s rubber tip regularly — if it cracks, flattens, or slips, replace it to maintain blending efficiency and protect the motor.
When this is the wrong approach
Don’t use a Vitamix to grind large batches of coffee or spices daily. It’s not built for that task — blades wear out faster and dust can compromise the seal. A dedicated grinder is better suited and more cost-effective in the long run.
Don’t blend hot oil-based sauces (like aioli) in a full container. Oil splatters and can burn. Use a small jar and blend slowly. A full pitcher traps steam, builds pressure, and erupts — I’ve seen scalded countertops and ruined blenders from this. Always fill no more than one-third, and pulse in short bursts while holding the lid down with a towel.
Don’t try to make whipped cream with a standard Vitamix — it overmixes and turns to butter. Use a hand mixer. The high speed and long duration of a Vitamix shear fat molecules too aggressively. You’ll get a grainy, greasy mess instead of soft peaks. A hand mixer takes 90 seconds and lets you stop the moment it’s right.
Don’t attempt to blend raw meat or bones. Vitamix isn’t designed for it — doing so voids the warranty and can cause serious damage. Use a food processor or butcher instead. Even frozen items can bend internal components. If it’s not soft, pre-chopped, or intended for blending, don’t put it in.
Related guides
Frequently asked questions
Can I blend hot soup in my Vitamix?
Yes, but only if the container is full (at least 32 oz) and you start on low. The friction heats it to 170°F in 6 minutes — no stove needed.
How long does it take to make almond butter?
2–4 minutes on high with the tamper. Start with 2 cups raw almonds. Stop when it turns glossy and flows.
Is it safe to blend frozen fruit?
Yes. Use 1–2 cups frozen fruit with ½ cup liquid. Blend on high for 45–60 seconds. No need to thaw.
Why does my Vitamix smell like burning?
It’s usually the motor overheating from long blends. Stop for 10 minutes. If it smells like plastic or smoke, unplug and call support.
What happens if I blend too little?
The blades can’t pull ingredients down. The motor strains, blends unevenly, and may shut off. Always stay above the MIN line.
Does it matter which lid I use?
Yes. Only use lids made for your model. A wrong lid won’t seal — it leaks or flies off. Check the model number on the lid.
Can I put my Vitamix container in the dishwasher?
Yes, top rack only. But hand-washing lasts longer. The seal and blade base wear faster in high heat.
Does it matter if I use the tamper?
Only for thick blends like nut butter or dough. For smoothies or soups, it’s not needed — and can cause spills.
What to do next
Start with a smoothie: add 1 cup water, 1 banana, ½ cup frozen berries, and 1 tbsp oats. Blend on high for 45 seconds. When it’s silky and no chunks remain, you’ve done it right. If the motor stops or the lid leaks, unplug and check the seal — don’t force it.
If your blender struggles, the fruit may be too frozen or the oats too coarse. Thaw the berries for 10 minutes first, or pulse the oats into a fine powder before adding. A thick smoothie that won’t spin isn’t a sign of poor technique — it’s a signal to adjust ingredients, not power. Many people add ice to thicken, but that just dulls flavor and strains the motor. Use frozen fruit instead — it chills without diluting.
If the lid still leaks after checking the seal, try a different blade assembly. Older models often have worn gaskets that don’t reseal properly, even when clean. Don’t assume the problem is you. If you’ve tried all this and it still fails, your blender may not be built for thick blends. Choose your tool for the job, not the other way around.