How To Make A Smoothie With An Immersion Blender: Easy Guide
Making a smoothie with an immersion blender is easier than most people think, and it comes with several unique advantages. If you have limited kitchen space, want less clean-up, or need a fast breakfast, the immersion blender can become your best friend.
Many people assume you need a big countertop blender for perfect smoothies, but a handheld blender can do the job just as well—sometimes even better. This guide shows you everything you need to know, from choosing the right ingredients to tips for smooth blending.
You’ll also learn common mistakes to avoid, how to get the best texture, and creative ways to use your immersion blender for healthy, delicious smoothies.
Why Use An Immersion Blender For Smoothies?
Immersion blenders, sometimes called stick blenders or hand blenders, are designed for convenience. Instead of pouring everything into a large blender jug, you blend right in your cup, bowl, or a tall container. This saves time and reduces the number of dishes to wash.
One big advantage is control. You can move the blender around, ensuring all ingredients get mixed evenly. Immersion blenders are also portable and easy to store. For people with small kitchens or busy mornings, these blenders offer a practical solution for enjoying fresh smoothies without hassle.
Another benefit is speed. Since you blend right in your cup or pitcher, there’s no need to transfer liquids between containers. This reduces the risk of spills and makes the process more efficient. If you like to make single servings, an immersion blender is ideal.
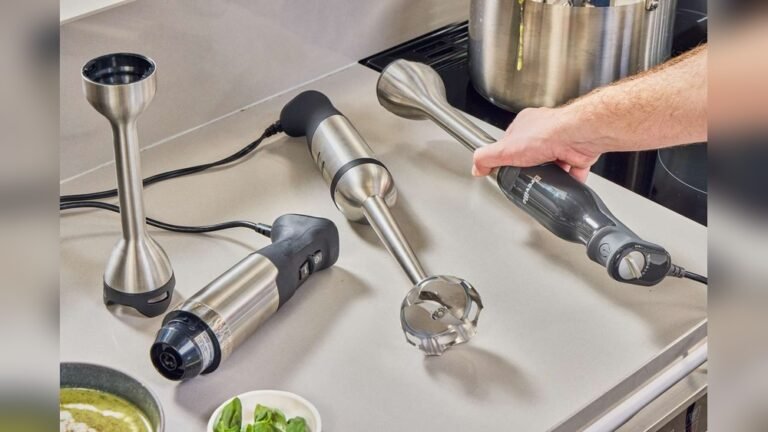
Choosing The Right Immersion Blender
Not all immersion blenders are created equal. Here’s what really matters when picking one for smoothies:
| Feature | Why It Matters | Recommended Specs |
|---|---|---|
| Power (Wattage) | Higher power blends ice and frozen fruit better | At least 200 watts |
| Blade Design | More blades = smoother blend | 2 or 4 prongs |
| Speed Settings | Variable speeds help control consistency | 2 or more speeds |
| Detachable Shaft | Easier to clean and store | Yes |
| Material | Stainless steel lasts longer, resists stains | Stainless steel preferred |
Some immersion blenders come with extra attachments, like a whisk or chopper. These are not necessary for smoothies, but can be helpful for other kitchen tasks. Also, check the shape of the bell (the part covering the blades). A slightly wider bell helps pull ingredients into the blades for smoother blending.

Credit: flegenheimer.com
Essential Ingredients For A Perfect Smoothie
A great smoothie starts with the right ingredients. The base, fruits, and add-ins all matter. Here are the must-have components:
- Liquid Base: Milk (dairy or non-dairy), juice, or even water. About 1 cup per serving is standard.
- Fruits: Bananas, berries, mangoes, peaches, or pineapple are common. Frozen fruit makes smoothies thicker and colder.
- Vegetables: Spinach, kale, or cucumber for extra nutrients without overpowering flavor.
- Thickeners: Yogurt, avocado, or silken tofu add creaminess.
- Sweeteners: Honey, maple syrup, or dates if your fruit isn’t sweet enough.
- Boosters: Chia seeds, flaxseed, protein powder, or oats for more nutrition.
Here’s a simple ratio to follow:
| Ingredient | Amount (per 1 serving) | Purpose |
|---|---|---|
| Liquid | 1 cup | Helps blend and creates desired texture |
| Fruit | 1 to 1.5 cups | Main flavor and nutrition |
| Greens/Vegetables | 1/2 cup (optional) | Extra vitamins and fiber |
| Thickener | 1/4 cup | Creaminess |
| Sweetener/Boosters | 1-2 tablespoons | Flavor and health extras |
Non-obvious tip: If you use ice, crush it a bit before adding. Large ice cubes can jam the blades or wear out weaker immersion blenders.
Step-by-step Guide: Making A Smoothie With An Immersion Blender
Let’s walk through the entire process, from prepping ingredients to pouring your drink.
1. Gather Your Tools And Ingredients
You’ll need:
- Immersion blender with blending shaft
- Tall cup, pitcher, or jar (at least 24 oz)
- Chopping board and knife
- Measuring cups and spoons
- Your chosen smoothie ingredients
Practical insight: A narrow, tall container works best. It keeps ingredients close to the blades, improving blending power.
2. Prepare Ingredients
- Wash all fruits and vegetables.
- Peel, core, or chop as needed. Slice bananas, hull strawberries, etc.
- If using greens, remove tough stems.
- For frozen fruit, let it sit at room temperature for 2-3 minutes for easier blending (but not so long it thaws).
3. Add Ingredients In The Right Order
Order matters to avoid blade jams and to ensure even blending:
- Liquids first (milk, juice, water)
- Soft ingredients (yogurt, leafy greens, avocado)
- Fruits
- Frozen items and ice (on top)
- Powders or seeds (last, so they don’t stick to the bottom)
This order helps the blender pull everything down toward the blades.
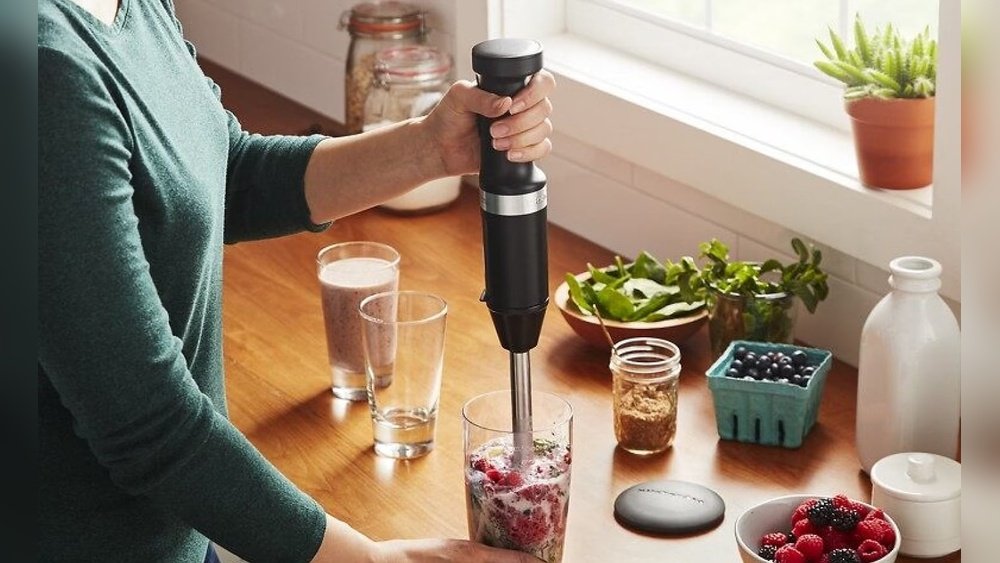
4. Submerge The Blender And Start Slow
Insert the immersion blender all the way to the bottom of the container before turning it on. Start at the lowest speed to prevent splashing.
Expert tip: Pulse the blender in short bursts at first. This breaks up bigger pieces and prevents overworking the motor.
5. Move And Blend
As the mixture starts to combine, move the blender up and down gently. This creates a vortex, circulating ingredients for a smoother result. Tilt the blender slightly if you see chunks stuck on the side.
If your blender has multiple speeds, increase power once ingredients are mostly broken down. Blend until the texture is completely smooth—usually about 45 seconds to 1 minute.
6. Check Consistency And Adjust
Stop the blender. If the smoothie is too thick, add a bit more liquid and blend again. If it’s too thin, add a few pieces of frozen fruit or ice.
Non-obvious insight: Don’t over-blend. This can make the smoothie foamy, which some people find unpleasant. Stop as soon as you reach your desired texture.
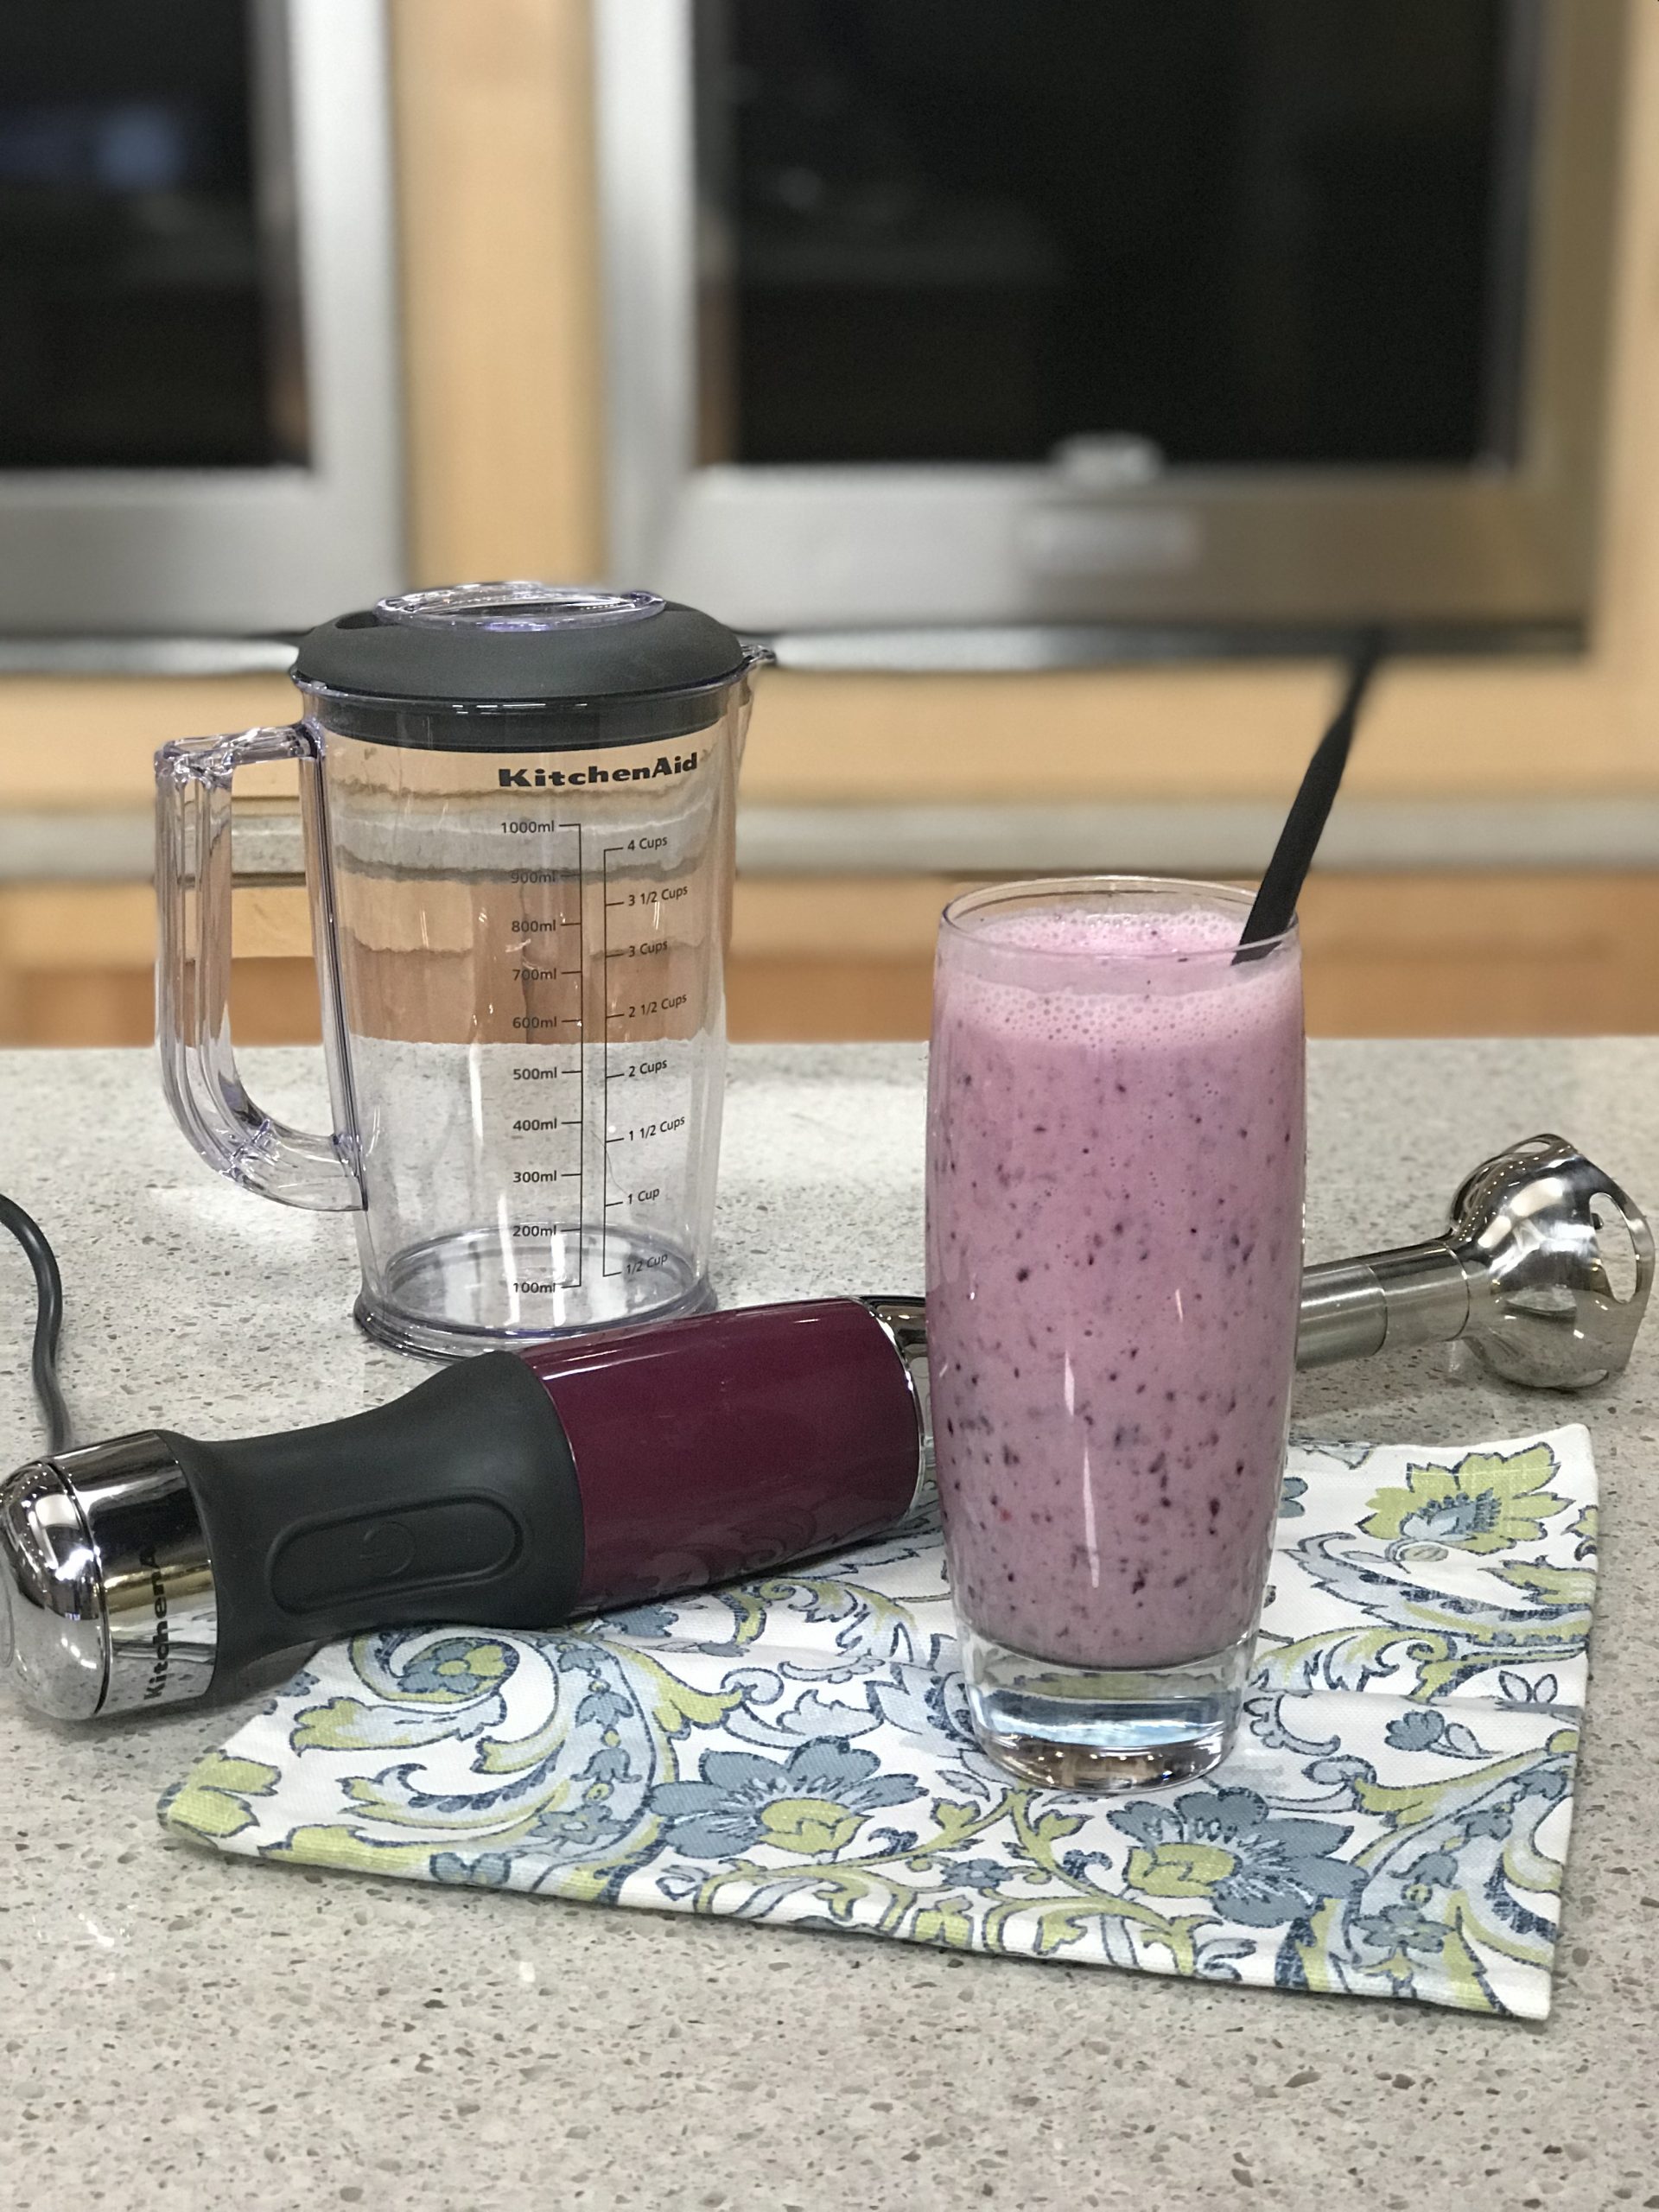
7. Serve And Clean Up
Pour your smoothie into a glass. Rinse the blending shaft under running water immediately, then wash with soapy water. Immersion blenders are easy to clean—just be careful with the sharp blades.
Troubleshooting: Common Immersion Blender Smoothie Problems
Even experienced smoothie makers run into issues. Here’s how to fix them:
- Smoothie won’t blend or blades jam: Too many frozen ingredients, or not enough liquid. Add more liquid or let frozen items thaw a minute longer.
- Smoothie is too chunky: Blend in shorter bursts, moving the blender shaft up and down. Check for stuck pieces and scrape down if needed.
- Smoothie is too thin: Add more frozen fruit, yogurt, or a handful of oats to thicken.
- Foamy texture: Blend just until smooth and no longer. Over-blending adds too much air.
- Bits of seeds or greens: Use a fine mesh strainer to pour if you want an ultra-smooth result, or blend a little longer at a higher speed.
Best Smoothie Recipes For Immersion Blenders
Here are three delicious recipes designed for immersion blenders. Each makes one large serving (about 16 oz).
Classic Strawberry Banana Smoothie
Ingredients:
- 1 cup milk (any kind)
- 1 cup frozen strawberries
- 1 ripe banana, sliced
- 1/4 cup plain Greek yogurt
- 1 tablespoon honey (optional)
Instructions:
- Add milk to your container.
- Add yogurt, banana slices, and strawberries.
- Drizzle honey on top.
- Submerge the blender and blend until smooth (about 1 minute).
Green Power Smoothie
Ingredients:
- 1 cup almond milk
- 1 cup baby spinach (packed)
- 1/2 frozen banana
- 1/2 cup frozen mango
- 1/4 avocado
- 1 tablespoon flaxseed
Instructions:
- Pour almond milk into the container.
- Add spinach, avocado, and flaxseed.
- Add banana and mango on top.
- Blend, moving the blender up and down until fully smooth.
Tropical Oat Breakfast Smoothie
Ingredients:
- 1 cup coconut water
- 1/2 cup frozen pineapple
- 1/2 cup frozen mango
- 1/2 ripe banana
- 1/4 cup Greek yogurt
- 2 tablespoons oats
Instructions:
- Add coconut water first, then yogurt and oats.
- Add fruits on top.
- Blend until oats are fully dissolved and texture is creamy.
Tip: Pre-soak oats in coconut water for 5-10 minutes for extra smoothness.
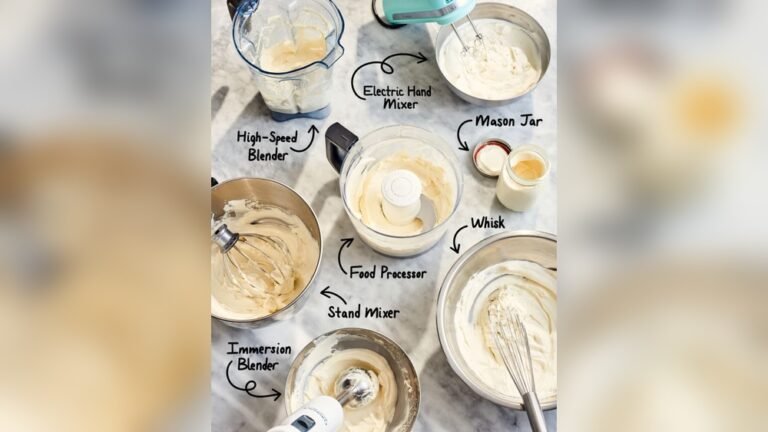
Comparing Immersion Blender Vs Countertop Blender For Smoothies
For those wondering about the differences, here’s a quick comparison:
| Feature | Immersion Blender | Countertop Blender |
|---|---|---|
| Portability | Very portable | Not portable |
| Cleaning | Quick and easy | More parts to wash |
| Batch Size | Single/Double servings | Large batches possible |
| Power | Lower (good for soft items) | Higher (better for ice/hard foods) |
| Control | Manual blending | Hands-free operation |
| Cost | Usually less expensive | Can be pricey |
Bottom line: Immersion blenders are perfect for everyday, quick smoothies and easy clean-up. For large families or heavy ice use, a countertop blender might be better.
Creative Variations And Advanced Tips
Once you’re comfortable with the basics, experiment with flavors and textures:
- Add herbs: Try a few mint or basil leaves for a fresh twist.
- Spices: Add a pinch of cinnamon, nutmeg, or ginger.
- Coffee smoothie: Blend cold brew coffee, banana, and chocolate protein powder for an energy boost.
- Chocolate lovers: Use cocoa powder, almond butter, banana, and milk.
- Meal replacement: Add protein powder, oats, and nut butter for a filling drink.
Advanced tip: For a frosty, milkshake-like texture, freeze your yogurt or blend with frozen milk cubes.
If you want a layered smoothie (two colors), blend one batch of light ingredients (like banana and pineapple), pour half into a glass, then add berries to the rest and blend again. Pour gently to create layers.
Credit: www.epicuricloud.com
Cleaning And Maintenance
Taking care of your immersion blender ensures it lasts longer and stays safe to use.
- Always unplug before cleaning.
- Remove the blending shaft and rinse immediately after use.
- For sticky residues, blend a cup of warm soapy water in a container, then rinse.
- Dry the blades carefully with a towel—don’t touch with bare hands.
- Don’t submerge the motor in water; wipe with a damp cloth instead.
Non-obvious insight: If you blend sticky ingredients (like dates or nut butter), check under the blades for trapped bits. Clean thoroughly to prevent odor or mold.
Store your blender with the shaft detached, especially if the blades are still wet. This prevents rust and keeps the motor safe.
Health Benefits Of Homemade Smoothies
Making your own smoothies means full control over ingredients and nutrition. Store-bought smoothies often contain added sugar, artificial flavors, or preservatives. With an immersion blender, you can choose:
- Fresh fruits and vegetables for more vitamins
- Low-fat or plant-based milks for fewer calories
- Seeds and nuts for healthy fats
- No added sugars unless you want them
Studies show that diets rich in fruits and vegetables lower the risk of heart disease and boost immune health. A smoothie is a simple way to add more produce to your day.
Practical example: One green smoothie (with 1 cup spinach, 1/2 banana, and 1 cup almond milk) provides over 50% of your daily vitamin K and a good amount of vitamin C.

Credit: flegenheimer.com
Cost Savings: Homemade Vs Store-bought
Making smoothies at home can save money and reduce waste. Here’s a quick cost comparison:
| Type | Average Cost per 16 oz | Main Benefits |
|---|---|---|
| Homemade Smoothie | $1.00 – $2.50 | Fresh, customizable, no hidden ingredients |
| Store-Bought Smoothie | $4.00 – $8.00 | Convenient, but can have added sugars |
Insider tip: Buy frozen fruit in bulk and portion it into small bags. This makes blending even faster and reduces cost per serving.
Sustainability And Less Food Waste
An immersion blender helps you use up leftover fruits or greens before they spoil. Overripe bananas, wilted spinach, or soft berries are perfect for smoothies. This reduces food waste and saves money.
If you make too much smoothie, freeze leftovers in ice cube trays. You can blend them again later with more liquid for a quick snack.
Safety Precautions When Using An Immersion Blender
While immersion blenders are generally safe, a few basic rules prevent accidents:
- Always turn off and unplug before removing the blade or cleaning.
- Never touch the blades when plugged in.
- Keep the blender fully submerged before starting to avoid splatter.
- Don’t blend hot liquids for smoothies—steam can cause splashing or burns.
Teach children proper use if they want to help. Supervision is important, as the blades are very sharp.
Frequently Asked Questions
Can I Blend Ice With An Immersion Blender?
Yes, but only in small amounts and with a powerful model (over 200 watts). Crush ice slightly before adding, and always blend with enough liquid to protect the motor. If you plan to blend ice often, a countertop blender might be a better choice.
What’s The Best Container To Use With An Immersion Blender?
A tall, narrow container works best. It keeps ingredients close to the blades for faster, smoother blending. Many immersion blenders come with their own beaker or cup. You can also use a wide-mouth mason jar or small pitcher.
How Do I Make My Smoothie Thicker Or Thinner?
To thicken a smoothie, add more frozen fruit, yogurt, or a few ice cubes. To thin it out, add extra liquid (milk, juice, or water) a few tablespoons at a time, blending between additions.
How Do I Clean An Immersion Blender Safely?
Unplug the blender, detach the blending shaft, and rinse immediately. For stubborn residue, blend a cup of warm, soapy water, then rinse. Dry the blades with a towel, keeping fingers away from sharp edges.
Are Immersion Blender Smoothies As Healthy As Those From A Countertop Blender?
Yes. Nutrition depends on the ingredients, not the blender. Immersion blenders may not pulverize seeds as finely, but you still get all the nutrients from fruits, vegetables, and add-ins. For a comparison of blenders and nutrition, see Wikipedia’s Blender article.
Enjoy the freedom and creativity that comes with making smoothies using an immersion blender. With a little practice, you’ll discover endless combinations for healthy, delicious drinks in just a few minutes—no bulky blender required.