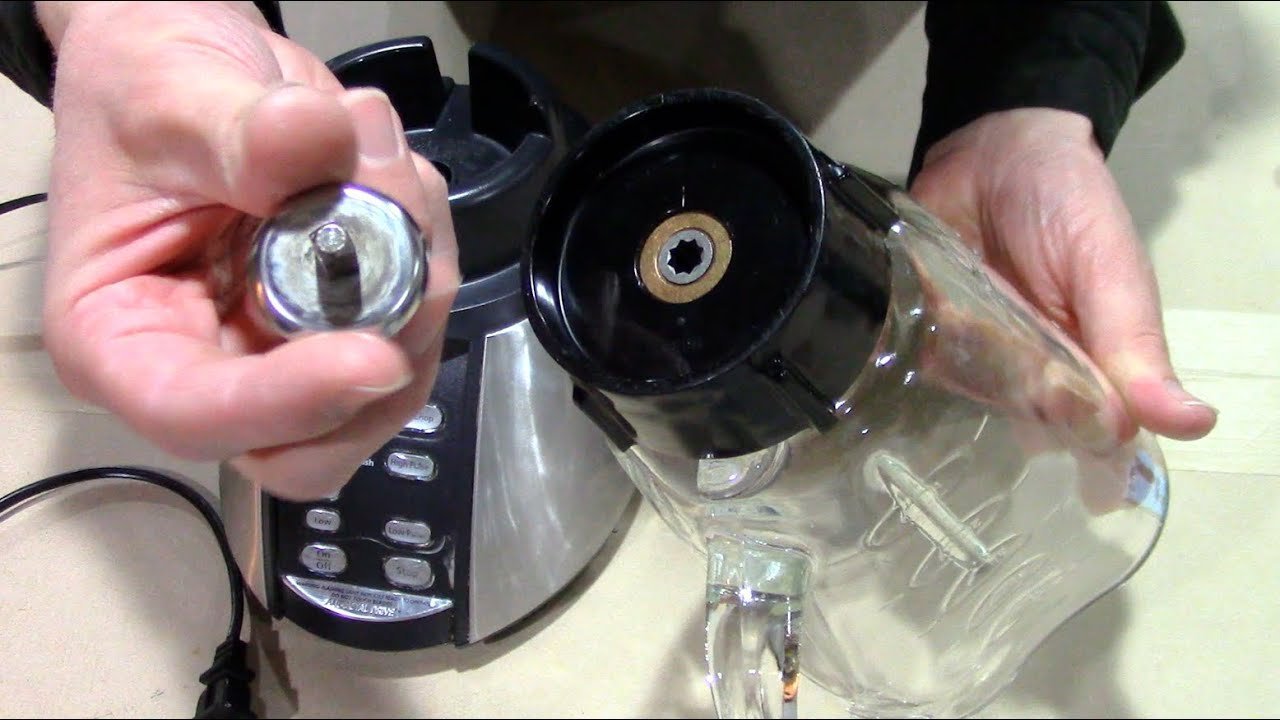
How To Disassemble an Oster Blender in 15 to 45 Minutes
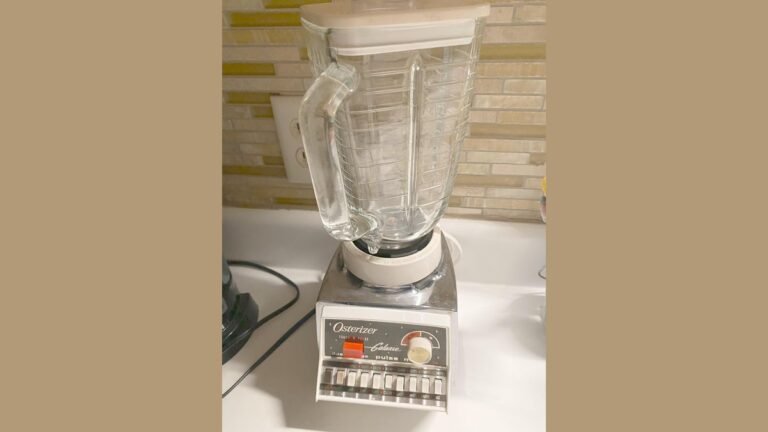
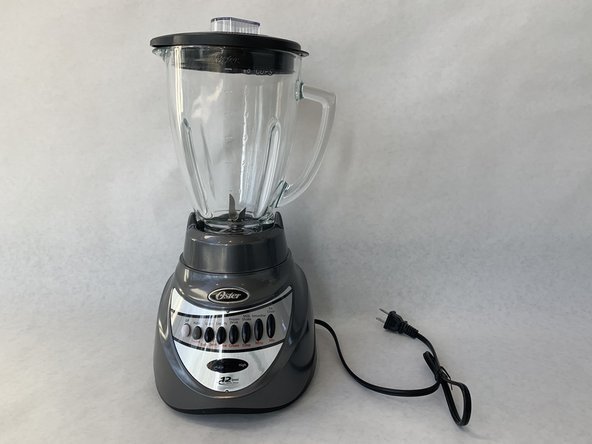
Disassembling an Oster blender is a straightforward job that usually takes 15 to 45 minutes with a Phillips-head screwdriver, a flathead screwdriver, and a little patience — and on most Oster models the entire process is reversing a few screws that hold the base, jar, and blade assembly together. Whether you’re replacing a worn drive coupling, fixing a blade assembly that leaks, or cleaning out years of dust and smoothie residue from the motor housing, the same basic sequence applies across the classic Osterizer line, the Beehive and Heritage collections, and the newer Pro and Versa countertop models.
Key Takeaways
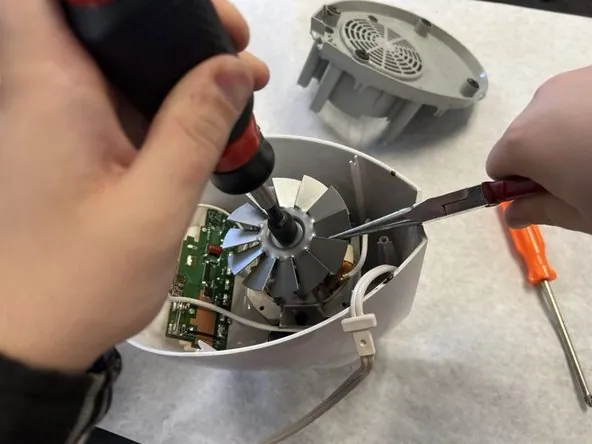
- Most Oster blenders come apart in four stages: jar and lid, blade assembly, collar or jar base, and the motor base itself.
- You almost always need only a Phillips-head screwdriver; some models add a flathead, a small hex key, or a spanner for the blade nut.
- Unplug the blender before touching a single screw — the motor base holds live wiring even when the switch is off.
- The drive coupling (the rubber or plastic gear on top of the motor) is the most common wear part and the usual reason people disassemble an Oster.
- Oster blade assemblies are left-hand threaded on many classic models, so turn clockwise to loosen, not counterclockwise.
- Keep screws in a labeled cup or magnetic tray by stage; base screws and jar-collar screws are rarely interchangeable.
Tools and Parts You Need
Before you start, gather everything in one place. Stopping mid-teardown to hunt for a screwdriver is how small parts get lost.
| Tool or Part | Why You Need It | Typical Cost |
|---|---|---|
| Phillips-head screwdriver (#1 and #2) | Base screws, collar screws, some switch plates | $5–$15 for a set |
| Flathead screwdriver (small) | Prying the base plate, releasing plastic clips | $3–$10 |
| Adjustable spanner or pliers | Blade nut on metal-drive models | $8–$20 |
| Small hex key set | Some Pro and Versa base housings | $6–$15 |
| Magnetic parts tray | Holds screws by stage so nothing rolls away | $5–$12 |
| Replacement drive coupling | The part you’re most likely replacing | $6–$15 |
| Replacement blade assembly | If the seal is leaking or blades are dull | $12–$30 |
| Replacement jar gasket | Stops leaks at the collar | $4–$10 |
| Isopropyl alcohol and a rag | Cleaning motor housing and switch contacts | $3–$8 |
Pro Tip: Take a photo of the base with your phone before you remove the first screw. Oster has used dozens of housing layouts over the decades, and a photo beats memory every time when you’re reassembling.
Safety First: Unplug and Discharge
A blender base contains a motor, a capacitor, and wiring that runs from the cord to the switch and back. Even a blender that has been sitting unplugged for a week can hold a residual charge in the capacitor on some electronic models.
- Unplug the power cord from the wall and wrap it loosely around the base so it doesn’t drag.
- Press the power button or toggle the switch a few times after unplugging to drain any stored energy in the switch circuit.
- Wait five minutes before opening the base if your model has a digital touch panel or a programmable preset pad.
- Work on a hard, well-lit surface — not carpet, where screws vanish and static can build up.
- Never put the motor base, cord, or switch assembly in water. Only the jar, lid, blade assembly, and collar are dishwasher-safe.
Warning: If you see a frayed cord, a scorched terminal, or melted insulation inside the base, stop and replace the cord or the whole base. Don’t tape over damaged wiring on a high-draw appliance.
How to Disassemble the Oster Blender Jar and Lid
This is the easy stage and the one most people actually need. Do it first, because a clean, empty jar is much easier to handle.
Removing the lid and cap
- Pull the lid straight up off the jar. On models with a locking tab, press the tab toward the jar wall while lifting.
- Twist the filler cap counterclockwise and lift it out of the lid. On some Oster lids the cap is a press-fit and simply pops out with a firm pull.
- Set both aside. If the lid has a rubber gasket seated in its rim, note which way it faces — it only seals one way.
Separating the jar from the collar
- Turn the jar upside down over a sink or towel.
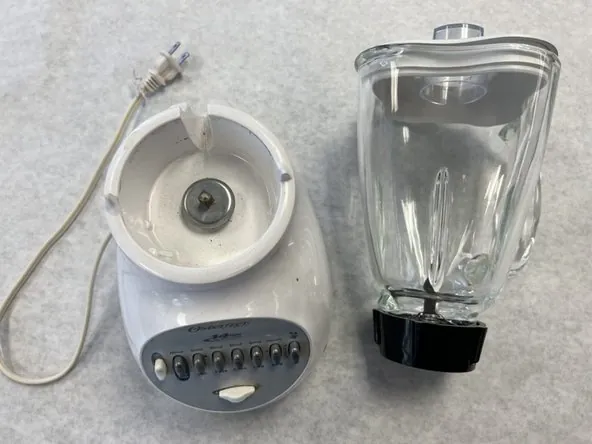
- Grip the jar collar (the plastic or metal ring at the bottom of the jar) with one hand and the jar with the other.
- Twist the collar counterclockwise until it releases. On most Oster jars this is a quarter to a half turn.
- Lift the jar off the collar. The blade assembly usually stays seated in the collar, but on some models it stays with the jar — either is normal.
- If the collar won’t budge, run warm water over the threads for 30 seconds to soften dried smoothie residue, then try again.
How to Remove the Blade Assembly
The blade assembly is the metal or plastic piece with the cutting blades and a sealing gasket underneath. This is where leaks start.
| Blade Assembly Type | How It Attaches | How to Remove It |
|---|---|---|
| Drop-in with rubber gasket | Sits in the collar, held by the jar’s weight | Lift straight out of the collar |
| Screw-on base | Threaded onto the collar | Turn the base counterclockwise |
| Left-hand threaded nut | Nut under the blades, reverse thread | Turn the nut clockwise to loosen |
| Press-fit with retaining ring | Snap ring holds the assembly in the collar | Pry the ring out with a small flathead |
Pro Tip: If the blade assembly is stuck, don’t grip the blades with pliers. Wrap the blade hub in a thick towel and twist the hub, not the cutting edges. Blades are sharp even when they look dull.
Once the assembly is out, inspect the gasket for cracks, flattening, or black residue. A gasket that has gone hard is the reason your blender leaks onto the counter.
How to Open the Motor Base
This is the stage that varies most between Oster models. The good news is that almost every Oster base follows one of four patterns.
Pattern 1: Screws under the base
- Turn the base upside down on a padded surface.
- Look for four to six recessed screws around the perimeter of the bottom plate.
- Remove them with a #2 Phillips screwdriver and lift the bottom plate off.
- Set the plate and screws in your tray.
Pattern 2: Screws hidden under rubber feet
- Turn the base upside down.
- Pry out the rubber feet with a small flathead screwdriver. They’re usually press-fit.
- Remove the screws revealed underneath.
- Lift the bottom plate free.
Pattern 3: Screws under the front or rear trim
- Look at the decorative band around the base — on many Osterizer and Heritage models, it snaps off.
- Work a flathead under the edge and gently pry the band free, working around the perimeter.
- Remove the screws now visible behind the band.
- Slide the housing halves apart.
Pattern 4: Clamshell housing with clips
- Some Pro and Versa bases split into two halves held by internal plastic clips.
- Insert a flathead into the seam at the back of the base and twist gently to release the first clip.
- Work forward along the seam, releasing one clip at a time.
- Pull the halves apart slowly — the switch and cord are still connected.
Warning: On clamshell models, the switch assembly and cord strain relief are attached to one half. Open the halves like a book, not like a clam, so you don’t yank a wire loose.
What You Will Find Inside
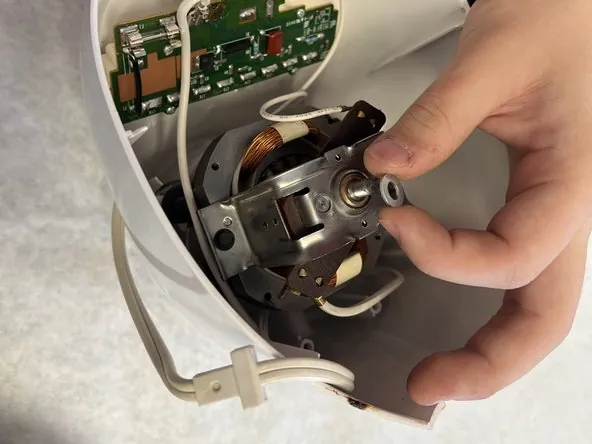
Once the base is open, you’re looking at a small, simple machine. Knowing the parts by name makes reassembly and repair much easier.
- Motor — the cylindrical unit in the center, usually with a cooling fan on the bottom shaft.
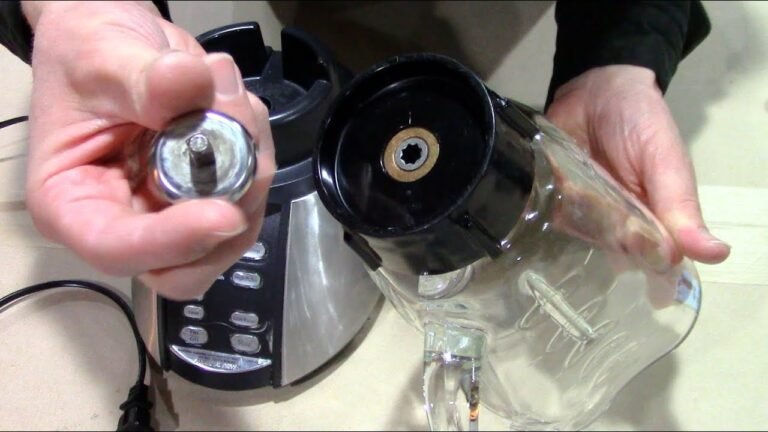
- Drive coupling — the rubber or plastic gear on top of the motor that meshes with the blade assembly. This is the #1 wear item.
- Fan — plastic fins on the lower motor shaft that pull air through the housing.
- Switch assembly — the push buttons, toggle, or touch panel on the front, wired to the motor.
- Speed control board — present on electronic and programmable models; a small circuit board behind the switch.
- Capacitor — a small cylinder on some models, wired near the switch or board.
- Cord and strain relief — where the power cord enters the base.
- Thermal fuse or breaker — a safety device that cuts power if the motor overheats.
Replacing the Drive Coupling
The drive coupling is the rubber or plastic star-shaped gear that sits on top of the motor shaft and engages the blade assembly. When it strips, the motor spins but the blades do not.
- Open the base using the pattern that matches your model.
- Locate the coupling on top of the motor shaft.
- On most Oster models, the coupling is press-fit — grip it firmly and pull it straight up off the shaft.
- On some models it’s held by a small screw or retaining clip — remove that first.
- Clean the shaft with isopropyl alcohol and a rag.
- Press the new coupling onto the shaft until it seats fully. It should sit flush, not wobble.
- Spin the coupling by hand to confirm it turns freely and doesn’t rub the housing.
Pro Tip: Buy two couplings. They’re cheap, they fail on a predictable schedule, and having a spare means your next breakdown is a 10-minute fix instead of a week waiting on shipping.
Replacing the Blade Assembly and Gasket
If your jar leaks at the bottom or the blades wobble, the blade assembly or its gasket is the culprit.
- Remove the jar and collar as described above.
- Take out the old blade assembly.
- Pry the old gasket out of its groove with a flathead. It may come out in pieces.
- Clean the groove thoroughly — old gasket residue causes new gaskets to seat crooked.
- Press the new gasket into the groove, working around the perimeter so it sits evenly.
- Seat the new blade assembly into the collar, aligning any tabs or flats.
- Reassemble the collar onto the jar and hand-tighten only. Over-tightening cracks plastic collars.
Cleaning the Motor Housing
While the base is open, this is your one chance to clear out the dust and grease that shorten motor life.
- Blow out loose dust with compressed air or a hair dryer on the cool setting.
- Wipe the motor housing with a rag lightly dampened with isopropyl alcohol.
- Clean the fan blades with a dry toothbrush. Don’t bend them.
- Check the air vents on the base and clear any blockage.
- Inspect the switch contacts for black carbon buildup. Clean lightly with a pencil eraser or contact cleaner.
- Let everything dry completely before closing the base.
Warning: Never spray liquid cleaner directly into the base. Liquid that reaches the motor windings or the circuit board can short the blender or create a shock hazard later.
Reassembly Tips That Save You Time
Reassembly is disassembly in reverse, but a few habits make it much smoother.
- Route the cord first. Lay the cord and strain relief in their channel before you close the housing.
- Seat the switch before the screws. The switch assembly often floats until the housing squeezes it into place.
- Start every screw by hand. Cross-threading a plastic boss is the fastest way to ruin a base.
- Tighten in a star pattern. Snug one screw, then the one opposite, working around the plate.
- Don’t overtighten. Plastic housings crack. Snug plus a quarter turn is plenty.
- Test before final assembly. Plug in with the base still open and the blades off, press each speed, and confirm the motor runs and the fan spins.
| Stage | Screws Removed | Parts Exposed | Time |
|---|---|---|---|
| Jar and lid | 0 | Lid, cap, jar, collar | 2–5 min |
| Blade assembly | 0–1 | Blades, gasket | 3–8 min |
| Bottom plate | 4–6 | Motor, fan, cord | 5–10 min |
| Housing halves | 2–6 | Switch, board, wiring | 5–15 min |
| Coupling replacement | 0–1 | Drive coupling, shaft | 5–10 min |
Common Problems and What They Mean
| Symptom | Likely Cause | Fix |
|---|---|---|
| Motor runs, blades don’t spin | Stripped drive coupling | Replace the coupling |
| Leaks from the bottom of the jar | Worn or hardened gasket | Replace the gasket |
| Burning smell | Dust on motor, worn brushes, or overheating | Clean the housing, let it cool, inspect the motor |
| Blender won’t start at all | Thermal fuse tripped, switch failure, or cord fault | Check the fuse, then the switch, then the cord |
| Grinding noise | Worn coupling or bearing, or a loose fan | Replace the coupling, check the fan |
| Only some speeds work | Dirty or failed switch contacts | Clean or replace the switch assembly |
| Jar won’t seal to collar | Cross-threaded collar or missing gasket | Re-seat the collar, replace the gasket |
When to Stop and Replace Instead
Not every Oster is worth fixing. Disassembly makes the decision clear.
- Replace if the motor windings are burned, blackened, or smell acrid after cleaning.
- Replace if the housing is cracked at the screw bosses — it will never hold screws again.
- Replace if the circuit board on an electronic model is scorched or has blown components.
- Repair if the only problems are the coupling, gasket, blade assembly, cord, or switch. These are all inexpensive and available.
- Repair if the motor runs smoothly and the fan spins freely. A healthy motor is the whole ballgame.
Frequently Asked Questions
Can I disassemble an Oster blender without any tools?
On a few models, yes — the jar, lid, and blade assembly come apart entirely by hand. The motor base, however, almost always needs a Phillips-head screwdriver, and some models need a flathead or hex key to release the housing. Plan on having at least a basic screwdriver set on hand.
How do I know if my Oster blade assembly is left-hand threaded?
If the nut sits under the blades and tightening it clockwise makes it feel tighter rather than looser, it’s left-hand threaded. Test gently. On left-hand models, turn the nut clockwise to loosen and counterclockwise to tighten. Forcing it the wrong way strips the threads or cracks the collar.
Why does my Oster blender leak after I reassemble it?
Almost always the gasket. A gasket that’s pinched, seated crooked, or reused after going hard will leak no matter how tight you make the collar. Remove the blade assembly, pull the gasket, clean the groove completely, and install a fresh gasket seated evenly all the way around.
Is it safe to run the blender with the base open?
For a brief test with the blades removed, yes — but only on a dry surface, with dry hands, and only long enough to confirm the motor and fan run. Never leave an open base plugged in, and never touch the wiring while it’s connected to power. Unplug before any further work.
How often should I replace the drive coupling?
Expect six months to two years of regular use from a rubber coupling, and longer from a plastic or metal one. Heavy use with thick mixtures like nut butters and frozen fruit shortens that considerably. Keeping a spare on hand turns a breakdown into a minor inconvenience.
Can I put the disassembled parts in the dishwasher?
Only the jar, lid, filler cap, collar, blade assembly, and gasket are dishwasher-safe, and only on the top rack. The motor base, cord, switch assembly, and any circuit board must never go in water. Hand-wash the base with a damp rag and mild soap.
Conclusion
Once you have the base open and the coupling or gasket replaced, reassemble in reverse order, tighten the screws in a star pattern, and run a short test with water before you commit to a full smoothie. If the motor spins smoothly and the jar stays dry, you have just saved yourself the cost of a new blender — and you now know exactly how to open it again the next time something wears out.