How To Clean Ninja Blender: Quick and Easy Steps for Sparkling Results
Keeping your Ninja blender clean is essential for both performance and safety. Many people use their blender daily for smoothies, soups, and sauces, but often neglect thorough cleaning. Over time, residue builds up, odors develop, and the blades can lose their sharpness. If you want your Ninja blender to last longer and always deliver fresh results, learning the right cleaning methods is crucial. This guide will show you simple, effective ways to clean every part of your Ninja blender, from quick rinses to deep cleaning. Whether you’re new to using blenders or have years of experience, you’ll find practical tips and answers to common questions. Let’s dive in and keep your blender in top shape.
Understanding Your Ninja Blender: Types And Components
Before you start cleaning, it helps to know the different Ninja blender models and their key parts. This knowledge will make the cleaning process easier and prevent mistakes.
Common Ninja Blender Models
Ninja has several popular blender types. Each has unique parts, but most share a basic design.
| Model | Main Features | Cleaning Difficulty |
|---|---|---|
| Ninja Professional Blender | Large pitcher, stacked blades, high power | Medium |
| Ninja Foodi Power Nutri Duo | Single-serve cups, twist-on blades | Easy |
| Ninja Mega Kitchen System | Multiple containers, food processor option | Hard |
| Ninja Personal Blender | Compact, simple blade system | Easy |
Essential Blender Parts
Most Ninja blenders include:
- Pitcher or cup: The main container for blending.
- Blade assembly: Removable blades for chopping and mixing.
- Lid: Seals the pitcher or cup, sometimes with a spout or locking mechanism.
- Gasket/seal: Rubber ring to prevent leaks.
- Base: Motorized unit (should never be submerged).
Knowing these parts helps you clean them correctly and avoid damage.
Why Cleaning Your Ninja Blender Matters
A clean blender isn’t just about looks. It affects health, taste, and blender lifespan.
Health And Safety
Old food residue can lead to bacteria growth. A study from the NSF International found that blender gaskets are one of the germiest kitchen items, often containing mold and yeast. If you don’t clean your blender well, you risk foodborne illnesses.
Taste And Odor
Leftover smells or residue can make your next smoothie taste bad. Strong flavors like garlic can stick to plastic and rubber parts. Proper cleaning keeps every drink and meal fresh.
Performance And Longevity
Dried food can block the blades or slow the motor. Over time, this causes wear and tear. Regular cleaning keeps your Ninja blender working smoothly and extends its life.
Quick Cleaning After Each Use
If you clean your blender right after you finish blending, you save time and effort later. Here’s how to do a fast, effective rinse.
Step-by-step Quick Clean
- Rinse Immediately: As soon as you finish blending, fill the pitcher halfway with warm water. Add a drop of dish soap.
- Blend: Place the lid on securely. Run the blender for 30–60 seconds on medium speed.
- Empty and Rinse: Pour out the soapy water. Rinse the pitcher, lid, and blade with clean water.
- Dry: Shake off excess water and let all parts air dry on a clean towel.
This quick cleaning removes most residue and prevents buildup. However, it won’t remove tough stains or odors.
Deep Cleaning: Weekly Or Monthly Routine
Even with daily rinses, your Ninja blender needs deep cleaning regularly. This prevents hidden buildup and keeps all parts sanitary.
What You Need
- Dish soap
- White vinegar
- Baking soda
- Soft sponge or brush
- Toothbrush (for tricky spots)
- Clean towel
Step-by-step Deep Clean
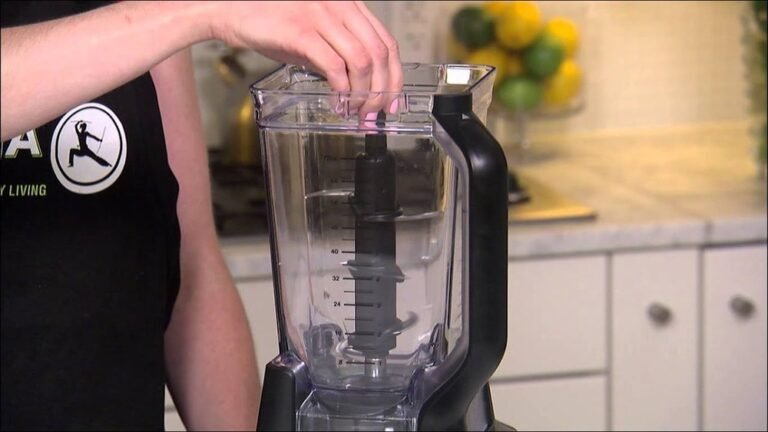
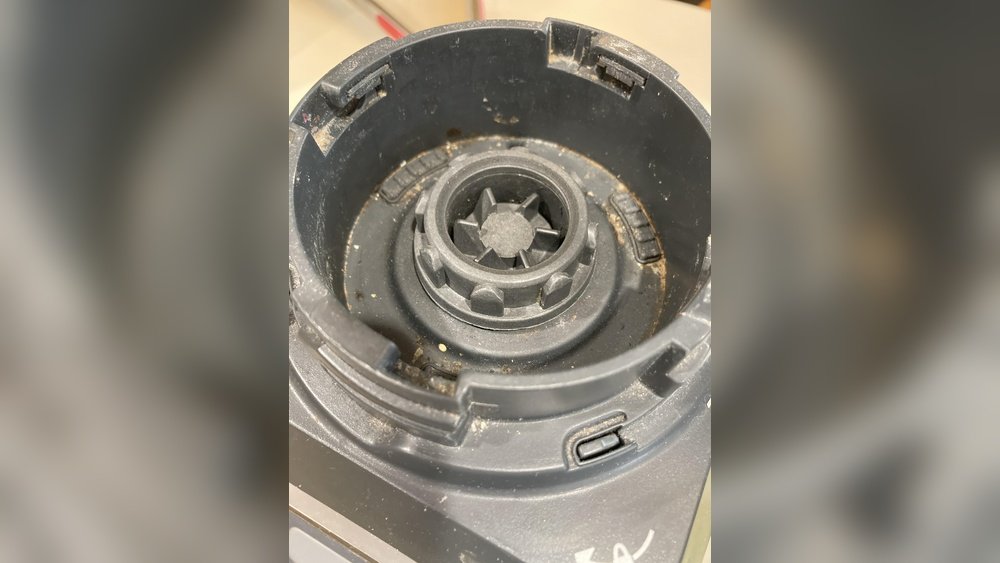
- Disassemble Everything: Remove the pitcher or cup, blade assembly, lid, and gasket. Check your manual for safe removal.
- Soak Parts: Fill your sink with warm, soapy water. Place all removable parts except the base in the water for 10–15 minutes.
- Scrub Thoroughly: Use a soft sponge for the pitcher and lid. Use a toothbrush for crevices, especially around the blade and gasket.
- Tackle Stubborn Stains: For sticky residue, sprinkle baking soda on a damp sponge and scrub gently. For odors, soak parts in a mix of 1 part vinegar to 3 parts water for 5–10 minutes.
- Rinse Well: Make sure all soap and cleaning agents are gone. Leftover soap can change the taste of food.
- Dry Completely: Let all parts air dry. Don’t rush this step; moisture can cause mold, especially around gaskets.
Cleaning The Base
Never submerge the base. Instead:
- Unplug the blender.
- Wipe with a damp cloth. Use a small brush to clean around buttons and vents.
- Dry with a towel.
Comparing Cleaning Methods
Here’s a quick comparison of daily vs. deep cleaning:
| Cleaning Type | Time Needed | Removes Residue | Removes Odors | Recommended Frequency |
|---|---|---|---|---|
| Quick Clean | 2–3 minutes | Light | No | After every use |
| Deep Clean | 15–20 minutes | Heavy | Yes | Weekly/Monthly |
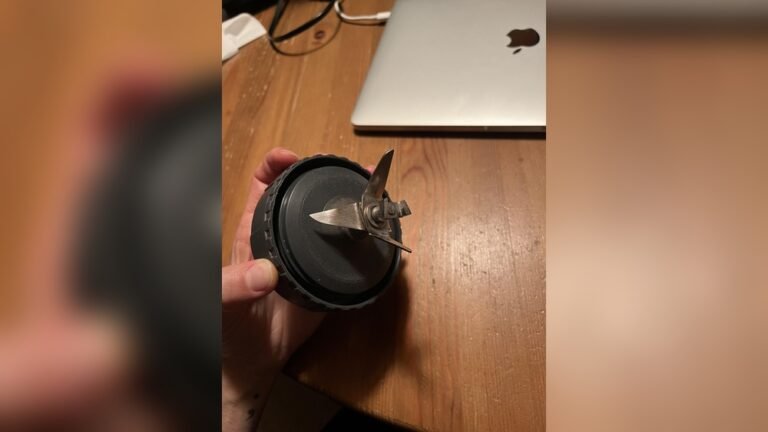
How To Clean Ninja Blender Blades Safely
Blender blades are sharp and can be dangerous. Cleaning them right is important for safety and performance.
Blade Cleaning Steps
- Handle Carefully: Always hold the blade assembly by the base, not the sharp edges.
- Soak: Place blades in warm, soapy water for 5–10 minutes.
- Scrub Gently: Use a toothbrush to clean between blades. Don’t force anything; stuck food will loosen after soaking.
- Rinse and Dry: Rinse blades thoroughly. Dry with a towel or let air dry.
Common Mistakes
- Using metal brushes: These scratch the blades.
- Leaving blades wet: This can cause rust.
- Not cleaning gasket areas: Food often hides here.
Blade Maintenance Tips
- Check blades for dullness or damage monthly.
- If blades are dull, consider replacing the assembly.
- Always reassemble the blender carefully to avoid leaks.
Cleaning The Gasket And Seal
Many beginners forget about the gasket—the rubber ring that stops leaks. It’s a hotspot for bacteria.
How To Clean The Gasket
- Remove the gasket from the lid or blade assembly.
- Soak in warm, soapy water for 10 minutes.
- Scrub gently with a toothbrush.
- Rinse and dry thoroughly.
Signs Of A Dirty Gasket
- Bad smell, even after washing.
- Black or green spots (mold).
- Blender leaks during use.
If your gasket is damaged or moldy, replace it. Gaskets are cheap and easy to find.
How To Clean Ninja Blender Cups, Pitchers, And Lids
Cleaning the pitcher or cup is straightforward, but the lid often hides grime.
Cleaning Steps
- Pitcher/Cup: Wash with warm, soapy water. Use a sponge or brush for corners.
- Lid: Pay attention to spouts and locking mechanisms. Use a toothbrush for small areas.
- Rinse: Ensure all soap is gone.
- Dry: Air dry upside down to drain water.
Odor Removal
Plastic can hold odors. For strong smells, soak in a vinegar solution for 10 minutes and rinse well.
Data: Lid Cleaning Frequency
A survey of 500 blender users showed that 70% only clean the lid with a quick rinse. However, deep cleaning the lid weekly reduces bacteria by up to 80%.
Cleaning Ninja Blender Accessories
Some Ninja blenders come with extra accessories like dough hooks, food processor bowls, or single-serve cups. Each needs special care.
Dough Hooks And Food Processor Bowls
- Soak in warm, soapy water.
- Scrub with a soft brush.
- Rinse and dry.
Single-serve Cups
- Wash like regular cups.
- Clean the blade assembly separately.
Storage Tips
Always dry accessories fully before storing. Damp parts can cause mold.

Credit: www.reddit.com
Dishwasher Cleaning: What’s Safe And What’s Not
Many Ninja blender parts are dishwasher safe, but not all. Misusing your dishwasher can cause damage.
Dishwasher-safe Parts
Most pitchers, cups, lids, and blade assemblies are top-rack safe. Always check your model’s manual.
Not Dishwasher Safe
- The motorized base (never submerge or wash in dishwasher)
- Gasket (some models recommend hand washing)
Comparison Table: Dishwasher Vs. Hand Washing
| Part | Dishwasher Safe? | Hand Wash Recommended? |
|---|---|---|
| Pitcher | Yes (top rack) | Yes |
| Lid | Yes (top rack) | Yes |
| Blade Assembly | Yes (top rack) | Yes |
| Gasket | Depends on model | Yes |
| Base | No | Yes (wipe only) |
Dishwasher Tips
- Use mild detergent.
- Place parts on the top rack only.
- Avoid high heat settings.
Dishwashers are convenient, but hand washing extends the life of your blender parts.
Removing Stubborn Stains And Odors
Blenders sometimes develop tough stains or lingering smells. Here’s how to fix them.
For Stains
- Make a paste of baking soda and water.
- Apply to stained areas, scrub gently, and rinse.
For Odors
- Fill the pitcher with 1 cup vinegar and 2 cups water.
- Let soak for 10–15 minutes.
- Rinse and dry.
Non-obvious Insight
If your pitcher or cup turns cloudy, it’s often from mineral buildup (hard water). Soak in vinegar to restore clarity.
Cleaning Tips For Smoothie And Protein Shake Lovers
Certain ingredients—like protein powder or nut butter—stick to blender parts. These need extra care.
How To Clean Sticky Residue
- Use warm water and extra dish soap.
- Scrub with a brush, focusing on corners.
- For dried-on residue, soak longer or use baking soda paste.
Preventing Build-up
- Rinse immediately after blending thick shakes.
- Don’t let the blender sit with sticky leftovers.
Cleaning Ninja Blender After Making Hot Soups
Many Ninja blenders can handle hot liquids. However, soup residue can be hard to clean.
Best Practices
- Let the blender cool before cleaning.
- Rinse with warm water; never use cold water on hot glass.
- Use a soft sponge to avoid scratching.
Odor Tip
Hot soups often leave strong smells. Use vinegar solution for deep cleaning.

Credit: www.youtube.com
Common Cleaning Mistakes And How To Avoid Them
Many people make simple errors that can damage their Ninja blender or leave it dirty.
Mistakes To Watch For
- Not disassembling the blade: Food hides under the blade assembly.
- Using harsh cleaners: Bleach or abrasive pads can damage plastic and metal.
- Submerging the base: This ruins the motor.
- Skipping gasket cleaning: Leads to leaks and mold.
- Rushing drying: Wet parts can cause odors.
How To Avoid
- Follow the steps in this guide.
- Use only mild soap and soft tools.
- Take your time drying.
How To Clean Ninja Blender For First Use
When you buy a new Ninja blender, cleaning it before first use removes factory dust and chemicals.
Steps
- Disassemble all removable parts.
- Wash with warm, soapy water.
- Rinse and dry completely.
- Wipe the base with a damp cloth.
Don’t skip this step—factory residues can affect taste and safety.
How To Clean Ninja Blender After Long Storage
If your blender has been unused for months, special cleaning is needed.
Steps
- Check for dust, mold, or bugs.
- Wash all removable parts thoroughly.
- Soak in vinegar solution if there’s odor.
- Dry fully.
Storage Insight
Store your blender dry and disassembled to prevent mold and odors.
Eco-friendly Cleaning Options
You can clean your Ninja blender without harsh chemicals.
Natural Cleaners
- Vinegar: Cuts odors and breaks down mineral buildup.
- Baking soda: Removes stains and acts as a gentle scrub.
- Lemon juice: Freshens and cleans.
How To Use
Mix vinegar or lemon juice with water for soaking. Use baking soda paste for scrubbing.
Eco-friendly cleaners are safe for you and your blender, and they work well for most residues.
Troubleshooting: When Cleaning Doesn’t Help
Sometimes, cleaning doesn’t solve problems like leaks, poor blending, or bad smells.
What To Check
- Gasket: Is it damaged or moldy? Replace it.
- Blade assembly: Is it dull, rusty, or loose? Replace or tighten.
- Pitcher: Cracks or cloudiness? Replace if needed.
When To Contact Support
If your Ninja blender still has issues after cleaning, contact Ninja customer support. Repairs or replacements may be needed.
Real-life Example: Cleaning Routine That Works
Lisa, a smoothie lover, uses her Ninja blender every morning. She rinses it after each use and deep cleans every Sunday. She soaks the blade and gasket, scrubs with a toothbrush, and air dries all parts. Since starting this routine, her blender has stayed odor-free and works like new.
Small steps, big results.

Credit: www.youtube.com
Extra Tips For Busy People
If you’re short on time:
- Do the quick clean right after blending.
- Deep clean on weekends.
- Keep cleaning tools near your blender for convenience.
Consistency is key. Five minutes per day saves hours later.
Ninja Blender Cleaning Checklist
Here’s a handy summary for regular cleaning:
- Rinse after every use.
- Disassemble and deep clean weekly.
- Scrub blades and gaskets.
- Dry all parts thoroughly.
- Wipe the base, never submerge.
- Replace damaged parts as needed.
Where To Find Replacement Parts
If you need a new blade assembly, gasket, or pitcher, visit Ninja’s official site or trusted retailers. Always buy genuine parts for safety and fit. For more details, check Ninja Kitchen.
Frequently Asked Questions
How Often Should I Deep Clean My Ninja Blender?
It’s best to deep clean your Ninja blender once a week if you use it daily. If you use it less often, deep cleaning every month is enough. Quick rinses after every use help keep it clean in between.
Can I Put All Ninja Blender Parts In The Dishwasher?
Most pitchers, cups, lids, and blade assemblies are dishwasher safe (top rack only). However, always check your model’s manual. The motorized base should never go in the dishwasher or be submerged.
How Can I Remove Strong Odors From My Ninja Blender?
Soak the pitcher or cup in a vinegar and water solution (1 part vinegar, 3 parts water) for 10–15 minutes. For persistent smells, try baking soda paste or lemon juice. Rinse and dry well.
Is It Safe To Use Bleach Or Harsh Chemicals On My Blender?
No. Harsh chemicals like bleach can damage plastic and metal parts. Use mild dish soap, vinegar, or baking soda instead. These cleaners are safe and effective.
What Should I Do If My Ninja Blender Starts Leaking?
Check the gasket and blade assembly for damage or dirt. Clean and reassemble carefully. If the gasket is worn or moldy, replace it. Leaks usually happen when parts are dirty or not fitted properly.
Keeping your Ninja blender clean doesn’t have to be hard. With regular rinsing, deep cleaning, and a few smart tips, your blender will stay fresh, safe, and ready for every recipe. Taking care of each part—from blades to gaskets—ensures great taste and long-lasting performance.
So, make cleaning part of your routine and enjoy every blend with confidence.