How To Close Ninja Blender Lid: Simple Steps for a Perfect Seal
Closing the lid of a Ninja Blender seems like a simple task. But for many new users, this step can be tricky, confusing, or even frustrating. If you’ve ever struggled with a stuck lid, leaks, or the blender not starting, you’re not alone.
Knowing how to close your Ninja Blender lid properly is essential for safety, blending performance, and avoiding messes. Whether you own a classic Ninja Professional, a compact Nutri Ninja, or the latest Smart Screen model, this guide will help you master the process and avoid common mistakes.
Let’s break down the steps, share expert tips, and make sure your blender lid closes securely every time.
Why Proper Lid Closure Matters
Closing the lid right is more important than it looks. Ninja Blenders are powerful machines, spinning blades at high speeds. If the lid is not locked tightly, you could face spills, safety risks, or the blender refusing to start. Most Ninja models have a safety interlock system—the blender won’t run unless the lid is closed and locked. This protects you from accidents but can be confusing if you don’t know how the mechanism works.
If you try to blend without the lid fully closed, you might see the blender lights flash or hear a beep, but the blades won’t spin. This is the built-in safety feature at work, preventing accidents. Even experienced users sometimes forget this step, especially when in a rush.
Taking a moment to double-check the lid can save you from cleaning up a messy spill or troubleshooting why your blender isn’t working.
Common Problems From Improper Closure
- Leaking: If the lid isn’t sealed, liquids can spray out, even at low speeds. This can make cleanup much harder, especially with sticky ingredients.
- Blender Won’t Start: The safety lock prevents operation, so the blender stays silent if the lid isn’t engaged.
- Difficulty Opening: If closed incorrectly, the lid can jam. Pressure can build inside, especially after blending hot or thick mixtures, making the lid hard to remove.
- Blade Misalignment: If the lid pushes the blade assembly, blending performance drops. This can cause uneven blends and even damage the blade or motor.
Ninja Blender Models: Lid Closure Differences
While most Ninja Blenders share similar lid designs, there are differences:
| Model | Lid Type | Lock Mechanism | Common Issues |
|---|---|---|---|
| Ninja Professional | Flip-top, handle | Side lock, click | Handle not fully pressed |
| Nutri Ninja | Screw-on | Twist to lock | Cross-threading |
| Ninja Foodi | Smart lid, handle | Front latch | Sensor misreading |
| Ninja Auto-iQ | Flip-top, handle | Side lock, click | Lid not lined up |
Understanding your model helps you avoid mistakes and close the lid correctly. For example, Nutri Ninja’s twist-lock lid can sometimes cross-thread if not aligned, making it hard to remove later. The Foodi’s smart lid has a sensor that can be triggered by crumbs or sticky residue, causing the blender to misread whether the lid is locked.
Step-by-step: How To Close Ninja Blender Lid
Let’s get practical. Here’s how to close the lid for most Ninja Blender models, step by step.
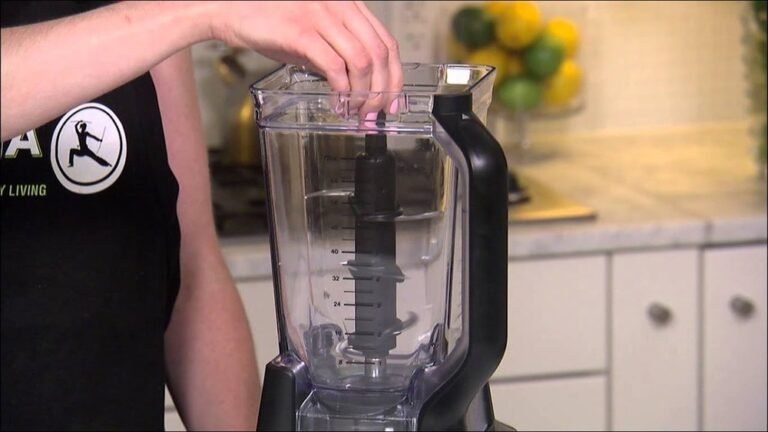
1. Check The Blender Bowl Or Pitcher
Before placing the lid, make sure the bowl or pitcher is seated correctly on the base. Ninja Blenders often require the pitcher to be set in a specific orientation.
- Align the handle with the front or side of the base (depends on model). Most models work best when the pitcher handle faces outward, making it easier to lock the lid and pour later.
- Press down gently to make sure it’s secure. You should feel the pitcher settle into the base, sometimes with a soft click.
- You should hear a soft click or see the pitcher lock in place. This step is easy to skip, but if the pitcher isn’t seated, the lid might not align, and the blender won’t start.
Some models, especially the larger Ninja Professional series, have a notch or groove at the base to guide placement. Take a second to check for these guides—lining up the pitcher first makes lid closure much easier.
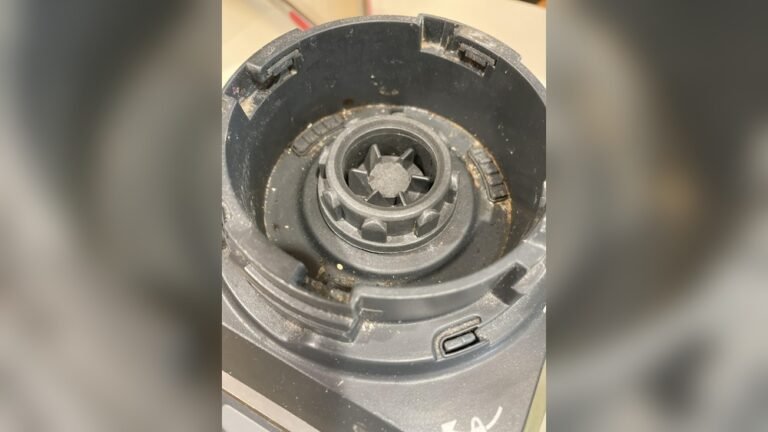
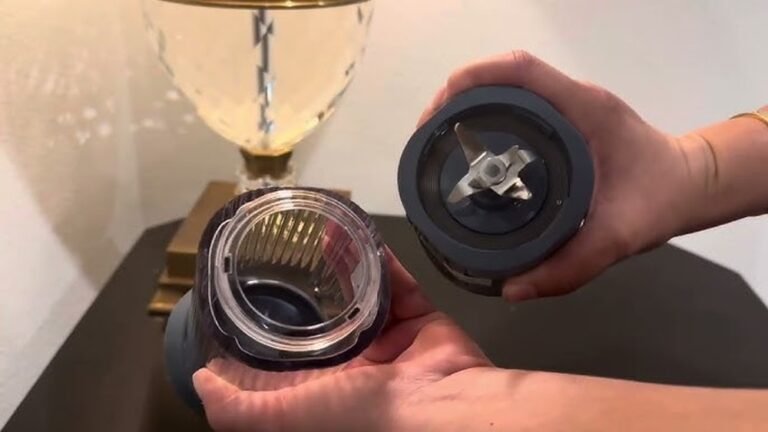
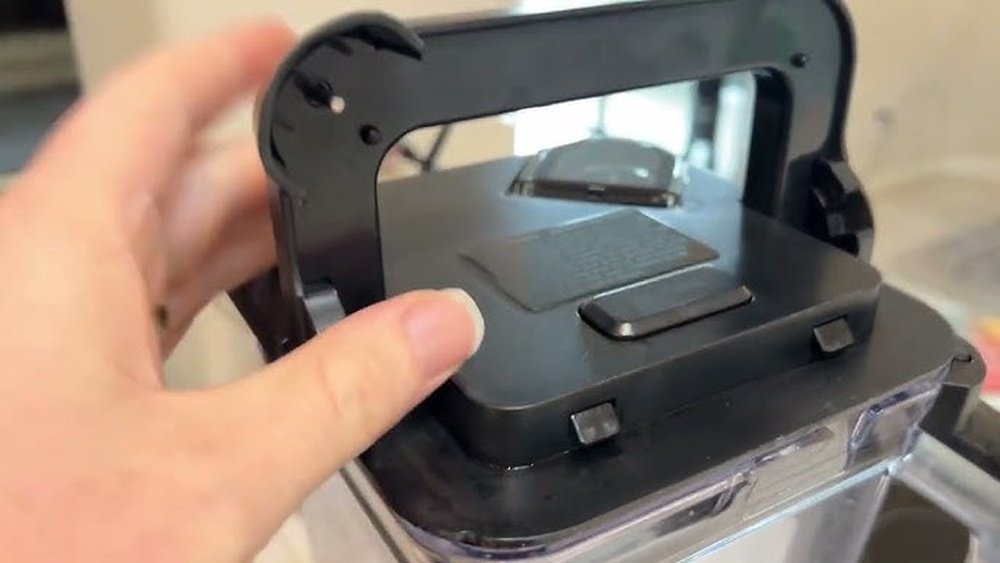
2. Inspect The Lid
Take a look at the lid. Ninja lids usually have:
- Locking tabs or grooves on the sides or front.
- A handle that acts as a locking lever.
- A pour spout or flip-top cap.
Make sure the lid is clean, undamaged, and the seal (rubber gasket) is in place. This gasket is key—it stops leaks and ensures the lid fits snugly. If you notice cracks, warping, or missing pieces, pause and replace the lid or gasket before blending.
It’s also good practice to check the underside of the lid for stuck ingredients, especially after blending sticky foods like dough or nut butter. Even small amounts can block the lock or sensor.
3. Align The Lid
Position the lid so the locking tab lines up with the pitcher’s groove. On most models:
- The handle faces the same direction as the pitcher handle.
- The pour spout matches the pitcher spout.
- Some lids have arrows or icons to guide alignment.
If you’re unsure, check your blender’s manual or look for alignment marks on the lid and pitcher. These marks are sometimes very small—just a tiny triangle or dot. They’re easy to miss but very helpful, especially if you’re new to the blender.
On twist-lock models, lining up the threads is important. If you feel resistance as you twist, stop and realign. Forcing the lid can damage the threads or make the lid stuck.
4. Place The Lid On The Pitcher
Lower the lid gently onto the pitcher. Avoid forcing it. If resistance is felt, recheck alignment.
- Press down so the lid sits flush with the rim.
- The locking tabs should fit into the grooves.
If the lid rocks or wobbles, it’s probably not lined up. Some users try to press harder, but this can bend the tabs or crack the lid. Instead, lift and realign.
5. Lock The Lid
Engage the locking mechanism:
- For models with a handle lock: Pull the lid handle down until you hear a click. Sometimes, you need to push the handle firmly—it should not feel loose.
- For twist-lock lids: Turn the lid clockwise until it stops. You’ll feel resistance at the end. Don’t over-tighten; just a snug fit is enough.
- For front latch: Push the latch until it clicks in place.
You should feel or hear a distinct click. This means the lid is locked. On some models, the click is quiet, so pay attention to the feel—the handle or latch should stay in position.
6. Double-check Lid Seal
Gently tug the lid to test if it’s secure. The lid should not lift off easily. Check the pour spout or cap—make sure it’s closed.
A common mistake is forgetting the pour spout cap. If it’s open, liquid can spray out as soon as you start blending. Always check this cap before pressing the start button.
7. Confirm Safety Lock
Most Ninja Blenders have a safety indicator light or a beep. If the lid is closed properly:
- The light turns green.
- The blender display shows “Ready.”
- If not, reopen and repeat steps.
If your model doesn’t have a light, the blender simply won’t start unless the lid is locked. Some models beep or flash an error icon. If you see these signs, check both the lid and pitcher seating.
8. Start Blending
Once the lid is locked, you can operate the blender. If the machine doesn’t start, check the lid and pitcher again.
If you notice vibration or shaking during blending, pause and check the lid again. A loose lid can cause spills or even damage the blender.
Ninja Blender Lid Closure: Troubleshooting
Even after following the steps, you might face issues. Let’s solve the most common problems.
Lid Won’t Close
- Check for blockages: Sometimes food, ice, or the blade assembly blocks the lid. Remove and clean the rim. For thick mixtures, scrape down the sides before closing the lid.
- Misalignment: Realign lid and pitcher. Look for arrows or icons. If the lid doesn’t fit, try rotating it and lining up the marks.
- Damaged parts: Cracks or warped plastic can prevent closure. Inspect the lid and pitcher rim for chips or bends.
Sometimes, leftover food or sticky liquids dry onto the rim, making closure harder. Running the lid under warm water can soften residue.
Lid Won’t Lock
- Handle not fully pressed: Push the handle down firmly. If the handle springs back up, check for debris.
- Twist-lock not tight: Keep turning until you feel resistance. If the lid spins loosely, check for missing threads.
- Safety lock sensor dirty: Clean the area near the sensor. Even a small crumb can block the sensor, making the blender think the lid isn’t closed.
If your model uses a front latch, make sure nothing is blocking the latch mechanism. Sometimes, the latch can stick after heavy use—wipe it clean and apply a tiny bit of food-safe lubricant if needed.
Blender Won’t Start After Closing Lid
- Safety lock not engaged: Reopen and relock the lid. Listen for the click and check the indicator light.
- Pitcher not seated: Remove and reattach pitcher. If the pitcher wobbles, the base isn’t locked.
- Electrical issue: Check power cord and outlet. Try plugging into a different socket.
If you have repeatedly checked the lid and pitcher, but the blender still won’t start, inspect the base for any visible signs of damage or loose parts.
Lid Stuck After Blending
- Pressure build-up: Wait a few minutes before opening. Hot or thick blends can create a vacuum—letting it rest helps release pressure.
- Sticky residue: Clean lid and rim thoroughly. If the lid is stuck, gently twist it rather than pulling.
- Handle jammed: Wiggle gently, avoid force. For flip-top lids, lifting slowly can help release the lock.
If your lid is stuck often, check for cracks or worn tabs. Replacing the gasket can also help.
Cleaning And Maintenance Tips For Ninja Blender Lids
Keeping the lid clean and well-maintained is key to proper closure and long life.
Daily Cleaning
- Remove the lid after each use.
- Wash with warm, soapy water.
- Rinse and dry thoroughly.
For best results, use a soft sponge and avoid harsh scrubbing pads, which can scratch the lid or damage the gasket. Pay attention to the locking tabs and handle areas, as food often gets trapped there.
Deep Cleaning
- Remove rubber gasket if possible.
- Soak in vinegar solution for tough stains.
- Scrub gently with a soft brush.
If your lid has a pour spout cap, open it and clean inside. Hidden residue here can cause unpleasant smells and make the cap sticky.
Maintenance Tips
- Check the seal for cracks or wear.
- Inspect locking tabs and handle.
- Replace damaged parts promptly.
Every few weeks, check the lid for signs of wear. A cracked gasket can cause leaks. You can buy replacement gaskets online or from Ninja.
A clean lid closes more easily and seals better, preventing leaks and jams. Regular cleaning also stops mold and smells from forming.
Comparing Ninja Blender Lid Designs
Not all Ninja lids are the same. Different designs affect closure, ease of use, and cleaning.
Here’s a comparison of three popular lid types:
| Lid Type | Closure Method | Ease of Use | Cleaning Difficulty |
|---|---|---|---|
| Flip-top lid with handle | Press handle down to lock | Easy for most users | Medium (handle area needs attention) |
| Twist-lock screw-on lid | Turn lid to lock | Simple but requires proper alignment | Low (few crevices) |
| Smart lid with front latch | Push latch to lock | Easy but sensor can be sensitive | Medium (sensor area needs cleaning) |
Choosing the right model based on lid design can make your blending experience smoother. For example, if you have limited hand strength, a flip-top handle is easier to use than a twist-lock lid.
Some users report that smart lids with sensors require more frequent cleaning to keep the sensor working. If you dislike cleaning small parts, consider a model with a simpler lid.
Real-world Examples: Lid Closure Success And Mistakes
Let’s look at a few stories from Ninja Blender owners.
Success Story: Perfect Protein Shake
Linda, a fitness enthusiast, uses her Ninja Professional daily. She found that aligning the lid handle with the pitcher handle and pressing the handle firmly solves her previous leaks. She checks the pour spout each time, and now her shakes never spill.
Linda also learned to check the lid’s gasket weekly. After a few months, she noticed the gasket starting to wear, so she replaced it. Since then, her blender has worked smoothly.
Mistake: Lid Not Fully Locked
Sam tried blending soup in his Nutri Ninja. He twisted the lid but didn’t feel the click. The blender refused to start. After checking the manual, he learned to twist until resistance was felt. Now, his blender starts every time.
Sam once cross-threaded the lid, making it hard to remove. He learned to line up the arrows carefully and twist gently to avoid damage.
Insight: Cleaning The Lid Solves Closure Issues
Maria noticed her Ninja Foodi lid wouldn’t lock. She discovered sticky residue around the locking tabs. A deep clean fixed the problem, and the lid now closes smoothly.
Maria also checks the sensor area for crumbs after each use. This simple habit prevents most lid closure problems.
Non-obvious Insight: Lid Alignment Markings
Many Ninja models have small alignment arrows or icons that are easy to miss. These markings help you line up the lid correctly, preventing jams or leaks. Check your lid and pitcher for these icons—they’re often on the rim or handle.
If you don’t see marks, try making your own using a small sticker or marker. This can make lid closure much easier, especially for seniors or busy families.
Safety Precautions When Closing Ninja Blender Lid
A Ninja Blender is powerful. Always follow these safety tips:
- Never force the lid. If it won’t close, check for blockages.
- Keep fingers away from blades while attaching or closing the lid.
- Make sure the lid is fully locked before starting.
- If the lid is damaged, do not use the blender.
- Do not blend hot liquids unless your model allows it.
It’s also wise to unplug the blender before cleaning or troubleshooting the lid, especially if kids are nearby. If you notice any cracks or loose parts, replace the lid before using the blender again.
How To Identify If Your Lid Is Closed Correctly
There are a few signs your Ninja Blender lid is properly closed:
- Click sound: Most lids lock with a clear click. This sound means the locking mechanism is engaged.
- No movement: The lid doesn’t wiggle or lift. Try gently tugging—if the lid stays in place, it’s secure.
- Safety indicator: Many models have a light or display. If the light is green, the lid is locked.
- Smooth blending: No leaks or shaking during operation.
If you notice leaks, noise, or blending problems, stop and check the lid. Sometimes, the click is quiet, so feeling the lock engage is just as important.
Avoiding Common Lid Closure Mistakes
Many Ninja owners make simple mistakes that lead to trouble.
1. Not Aligning Lid And Pitcher
Always match the alignment marks or handles. Misalignment can cause leaks or prevent the blender from starting.
2. Forgetting To Close Pour Spout
The small pour spout cap must be closed. Leaving it open causes leaks, especially with thin liquids like juice or milk.
3. Not Pressing Handle Fully
If your lid has a locking handle, push it all the way down. Some users stop halfway, thinking the lid is secure, but the blender won’t start.
4. Dirty Seal Or Locking Tabs
Food residue can block the lock. Clean regularly, focusing on tabs and gasket.
5. Overfilling The Pitcher
Too much liquid or ingredients can make the lid hard to close. Always leave some space at the top, usually about one inch.
6. Using Damaged Lid
Cracks or broken tabs prevent proper closure. Replace as needed. A damaged lid can lead to leaks or make the blender unsafe.
Ninja Blender Lid Closure For Different Uses
Closing the lid properly is important for various blending tasks:
Smoothies
- Use cold ingredients to avoid steam pressure.
- Don’t overfill; leave room for blending.
- Close pour spout.
Soups
- Let hot liquids cool slightly. Blending boiling soup can create dangerous pressure.
- Close lid tightly; pressure can build up.
Dough Or Batters
- Scrape sides before closing lid. Thick dough can block the lock.
- Clean locking tabs after sticky blends.
Ice Crushing
- Make sure lid is locked; ice can force lid open if not secured.
- Fill pitcher only halfway for best results. Too much ice can jam the lid.
For each blending task, following these lid closure tips ensures safe, clean blending and protects your blender.

Credit: www.youtube.com
Ninja Blender Lid Replacement: What To Look For
If your lid is damaged, replacing it is critical.
Buying Tips
- Get the exact model number. Ninja lids are not universal.
- Look for genuine parts from Ninja or authorized sellers.
- Check for included gasket/seal.
If you buy a third-party lid, read reviews and check return policies. A poor-fitting lid can cause leaks or make the blender unsafe.
Comparing Replacement Lid Options
Here’s a quick look at replacement lid choices:
| Source | Price Range | Warranty | Compatibility |
|---|---|---|---|
| Official Ninja Store | $20–$35 | 1 year | Guaranteed for listed models |
| Amazon | $15–$30 | 30 days | Model-specific, check details |
| Third-party websites | $10–$25 | Varies | May not fit all models |
Choose trusted sources and double-check compatibility. Buying from Ninja ensures you get the right fit and warranty.
Ninja Blender Lid Closure: Expert Tips
Here are some expert tips to make closing your Ninja Blender lid easy and reliable:
Use Both Hands
Use one hand to hold the pitcher steady, and the other to guide the lid. This prevents slips and ensures alignment. For heavy pitchers, this makes closure safer and easier.
Check The Gasket Each Time
The rubber gasket is key to sealing the lid. If it’s loose or missing, leaks will occur. Inspect the gasket before each use, and keep a spare on hand.
Listen For The Click
Don’t rely only on visual cues. The click sound means the lock is engaged. If you’re unsure, press the handle or latch again.
Clean After Each Use
Even small amounts of residue can block the lock or sensor. Make cleaning the lid part of your routine.
Don’t Over-tighten
Twist-lock lids need to be tight, but too much force can damage threads. Stop twisting when you feel resistance.
Learn Your Model’s Features
Some Ninja models have unique sensors or locks. Review the manual for your blender. Knowing your model’s quirks makes lid closure easier.
Lid Closure For Ninja Blender Accessories
Ninja Blenders often come with extra cups or bowls. The closure process can vary.
Single-serve Cups
- Screw the lid on tightly.
- Make sure the threads are lined up.
- Don’t overfill.
Food Processor Bowl
- Match lid tabs to bowl grooves.
- Press down until locked.
- Check safety lock indicator.
Nutri Ninja Cups
- Twist until you feel resistance.
- Double-check for leaks.
For all accessories, check for alignment marks and make sure the lids are clean before use.
Non-obvious Insights For Beginners
Many new users miss these points:
- Alignment arrows: These small marks on the lid and pitcher help you close the lid correctly. If your model doesn’t have arrows, you can add your own with a sticker.
- Safety lock sensors: Some models have sensors that must be clean and unobstructed for the blender to work. Clean the sensor area regularly.
- Gasket maintenance: Regularly check and clean the gasket; a dirty or damaged gasket is a top cause of leaks. Replace gaskets every 6–12 months for best results.
Another tip: If your blender lid is hard to close after several months, try lubricating the gasket with a drop of food-safe oil. This can make closure smoother.

Credit: www.ifixit.com
Ninja Blender Lid Closure: Special Situations
Sometimes you need to close the lid under special conditions.
Blending Hot Liquids
- Allow liquids to cool before blending.
- Leave the lid vent open if your model allows.
- Never blend boiling liquids.
For soups, use a towel to cover the lid and hold it down gently, but never force the lid closed over hot steam.
Blending Thick Mixtures
- Scrape down thick ingredients before closing lid.
- Avoid overfilling, as thick mixtures can push the lid open.
For nut butters or dough, blending in smaller batches can make lid closure easier.
Blending With Pulsing
- If pulsing, check lid after each batch.
- Secure lid before restarting.
Pulsing can shake the lid loose, especially if not locked fully.
Ninja Blender Lid Closure For Seniors And Kids
Seniors may have difficulty with tight locks, and kids need supervision.
Seniors
- Choose models with easy-to-use handle locks.
- Avoid twist-lock lids if hand strength is a concern.
- Check for ergonomic designs.
Large handles and clear markings make lid closure easier for seniors. Flip-top handles are usually the easiest.
Kids
- Supervise at all times.
- Teach proper lid closure and safety.
- Never allow kids to operate blender unattended.
Show kids how to align marks and listen for the click. Make safety part of the lesson.
Credit: www.reddit.com
Ninja Blender Lid Closure: Environmental Factors
Temperature and humidity affect lid closure.
- Hot environments can soften plastic, making closure harder.
- Cold environments may stiffen gaskets.
- High humidity can cause sticky residue.
Store your blender in a cool, dry place and clean regularly. If you live in a humid area, deep clean the lid and gasket more often.
Ninja Blender Lid Closure: When To Seek Help
If you can’t close the lid after trying all tips:
- Contact Ninja customer support.
- Visit the official Ninja website for troubleshooting.
- Consider professional repair if damage is found.
For official guidance and product manuals, check the Ninja Kitchen Support site.
If your lid is stuck or damaged, don’t force it—this can cause injury or more damage.
Frequently Asked Questions
How Do I Know If My Ninja Blender Lid Is Fully Closed?
Look for a click sound, check the lid for movement (should not lift or wiggle), and see if the safety indicator light turns on. If your blender starts, the lid is likely closed correctly.
Why Does My Ninja Blender Lid Keep Leaking?
Leaks are usually caused by a damaged gasket, overfilling the pitcher, or not closing the lid properly. Clean the seal, check for damage, and make sure the pour spout is closed.
Can I Blend Hot Liquids With The Ninja Blender Lid Closed?
Most Ninja models are not designed for hot liquids. Let liquids cool before blending. Check your manual to see if your model allows blending hot items. Never blend boiling liquids.
What Should I Do If My Ninja Blender Lid Won’t Lock?
First, check for food residue or blockages around the locking mechanism. Align the lid carefully and try again. If it still won’t lock, inspect for damage or contact customer support.
Are Ninja Blender Lids Interchangeable Between Models?
No, Ninja Blender lids are not universal. Always check your model number and buy the correct lid for your blender to ensure proper closure and safety.
Closing the lid of your Ninja Blender is easy once you know the steps. With careful alignment, regular cleaning, and attention to safety features, you’ll get smooth blends, prevent leaks, and keep your blender running for years. Remember the expert tips, watch for alignment marks, and don’t rush the process.
If you ever have trouble, review these steps or reach out for help. Your Ninja Blender is a powerful kitchen tool—use it safely and confidently every time.