How To Clean Inside Of Ninja Blender Base: Easy Step-by-Step Guide
Keeping your Ninja blender in top shape means more than just cleaning the jar and blades. Over time, food particles, dust, and even liquid can find their way into the blender base—the part that houses the motor and controls. If left unchecked, this buildup can cause unpleasant smells, sticky buttons, and even damage the electrical parts. Many people skip cleaning this area, either because they’re unsure how or they’re worried about making a mistake. The good news is, with a bit of care and the right steps, you can safely and thoroughly clean inside your Ninja blender base, making your appliance last longer and work better.
Most guides only talk about cleaning the pitcher and blade. But the inside of the base is where crumbs, spills, and sticky residue really hide. Ignoring this part may even void your warranty or cause safety issues. The process isn’t as scary as it sounds, but you do need to follow the right steps to avoid getting water in the motor or damaging the electronics. In this guide, you’ll learn exactly how to clean inside your Ninja blender base, what tools you’ll need, and what mistakes to avoid. You’ll also find practical tips for regular upkeep and troubleshooting common problems like weird smells or stuck buttons. Whether you use your Ninja daily or just for the occasional smoothie, a clean base keeps your kitchen healthier and your blender running smoothly.
Why Cleaning The Ninja Blender Base Matters
Most people focus on the pitcher and blades, but the blender base is just as important. The base houses the motor, ventilation slots, and control buttons. If dirt, crumbs, or liquid get inside, you might notice several problems:
- Foul odors from old food or spilled drinks
- Sticky or unresponsive buttons
- Reduced motor performance due to dust buildup
- Electrical risks if moisture reaches the wiring
According to consumer surveys, about 30% of blender failures are linked to poor cleaning and maintenance practices. So, spending a few minutes cleaning the base can prevent costly repairs and extend your blender’s life.
Common Mistakes People Make
Many users think wiping the outside is enough. Others try to wash the base under running water, which can be dangerous. Some ignore the base until something goes wrong, like smoke or a jammed button. Cleaning inside the base may sound advanced, but it’s really about patience and the right approach.
Understanding The Ninja Blender Base
Before you start, it’s helpful to know what’s inside the base. Most Ninja blenders have:
- A motor compartment (not waterproof!)
- Ventilation slots for cooling
- Control buttons and display panels
- Rubber feet for stability
Dust and crumbs often enter through the vent slots or when liquid spills down the pitcher. Over time, this can block air flow and overheat the motor. So, cleaning is not just about looks—it’s about performance and safety.
Types Of Ninja Blender Bases
Ninja offers several popular models, each with a slightly different base design. Here’s a simple comparison:
| Model | Base Shape | Button Type | Unique Features |
|---|---|---|---|
| Ninja Professional | Square | Physical buttons | Wide vents |
| Ninja Foodi Power Blender | Round | Touch panel | Compact motor |
| Ninja Nutri-Blender | Tall cylinder | Twist-to-start | Few vents |
Knowing your model helps you find hidden crevices and plan your cleaning approach.
What You’ll Need
Cleaning inside the Ninja blender base doesn’t require expensive tools, but having the right supplies makes the job safer and easier. Gather these items before you start:
- Small Phillips screwdriver (for removing screws, if needed)
- Soft brush (a clean toothbrush or small paintbrush)
- Compressed air can (optional, for blowing out dust)
- Cotton swabs (for corners and tight spots)
- Microfiber cloth (lint-free, for wiping)
- White vinegar or rubbing alcohol (for sticky stains)
- Mild dish soap
- Distilled water
- Dry towel
- Vacuum with a brush attachment (optional, for deep cleaning)
Never use soaking wet cloths or pour water into the base. Always unplug the blender first.
How To Clean The Outside Of The Ninja Blender Base
Before going inside, it’s smart to remove any surface dirt. This prevents crumbs or dust from falling into the motor when you open things up.
- Unplug the blender. Always pull the plug, not the cord.
- Wipe the exterior. Use a damp microfiber cloth with a drop of mild soap. Wipe all sides, the cord, and feet.
- Clean around buttons. Use a cotton swab or soft brush to reach under and between buttons.
- Clean vent slots. Tilt the base and gently brush or blow out dust from the vents.
This step alone can remove 80% of the visible grime.
Step-by-step: Cleaning Inside The Ninja Blender Base
Now let’s get into the heart of the cleaning process. This part requires care because the motor and wiring can be damaged by water or rough treatment.
1. Unplug And Prepare
Safety first. Make sure your Ninja blender is unplugged. Move it to a clean, dry workspace with good lighting. Lay down a towel to catch any small screws or debris.
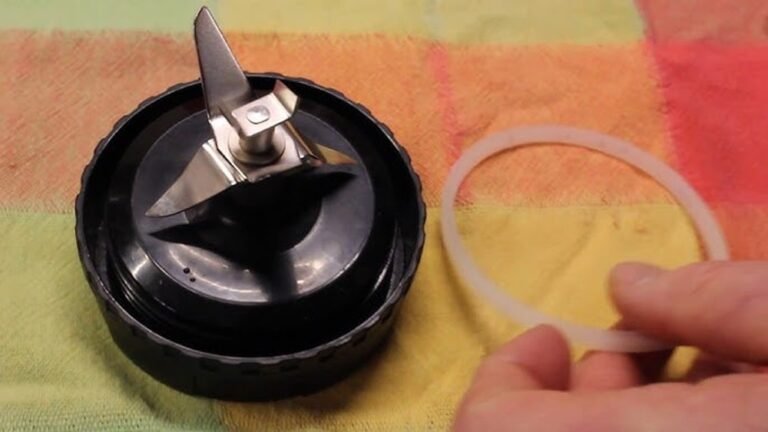
2. Remove The Blender Jar And Blades
Set aside the pitcher, blades, and any accessories. These should never be cleaned while attached to the base.
3. Check If Your Base Opens
Most Ninja bases are sealed, but some have screws on the underside for access. Check the bottom for visible screws. If you see them:
- Use a small Phillips screwdriver to remove the screws.
- Keep screws in a dish so you don’t lose them.
- Gently lift the base plate off. Do not force it—if it feels stuck, double-check for hidden screws.
If your model doesn’t open, you’ll clean through the vents and button gaps.
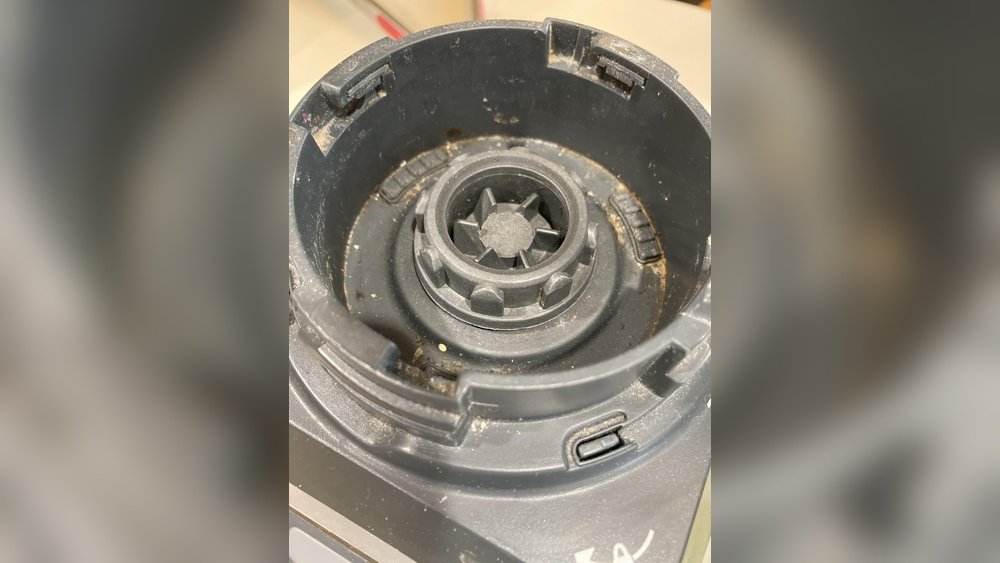
4. Remove Loose Debris
Use a soft brush or compressed air to loosen and remove any dust, crumbs, or hair. Pay special attention to:
- Ventilation slots
- Around the motor
- Under the buttons
If you have a vacuum with a brush attachment, gently vacuum these areas. Never use a high-powered setting.
5. Spot Clean Sticky Areas
Dip a cotton swab or corner of your microfiber cloth in a mix of equal parts distilled water and vinegar (or rubbing alcohol). Squeeze out extra liquid—the cloth should be damp, not wet.
- Dab sticky or stained spots inside the base.
- Wipe gently, avoiding wires and the motor.
- For stubborn stains, let the damp cloth sit for 30 seconds, then wipe.
Never spray liquid directly into the base.
6. Clean The Buttons And Control Panel
If crumbs or liquid have gotten around the buttons, use a dry cotton swab to clean the gaps. For touch panels, wipe with a barely damp cloth and immediately dry with a towel.
7. Dry Thoroughly
Before reassembling, make sure all parts are completely dry. Use a dry microfiber cloth or let the base air out for 30 minutes. Any leftover moisture can cause electrical shorts.
8. Reassemble And Test
If you removed the base plate, screw it back on securely but don’t overtighten. Plug in the blender and check that all buttons work and there’s no odd smell or noise.
Example: Cleaning A Ninja Professional Base
Let’s say you have a Ninja Professional blender. It has a square base with large vent slots. After unplugging, you remove the four screws on the bottom. Inside, you find a few crumbs near the motor and sticky residue near the buttons. Using a soft brush, you clean the crumbs, then wipe the sticky area with a vinegar-dampened cloth. After drying and reassembling, your blender feels and smells fresh.
Cleaning Without Opening The Base
Some Ninja blender bases are sealed and cannot be opened without special tools. That’s okay—you can still clean most dirt using these methods:
- Compressed air: Blow dust out of vents and around buttons.
- Vacuum: Use a brush attachment to suck up debris.
- Cotton swabs: Reach into vent slots and button gaps.
- Damp cloth: Wipe all reachable surfaces, always drying afterward.
If you spill liquid inside, unplug immediately and let the blender sit upside down for 24 hours before using again.

Credit: simplicityandastarter.com
Dealing With Spills And Sticky Residue
Accidental spills are common, especially when blending soups or smoothies. If liquid enters the base, act fast:
- Unplug the blender.
- Turn the base upside down. Let gravity help drain out any liquid.
- Blot with paper towels. Absorb as much as possible through the vent slots.
- Let dry for 24-48 hours. Do not plug in until you’re certain it’s dry.
- Clean as above. Once dry, follow the steps for dust and residue.
If you notice a burning smell or the blender won’t start after a spill, the motor may be damaged. Contact Ninja support before trying to use it again.
Preventing Future Build-up
Regular maintenance can save hours of deep cleaning and keep your blender working like new.
- Wipe the base after every use. Especially if you spill.
- Vacuum or brush vents weekly. This prevents dust from building up.
- Store in a dry place. Avoid locations where spills or splashes are likely.
- Check for leaks. Make sure the pitcher and lid are properly sealed before blending.
- Deep clean monthly. Open the base (if possible) and remove any hidden dirt.
A few minutes of regular care can double the life of your Ninja blender.
Credit: www.reddit.com
How Often Should You Clean Inside The Base?
Cleaning frequency depends on how much you use your blender:
| Usage | Recommended Cleaning Interval |
|---|---|
| Daily (multiple times) | Wipe after each use, deep clean every 2 weeks |
| Several times a week | Wipe after each use, deep clean monthly |
| Occasional (once a week or less) | Wipe after use, deep clean every 2-3 months |
If you blend sticky foods or liquids often, increase the frequency. Always clean immediately after spills.
Troubleshooting Common Issues
Even with regular cleaning, problems can happen. Here’s how to solve the most common ones:
Blender Base Smells Bad
This usually means old food or liquid has dried inside. Unplug, open if possible, and clean as above. If the smell remains, let the base air out for 48 hours.
Buttons Stick Or Don’t Work
Crumbs or dried liquids are likely. Use a dry brush or compressed air to clean around the buttons. For touch panels, wipe with a microfiber cloth.
Loud Or Grinding Noise
Dust or debris near the motor can cause noise. Clean inside the base if possible. If noise continues, the motor may need service.
Blender Won’t Turn On
Check the power outlet first. If the blender is clean and dry but still won’t start, contact Ninja support.
What Not To Do
Many people make mistakes that damage their blender or make cleaning harder. Avoid these common errors:
- Never submerge the base in water or put it in the dishwasher.
- Don’t use harsh chemicals like bleach or oven cleaner.
- Don’t poke sharp objects into vent slots.
- Never spray liquid directly onto the base.
- Don’t force open a sealed base—this may void your warranty.
Extra Tips For Long-term Care
- Always let the base dry fully after cleaning.
- If you lose a screw, don’t use a random replacement—order from Ninja.
- Mark the cleaning date on a sticker under the base so you remember.
- Use a small paintbrush for tight corners.
- Store the blender unplugged to avoid dust in unused outlets.
How The Ninja Blender Compares To Other Brands
If you’re curious how Ninja’s base design compares to other brands for cleaning, here’s a quick summary:
| Brand | Base Accessibility | Cleaning Difficulty | Common Issues |
|---|---|---|---|
| Ninja | Some models open, some sealed | Moderate | Vents collect dust, sticky buttons |
| Vitamix | Mostly sealed | Easy outside, hard inside | Button gaps trap residue |
| Oster | Bottom plate opens | Moderate | Motor dust buildup |
| NutriBullet | Mostly sealed | Easy outside, hard inside | Spills hard to reach |
Ninja blenders offer a good balance of power and maintenance, but they do require regular cleaning—especially around the vents and buttons.
When To Seek Professional Help
If your Ninja blender base is making unusual sounds, emits smoke, or continues to smell after cleaning, it’s best to consult a professional. Attempting to repair internal wiring or the motor yourself can be dangerous and may void your warranty.
Ninja offers authorized service centers and support for most models.
You can find official support and service information at the Ninja Kitchen Support site.
Credit: www.reddit.com
Frequently Asked Questions
How Do I Clean Sticky Buttons On My Ninja Blender?
Use a dry toothbrush or a cotton swab dipped lightly in rubbing alcohol. Gently clean around and between the buttons, then wipe with a dry cloth. Avoid using too much liquid to prevent it from entering the base.
Can I Put The Blender Base In The Dishwasher?
No, never put the base in the dishwasher. The base contains electrical parts and the motor, which can be permanently damaged by water and heat.
What Should I Do If Water Gets Inside The Ninja Blender Base?
Immediately unplug the blender. Turn the base upside down to drain out any liquid. Let it air dry for 24-48 hours before plugging it in. If the blender does not work or smells burnt afterward, contact Ninja support.
How Often Should I Deep Clean The Base?
If you use your Ninja blender daily, deep clean the base at least once every 2-4 weeks. For less frequent use, clean every 2-3 months. Always clean immediately after spills.
Is It Safe To Open The Base For Cleaning?
Most Ninja blender bases can be opened if you have the right screwdriver. However, opening the base may void your warranty. Always check your user manual before opening. If in doubt, clean through the vents and around buttons only.
Regular cleaning inside your Ninja blender base is one of the best ways to keep your appliance working well and your kitchen safe. With the right tools and a bit of care, you can prevent most issues before they start, saving money and hassle in the long run.