How To Deep Clean Ninja Blender: Step-by-Step Guide for Sparkling Results
Keeping your Ninja Blender truly clean is not just about looks—it’s about safety, taste, and performance. Many people rinse their blender after smoothies or soups and think that’s enough. But blenders, especially high-powered ones like the Ninja, can hide bits of food and bacteria in places you don’t see. If you’ve ever noticed odd smells or cloudy glass, or your recipes start to taste “off,” your blender is probably due for a deep clean.
Deep cleaning a Ninja Blender isn’t hard, but it does require more than a quick rinse. With the right method, you’ll remove stubborn stains, old food, and smells. You’ll also help the motor last longer and keep every smoothie, sauce, or shake as fresh as possible.
Let’s walk through a complete, step-by-step process—from taking apart your blender safely to cleaning tricky parts like the blades and seals. If you follow these tips, your Ninja Blender will look and work like new.
Why Deep Clean Your Ninja Blender?
Surface cleaning removes visible dirt, but deep cleaning targets the hidden grime that can collect over weeks or months. Here are some reasons why a deep clean matters:
- Hygiene: Blender blades and seals can hide bacteria, mold, or old food.
- Performance: A clean blender works more smoothly and blends more evenly.
- Taste: Old residue can make new recipes taste strange.
- Smell: Deep cleaning removes unpleasant odors from garlic, onions, or protein shakes.
- Safety: Clean blades and seals mean fewer chances of mold or cross-contamination.
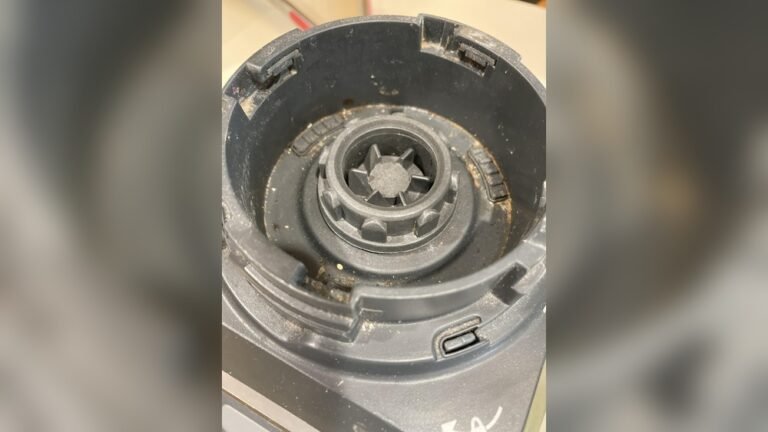
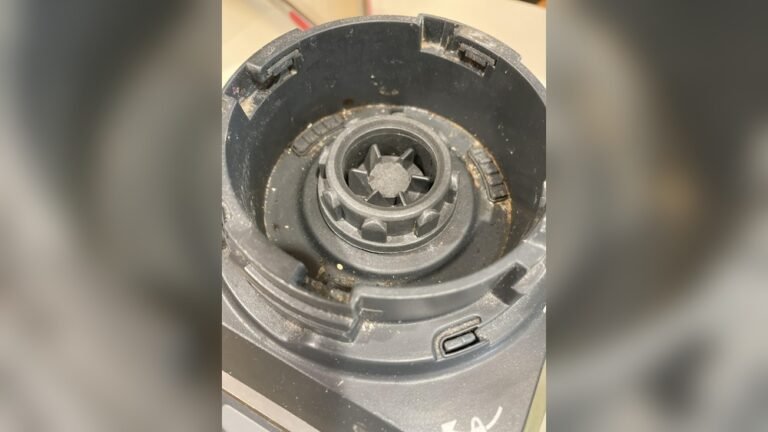
Many people are surprised to find sticky film or dark spots hiding under the blades or inside the gasket ring. These are areas most people miss with standard washing.
How Often Should You Deep Clean?
For most home cooks, a full deep clean every 1-2 weeks is enough if you use the blender daily. If you blend sticky ingredients (like nut butters or protein shakes), clean more often. If you rarely use your blender, a deep clean once a month is usually fine.
Quick tip: If you notice a lingering smell or see residue after washing, it’s time to deep clean, no matter how long it’s been.

Credit: simplicityandastarter.com
What You’ll Need
Gather these items before you begin:
- Dish soap (unscented is best)
- White vinegar
- Baking soda
- Soft sponge or dishcloth
- Old toothbrush or small cleaning brush
- Microfiber towel or lint-free cloth
- Small bowl or cup
- Toothpicks or cotton swabs
- Mild bleach solution (optional, for stains or mold)
- Rubber gloves (optional, for safety)
- Warm water
If your Ninja Blender has removable blades or parts, check your user manual. Some parts are dishwasher-safe; others are hand-wash only.
Safety First: Unplug And Disassemble
Unplug your Ninja Blender before you start. Never clean a blender while it’s still connected to power—this is a simple but important safety step.
Next, take apart the blender:
- Remove the pitcher or cup from the base.
- Take off the lid and any removable blade assembly.
- If your model has a removable gasket ring (the rubber seal), gently pull it out.
- Remove any extra accessories (like pour spouts or tampers).
Keep all small parts together so nothing gets lost.
Basic Cleaning Vs. Deep Cleaning: A Quick Comparison
To understand why deep cleaning is important, see how it compares to basic cleaning:
| Step | Basic Cleaning | Deep Cleaning |
|---|---|---|
| How Often | After each use | Every 1-2 weeks |
| Tools | Soap, water, sponge | Vinegar, baking soda, brush, more |
| Targets | Visible residue | Hidden buildup, stains, odors |
| Time Needed | 2-3 minutes | 10-20 minutes |
| Effectiveness | Removes surface dirt | Removes deep grime, bacteria |
Most people do basic cleaning, but deep cleaning is the only way to truly sanitize your Ninja Blender.
Step-by-step: How To Deep Clean Your Ninja Blender
1. Soak Removable Parts
Fill your sink or a large bowl with warm, soapy water. Place the pitcher, lid, blade assembly, gasket, and any other removable parts into the water. Let them soak for 10–15 minutes. This loosens dried-on bits and softens stubborn stains.
If your blender has tough stains, add a splash of white vinegar to the soaking water. Vinegar breaks down food residue and helps kill bacteria.
2. Scrub With Care
After soaking, use a soft sponge or cloth to clean each part. For areas around the blades, use a toothbrush—this gets into tight spots that a sponge can’t reach.
Be careful with the blades; they are very sharp. Hold them by the plastic base, not the cutting edges. If food is stuck, use a toothpick or cotton swab to gently dislodge it.
Don’t forget the gasket ring (the rubber seal). This part traps liquids and can easily hide mold. Wipe it thoroughly.
3. Baking Soda Paste For Stubborn Stains
If you notice cloudy spots or tough stains, make a baking soda paste:
- Mix 1 tablespoon of baking soda with 2 tablespoons of water.
- Spread the paste on stained areas inside the pitcher or lid.
- Let it sit for 10 minutes, then scrub gently with a sponge or brush.
- Rinse thoroughly.
Baking soda is slightly abrasive but safe for plastic and glass. It also removes odors.
4. Clean The Base And Motor Housing
Never put the motor base in water. Instead, wipe it with a damp cloth. If spills or sticky residue are present, use a little dish soap on the cloth. For buttons or crevices, use a toothbrush or cotton swab.
Make sure no water gets inside the motor vents. If you see dust or food near the buttons, a toothpick can help dislodge it.
5. Rinse Everything Well
After scrubbing, rinse all parts under running water. Any soap left behind can create a film or odd taste. For the gasket and blades, pay special attention to corners and edges.
6. Dry Completely Before Reassembly
Dry every part with a microfiber towel or let them air dry on a clean rack. Make sure the gasket and blade assembly are fully dry—moisture can lead to mold.
Never reassemble and store your blender while parts are damp.
7. Deodorize With Vinegar (optional)
If your blender still smells, fill the pitcher with 1 cup of white vinegar and 2 cups of water. Let it sit for 15–20 minutes, then rinse well. This removes strong odors like garlic or protein powder.
8. Remove Cloudiness From Pitcher
Cloudy glass or plastic is common after many uses. Here’s how to clear it:
- Fill the pitcher with warm water and a few drops of dish soap.
- Add 1/4 cup of baking soda.
- Let soak for 1 hour.
- Scrub with a sponge, then rinse.
If cloudiness remains, repeat or try a vinegar soak.
9. Sanitize For Mold Or Heavy Stains
If you see black spots (possible mold) or heavy stains, sanitize with a mild bleach solution:
- Mix 1 tablespoon of bleach in 1 gallon of water.
- Soak affected parts for 5 minutes.
- Rinse several times with clean water.
Wear gloves and avoid breathing in bleach fumes. Use this only when needed—not for every cleaning.
10. Check And Reassemble
Before putting your Ninja Blender back together, check every part:
- Is the gasket clean and flexible?
- Are the blades sharp and free from residue?
- Does the lid seal well?
Once everything is dry and clean, reassemble the blender carefully.

Credit: www.youtube.com
Cleaning Hard-to-reach Areas
Some Ninja models have fixed blades or tricky corners. Here’s how to clean them:
- Use a bottle brush for tall pitchers.
- For fixed blades, fill the pitcher halfway with warm water and a drop of dish soap. Run the blender for 30 seconds, then rinse well.
- For crevices, wrap a damp cotton swab around a toothpick to reach into narrow gaps.
If you can’t remove the blade assembly, blending warm soapy water is the next best method.
Dishwasher Vs. Hand Washing
Some Ninja Blender parts are dishwasher-safe, but not all. Check your manual before placing items in the dishwasher. Usually, the pitcher, lid, and single-serve cups can go on the top rack. Blades and gaskets are often hand-wash only.
Comparison of methods:
| Cleaning Method | Pros | Cons |
|---|---|---|
| Dishwasher | Easy, hands-off, sanitizes at high heat | Can wear out plastic, may miss stuck-on food |
| Hand Washing | Gentle, reaches all areas | Takes more time, risk of injury with blades |
Pro tip: Even if you use a dishwasher, inspect parts for stuck food. Sometimes, a quick hand wash is still needed.
What To Avoid When Cleaning
Not all cleaners or methods are safe for your Ninja Blender. Avoid:
- Abrasive pads: These scratch plastic and cloud glass.
- Harsh chemicals: Stick to dish soap, vinegar, and mild bleach when needed.
- Soaking the motor base: Moisture inside can ruin the motor.
- Reassembling wet parts: Trapped moisture leads to mold.
Another mistake: using very hot water on plastic parts. Rapid temperature changes can cause warping or cracks.
How To Remove Lingering Smells
Sometimes, even after washing, smells stay behind. Here are targeted tips:
- Lemon juice: Rub a slice of lemon inside the pitcher or blend lemon juice with water. Rinse well.
- Vinegar soak: Fill with equal parts white vinegar and water, soak 1 hour, then rinse.
- Baking soda rinse: Add 2 tablespoons of baking soda to water, blend for 30 seconds, rinse.
For very strong odors, repeat these steps or let parts air out overnight.
Dealing With Cloudy Plastic Or Glass
Cloudiness is usually from minerals, oils, or tiny scratches. To reduce this:
- Soak in baking soda and water as described above.
- Use white vinegar to dissolve mineral deposits.
- Avoid abrasive cleaners that make scratches worse.
If your pitcher is very old or scratched, replacement may be the only way to restore full clarity.
How To Maintain Your Ninja Blender After Deep Cleaning
Once your blender is spotless, keep it that way with these habits:
- Rinse immediately after each use—don’t let food dry inside.
- Deep clean regularly (every 1-2 weeks).
- Check gaskets and seals for mold or wear.
- Dry all parts before storing.
- Store with lid off to prevent moisture buildup.
If you use your blender for sticky ingredients, like nut butter, clean after each batch.
Credit: www.reddit.com
Common Mistakes To Avoid
Many people make cleaning errors that shorten the life of their Ninja Blender. Watch out for these:
- Skipping the gasket: This ring traps food and is often forgotten.
- Not drying blades: Moisture leads to rust, even on stainless steel.
- Overusing dishwasher: Frequent dishwashing can weaken plastic.
- Ignoring smells: Odors are a sign of hidden residue or bacteria.
- Using bleach too often: Only sanitize when needed; regular use damages seals.
Small changes in cleaning habits can add years to your blender’s life.
Troubleshooting: When Cleaning Isn’t Enough
Sometimes, even after a deep clean, your Ninja Blender might have issues:
Odors Won’t Go Away
Try soaking in vinegar overnight or blend a mixture of lemon juice and water. If the smell returns, check for mold under the gasket or blade assembly.
Cloudy Pitcher Persists
Light scratches can hold onto oils and smells. If repeated cleaning doesn’t help, replacement may be needed.
Blades Are Dull Or Rusted
Dull blades can’t be sharpened at home—replacement is safest. If you see rust, clean with baking soda, rinse well, and dry fully. If rust returns, replace the blade assembly.
Leaks
Leaks often come from a damaged gasket or loose assembly. Check parts for cracks or wear, and replace if needed.
How Ninja Blender Models Differ
Not all Ninja Blenders are the same. Some have single-serve cups, others have large pitchers, and blade designs can be fixed or removable. Here’s a quick overview:
| Model Type | Blade Design | Typical Cleaning Method | Common Issues |
|---|---|---|---|
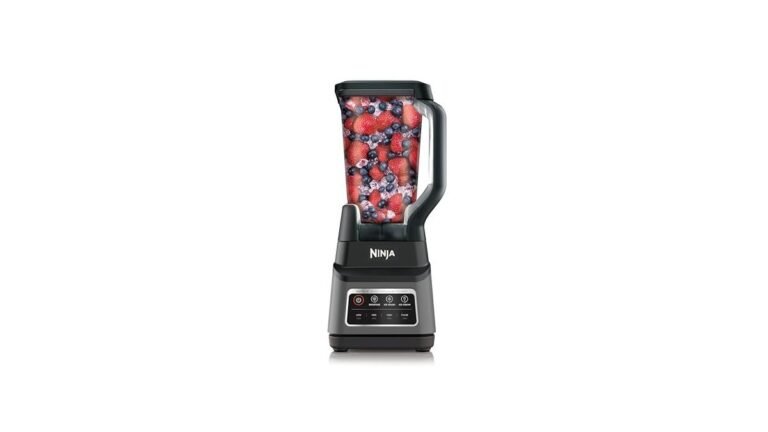
| Professional Series | Removable stacked blade | Disassemble, soak, scrub | Food under blades, gasket mold |
| Personal/Single-Serve | Fixed blade in cup | Blend soapy water, brush inside | Hard-to-reach under blade |
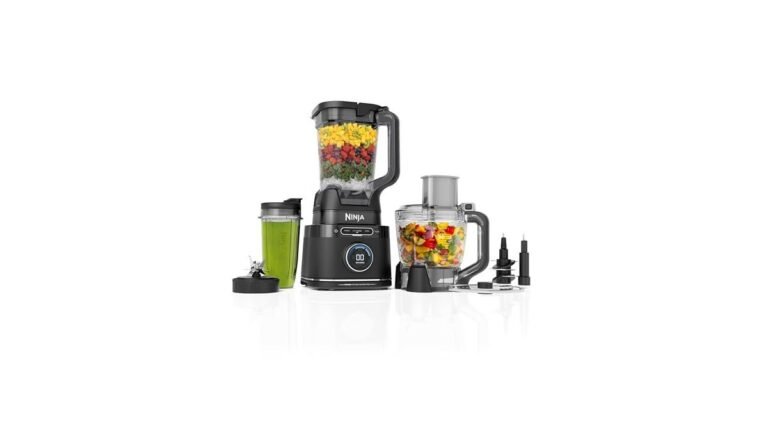
| Food Processor Attachment | Removable disc/blade | Hand wash, brush discs | Residue in disc gaps |
Knowing your model helps you target cleaning for best results.
When To Replace Parts
Even with perfect cleaning, some parts wear out. Replace:
- Blades if they are dull, chipped, or rusted.
- Gaskets if they are cracked, stretched, or smell bad even after cleaning.
- Pitcher if it’s deeply scratched, cloudy, or cracked.
Replacement parts are available from Ninja’s official website or major retailers.
Non-obvious Insights For Better Cleaning
Here are two tips most beginners miss:
- Rotate the gasket after each cleaning. This prevents it from warping and helps it last longer. Most people put it back the same way every time, causing uneven pressure and early wear.
- Soak the blade assembly separately in vinegar once a month. Even if you clean well, mineral deposits can build up on the blade edges, causing dullness and off smells.
Another insight: If you live in an area with hard water, mineral deposits are more likely. Use filtered or distilled water for rinsing to prevent this.
Is Deep Cleaning Different For Other Brands?
While this guide is for Ninja Blenders, the same principles apply to many brands. However, always check your manual—some brands have unique seals, blade designs, or dishwasher limits.
For more blender care tips, you can visit Consumer Reports.
Frequently Asked Questions
How Do I Clean Stuck Food Under The Ninja Blender Blades?
Turn the blender upside down. Use a toothbrush or cotton swab to reach under the blades. For tough spots, soak the blade assembly in warm, soapy water for 15 minutes, then scrub gently. Never use sharp objects; they can damage the blade or seal.
Can I Put All Ninja Blender Parts In The Dishwasher?
Most pitchers and lids are top-rack dishwasher safe. Blades and gaskets are usually hand-wash only. Always check your user manual. Dishwashing plastic parts too often may cause wear or cloudiness over time.
How Do I Remove Strong Smells From My Ninja Blender?
Fill the pitcher with equal parts white vinegar and water, let soak for 1 hour, then rinse. You can also blend lemon juice and water, or scrub with baking soda paste. Air drying with the lid off helps odors fade.
What Should I Do If My Ninja Blender Leaks After Cleaning?
Check the gasket for cracks, stretching, or debris. Make sure all parts are fully dry and assembled correctly. If leaks continue, replace the gasket or pitcher. Over-tightening can also cause leaks—snug is enough.
How Often Should I Deep Clean My Ninja Blender?
Deep clean every 1–2 weeks for daily use, or after blending sticky, oily, or strong-smelling foods. If you notice residue, odors, or cloudy parts, deep clean right away.
Keeping your Ninja Blender clean protects your health and keeps every blend tasting its best. With these steps, you’ll avoid hidden grime and keep your blender running like new. A little extra effort now saves time and trouble later—your smoothies, soups, and sauces will thank you!