How To Fix Ninja Blender Lid: Easy Steps for Quick Repair
A Ninja blender is a trusted kitchen appliance for many people who want to blend smoothies, crush ice, or prepare sauces quickly. However, even the best blenders sometimes face problems. One of the most common issues is a stuck, broken, or malfunctioning lid. If your Ninja blender lid won’t close, open, or seal, it can stop your blending plans and cause frustration. Luckily, most lid problems have clear solutions you can do at home. Whether your lid is jammed, the safety lock isn’t working, or the gasket is loose, this guide will show you how to fix your Ninja blender lid safely and effectively.
This article explains common Ninja blender lid issues, step-by-step fixes, and practical tips to prevent future problems. With easy language and real examples, you’ll learn how to troubleshoot your lid, what tools you might need, and when to contact customer support.
By the end, you’ll be ready to fix your Ninja blender lid and get back to blending with confidence.
Understanding Ninja Blender Lid Problems
Before fixing your lid, it helps to know why Ninja blender lids can have problems. Ninja blenders use safety mechanisms to prevent accidents. For example, the blender will not run unless the lid is locked. Over time, the lid or its parts can get dirty, worn, or damaged.
Here are the most frequent lid problems:
- Lid won’t close or lock
- Lid is stuck and won’t open
- Lid leaks during blending
- Lid safety switch isn’t working
- Lid gasket is out of place or broken
Identifying your exact problem will help you choose the right fix. Let’s look at each issue and see why it happens.
Why Do Ninja Blender Lids Get Stuck Or Broken?
Ninja blender lids have moving parts like the locking tab, silicone gasket, and safety switch. These parts can fail due to:
- Food debris stuck in grooves or under the gasket
- Wear and tear from regular use
- Incorrect assembly after cleaning
- Forcing the lid when misaligned
- Heat damage (if washed in hot water or dishwasher)
Non-obvious insight: Sometimes, the issue is not with the lid but with the pitcher or base. A warped or cracked pitcher rim can make the lid hard to close or open. Always check both parts.
Tools And Materials You Might Need
Most Ninja blender lid fixes do not require special tools. However, having these items ready can make repairs easier:
- Soft brush (like a toothbrush) for cleaning
- Dish soap and warm water
- Paper towels or a soft cloth
- Plastic spatula or butter knife for gentle prying (never use sharp knives)
- Replacement gasket (if the old one is damaged)
- Silicone grease (optional, for lubricating rubber parts)
Some fixes need only your hands and patience. If you need replacement parts, make sure they are official Ninja parts or from a trusted seller.

Credit: www.reddit.com
Step-by-step Fixes For Common Lid Problems
Let’s look at clear solutions for each major Ninja blender lid issue. Follow the step that matches your problem.
1. Lid Won’t Close Or Lock
This is a common problem, especially after washing the lid or pitcher. The lid must align with the pitcher notches for the safety lock to engage.
How to Fix:
1. Check For Misalignment.
Put the lid on the pitcher and rotate it gently. The arrow or lock mark on the lid should match the pitcher’s mark. Don’t force it.
2. Inspect For Debris.
Remove the lid. Check the rim of the pitcher and the grooves of the lid for stuck food, seeds, or sticky residue. Clean with a brush and warm, soapy water.
3. Examine The Locking Tab.
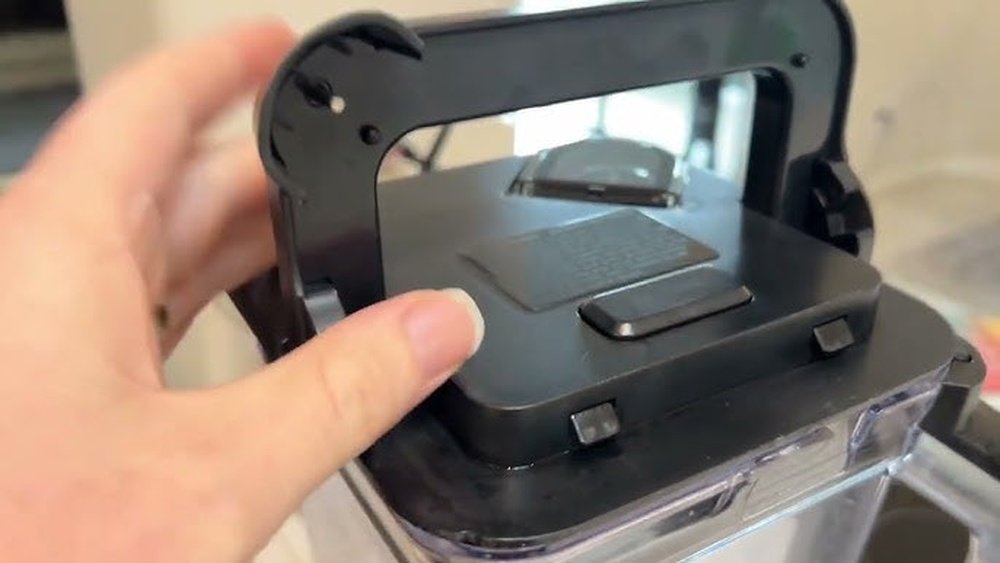
Look at the small plastic tab that sticks out from the lid. Is it bent or broken? If so, you may need a replacement lid.
4. Test The Safety Switch.
Some models have a small button on the lid that must press down when closed. If it’s jammed, clean it carefully with a brush.
Pro tip: After cleaning, dry all parts completely before reassembling. Moisture can cause the lid to slip or not lock correctly.
2. Lid Is Stuck And Won’t Open
A stuck Ninja blender lid is frustrating. It can happen if blending creates a vacuum, or if food hardens under the gasket.
How to Fix:
1. Release Vacuum Pressure.
If the lid is airtight, unplug the blender. Tap the top gently with your palm or a rubber mallet. This can break the seal.
2. Wiggle, Don’t Yank.
Hold the pitcher firmly and gently twist the lid back and forth. Don’t use force—you may crack the plastic.
3. Check The Spout Cap.
Open the small pouring spout (if your model has one) to let in air. This often breaks the vacuum.
4. Soak In Warm Water.
Fill the pitcher with warm (not hot) water. Let it sit for 10–15 minutes. The heat softens stuck food or residue.
5. Use A Plastic Tool.
Insert a plastic spatula under the lid edge and gently pry upward as you twist.
Non-obvious insight: If you used sticky ingredients (like honey or syrup), clean both the lid and pitcher rim thoroughly after every use to prevent sticking next time.
3. Lid Leaks During Blending
A leaking lid can make a mess and cause dangerous spills. This usually means the gasket (the soft ring under the lid) is out of place, dirty, or worn.
How to Fix:
1. Remove And Check The Gasket.
Most Ninja lids have a removable silicone or rubber gasket. Gently pull it out and inspect for cracks, warping, or food buildup.
2. Clean The Gasket And Lid Groove.
Wash both with warm, soapy water and a brush. Dry fully before putting the gasket back.
3. Re-seat The Gasket.
Push the gasket evenly into the groove. Make sure it isn’t twisted or pinched.
4. Replace If Needed.
If the gasket is stretched, cracked, or doesn’t seal, order a new one from Ninja or a trusted supplier.
Practical tip: Never run the blender if you see liquid leaking from the lid. Stop and fix the problem first to avoid damaging the motor.
4. Lid Safety Switch Isn’t Working
Ninja blenders have a safety lock system to prevent operation if the lid isn’t closed. Sometimes, the blender thinks the lid isn’t on—even when it is.
How to Fix:
1. Check The Lid Tab.
The small tab on the lid must press the switch on the pitcher or base. If it’s bent or missing, the switch won’t trigger.
2. Clean The Switch Area.
Food splashes or sticky liquids can block the switch. Wipe carefully with a damp cloth.
3. Try A Different Lid Or Pitcher.
If you have another compatible Ninja blender, test with its lid. If that works, your original lid is the problem.
4. Inspect For Electrical Faults.
If the switch is clean and undamaged, but the blender still won’t start, the safety sensor may be faulty. Contact Ninja support for help.
Pro insight: Never bypass the safety system (for example, by pressing the switch with a tool). This risks injury and voids your warranty.
5. Lid Gasket Is Out Of Place Or Broken
The gasket is vital for a tight seal. If it’s loose, twisted, or missing, your Ninja blender will leak or not lock.
How to Fix:
1. Remove The Gasket.
Pry gently with your fingers or a plastic tool.
2. Inspect For Damage.
Look for tears, stretching, or flattening.
3. Clean And Lubricate.
Wash and dry the gasket. You can rub a tiny bit of food-safe silicone grease to help it fit and seal better.
4. Install A New Gasket.
If the old one is damaged, replace it with a genuine Ninja part.
Pro tip: Avoid washing the gasket in the dishwasher—it can shrink or warp. Always wash by hand.
When To Replace The Lid
Not all lid problems can be fixed. If your Ninja blender lid is cracked, warped, or has a broken locking tab, it’s best to buy a new lid. Using a damaged lid is unsafe and can void your warranty.
Here’s a comparison of when to repair vs. replace your Ninja blender lid:
| Problem | Can Be Fixed? | Requires Replacement? |
|---|---|---|
| Dirty, stuck gasket | Yes (clean or reseat) | No |
| Cracked lid plastic | No | Yes |
| Bent or missing tab | No | Yes |
| Loose or worn gasket | Sometimes | Yes (if cleaning doesn’t help) |
| Stuck lid (vacuum/food) | Yes (cleaning/soaking) | No |

Credit: www.youtube.com
How To Clean And Maintain Your Ninja Blender Lid
Regular cleaning prevents most lid problems. Here’s how to keep your lid working well:
1. Rinse Immediately After Use.
Don’t let food dry on the lid or gasket.
2. Wash All Parts By Hand.
Use warm, soapy water and a brush. Pay special attention to grooves and the gasket channel.
3. Dry Completely.
Moisture can cause mold, bad smells, or slippery seals.
4. Remove The Gasket Weekly.
Wash and dry it to prevent buildup and odor.
5. Inspect For Cracks Or Wear.
Do this every month, especially if you blend hard or sticky foods.
Non-obvious insight: Even if your lid looks clean, tiny bits of food or smoothie can hide under the gasket or in the locking mechanism. Deep clean once a week for best results.
Common Mistakes To Avoid
Even careful users can make simple errors that damage the Ninja blender lid. Here are some common mistakes and how to avoid them:
- Forcing the lid when it doesn’t fit. Always check for alignment and debris.
- Washing the lid in the dishwasher. High heat can warp or shrink plastic and rubber parts.
- Ignoring small leaks. Even a tiny leak can signal a gasket problem—fix it early.
- Using non-Ninja replacement parts. They might not fit perfectly, causing new issues.
- Leaving the lid on for days. This can cause food to harden and stick, making removal tough.
Credit: www.reddit.com
Ninja Blender Lid Types And Model Differences
Ninja blenders come in several models, and not all lids are the same. Some have a locking handle, others use a twist-and-lock design. Single-serve cups often have a screw-on lid.
Here’s a comparison of Ninja blender lid types:
| Model Type | Lid Locking Mechanism | Common Issues |
|---|---|---|
| Classic pitcher (e.g., BL610) | Locking tab + arrow alignment | Tab damage, stuck lid, gasket leaks |
| Professional series | Handle lock + safety switch | Broken handle, switch not triggering |
| Single-serve cup | Screw-on lid | Thread misalignment, worn gasket |
| Food processor attachment | Twist-and-lock | Stuck lid, alignment issues |
Pro tip: Always check your model number before ordering a replacement lid or gasket. Parts are not always cross-compatible.
When To Contact Ninja Support
Some lid problems need professional help. If you notice any of these, contact Ninja’s customer service:
- Lid or gasket is damaged and you can’t find a replacement
- The safety switch won’t work even after cleaning
- The pitcher rim is cracked or warped
- You see sparks, smoke, or hear grinding noises from the lid area
Ninja support can help you order the right parts or, if your blender is under warranty, arrange a repair or replacement. Keep your purchase receipt and model information ready for faster service.
For more information, you can visit the official Ninja Kitchen Support page.
Preventing Future Lid Problems
The best way to avoid lid issues is regular maintenance and careful use. Here are practical steps:
- Always align the arrows or marks before closing the lid.
- Never blend hot liquids in a Ninja blender pitcher (it can create pressure and break the seal).
- Don’t overfill the pitcher—leave space for the lid to fit and the gasket to seal.
- Remove the lid and gasket after every use for cleaning.
- Store your Ninja blender with the lid off to allow airflow and prevent odors.
Troubleshooting Quick Reference
Sometimes you just want a quick answer. Here’s a summary troubleshooting guide for Ninja blender lids:
| Problem | Quick Fix |
|---|---|
| Lid won’t close | Check alignment, clean rim and grooves, inspect tab |
| Lid stuck | Release vacuum, soak in warm water, wiggle gently |
| Lid leaks | Clean or replace gasket, check for cracks |
| Safety switch not working | Clean switch area, check tab, try another lid |
| Gasket loose or damaged | Reseat or replace gasket |
Keep this chart handy for quick reference when you face a Ninja blender lid issue.
Frequently Asked Questions
What Should I Do If My Ninja Blender Lid Won’t Lock?
First, check for food debris or misalignment. Clean the lid and pitcher rim. Make sure the lid’s locking tab lines up with the pitcher’s mark. If the problem continues, inspect the tab for damage. A broken tab means you’ll need a new lid.
Can I Buy A Replacement Gasket For My Ninja Blender Lid?
Yes, you can buy replacement gaskets from the official Ninja website or trusted sellers. Always choose the gasket that matches your blender model. Using the wrong size can cause leaks or prevent the lid from sealing.
Is It Safe To Use My Ninja Blender If The Lid Is Cracked?
No, using a blender with a cracked lid is unsafe. It can leak, break during blending, or fail to activate the safety switch. Stop using the blender and order a new lid to avoid injury or motor damage.
Why Does My Ninja Blender Lid Keep Getting Stuck?
A lid can get stuck due to vacuum pressure, dried food, or sticky ingredients under the gasket. Release the vacuum by opening the spout cap, soak the pitcher in warm water, and clean the gasket and rim regularly to prevent sticking.
How Often Should I Clean My Ninja Blender Lid And Gasket?
Wash the lid and remove the gasket for cleaning after every use. Deep clean all parts at least once a week. Regular cleaning stops leaks, odors, and stuck lids.
A Ninja blender is a powerful tool, but a lid problem can stop your kitchen routine. With these clear steps, maintenance tips, and troubleshooting advice, you can fix most Ninja blender lid issues yourself. Remember, patience, gentle handling, and regular cleaning are the keys to a long-lasting, reliable blender. If you ever have doubts, reach out to Ninja support or visit their official help center for guidance. Happy blending!