How To Clean Nutri Ninja Blender Base Easily and Effectively
Keeping your Nutri Ninja blender base clean is essential for performance, safety, and the life of your blender. Many people clean the jar and blades regularly, but neglect the base. Over time, dust, spilled liquids, and food particles can build up inside and outside the base.
This can lead to bad smells, sticky buttons, or even electrical issues. Cleaning the Nutri Ninja blender base is not complicated, but it does require care and the right steps. In this guide, you’ll learn exactly how to clean your Nutri Ninja blender base, avoid common mistakes, and keep your appliance running smoothly for years.
Why Cleaning The Nutri Ninja Blender Base Matters
Most users focus on cleaning the cups and blades after every use. However, the blender base is just as important. The base houses the motor, electrical controls, and buttons. If dirt or moisture gets inside, it can cause:
- Sticky buttons
- Unpleasant odors
- Motor overheating
- Electrical shorts
- Reduced lifespan
A neglected base can also attract insects or mold, especially in humid climates. According to appliance experts, regular base cleaning can extend the life of your Nutri Ninja by up to 30%.
Tools And Supplies Needed
Before you start, gather these items:
- Soft microfiber cloths
- Small brush (like a toothbrush or paintbrush)
- Cotton swabs
- Mild dish soap
- Warm water
- Compressed air (optional)
- Screwdriver (for advanced cleaning)
- Paper towels
Never use harsh chemicals, bleach, or abrasive pads. These can damage the finish or seep into the motor housing.
Safety Precautions
Blender bases contain electrical parts. Follow these safety tips:
- Unplug the blender before cleaning.
- Avoid soaking the base in water.
- Do not use wet cloths near the power socket or motor vents.
- Check your user manual for specific warnings.
If you spill water inside the base, let it dry completely before plugging in. Never operate a wet blender base.
Step-by-step Guide: Cleaning The Nutri Ninja Blender Base
1. Surface Cleaning
Start with the outside of the base. This removes dust, fingerprints, and minor spills.
- Dampen a microfiber cloth with warm, soapy water.
- Wring out excess water so the cloth is only slightly damp.
- Wipe all exterior surfaces: Sides, top, bottom, and control panel.
- Pay special attention to the buttons and dial.
- Use a dry cloth to buff the surface and remove any moisture.
2. Cleaning The Control Panel And Buttons
Buttons can become sticky from smoothie spills or greasy hands.
- Dip a cotton swab in mild soapy water.
- Gently clean around each button, removing grime.
- For tough dirt, use a soft brush.
- Dry the area with a paper towel.
Never spray cleaner directly onto the panel. Liquids can seep under the buttons.
3. Removing Residue From The Power Socket And Motor Vents
Motor vents and power sockets often trap dust and crumbs.
- Use a dry toothbrush or paintbrush to sweep away debris.
- For deep cleaning, use compressed air to blow out dust.
- Wipe the area with a dry cloth. Never use water near these parts.
4. Cleaning The Base Plate
Turn the blender upside down (after unplugging).
- Wipe the bottom plate with a damp cloth.
- Check for stuck-on dirt or spills; scrub gently if needed.
- Dry with a paper towel.
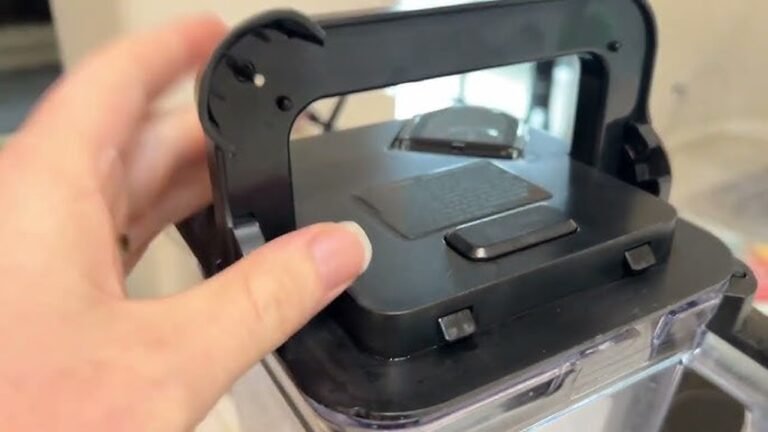
5. Deep Cleaning: Opening The Base
Sometimes, liquid spills inside the base. For advanced cleaning:
- Remove screws from the bottom plate using a screwdriver.
- Carefully lift the plate. Do not pull wires or damage internal parts.
- Use a dry brush to clean dust inside.
- If you see dried liquid, use a slightly damp cloth to wipe.
- Let all parts dry fully before reassembly.
- Screw the plate back securely.
Many people avoid this step, but it’s useful for removing deep-seated grime. Only open the base if you feel confident; otherwise, contact a professional.
6. Odor Removal
If your blender base smells bad:
- Sprinkle baking soda on a damp cloth.
- Wipe the inside and outside of the base (never the motor).
- Let sit for 10 minutes, then wipe off.
- For stubborn smells, leave the base open and air-dry overnight.
Common Mistakes When Cleaning Blender Bases
Many beginners damage their blender by making avoidable mistakes. Here are some you should watch for:
- Using too much water: Excess moisture can damage the motor.
- Spraying cleaner directly: Liquids can seep inside and short the circuits.
- Using abrasive pads: These scratch the plastic and leave marks.
- Forgetting to unplug: Always disconnect the blender before cleaning.
- Leaving wet spots: Moisture attracts mold and rust.
Avoiding these errors will help your Nutri Ninja last longer and perform better.
How Often Should You Clean The Blender Base?
Frequency depends on usage:
- Daily use: Wipe the surface and buttons weekly.
- Occasional use: Clean every two weeks.
- Heavy spills: Clean immediately.
Deep cleaning (opening the base) is only needed every 4–6 months, or after a major spill.

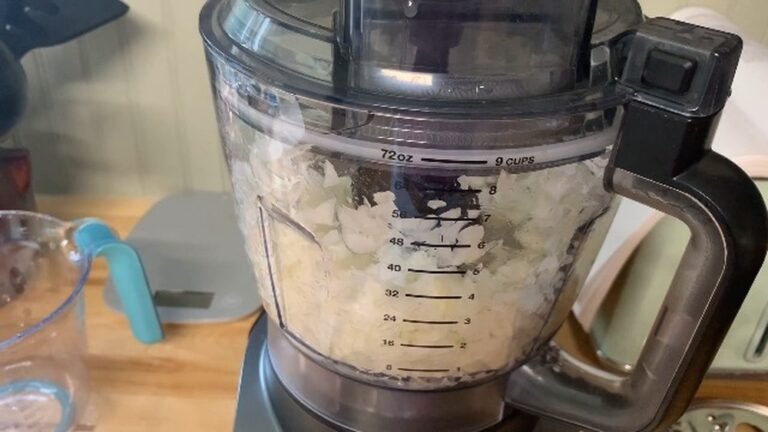
Credit: www.youtube.com
Practical Tips For Easier Cleaning
Here are some clever ways to make cleaning faster and safer:
- Use compressed air for tight spaces.
- Keep a soft brush near your blender for quick dust removal.
- Cover the base with a towel when blending messy ingredients (like beetroot).
- If you spill, unplug the blender immediately and wipe up the liquid.
- Store your Nutri Ninja in a dry spot to prevent moisture buildup.
One tip many people miss: if you blend sticky foods (like honey or peanut butter), wipe the base immediately after use. Waiting even a few hours can make cleaning much harder.
Nutri Ninja Blender Base Vs Other Blender Bases
Nutri Ninja bases are known for their compact design and easy-access controls. But how do they compare with other popular brands when it comes to cleaning? Here’s a quick comparison:
| Brand | Ease of Cleaning | Button Design | Opening the Base |
|---|---|---|---|
| Nutri Ninja | Simple | Flat, easy wipe | Requires screwdriver |
| Vitamix | Moderate | Raised buttons | Special tools needed |
| Magic Bullet | Easy | No buttons | Simple clips |
| Oster | Moderate | Flat, some grooves | Screwdriver |
The Nutri Ninja base is easier to wipe clean than many high-end blenders. However, opening the base for deep cleaning requires a basic screwdriver.
Data: How Clean Blender Bases Impact Appliance Lifespan
A clean blender base is more than just cosmetic. Studies show that appliances with regular base cleaning last longer. Here’s some data on blender longevity:
| Cleaning Frequency | Average Blender Lifespan | Common Issues |
|---|---|---|
| Weekly | 7+ years | Minimal, mostly wear |
| Monthly | 5–6 years | Sticky buttons, odors |
| Rarely | 3–4 years | Motor failures, rust |
This shows that cleaning your Nutri Ninja base weekly can add years to its life.
Troubleshooting: What To Do If Your Blender Base Is Still Dirty
Sometimes, stubborn grime won’t come off with basic cleaning. Here’s what to try:
- Use a magic eraser for tough stains.
- For sticky buttons, remove the panel carefully and clean underneath.
- If odors persist, check for mold inside the base (deep clean needed).
- For burned smells, inspect the motor area. If you see black residue, unplug and consult a technician.
Never force open the base if you feel resistance. Nutri Ninja bases are designed to be tight for safety.
Real-world Example: Cleaning After A Major Spill
Imagine you spill a thick smoothie (with banana, honey, and milk) into the base. Here’s how to handle it:
- Unplug the blender immediately.
- Turn the base upside down and shake gently to remove excess liquid.
- Open the bottom plate (if possible).
- Use paper towels to soak up the spill inside.
- Wipe with a slightly damp cloth and dry completely.
- Leave the base open to air-dry overnight.
- Reassemble and test only when fully dry.
This process prevents mold, sticky buttons, and electrical damage.
Non-obvious Insights For Cleaning Nutri Ninja Blender Base
Most cleaning guides focus on surface cleaning. Here are two insights beginners often miss:
- Motor vent cleaning: Dust in motor vents can cause overheating. Use compressed air monthly to keep these clear.
- Odor sources: Bad smells often come from spills inside the base, not just the exterior. If your blender smells, open the base and wipe inside.
Both steps can prevent many common blender problems.

Credit: www.reddit.com
Diy Cleaning Solutions Vs Commercial Cleaners
Some people use commercial appliance cleaners. However, for the Nutri Ninja base, simple dish soap and warm water work best. Commercial sprays often contain chemicals that can damage plastic or seep inside.
If you need a stronger cleaner, mix:
- 1 tablespoon baking soda
- 1 cup warm water
This is safe, effective, and leaves no harsh residue.
Environmental Impact: Why Regular Cleaning Matters
Cleaning your Nutri Ninja blender base helps reduce waste. Most blenders are thrown away because of electrical failures or mold—often caused by spills or neglect. By cleaning the base, you reduce appliance waste and save money.
According to the EPA, over 2 million small kitchen appliances are discarded yearly in the US. Extending your blender’s life helps cut this number.
Cost Comparison: Diy Cleaning Vs Professional Cleaning
Professional appliance cleaning services can cost $50–$100 per visit. Doing it yourself costs less than $2 per session (for supplies).
| Method | Average Cost | Effectiveness |
|---|---|---|
| DIY Cleaning | $2 | High |
| Professional Service | $75 | Very High |
DIY cleaning is enough for most users. Professional cleaning is only needed for deep mold or electrical issues.
Cleaning Tips For Specific Nutri Ninja Models
The Nutri Ninja brand has several models. Cleaning steps are similar, but here are a few differences:
- Nutri Ninja Pro: Flat buttons, easy to wipe. Base opens with standard screwdriver.
- Nutri Ninja Auto-iQ: Larger base, more buttons. Use cotton swabs for tight spaces.
- Nutri Ninja BL480: Compact base. Motor vents are smaller—use compressed air carefully.
Check your model number in the user manual for detailed instructions.
What To Avoid When Cleaning
Some actions can damage your Nutri Ninja blender base:
- Never submerge the base in water.
- Avoid using sharp tools to scrape dirt.
- Don’t use strong solvents (like acetone).
- Keep moisture away from internal wires.
- Don’t force open the base if it’s stuck.
Respect these warnings to keep your blender safe.
Cleaning The Nutri Ninja Blender Base For Longevity
Regular base cleaning isn’t just about looks. It prevents:
- Electrical failures
- Motor overheating
- Rust and corrosion
- Button sticking
A few minutes of care each week can add years to your blender’s life and ensure your smoothies stay safe and delicious.

Credit: www.amazon.com
Frequently Asked Questions
How Do I Clean Sticky Buttons On My Nutri Ninja Blender Base?
Use a damp cotton swab with mild dish soap. Gently clean around each button, removing sticky residue. Dry with a paper towel. Never spray cleaner directly on the buttons.
Can I Open The Base For Deep Cleaning?
Yes, but only if you’re comfortable. Unplug the blender, remove screws from the bottom plate, and clean inside with a dry brush. Do not touch the motor or wires. If unsure, contact a technician.
What Should I Do If I Spill Liquid Inside The Base?
Unplug immediately. Turn the base upside down and let excess liquid drain. Open the base (if possible) and use paper towels to soak up the spill. Let all parts dry fully before plugging in again.
Is It Safe To Use Compressed Air For Cleaning?
Yes, compressed air is safe for cleaning dust from motor vents and tight spaces. Make sure the blender is unplugged and use gentle bursts to avoid damage.
How Often Should I Clean My Nutri Ninja Blender Base?
For daily use, wipe the surface weekly. Deep clean every 4–6 months or after a major spill. Cleaning frequency depends on how often you use the blender and the types of ingredients.
Keeping your Nutri Ninja blender base clean is simple and effective. With the right tools, habits, and care, you can enjoy a reliable blender for years. If you need more tips on appliance maintenance, you can check resources like Consumer Reports for extra guidance. Regular cleaning is an easy step that makes a big difference for your kitchen and your health.