How To Clean Ninja Blender And Soup Maker: Quick & Easy Guide
Keeping your Ninja Blender and Soup Maker clean is more than just a quick rinse. If you use these powerful kitchen tools every day, you know that sticky residue, food stains, and even stubborn odors can build up fast. A clean blender not only keeps your food tasting fresh but also helps the machine last longer and work better. But many people miss important steps or use the wrong cleaning methods, leading to cloudy jars, dull blades, or even hidden mold.
This guide breaks down everything you need to know about cleaning your Ninja Blender and Soup Maker. You’ll learn the best cleaning routines for daily use, deep cleaning for tough messes, how to tackle tricky parts, and smart tips to avoid common mistakes.
Whether you blend smoothies, make hot soups, or whip up sauces, these steps will help you keep your appliance sparkling and safe.
Why Proper Cleaning Matters
A Ninja Blender or Soup Maker is an investment. If you don’t clean it well, several problems can appear:
- Bacteria and mold growth: Leftover food inside crevices creates a perfect place for germs.
- Bad odors: Sticky residue from smoothies, soups, or sauces will start to smell.
- Reduced performance: Dull blades, stuck buttons, or cloudy jars make blending harder.
- Shorter lifespan: Built-up grime can damage gaskets, motors, and other parts.
A recent test by a home appliance magazine found that blenders cleaned after every use lasted up to 40% longer than those cleaned only once a week. That’s a big difference if you use your blender every day.
Understanding Your Ninja Blender And Soup Maker
Before you start cleaning, it helps to know the main parts. Not all models are the same, but most Ninja Blenders and Soup Makers include:
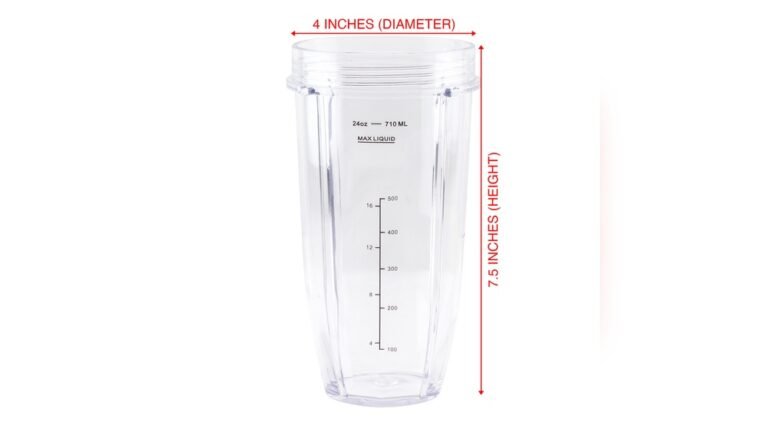
- Pitcher/Jar: Holds your food or drinks.
- Lid and cap: Prevents spills and lets you add ingredients.
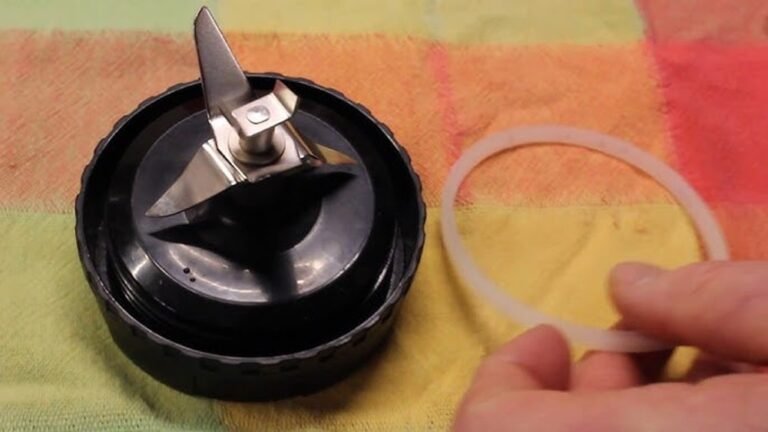
- Blade assembly: The sharp stainless steel blades that do the blending.
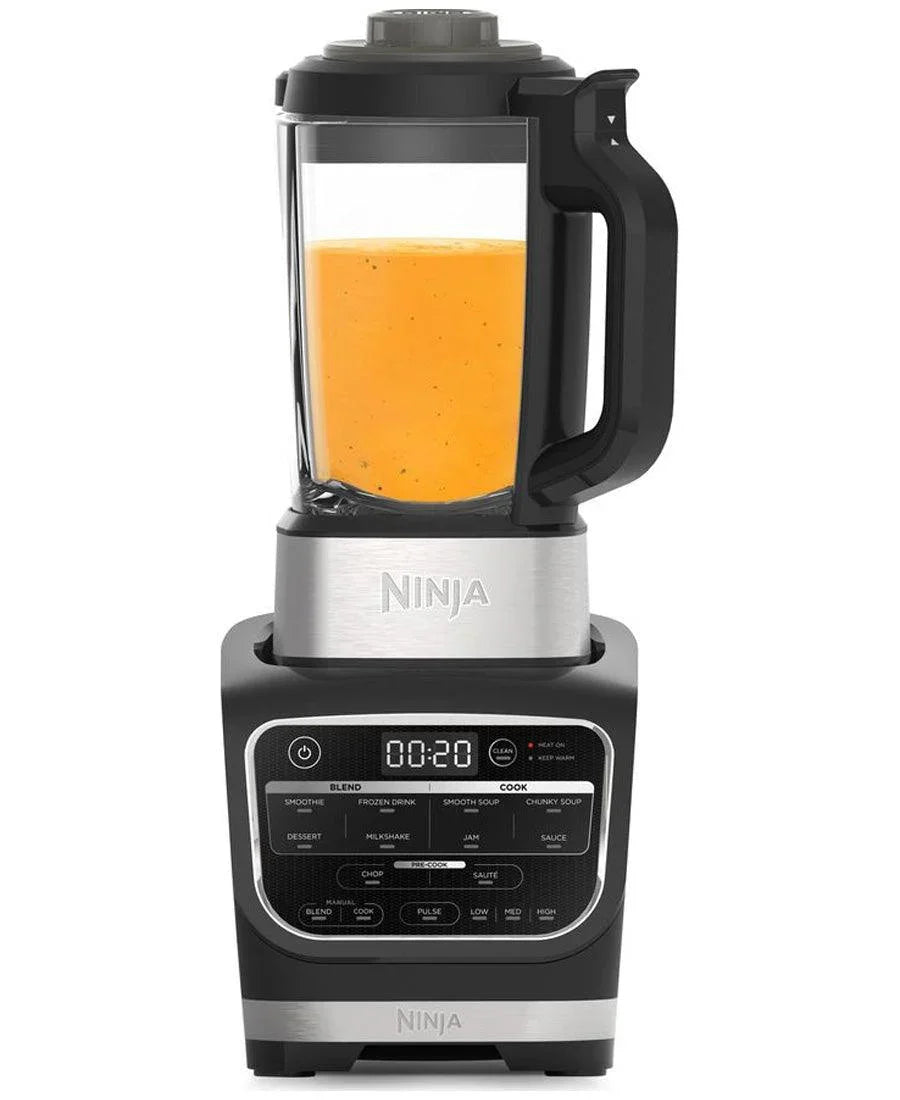
- Base: The motorized part that stays on your counter.
- Gasket/seal: A rubber ring that prevents leaks.
- Control panel: Buttons or touchpads for settings.
- Heating element: (Soup Maker only) Heats up the food.
Some have extra accessories or attachments, like single-serve cups or stirring paddles. Always check your model’s manual for any unique parts.
| Part | Can Go in Dishwasher? | Needs Handwashing? |
|---|---|---|
| Pitcher/Jar | Yes (top rack) | Recommended |
| Blade Assembly | No | Yes |
| Lid and Cap | Yes (top rack) | Yes (for deep clean) |
| Base | No | Wipe Only |
| Gasket/Seal | No | Yes |
| Heating Element (Soup Maker) | No | Yes (carefully) |
Credit: www.youtube.com
Daily Cleaning Routine
A simple cleaning habit after every use keeps your Ninja Blender or Soup Maker fresh and ready. Here’s how to do it right:
- Unplug the appliance. Safety first—always unplug before cleaning.
- Disassemble all removable parts. Take out the pitcher, blade, lid, and gasket if possible.
- Rinse immediately. Run warm water over all parts to remove loose food and liquid.
- Soak for tough messes. Fill the pitcher with warm water and a drop of dish soap. Let it soak for 5–10 minutes.
- Use the self-clean function. If your model has this feature, fill halfway with warm water and a drop of soap, secure the lid, and run the cleaning cycle.
- Scrub gently. Use a soft sponge or brush for blades and seals. Avoid steel wool or anything abrasive.
- Rinse and dry. Rinse all parts with clean water and let them air dry fully before reassembling.
Quick Cleaning For Light Use
If you just blended water, juice, or something not sticky, a quick rinse and air dry may be enough. But for anything with dairy, eggs, or cooked food, always use soap.
Pro Tips
- Never soak the base or motor. Only wipe with a damp cloth.
- Check under the blades. Food can hide here and cause smells or mold.
- Air dry with lid off. This prevents moisture buildup and helps avoid odors.
Deep Cleaning: Weekly Or As Needed
Even if you clean every day, some build-up will happen over time, especially with thick soups, smoothies, or sauces. Deep cleaning removes what regular washing can miss.
What You’ll Need
- Dish soap
- Baking soda
- White vinegar
- Soft-bristled brush or old toothbrush
- Microfiber cloth
- Cotton swabs
Steps For Deep Cleaning
- Disassemble completely. Take everything apart, including gaskets or seals.
- Soak in soapy water. Use warm, soapy water for 20–30 minutes.
- Scrub details. Use a brush on blades, corners, and under gaskets.
- Deodorize with baking soda. Sprinkle baking soda inside the jar, add a little water to make a paste, and scrub gently.
- Remove stains with vinegar. For stubborn stains or cloudiness, fill the jar with equal parts vinegar and water. Let sit for 20 minutes, then rinse well.
- Clean the base carefully. Wipe with a damp microfiber cloth. Use a cotton swab for buttons and crevices.
- Inspect and reassemble. Make sure all parts are dry and check for cracks or damage before putting back together.
Common Trouble Spots
- Blade assembly: Dried food can get stuck underneath.
- Gasket/seal: Can hide mold if not removed and cleaned.
- Lid corners: Residue builds up in grooves and under rubber flaps.
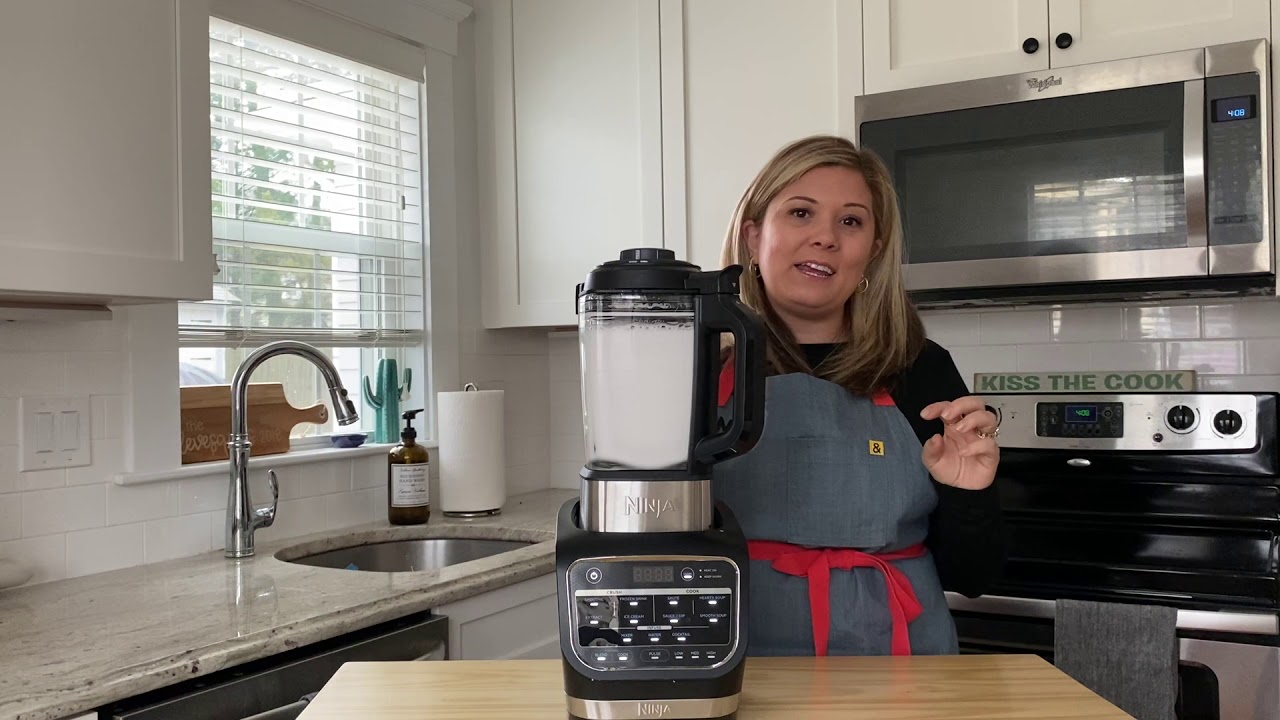
How To Clean The Ninja Soup Maker
Soup Makers need extra care because they heat food, which can cause burnt-on stains and strong odors.
Step-by-step Soup Maker Cleaning
- Unplug and cool. Let the Soup Maker cool down fully before cleaning.
- Remove large food bits. Scrape out leftovers with a spatula.
- Soak with soapy water. Fill the jug with warm water and a few drops of dish soap.
- Use the cleaning program. If available, run the clean cycle to loosen stuck food.
- Scrub the heating element. Carefully use a soft brush or sponge; never use anything abrasive.
- Tackle stubborn stains. Use a mix of baking soda and water or white vinegar for burnt-on food.
- Rinse thoroughly. Make sure no soap or cleaner is left behind.
- Wipe the lid and seals. Food often splashes into these parts.
- Dry completely. Leave the lid off and let the jug air dry upside down.
What Not To Do
- Never immerse the base or heating element in water.
- Don’t use bleach or harsh chemicals—they can damage the coating.
- Avoid metal brushes or scouring pads.
Cleaning The Blades Safely
Blender blades are very sharp. Many injuries happen when people rush or use the wrong tools.
Safe Blade Cleaning Process
- Unplug and remove. Take the blade assembly out of the pitcher.
- Use a brush, not fingers. A bottle brush or old toothbrush works best.
- Soak if needed. For dried-on gunk, soak blades in warm soapy water.
- Rinse and check. Make sure all debris is gone.
- Dry upright. Place on a towel to air dry.
Safety Tips
- Never try to clean blades while attached to the base.
- Don’t use your fingers to scrub sharp edges.
- Always store blades out of reach of children.
Credit: aceappliances.ie
How To Remove Odors From Your Ninja Blender And Soup Maker
Sometimes, even after washing, your blender or soup maker may smell like onion, garlic, or old smoothies. Here’s how to fix it:
- Lemon rinse: Squeeze half a lemon into the pitcher, fill with water, blend for 30 seconds, and rinse.
- Baking soda soak: Fill with warm water and 2 tablespoons of baking soda. Let sit for 30 minutes, then rinse.
- Vinegar cycle: Mix equal parts white vinegar and water, blend for a minute, and rinse well.
For strong odors, repeat these steps or leave the pitcher open to air out overnight.
Dealing With Cloudy Or Scratched Jars
Over time, blender jars can look cloudy or scratched, making them appear dirty even when clean.
Causes
- Hard water stains: Minerals build up from tap water.
- Micro-scratches: Using abrasive sponges or cleaners.
- Stuck-on oils: Greasy foods leave a film.
How To Restore Clarity
- Vinegar soak: Fill with warm vinegar and let sit for 1 hour, then scrub gently.
- Baking soda paste: Make a paste and gently rub on cloudy spots.
- Use a plastic-safe polish: Some products can remove fine scratches (always check manufacturer’s advice).
Prevention
- Always use soft sponges.
- Rinse and dry immediately after use.
- Avoid blending ice or hard seeds without enough liquid.
How To Clean The Ninja Blender Base
The base contains the motor and controls—it can’t be put in water. But spills and splashes are common.
Cleaning Steps
- Unplug the base. Wait for all parts to cool if just used.
- Wipe with a damp cloth. Mild dish soap on a cloth is safe.
- Clean crevices and buttons. Use a cotton swab for narrow spots.
- Dry with a towel. Make sure no water enters the vents or motor.
What To Avoid
- Never pour water on the base.
- Don’t spray cleaners directly onto buttons or digital screens.
Cleaning The Lid, Gasket, And Accessories
Lids, seals, and accessories like single-serve cups or tamper sticks also need attention.
Steps
- Remove seals/gaskets. These often hide food and bacteria.
- Wash in warm soapy water. Scrub grooves and corners.
- Dishwasher safe? Most can go in the top rack, but check your manual.
- Air dry fully. Moisture under seals leads to mold.
Cleaning Comparison: Daily Vs. Deep Cleaning
Here’s how regular cleaning compares to deep cleaning for your Ninja appliances:
| Cleaning Type | Frequency | Main Steps | Time Needed | Purpose |
|---|---|---|---|---|
| Daily Cleaning | After each use | Rinse, soap, quick scrub, air dry | 5–10 min | Removes fresh residue |
| Deep Cleaning | Weekly or as needed | Soak, scrub, vinegar/baking soda, detail clean | 30–45 min | Removes stains, odors, buildup |
Common Mistakes To Avoid
Cleaning mistakes can cause damage or leave your blender less than clean. Here are the most common errors:
- Using harsh cleaners or scouring pads. These scratch plastic and dull blades.
- Skipping the gasket. Mold often hides under seals.
- Leaving parts wet. Trapped moisture breeds bacteria and odors.
- Forgetting to unplug. Cleaning plugged-in appliances is dangerous.
- Running the dishwasher too hot. High heat can warp plastic parts.
- Not cleaning after every use. Even a quick rinse is better than nothing.

Credit: www.amazon.sa
How To Extend The Life Of Your Ninja Blender And Soup Maker
A clean appliance works better and lasts longer. Here’s how to keep yours in top shape:
- Store with lid off. Prevents trapped moisture and odors.
- Inspect parts regularly. Replace damaged seals or cracked jars.
- Sharpen or replace blades as needed. Dull blades are less effective and make the motor work harder.
- Avoid overfilling. Too much food can spill into the base and be hard to clean.
- Use only approved cleaners. Stick with dish soap, baking soda, and vinegar.
Extra Insight: Dishwasher Vs. Handwashing
While many Ninja parts are labeled as dishwasher-safe, handwashing is usually gentler and prevents warping or cloudiness. If you use the dishwasher, always put parts on the top rack and avoid high heat drying cycles.
Troubleshooting: What If It Still Smells Or Looks Dirty?
Even after deep cleaning, some blenders or soup makers still have issues. Here’s what to try:
- Persistent stains: Repeat vinegar and baking soda treatments.
- Lingering smells: Leave the jar with lemon slices overnight.
- Sticky buttons: Carefully clean with a damp cotton swab, then dry.
- Cloudy plastic: Sometimes plastic will discolor permanently—replacement may be needed after years of heavy use.
If you notice cracks, leaking, or parts that don’t fit tightly, check the manufacturer’s website for replacement parts or warranty support.
Quick Reference: Cleaning Frequency Guide
How often should you clean each part? Here’s a simple guide:
| Part | Daily | Weekly | Monthly |
|---|---|---|---|
| Pitcher/Jar | Yes | Deep clean | Inspect for stains |
| Blades | Yes | Deep clean | Sharpen or replace |
| Lid & Gasket | Yes | Remove & deep clean | Check for mold |
| Base | Wipe as needed | Button detail clean | Check for buildup |
| Soup Maker Heating Element | Yes | Descale if needed | Inspect for wear |
Real-world Example: A Week In The Life Of A Busy Blender
Let’s look at a typical week with a Ninja Blender or Soup Maker:
- Monday: Make a green smoothie. Quick rinse and soap cycle right after.
- Wednesday: Blend hot soup. Soak the jug, scrub the heating element, and air dry.
- Friday: Make hummus. Oil and garlic residue—do a deep clean with baking soda.
- Sunday: Inspect all parts, remove gaskets, soak and scrub everything. Wipe base and check for hidden spills.
By the end of the week, your blender is clean, fresh, and ready for more.
Non-obvious Insights
- Gaskets are mold magnets. Most people rinse the pitcher but forget the rubber gasket or seal. Always remove and clean these—mold grows fast in hidden spots.
- Self-clean cycles aren’t enough. While convenient, these cycles won’t reach sticky food under blades or in lid crevices. Manual scrubbing is still needed.
- Hard water can ruin clarity. If your tap water is hard, mineral deposits will cloud your blender over time. Use filtered water for the final rinse if possible.
- Airflow matters. Letting parts air dry completely (not stacking or sealing wet) keeps everything odor-free and safe from bacteria.
Frequently Asked Questions
How Do I Clean The Ninja Blender Blade Without Cutting Myself?
Always remove the blade assembly from the pitcher before cleaning. Use a soft brush or toothbrush instead of your hands. Never clean blades while attached to the base, and let them air dry upright.
Can I Put Ninja Blender Or Soup Maker Parts In The Dishwasher?
Most pitchers, lids, and accessories are top-rack dishwasher safe, but always check your manual. The base, blade assembly, and heating element should only be hand washed.
What Should I Do If My Ninja Blender Smells Bad After Cleaning?
Try a lemon rinse or soak the jar with baking soda and water. If odors remain, leave the jar open overnight. Persistent smells may mean food is trapped under the gasket or blade—remove and clean these parts.
How Do I Remove Burnt-on Food From My Ninja Soup Maker?
Fill the jug with warm water and vinegar and let it soak for 30 minutes. Use a soft brush to gently scrub the heating element and jug. Avoid metal scouring pads, as they can damage the surface.
How Often Should I Deep Clean My Ninja Blender And Soup Maker?
A deep clean once a week is best if you use the appliance daily, or at least every two weeks. Always deep clean after blending sticky, oily, or strong-smelling foods.
For more tips on keeping kitchen appliances clean, check the official Ninja Kitchen Support page.
A clean Ninja Blender or Soup Maker makes every meal taste fresher, prevents health hazards, and keeps your machine running for years. With these steps and insights, you’ll never have to worry about sticky jars or strange smells again—just smooth blending and delicious soups, day after day.