How To Fix Ninja Blender Blades: Quick and Easy Solutions
A Ninja blender is a powerful kitchen tool. It can handle everything from smoothies to nut butters. But what do you do when the blades stop working properly? Many people run into problems like dullness, jamming, or even strange noises. You might think you need to replace the whole blender. But in most cases, you can fix the blades yourself. This guide will show you step by step how to troubleshoot and repair Ninja blender blades. You’ll also learn when to seek professional help and how to keep your blender in top shape for years.
Understanding How Ninja Blender Blades Work
Before you start repairs, it helps to know how the blades work. Ninja blenders use stacked, multi-level blades. These blades are made of stainless steel. They are sharp and strong, designed to crush ice and blend tough ingredients. The blades fit onto a central spindle that connects to the motor. When you turn on the blender, the motor spins the spindle, which rotates the blades.
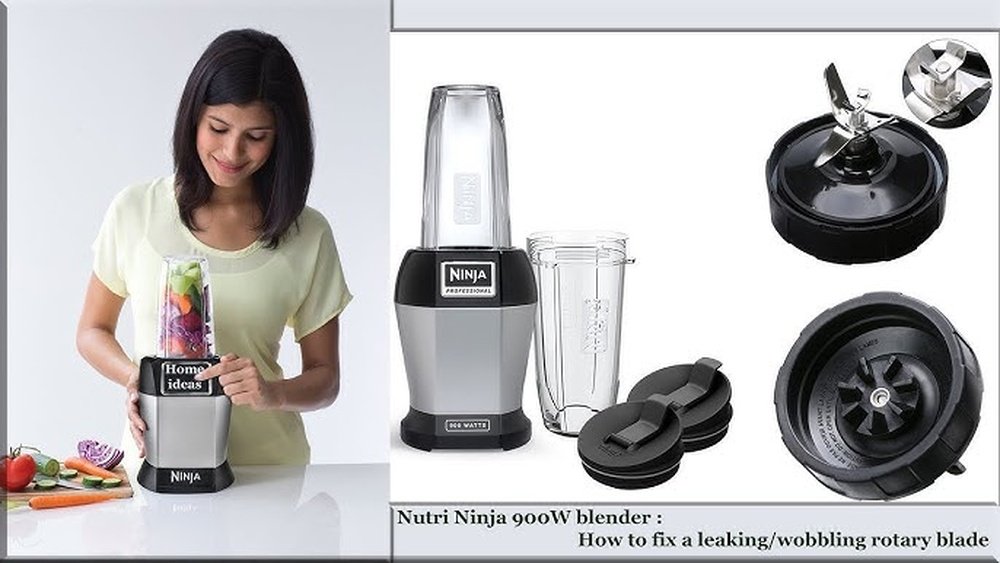
The design varies between models. Some have removable blade assemblies (for example, Ninja Professional models), while others have blades fixed in place (like some Nutri Ninja cups). Always check your user manual before opening your blender.
Common Problems With Ninja Blender Blades
Many issues can affect Ninja blender blades. Here are the most common:
- Blades are dull – They do not cut ingredients well. Smoothies have chunks or unblended pieces.
- Blades are jammed – They do not rotate at all or stop during use.
- Blades are loose – The assembly wobbles or makes noise.
- Leaking from blade base – Liquid seeps out from the bottom of the pitcher.
- Rust or discoloration – The blades look brown or stained.
- Strange noises – Grinding, squealing, or rattling sounds.
Each problem has different causes and solutions. Let’s look at how to fix each one.
Safety Precautions Before You Start
Working with blender blades can be dangerous. Follow these tips to stay safe:
- Always unplug the blender before touching the blades.
- Wear cut-resistant gloves if possible.
- Use tools, not your fingers, to handle sharp parts.
- Work on a stable, clean surface.
- Keep small parts away from children and pets.
Tools And Materials You May Need
To repair Ninja blender blades, gather these items:
- Phillips and flathead screwdrivers
- Pliers or adjustable wrench
- Small brush or old toothbrush
- White vinegar or dish soap
- Food-safe lubricant (for blade bearings)
- Replacement blades or gaskets (if needed)
- Cut-resistant gloves
- Clean towel
Some jobs may only need a few of these. Others, like replacing blades, require more.
Diagnosing The Problem
Before you start fixing, figure out what’s wrong. Here’s a simple process:
- Check for power issues – If the blender will not turn on, the problem may not be the blades.
- Inspect blade movement – Try turning the blades by hand (with the blender unplugged). They should spin freely.
- Look for leaks – Fill the pitcher with water and watch for drips from the base.
- Check for visible damage – Look for bent, dull, or rusted blades.
Write down what you find. This will help you choose the right fix.
How To Fix Dull Ninja Blender Blades
Blades that are dull will not blend well. You can sharpen them at home, but do it carefully. Here’s how:
- Remove the blade assembly from the pitcher. Most Ninja models have a removable blade set. Twist and lift it out.
- Wash the blades with warm, soapy water. Dry them completely.
- Sharpen the blades using a small sharpening stone, diamond file, or knife sharpener. Hold the blade at a 20-degree angle. Move the sharpener along the edge a few times.
- Clean off metal shavings with a brush or cloth.
- Reassemble and test the blender with water before blending food.
Non-obvious tip: Don’t over-sharpen. Ninja blades are designed for crushing, not slicing. Too-sharp blades can chip or break.
If the blades are deeply damaged or chipped, it’s safer to replace the blade assembly.
How To Fix Jammed Or Stuck Blades
Jammed blades are a common problem. This happens when food or debris gets caught around the blade. Here’s how to fix it:
- Unplug the blender and remove the pitcher.
- Take out the blade assembly (if removable).
- Check for blockages. Look for pieces of food, ice, or seeds.
- Soak the blade assembly in hot, soapy water for 15 minutes.
- Scrub gently with a brush, especially around the blade base.
- Rinse and dry thoroughly.
- Lubricate the blade bearings with a drop of food-safe oil if the movement still feels stiff.
- Reassemble and test the blender.
Non-obvious insight: Hard water can cause mineral buildup around the blade shaft. Use vinegar to soak and dissolve stubborn deposits.
If the blade is still stuck, the problem may be with the blade bearings or the spindle. These may need replacement.
How To Fix Loose Or Wobbly Blades
Loose blades can cause leaks, noise, or poor blending. Here’s how to fix them:
- Remove the blade assembly from the pitcher.
- Check the blade base gasket (rubber ring). If it’s cracked or missing, replace it.
- Tighten the blade assembly. Some models have a nut at the bottom you can tighten with a wrench.
- Check for damage to the blade base. If the plastic is cracked, replace the assembly.
- Reinsert the blade assembly and test with water.
Practical tip: Never over-tighten. This can strip the threads or crack the pitcher.
How To Fix Leaking Ninja Blender Blades
Leaks usually start at the base of the pitcher. Here’s how to stop them:
- Empty the pitcher and dry it.
- Remove the blade assembly and check the gasket.
- Clean the gasket and blade base with soapy water.
- Inspect the gasket for wear. If it’s stretched, cracked, or deformed, replace it.
- Reinstall the gasket snugly into its groove.
- Reattach the blade assembly and test with water.
If it still leaks, the pitcher or blade base may be warped. Replacement is usually the only solution.
How To Fix Rusty Or Discolored Blades
Rust can happen if blades are left wet or are not dried after washing. Here’s what to do:
- Remove the blade assembly.
- Soak in white vinegar for 15-20 minutes. This dissolves rust.
- Scrub gently with a brush or steel wool pad.
- Rinse and dry completely.
- Apply a light coat of food-safe oil to protect the blades.
Non-obvious insight: Rust often starts on the underside of the blade or around the base, where water collects. Always dry these areas carefully.
If the rust has deeply pitted the metal, replace the blade assembly.

Credit: www.youtube.com
How To Fix Strange Noises From Ninja Blender Blades
Unusual sounds can mean several things: loose parts, stuck food, or motor issues. To fix:
- Turn off and unplug the blender.
- Remove the pitcher and blade assembly.
- Check for loose screws or nuts on the blade base. Tighten if needed.
- Clean out any trapped food or debris.
- Check the motor coupling (the part that connects the pitcher to the base) for wear.
- Test the blender with water to see if the noise is gone.
If the noise continues, the problem may be in the motor or drive gear. This may need professional repair.
When To Replace The Blade Assembly
Sometimes, fixing is not enough. Replace the blade assembly if:
- The blades are badly bent, chipped, or cracked.
- The blade base is warped or leaking badly.
- The bearings are seized and will not move, even after cleaning.
- The gasket is missing and cannot be replaced separately.
Most Ninja blade assemblies cost $15–$30. Always buy genuine Ninja parts for best results.
Here’s a quick comparison of when to repair or replace:
| Problem | Repair | Replace |
|---|---|---|
| Dull blades | Sharpen | If chipped/bent |
| Stuck blades | Clean/lubricate | If bearings seized |
| Loose blades | Tighten gasket | If base is cracked |
| Leaking | Replace gasket | If pitcher/base warped |
| Rust | Clean with vinegar | If deep pits |
How To Replace Ninja Blender Blades
If you decide to replace the blades, follow these steps:
- Buy the correct replacement blade for your model. Check the model number under the pitcher or on the base.
- Unplug the blender.
- Remove the pitcher and blade assembly.
- Remove the old gasket (if separate).
- Install the new blade assembly into the pitcher.
- Insert the new gasket (if needed).
- Make sure everything fits tightly.
- Test with water before blending food.
Tip: Keep the old blade assembly as a backup for parts.
How To Prevent Ninja Blender Blade Problems
Prevention is better than repair. Here’s how to avoid common issues:
- Wash and dry blades after every use. Never let them sit wet.
- Do not blend very hard items (like bones or frozen fruit without liquid).
- Do not overload the pitcher. Follow maximum fill lines.
- Add enough liquid to help blades move freely.
- Use pulse mode for tough ingredients to avoid jamming.
- Check gaskets for wear every few months.
- Sharpen blades once a year if you use the blender often.

Credit: www.reddit.com
Comparing Common Ninja Blender Models And Their Blade Assemblies
Different Ninja models use different blade types. Here’s a comparison:
| Model | Blade Type | Removable | Typical Problems |
|---|---|---|---|
| Ninja Professional (BL610) | Stacked 6-blade | Yes | Dull, leaks |
| Ninja Mega Kitchen (BL770) | Stacked, food processor, dough | Yes | Loose, jammed |
| Ninja Nutri Pro (BL456) | 4-blade extractor | Yes | Rust, stuck |
| Ninja Foodi Power Pitcher | Hybrid blade | Yes | Noise, leaks |
Non-obvious tip: Always check for model-specific instructions. Some blades have special locking mechanisms or require special tools.
Troubleshooting: Step-by-step Guide
If you’re not sure what’s wrong, follow these steps:
- Unplug and disassemble the blender.
- Inspect the blades and base for visible problems.
- Check gasket and base for leaks.
- Test blade movement by hand.
- Clean all parts thoroughly.
- Reassemble and test with water.
- Listen for unusual sounds.
- If problems persist, replace blade assembly or seek help.
What If The Problem Is Not The Blades?
Sometimes, issues are caused by the motor base or coupling rather than the blades. Symptoms include:
- The motor spins but the blades do not turn.
- There is a burning smell during use.
- The blender shuts off during blending.
In these cases, check:
- The coupler (plastic gear under the pitcher) for wear.
- The motor base for burning or damaged parts.
If you’re unsure, contact Ninja customer support or a local appliance repair shop.
How To Clean Ninja Blender Blades Properly
Cleaning is key to long life. Here’s the best way:
- Rinse immediately after use with warm water.
- Disassemble the blade assembly (if possible).
- Soak in warm, soapy water for 5–10 minutes.
- Scrub with a brush to remove stuck food.
- Rinse and dry completely.
- Sanitize with a vinegar soak once a month.
Never put blades in the dishwasher unless your manual says it’s safe. The heat can warp plastic parts.
Professional Repair Vs. Diy
Most blade problems can be fixed at home. But seek professional help if:
- The blender is under warranty (DIY repairs can void it).
- The motor smells burnt or doesn’t work.
- The pitcher is cracked or leaking badly.
Authorized repair shops can get genuine parts and test the blender safely.
For more on blender care, see this Consumer Reports blender guide.
How Long Do Ninja Blender Blades Last?
With proper care, Ninja blades last 2–3 years for average home use. Heavy users may need to replace them more often. Signs you need new blades:
- Consistently poor blending results
- Visible chips or bending
- Rust that does not clean off
- Persistent leaks from the blade base

Credit: www.ifixit.com
Comparison: Diy Blade Repair Vs. Buying A New Blender
Is it worth fixing your Ninja blender, or should you buy a new one? Here’s a summary:
| Option | Cost | Time | Best For |
|---|---|---|---|
| DIY Blade Repair | $0–$30 | 30–60 min | Minor blade issues |
| Professional Repair | $30–$70 | 1–2 days | Motor/coupler problems |
| New Blender | $80–$200+ | Immediate | Major damage, old units |
Tip: For most blade problems, DIY repair or blade replacement is the most affordable solution.
Frequently Asked Questions
How Often Should I Sharpen Ninja Blender Blades?
Most home users only need to sharpen blades once a year. If you blend hard foods often (like nuts or ice), check the blades every six months. Always inspect for chips before sharpening.
Can I Put Ninja Blender Blades In The Dishwasher?
Some Ninja blades are dishwasher safe (top rack only), but many are not. Check your manual. Hand washing is safer and will help prevent rust and dullness.
What Should I Do If My Ninja Blender Leaks After Fixing The Blades?
If the blender still leaks, inspect the gasket and blade base for cracks or damage. Replace worn parts. Make sure the blade assembly is installed tightly and correctly.
Is It Safe To Use A Blender With Rusty Blades?
No. Rust can flake into food and damage the motor. Clean off minor rust with vinegar. If the blades are deeply rusted or pitted, replace them.
Where Can I Buy Replacement Ninja Blender Blades?
Buy from official Ninja retailers, Amazon, or major appliance stores. Always use genuine parts for safety and the best fit.
Taking care of your Ninja blender blades will save you money and keep your smoothies, soups, and sauces delicious. With the right tools and a careful approach, you can fix most blade issues yourself. If in doubt, seek help from the manufacturer or a trusted repair shop.
Your blender can last for years with proper maintenance and a little DIY know-how.