How To Make Butter In A Ninja Blender: Easy Step-by-Step Guide
Making your own butter at home is more than just a fun kitchen project—it’s a way to enjoy fresh, pure flavors and take control over what goes into your food. If you own a Ninja Blender, you might be surprised at how easy it is to whip up creamy, delicious butter with just heavy cream and a little patience.
Unlike traditional butter churns or stand mixers, a Ninja Blender is fast, efficient, and perfect for small batches. This guide will walk you through every step, highlight common pitfalls, and explain the science behind butter making. Whether you want to impress guests or just explore homemade dairy, you’ll find everything you need to get started here.
Why Make Butter At Home?
Store-bought butter is convenient, but homemade butter offers unique advantages. When you make your own, you control the ingredients. You can choose organic cream, add your favorite flavors, or leave out salt for a healthier option. Homemade butter is usually fresher and richer in taste.
Another plus is the buttermilk byproduct, which you can use in pancakes, biscuits, or even salad dressings. Making butter is also a great way to teach kids about food science, since they can watch the transformation from liquid cream to solid butter.
Many people think making butter is complicated, but with a Ninja Blender, it’s surprisingly simple. You just need the right technique and a few tips to avoid messes and get the best texture.
How A Ninja Blender Makes Butter Different
Most people use stand mixers, food processors, or even hand-churning to make butter. So, why use a Ninja Blender?
- Speed: The Ninja’s powerful motor can turn cream to butter in minutes.
- Convenience: No need to buy extra attachments or equipment.
- Small Batch Friendly: Perfect for making just the amount you need.
- Easy to Clean: The removable blades and pitcher clean up quickly.
But there are some differences. The Ninja Blender’s sharp blades can sometimes over-process the butter if you’re not careful. Also, the blending action creates more splashing, so it’s important to use the lid and maybe a kitchen towel for extra safety.
What You Need To Make Butter In A Ninja Blender
Before you start, gather the essentials. Here’s a straightforward checklist:
- Heavy whipping cream (min. 36% fat): 1-2 cups for a small batch
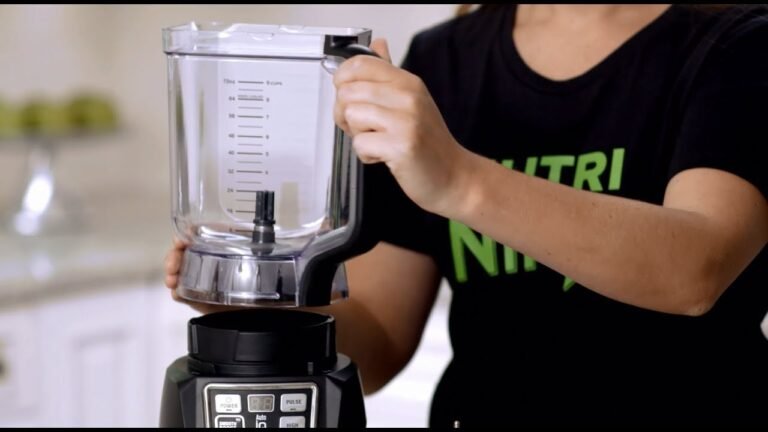
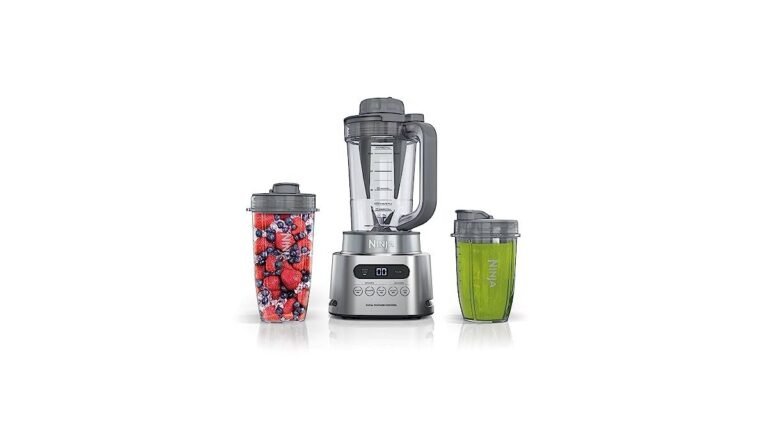
- Ninja Blender (any model with a pitcher)
- Fine mesh strainer or cheesecloth
- Cold water (for washing the butter)
- Spatula (for scraping and shaping)
- Salt (optional, for salted butter)
- Ice cubes (optional, for firming up butter)
If you want to add flavors, have herbs, garlic, or honey ready.
Comparing Ninja Blender Models For Butter
Not all Ninja Blenders perform exactly the same. The table below highlights key differences:
| Ninja Blender Model | Suitable for Butter? | Pitcher Size | Blade Type |
|---|---|---|---|
| Ninja Professional (BL610) | Yes | 72 oz | Stacked 6-blade |
| Ninja Foodi Power Blender | Yes | 72 oz | Hybrid Edge |
| Ninja Nutri-Blender Pro | Yes, for very small batches | 24 oz | Pro Extractor |
| Ninja Mega Kitchen System | Yes | 72 oz | Stacked 6-blade |
Tip: Use a full-size pitcher for best results. Personal-size cups can work, but you may need to reduce the cream amount.
Choosing The Right Cream
The most important ingredient is heavy cream. For butter, you need cream with at least 36% fat. Whipping cream works, but avoid “light cream” or half-and-half—they won’t separate properly.
- Pasteurized cream is fine, but avoid “ultra-pasteurized” if possible. Ultra-pasteurization can affect flavor and sometimes texture.
- Organic or grass-fed cream will give your butter a deeper yellow color and richer taste.
Some brands add stabilizers or thickeners. These aren’t harmful, but pure cream gives the best butter.
How Much Cream Makes How Much Butter?
On average, 1 cup of heavy cream yields about 1/3 to 1/2 cup of butter, plus 1/2 cup of buttermilk.
Here’s a quick reference table:
| Cream Amount | Butter Yield | Buttermilk Yield |
|---|---|---|
| 1 cup (240 ml) | 1/3 – 1/2 cup | 1/2 cup |
| 2 cups (480 ml) | 2/3 – 1 cup | 1 cup |
| 4 cups (960 ml) | 1 1/3 – 2 cups | 2 cups |
If you need a lot of butter, make it in batches. Overfilling the blender can lead to leaks or uneven processing.

Credit: www.youtube.com
Step-by-step: How To Make Butter In A Ninja Blender
Now, let’s get into the process. Follow these steps for creamy, homemade butter:
1. Chill The Equipment
Cold helps the butterfat separate from the buttermilk. For best results:
- Place the blender pitcher and blades in the fridge for 15-20 minutes before starting.
- Use cream straight from the fridge (not room temperature).
2. Add Cream To The Blender
Pour 1–2 cups of heavy cream into the pitcher. Do not fill more than halfway to prevent splattering.
3. Blend
Start with a low setting, then increase to medium. Blend for 2–3 minutes, stopping every 30 seconds to check progress.
- First, the cream becomes thick whipped cream.
- Keep blending—after a minute or two, you’ll hear the sound change and see liquid separating. This is the buttermilk being released.
Important: Stop blending as soon as you see clumps of yellow butter forming and a pool of watery buttermilk. Over-blending can turn the butter grainy.
4. Strain Out The Buttermilk
Pour the contents into a fine mesh strainer or cheesecloth over a bowl. Gently press with a spatula to squeeze out as much buttermilk as possible.
- Save the buttermilk for other recipes—it’s full of flavor.
5. Wash The Butter
Washing removes leftover buttermilk, which helps your butter last longer.
- Place the butter clumps back into the blender pitcher.
- Add 1/2 cup of ice-cold water.
- Pulse 2–3 times to rinse the butter.
- Pour off the cloudy water and repeat until the water runs clear (usually 2–3 times).
Alternatively, knead the butter in a bowl of ice water by hand.
6. Season And Shape
- Add salt if you want salted butter—start with 1/4 teaspoon per cup of cream and mix in with a spatula.
- For flavored butter, add chopped herbs, garlic, or honey at this stage.
- Scoop the butter onto parchment paper or into a small container.
- Shape it into a log or block, wrap, and chill.
7. Store Properly
Butter will keep for up to 1 week in the fridge, or longer if well-washed and salted. For best texture, use within a few days.
- Unsalted butter goes rancid faster, so use quickly.
- Freeze extra butter in an airtight container for up to 3 months.
Common Mistakes When Making Butter In A Ninja Blender
Even with a strong blender, a few things can go wrong. Here’s what to watch for:
- Overfilling the pitcher: This causes leaks and uneven blending.
- Using warm cream: Butter won’t form as easily.
- Blending too long: Butter turns grainy and greasy.
- Not washing enough: Residual buttermilk causes spoilage.
- Forgetting to save the buttermilk: It’s a valuable byproduct!
Many beginners stop at the whipped cream stage or don’t recognize the moment when butter is ready. Listen for the sound change and watch for butter clumps.
Credit: lowcarbafrica.com
Flavor Variations: Make Your Butter Special
One of the joys of homemade butter is customizing it. Here are some favorites:
- Herb butter: Mix in chopped parsley, chives, or dill.
- Honey butter: Add 1–2 teaspoons of honey for a sweet spread.
- Garlic butter: Blend in roasted garlic and a pinch of salt.
- Spicy butter: Stir in chili flakes or smoked paprika.
For best results, add flavors after washing and draining the butter.
How To Use Homemade Buttermilk
The leftover buttermilk isn’t the same as cultured buttermilk from the store, but it’s excellent for baking and cooking. Try it in:
- Pancakes or waffles (for extra fluffiness)
- Biscuits or scones
- Mashed potatoes or salad dressings
Buttermilk from fresh butter is thin and sweet. Store it in the fridge and use within 2–3 days.
Comparing Homemade Vs. Store-bought Butter
Is homemade really better? The table below breaks down the main differences:
| Feature | Homemade Butter | Store-Bought Butter |
|---|---|---|
| Flavor | Rich, creamy, customizable | Consistent, but less fresh |
| Ingredients | Just cream (plus optional salt/flavors) | May include additives or preservatives |
| Texture | Varies (can be smoother or chunkier) | Smooth, uniform |
| Cost | Varies—can be higher or lower | Usually cheaper for basic butter |
| Shelf Life | Shorter (1–2 weeks) | Longer (up to 2 months unopened) |
Homemade butter shines when you want fresh taste, control over ingredients, or special flavors.
Cleaning Your Ninja Blender After Butter
After making butter, you’ll notice a greasy residue in the pitcher and on the blades. Here’s how to clean up easily:
- Rinse everything with hot water right away.
- Add a few drops of dish soap and more hot water, then blend for 30 seconds.
- Rinse and dry thoroughly.
If you wait too long, the fat can harden and become difficult to remove. For stubborn spots, use a soft brush. Avoid harsh scrubbers that can scratch the pitcher.
Is Butter In A Ninja Blender Healthy?
Homemade butter is still high in fat, but making it yourself means you know exactly what’s inside. You can skip the salt, use organic cream, or add healthy herbs and spices.
- Calories: 1 tablespoon of butter has about 100 calories.
- Fat: Mostly saturated, but also contains beneficial vitamins like A, D, and E.
- Additives: None, unless you add them.
If you’re watching your fat intake, use butter in moderation. But for most people, homemade butter is a fresh, natural choice.
Non-obvious Tips For Perfect Butter
Some details make a big difference, but are easy to overlook:
- Don’t skip the washing step: Even if the butter looks clean, small amounts of buttermilk can spoil it quickly.
- Let the butter rest: If it seems too soft after blending, chill for 10–15 minutes before shaping. This makes it easier to handle.
- Use the right container: Glass or ceramic keeps butter fresher than plastic.
If you want to make cultured butter, add a spoonful of plain yogurt to the cream and let it sit at room temperature for 12 hours before blending. This gives the butter a tangy, complex flavor.
Troubleshooting: When Things Don’t Go As Planned
If your butter isn’t forming, check these:
- Cream is too warm: Chill and try again.
- Low-fat cream: Only use cream with 36% fat or higher.
- Over-blending: Stop as soon as butter separates from buttermilk.
If you end up with whipped cream, you stopped too soon. If you get a greasy, oily mess, you blended too long.
The Science Behind Butter Making
Butter making is a physical process. Blending agitates the cream, causing the fat molecules to clump together and separate from the liquid (buttermilk). The result is a solid fat (butter) and a watery byproduct.
The process is simple, but the details matter:
- Temperature: Cold helps fat stick together.
- Fat content: Higher fat means more butter and easier separation.
- Time: Over-blending can break down texture.
This is why using a Ninja Blender works so well—it’s powerful enough to do the job quickly, but you need to watch closely to avoid over-processing.
Credit: familyfocusblog.com
Sustainability And Cost
Making butter at home can be more sustainable if you buy local, organic cream and avoid packaging waste. You can also use the buttermilk instead of throwing it away.
However, homemade butter is usually more expensive than generic store butter. It’s most cost-effective when you want special flavors, small batches, or use leftover cream.
Butter Storage And Shelf Life
Once you’ve made your butter, storage is important to keep it fresh:
- Short term: Store in an airtight container in the fridge. Use within 7–10 days.
- Long term: Wrap in parchment and freeze for up to 3 months. Thaw in the fridge before use.
- Soft spread: Leave a small amount at room temperature for easy spreading, but use within 1–2 days.
You can also freeze butter in small portions, so you always have some on hand.
Frequently Asked Questions
How Long Does Homemade Butter Last?
Homemade butter lasts up to 1 week in the fridge if unsalted, and up to 2 weeks if salted and well-washed. For longer storage, freeze it in an airtight container for up to 3 months.
Can I Make Butter With Half-and-half Or Low-fat Cream?
No. Half-and-half and low-fat creams do not have enough fat to separate into butter and buttermilk. Use heavy cream with at least 36% fat for the best results.
What Can I Do With Leftover Buttermilk?
The leftover buttermilk is great for baking—use it in pancakes, waffles, biscuits, or as a marinade for chicken. It’s not cultured buttermilk, but it still adds moisture and a mild tang.
Is It Possible To Make Flavored Or Compound Butter In The Ninja Blender?
Yes! After washing and draining your butter, add herbs, spices, honey, or garlic right in the blender. Blend briefly or mix by hand, then chill to set the flavors.
Where Can I Learn More About Dairy Science Or Butter Making?
For more details and advanced tips, check the Wikipedia butter article. It covers history, chemistry, and global variations in butter making.
Making butter in a Ninja Blender puts fresh, delicious spread within easy reach. With a bit of practice, you’ll enjoy butter that’s richer and more flavorful than anything from the store. Try it, experiment with flavors, and enjoy the simple pleasure of homemade butter on your next slice of bread.