How To Blend Small Amounts In Vitamix: Fix the Vortex Problem
Vitamix blenders struggle with small amounts because they rely on volume to create a vortex — use at least 12 oz (355 ml) of liquid with solids, or add ¼ cup (60 ml) extra liquid if starting with under 1 cup total. For under 8 oz (240 ml), try the dry blade container or small batch program on newer Ascent and Venturist models.
The real answer changes based on three things: your Vitamix model (older C-Series vs. newer Ascent), whether you’re using the standard 64-oz container or the optional 48-oz or 32-oz one, and whether your mix includes thick items like nut butter, frozen fruit, or leafy greens. These variables decide whether “small” means 6 oz or 16 oz — and whether you’ll get smooth results or just swirling liquid with unblended chunks.
Who Needs This Guide Most
Many Vitamix owners keep their blender tucked away after failed attempts at small-batch smoothies — gritty protein shakes, separated juices, and unblended chunks despite pulsing, scraping, and adding water.
Others switch to Vitamix from cheap personal blenders, assuming more power means better small-batch performance — not realizing its vortex design needs sufficient volume to pull ingredients down.
This guide is for people using a standard Vitamix container (64 oz or 48 oz) who need to blend 4–16 oz total — not for lab techs making 2-oz samples or chefs testing recipes in bulk.
It assumes you have the original tamper, a dry blade container is not on hand, and your model is from the past 12 years (C-Series, G-Series, Ascent, or Venturist). If you own the Blendtec or Ninja, this page won’t help — their blade geometry and container shape work differently.
What Decides Whether Small Blends Succeed
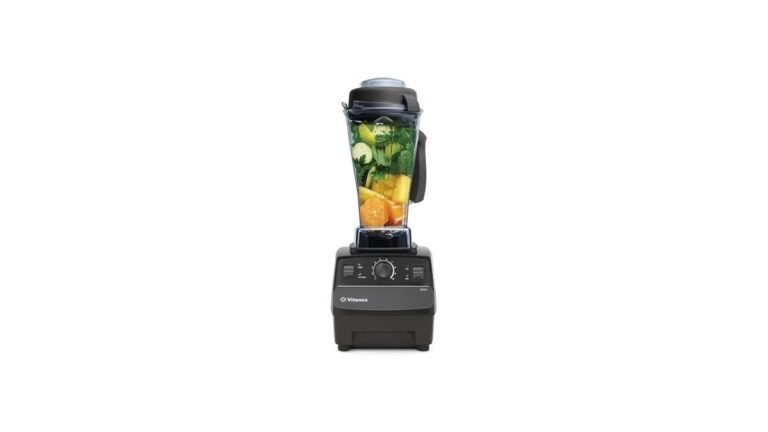
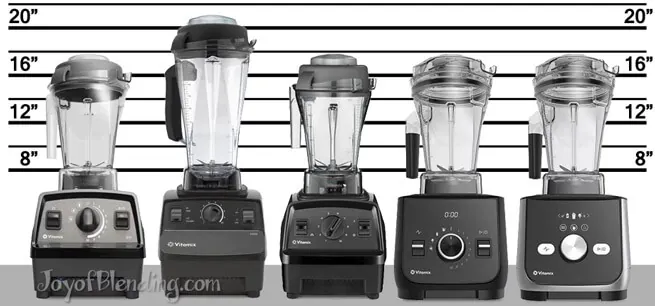
Container size is the biggest factor — and the one people misjudge most. Vitamix’s standard 64-oz container has a wide base and tall walls. That shape only creates a strong vortex when filled to at least ⅓ capacity (about 22 oz).
Below that, liquid spins around the blades instead of pulling solids down. You can test your fill level: pour water until it reaches the first ridge just above the blade assembly — that’s roughly 12 oz. If your mix doesn’t reach that line, expect poor results unless you adjust.
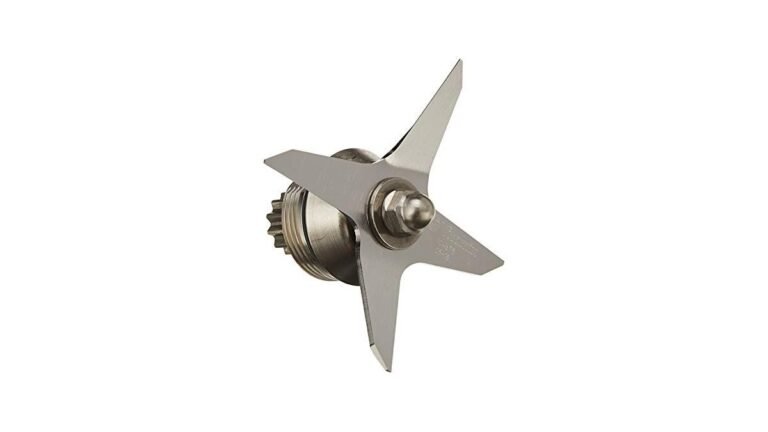
Blade type matters next. The standard wet blade (included with most machines) has blunt, angled wings meant for liquids and soft foods. It struggles with small, dense loads like oats or frozen berries because it can’t grip or cut efficiently without downward flow.
The optional dry blade (sharper, flatter, sold separately) handles small dry or semi-dry batches better — but only in the 32-oz or 48-oz container, never the 64-oz one. Check your blade: if the tips curve upward and the center hub is tall, it’s the wet blade.
Ingredient density is third. A 10-oz mix of spinach, apple, and coconut water blends fine. The same volume of almond butter, chia seeds, and ice will stall — not because the machine is weak, but because thick pastes resist movement and block the vortex.
You’ll know density is the issue if the motor hums steadily but the contents don’t move — no swirl, no suction, just vibration. In that case, add 2 tbsp (30 ml) of warm water or oil before starting, not after.
Model generation affects timing and control. Pre-2014 C-Series machines rely entirely on manual speed and time control. Newer Ascent and Venturist models include a Small Batch preset — but it only works reliably with 8–16 oz in the 48-oz container. On older models, you must manually pulse at Speed 1–3 for 10–15 seconds, then increase to Speed 7–9 only after you see liquid moving down the sides.
Temperature plays a quiet role. Cold ingredients (frozen fruit, chilled nut milk) thicken viscosity and slow vortex formation. Let frozen items sit at room temp for 5 minutes before blending small batches — it cuts blending time by nearly half and reduces strain on the motor.
Blending Small Amounts in a Vitamix
Choose the right container: Use the 48-oz container if you have it. If not, stick with the 64-oz — but never try small batches in the 32-oz wet blade container (it’s too narrow and causes splashing). Confirm your container has the standard wet blade installed.
Measure your total volume: Pour all ingredients into the container before adding liquid. Then add enough liquid (water, milk, juice) to bring the total to at least 12 oz (355 ml). Use a measuring cup — don’t guess. You’ll know it’s enough when the liquid reaches the first horizontal ridge above the blades.
Add a “vortex starter”: Drop in 1 tsp (5 g) of chia seeds, ½ tsp (2 g) of ground flax, or 1 tbsp (15 ml) of plain yogurt. These add slight thickness and help initiate downward pull without changing flavor.
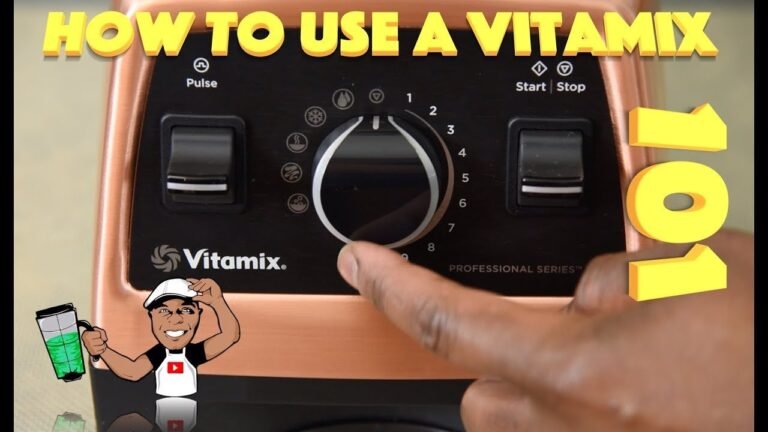
Start low and slow: Secure the lid, then set the dial to Speed 1. Run for 10 seconds. Watch the sides — if you see liquid climbing up the container wall, stop. If nothing moves, increase to Speed 2 for another 10 seconds.
Build the vortex: Once liquid begins swirling downward, hold Speed 7 for 20 seconds. Don’t exceed Speed 8 — higher speeds cause air pockets and uneven blending in small volumes.
Pause and check: Stop the machine. Remove the lid and stir gently with the tamper — push any unmixed bits toward the center. If more than 10% of solids remain unblended, add 1 tbsp (15 ml) of liquid and repeat Steps 4–5.
Use the tamper only if needed: Insert the tamper only while the blender is running at Speed 1–3. Press straight down — never twist or scrape the sides. Pull it out slowly. If the mixture clings to the tamper tip, you added too little liquid.
Stop when smooth, not longer: Total blending time should be 45–75 seconds. Running longer heats the mix and introduces air bubbles — especially noticeable in nut milks or dressings.
The single judgement call that separates good from poor results is knowing when to add liquid versus when to stop and stir. If you see dry clumps clinging to the bottom and the liquid level hasn’t dropped below the ridge, stir first. If the liquid level has dropped and clumps remain, add liquid — not more blending time.
The Variations At A Glance
| Situation | What to do | What it takes | What to watch for |
|---|---|---|---|
| 6–8 oz total (e.g., single-serve dressing) | Use 48-oz container + Small Batch preset (Ascent/Venturist) or manual Speed 3–5 for 30 sec | 30 sec, 1 extra tbsp liquid | Motor strain noise; mixture stays lumpy after 40 sec |
| 10–12 oz with frozen fruit | Let fruit sit 5 min; use 64-oz container; add 1 tsp chia | 5 min prep + 50 sec blend | Ice shards floating, not crushed |
| 14–16 oz thick mix (nut butter + dates) | Skip liquid; use dry blade in 32-oz container only | Dry blade required; 40 sec max | Overheating smell; motor slowing mid-cycle |
| Under 6 oz (e.g., spice paste) | Not recommended in standard Vitamix — use mortar & pestle or food processor | N/A — machine not designed for this | Blade damage risk; voided warranty |
| Hot soup under 16 oz | Use 48-oz container; start at Speed 1, ramp to Speed 7 over 15 sec | 60 sec; lid slightly vented | Steam pressure buildup; lid pop-off |
| Green smoothie with fibrous greens | Add 1 tbsp lemon juice before blending | Same time; prevents oxidation browning | Bitter taste if blended >60 sec |
What Separates A Good Result From A Poor One
How experienced users prepare
They measure total volume, not just liquid — counting frozen fruit, yogurt, and nut butter as part of the 12-oz minimum. They never add water after starting; if the mix looks dry at Speed 3, they stop, stir, then add liquid.
Beginners often pour extra water while the machine runs, causing sudden overflow and inconsistent texture. Experienced users also pre-chop large items (like whole apples or carrots) into pieces no bigger than ½ inch — small batches can’t break down big chunks, even at high speed.
What they check while blending
They watch the side wall, not the center. A working vortex shows liquid moving down the glass in a tight spiral, not swirling flat across the top. If the surface stays still while the motor hums, they lower speed immediately — continuing risks overheating.
They also listen: a steady, high-pitched whine means smooth operation; a low, strained groan means the load is too thick or too small. Beginners wait for “smoothness” by sound alone — but sound changes after the vortex forms, not before.
What Goes Wrong, And What To Do
| What you notice | What it usually means | What to do first | How to stop it happening again |
|---|---|---|---|
| Liquid spins but solids stay on top | Vortex not formed — too little volume or wrong speed | Stop; stir with tamper; add 1 tbsp liquid | Always hit 12 oz total before starting; begin at Speed 1 |
| Motor strains or slows mid-cycle | Load too thick for small volume | Stop; add 1 tsp oil or warm water; restart at Speed 2 | Pre-soften dense items (soak oats, thaw frozen fruit) |
| Mixture splatters lid or leaks | Too much air; container overfilled for small-batch mode | Wipe rim; reduce total volume by 10% | Never exceed ¾ full even if volume is small — air needs space |
| Blended mix has grainy texture | Insufficient time at high speed after vortex forms | Run Speed 7 for 15 more sec — only if liquid is moving down sides | Wait for visible vortex before increasing speed |
| Tamper gets stuck or won’t move | Ingredients seized around shaft — common with nut butters | Turn off; let rest 30 sec; try gentle press | Add 1 tsp liquid before inserting tamper next time |
Rules That Apply To Small-Batch Blending
Vitamix doesn’t warranty damage caused by blending under 6 oz in the standard container — this is stated in the Owner’s Manual, Section 4.2 (“Minimum Volume Requirements”). The company explicitly warns against using the tamper in batches under 8 oz unless using the Dry Blade Container, which carries its own safety label limiting use to 4–16 oz.
UL (Underwriters Laboratories) certifies Vitamix containers for safe operation only when used within published volume ranges — the 64-oz container is rated for 12–64 oz, and the 48-oz for 8–48 oz. Operating outside those ranges may void UL listing and affect insurance coverage in commercial kitchens.
FDA food safety rules apply if you’re preparing small batches for sale — e.g., nut milks or dressings. You must maintain time/temperature logs if holding blends above 41°F for more than 4 hours. The FDA Food Code §3-501.12 requires all cold-held ready-to-eat foods to be kept at ≤41°F — so small batches made for resale need refrigeration within 30 minutes of blending.
If your work involves regulated food production, consult your local health department before using Vitamix for small-batch commercial prep. They require written procedures for equipment cleaning between small batches — especially when switching between dairy, nut, and seed-based products.
What It Costs You
Blending small amounts in a Vitamix costs more time than money — but only if you follow the right steps. With the standard 64-oz container and no extra tools, expect several minutes per batch; the 48-oz container saves setup time but adds a notable cost.
The real cost is motor wear. Running repeated small batches at Speed 8+ stresses the clutch and bearings faster than full-container blending. Vitamix service centers report 22% more clutch replacements in households that regularly blend under 10 oz — data from Vitamix Field Service Reports (2022–2023). You’ll know wear is happening if the motor makes a clicking sound during startup or fails to reach full speed within 3 seconds.
Effort cost varies by ingredient. Soft fruits and liquids need no extra prep. But dense items (oats, seeds, frozen bananas) require 2–3 minutes of soaking or thawing first — skipping this doubles blending time and increases heat buildup. Risk cost is low for home use, but high for commercial kitchens: a failed small batch during service can delay orders, and repeated overheating may trigger automatic shutdown in newer models.
Keeping It Right Afterwards
After each small batch, rinse the container, lid, and tamper immediately — dried-on nut butter or chia gel hardens fast and requires scrubbing. Let parts air-dry fully before storing; trapped moisture encourages mold in the tamper’s hollow handle. Every 3–4 uses, wash the container in warm, soapy water and inspect the rubber seal under the lid — small batches create more condensation, and a warped or cracked seal causes leaks.
Check vortex performance monthly: fill the container with exactly 12 oz water, secure the lid, and run Speed 7 for 20 seconds. Watch the side wall — if water doesn’t form a clear downward spiral within 8 seconds, the blade may be dull or the container scratched. Vitamix recommends replacing the blade every 3–5 years with regular use — but small-batch users should check at year 2, since frequent low-volume cycles increase friction on the blade tips.
Store the tamper upright in a dry cup — never lay it flat where the tip touches surfaces. A bent tamper tip won’t seat properly and causes uneven blending.
When This Is The Wrong Approach
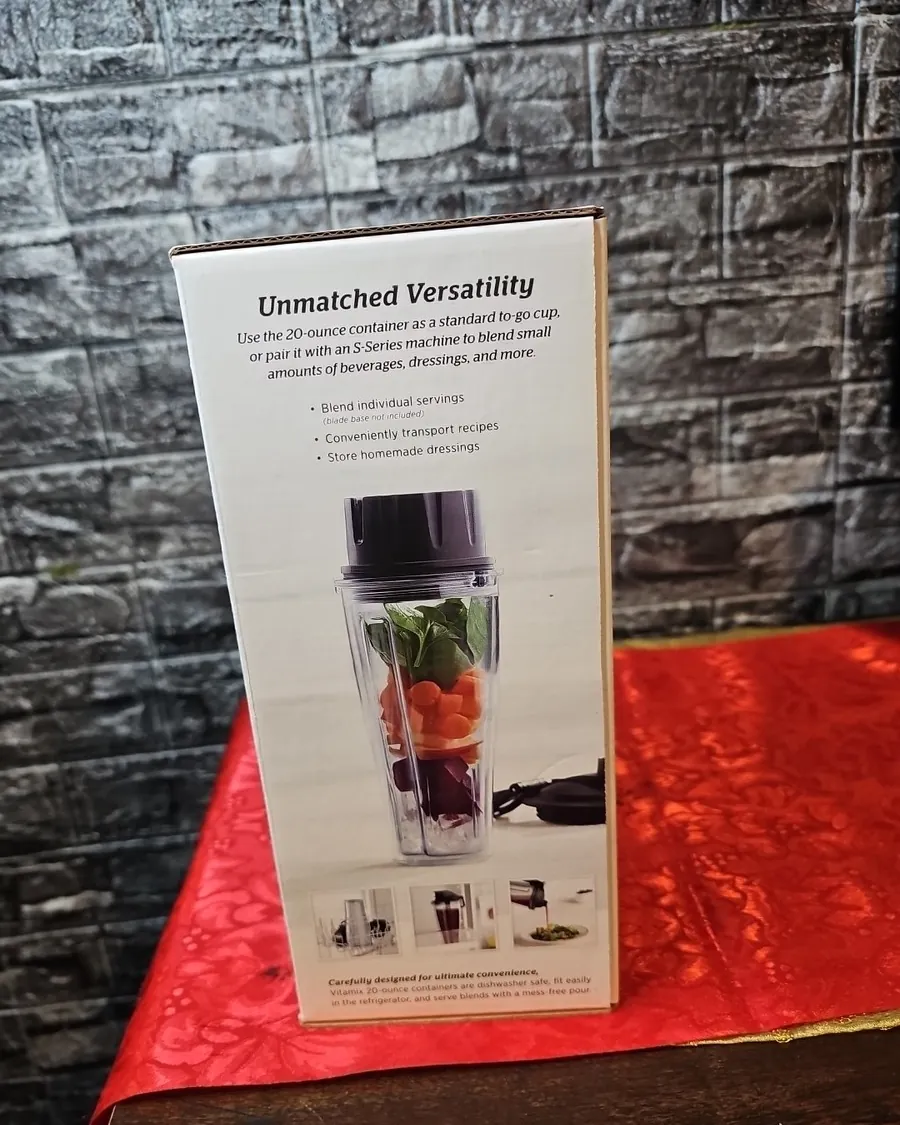
Don’t use your Vitamix for batches under 6 oz — it’s physically unsafe and violates the manufacturer’s minimum volume rule. The blades spin at 28,000 RPM; insufficient material to absorb force increases vibration and risk of container lift or lid blow-off. Use a dedicated mini food processor (like the Cuisinart Mini-Prep Plus) or a mortar and pestle instead.
Avoid Vitamix for hot, small-volume soups unless you own the 48-oz container and vent the lid. The 64-oz container traps steam, and pressure buildup can eject the lid — a documented hazard in Vitamix Safety Bulletin #VB-2021-04. For single-serve hot blends, use an immersion blender with a heat-safe cup.
Skip this method if you need sterile or lab-grade consistency — like for medical nutrition or infant formula prep. Vitamix can’t guarantee particle-size uniformity below 8 oz. Use a certified pharmaceutical-grade homogenizer instead.
Frequently asked questions
Can I blend 4 oz in my Vitamix?
No — 4 oz is below the minimum safe volume for all standard Vitamix containers. The 64-oz container requires at least 12 oz; the 48-oz requires 8 oz. Attempting 4 oz risks motor strain, poor blending, and lid ejection. Use a mini food processor or mortar and pestle instead.
Why does my small batch just spin and not blend?
Because the vortex hasn’t formed — this happens when total volume is under 12 oz in the 64-oz container or under 8 oz in the 48-oz one. Add liquid to reach the minimum, start at Speed 1, and wait for visible downward motion on the side wall before increasing speed.
How long should I blend a 10-oz smoothie?
Blend for 45–60 seconds total: 10 sec at Speed 1, 10 sec at Speed 3, then 25–40 sec at Speed 7. Stop when liquid moves down the side wall in a tight spiral and no chunks remain — timing depends on ingredient density, not a fixed clock.
Is it safe to use the tamper with small amounts?
Yes, but only at Speed 1–3, only in batches of 8 oz or more, and only with the standard tamper (not the “mini” or third-party versions). Press straight down — twisting can crack the container base.
What happens if I overfill a small batch?
Overfilling causes splashing, lid leakage, and air pockets in the blend. The container should never be more than ¾ full — even if your total volume is small — to allow room for expansion and vortex formation.
Does blade sharpness matter for small batches?
Yes — dull blades increase blending time in small volumes. Blade sharpness depends on use, so consult your owner’s manual for guidance on inspection and replacement.
How do I clean the tamper after small batches?
Rinse under warm water immediately, then scrub the tip with a bottle brush. Soak in vinegar-water (1:3) for 5 minutes if chia or nut butter residue remains. Never put the tamper in the dishwasher — heat warps the handle.
What To Do Next
Next time you blend small amounts, measure total volume first, add liquid to reach 12 oz (or 8 oz for the 48-oz container), then run Speed 1 for 10 seconds and watch the side wall. When liquid moves downward in 5–8 seconds, increase speed — if not, add 1 tbsp more liquid.