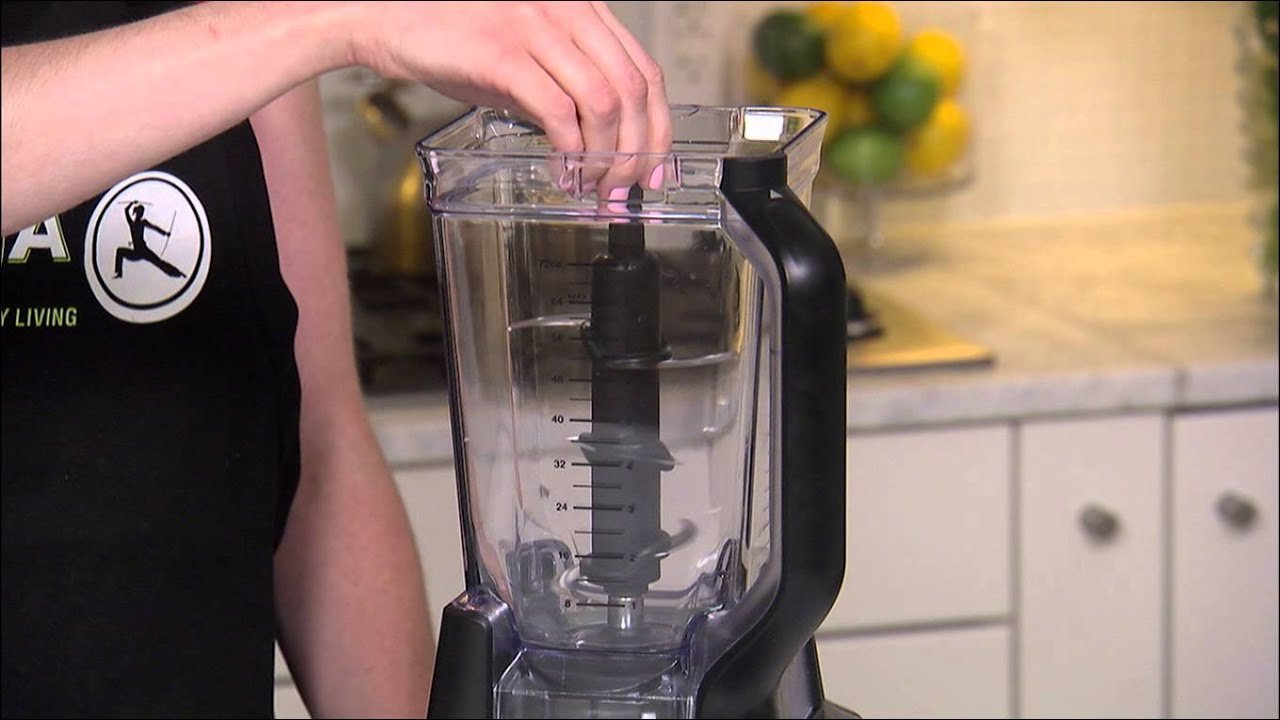
How To Release Ninja Blender Pitcher: Simple Step-by-Step Guide
To release a ninja blender pitcher from the base, you must press the release button located on the handle while simultaneously lifting the container vertically. If your model doesn’t have a button on the handle, simply rotate the pitcher counter-clockwise until the locks disengage before lifting it away from the motor base.
These methods cover most standard Ninja systems, but the specific locking mechanism varies based on whether you have a single-serve cup or a large-capacity pitcher. Please verify your specific model number on the base label to ensure you’re following the correct release sequence for your unit.
Who needs to release a Ninja blender
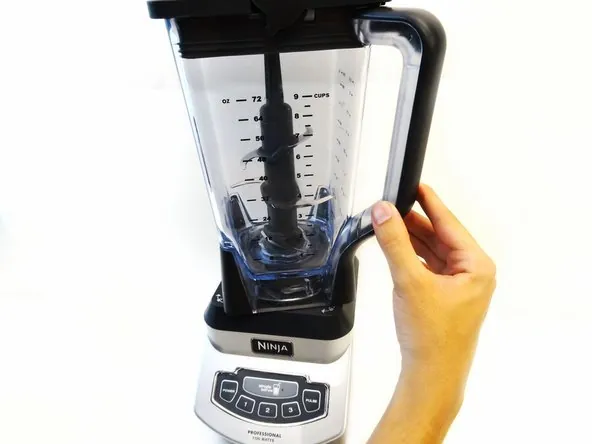
This guide serves users who struggle to remove a stuck blender pitcher or those who recently purchased a Ninja system and want to avoid damaging the plastic locking tabs. Whether you own a professional-grade countertop blender or a compact personal system, the goal remains the same: removing the container without applying excessive force that could snap the locking pins.
This page is best for users who have a standard Ninja blender with a mechanical locking base. If you’re using an older model or a specialized food processor attachment, you might notice slightly different resistance levels, but the fundamental physics of the release remain consistent. We assume that your blender is currently unplugged, as you should never attempt to force a stuck container while the unit is connected to power.
If you’re a beginner who is unsure about the amount of pressure required, this guide helps you identify the difference between a stuck lid and a locked base. Users dealing with a completely seized motor base or damaged locking teeth should consult the official Ninja Kitchen support site for troubleshooting, as this guide focuses on normal operation and standard release procedures.
Factors affecting release ease
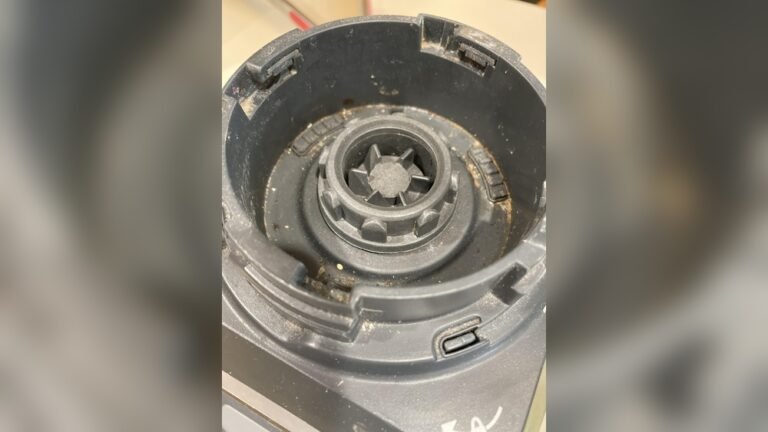
The primary factor that determines how easily a container releases is the amount of dried residue trapped in the locking slots. If food particles or sticky liquids have dried around the base of the pitcher, the locking mechanism will feel stuck even when you press the release button. You can check this by inspecting the gap between the pitcher and the motor base for visible debris.
The second factor is the internal pressure created by processing hot ingredients. If you blended hot liquids, the vacuum created during cooling can pull the pitcher down tightly onto the base. If you suspect this has happened, wait for the container to return to room temperature before attempting to release it, as pulling too hard while the seal is tight can damage the plastic base.
The third factor is the alignment of the pitcher tabs. If the pitcher wasn’t seated perfectly flat when you locked it into place, the friction against the base increases significantly. You can test this by gently pressing down on the handle before attempting the release movement; if the pitcher shifts downward, it was likely slightly misaligned.
Finally, the most common mistake is pulling upward before the locking mechanism has fully disengaged. People often try to yank the pitcher off while the button is only partially depressed, which causes the internal plastic teeth to jam against the base. Always ensure the button is fully pressed and the pitcher has rotated to the unlock position before moving upward.
Steps to release the pitcher
- Unplug the power cord from the wall outlet to ensure the blades don’t spin while you’re applying pressure to the housing.
- Examine the base of the handle to find the release button, which is usually a textured plastic lever or a large push-button.
- Firmly press and hold the release button down; you should feel a slight click as the internal safety lock disengages.
- While holding the button, use your other hand to grip the handle and rotate the pitcher about 15 degrees counter-clockwise.
- If your model doesn’t feature a button, simply rotate the pitcher counter-clockwise until you feel the resistance stop.
- Lift the pitcher straight up and away from the base, keeping it level to avoid catching the plastic drive gear.
- If the pitcher doesn’t lift, return it to the locked position, clear any debris from the base, and repeat the process.
The single judgment call that separates a professional result from a broken unit is the amount of force you apply when the pitcher feels stuck. If you meet significant resistance, stop immediately, as forcing the pitcher will break the plastic locking tabs. If the container refuses to move after a moderate pull, check the base for any food buildup or misaligned locking tabs that require manual cleaning.
Summary of release methods
| Situation | Action | Effort Level | What to watch |
|---|---|---|---|
| Button-style model | Press handle button | Low | Click sound |
| Twist-lock model | Rotate counter-clockwise | Low | Smooth rotation |
| Stuck with residue | Clean base gap | High | Sticky debris |
| Vacuum seal | Let cool down | Medium | Internal pressure |
| Misaligned base | Press down then twist | Medium | Even seating |
Choose your release method based on the mechanical feedback of the device. If you feel resistance, stop immediately. Forcing a release when the internal vacuum seal is active can shear the locking pins, leading to a permanent failure of the housing.
If the unit remains stuck despite following the table, check for mineral buildup or food residue in the base gap. A simple buildup of 0.5 millimeters of dried debris is enough to prevent the locking mechanism from retracting fully. Use a stiff nylon brush to clear this area before attempting another release.
The most common mistake is applying lateral pressure while turning. This creates a binding effect that mimics a stuck seal. If you encounter resistance, apply vertical force directly downward to reset the alignment before rotating.
If you hear a hissing sound, the vacuum seal is still active. Never pry the unit open during this phase. Wait at least three minutes for the internal pressure to equalize. If the unit is cool to the touch but still refuses to open, the seal has likely failed, and you must contact the manufacturer for a professional disassembly.
Differences in release techniques
Understanding the locking mechanism
The locking mechanism relies on small plastic tabs that grip the motor base, and these tabs are designed to be delicate to protect the motor. Experienced users know to apply steady, even pressure rather than sudden jerks. Beginners often make the mistake of twisting the pitcher while the button isn’t fully depressed, which grinds the plastic teeth and makes future releases even harder.
Handling resistance safely
If you feel the pitcher is stuck, don’t reach for tools like screwdrivers or knives to pry it open. These tools will scratch the plastic housing and potentially crack the pitcher base, which can lead to leaks during future use. Instead, use a damp cloth to wipe the edges of the base, which often removes the thin layer of dried sugar or oil that acts like glue.
Troubleshooting stuck containers
| What you notice | What it usually means | What to do first | How to stop it |
|---|---|---|---|
| Button won’t press | Debris in button | Wipe with cloth | Wash after use |
| Pitcher won’t twist | Food in base | Check base gap | Rinse base daily |
| Grinding sound | Misaligned tabs | Reset and twist | Seat it flat |
| Stuck after hot | Vacuum seal | Let it cool | Don’t overfill |
| Base moves too | Loose feet | Tighten base | Clean counter |
If the button remains unresponsive after wiping, dried sugar or protein has likely crystallized inside the spring mechanism. Apply a single drop of warm water to the gap and depress the button repeatedly to dissolve the blockage. Don’t use a knife to pry it, as this often snaps the plastic housing, which is inexpensive to replace.
When the pitcher resists twisting, check for a thin film of dried residue on the locking track. If the gap is clear but the pitcher still binds, the drive coupling is likely misaligned. Press down firmly on the lid while rotating counter-clockwise to force the gears to re-index.
Vacuum seals occur most often when blending hot liquids. The steam cools rapidly, creating a pressure differential that locks the lid. If you can’t remove the lid after five minutes of cooling, place a warm, damp towel over the top to expand the air inside.
To prevent this, never fill the container past the halfway mark when processing ingredients above 120 degrees Fahrenheit. If the base slides during operation, the rubber feet have lost their grip due to kitchen grease. Wipe the feet and the countertop with a degreaser to restore friction.
Rules for safe handling
The primary safety rule published by Ninja Kitchen is to never operate the appliance if the pitcher or lid is cracked. If you encounter a situation where the pitcher is stuck due to physical damage or a melted plastic component, you must stop all attempts to force it. Contact the manufacturer directly for guidance, as attempting to dismantle the motor housing yourself can void your warranty and create a safety risk.
Remember that the drive gear and locking teeth are made of high-impact plastic. These parts are meant to wear down over time, but they can’t handle excessive torque. If you feel that you need to use two hands and your full body weight to remove the pitcher, you’re likely missing a simple mechanical step or dealing with a severe obstruction. Always ensure the unit is unplugged, and never use sharp objects to clear debris from the locking area.
Costs of improper removal
The cost of forcing a stuck pitcher is usually the price of a replacement pitcher, which varies by model but is generally inexpensive. Replacing the motor base is significantly more expensive and is often not cost-effective compared to buying a new unit. You can check current replacement part pricing on the official company website by entering your specific blender model number.
The most common mistake is applying torque to the handle rather than the base. This leverage often snaps the plastic locking tabs, turning a simple jam into a permanent mechanical failure. If you hear a plastic snapping sound, stop immediately. You have likely broken the internal housing, which renders the safety interlock switch useless and necessitates a full unit replacement.
Time is the other currency here. Spending five minutes to carefully clean the base or wait for the unit to cool is always faster than the days it takes to order a replacement part and wait for shipping.
If the pitcher remains stuck after a thorough cleaning, use a hairdryer on a low setting to warm the plastic base for thirty seconds. This expansion often releases the vacuum seal. If the unit still doesn’t budge, don’t use a screwdriver for leverage; you’ll crack the casing. At that point, professional service is the only safe path.
Keeping the system functioning
To keep your blender operating smoothly, clean the base and the locking slots after every single use. Dried food residue is the leading cause of “stuck” pitchers, and it only takes a few seconds to wipe the base with a damp cloth. You should see a clean, debris-free gap between the pitcher and the motor base at all times.
If you notice the pitcher becoming harder to twist over time, it’s a sign that residue is accumulating in the hidden slots. Put the pitcher through a cycle with warm, soapy water to loosen any hidden buildup. If the pitcher still feels stiff after a thorough cleaning, check the locking tabs on the bottom of the container for any signs of plastic stress or warping.
Most users make the mistake of submerging the entire base in water to clean these gaps. This destroys the internal electronics. Instead, use a cotton swab dipped in isopropyl alcohol to reach deep into the locking channels. This solvent evaporates quickly and breaks down stubborn, sticky sugars that water alone can’t reach.
If the pitcher rotates but feels loose or rattles during operation, the locking tabs have likely worn down. A firm, secure “click” should be audible when you lock the pitcher into place. If you hear nothing, stop using the machine immediately to prevent motor coupling damage. Replacement pitchers are cheaper than replacing a stripped drive socket.
When to seek help
If you have followed the release steps and the pitcher remains firmly stuck, don’t attempt to open the motor housing.
Attempting to pry the housing open with a screwdriver often cracks the plastic casing or damages the internal seals. This mistake permanently voids your warranty and can cost you the full replacement value of the unit.
Use this simple decision rule to determine your next move. If the pitcher rotates slightly but won’t lift, the issue is likely a mechanical jam in the locking collar. You can safely try applying a small amount of food-grade lubricant to the base.
However, if there’s zero movement or you hear a grinding noise when the unit is plugged in, the fault is internal. Don’t force it. Take the entire unit to an authorized service center or contact the manufacturer to determine if a professional technician is required for the repair.
If the unit is less than two years old, check your receipt before visiting a shop. Many manufacturers provide free shipping for warranty repairs, saving you the typical diagnostic fee charged by local repair centers.
Frequently asked questions
Can I use lubricant to release a stuck Ninja blender pitcher?
No, you should never use oil or chemical lubricants on the blender base. These substances can seep into the motor housing and damage the electrical components, which creates a fire hazard. Simply clean the area with warm water and soap to remove the sticky residue that’s causing the friction.
Why is my ninja blender pitcher stuck after blending hot liquids?
The pitcher is likely stuck because of a vacuum seal created by the cooling air inside the container. This happens when hot air contracts as it loses temperature, pulling the container downward onto the base. Wait for the pitcher to reach room temperature, and it should release with minimal effort.
How do I know if the locking tabs are broken?
You can identify broken tabs by inspecting the bottom of the pitcher for missing or jagged plastic pieces. If the pitcher wobbles excessively when placed on the base or fails to trigger the safety switch, the tabs are damaged. You’ll need to purchase a replacement pitcher to restore safe operation.
Is it safe to force the pitcher if it won’t twist?
No, forcing the pitcher will result in broken locking tabs or a damaged motor base. If the pitcher doesn’t rotate after pressing the release button, there’s likely a physical obstruction or a misalignment. Inspect the base for debris and ensure the pitcher is seated perfectly flat before trying again.
What happens if I pull the pitcher without pressing the release button?
Pulling the pitcher without pressing the button puts excessive stress on the plastic locking teeth. This can cause the teeth to snap or become permanently jammed in the locked position. Always ensure the button is fully depressed to retract the safety lock before you attempt to lift the container.
Does the model version change how I release the pitcher?
Yes, the release method depends on your specific model, as some use a handle-mounted button while others rely on a simple twist-to-unlock system. Check the user manual or the label on the bottom of your motor base to confirm the specific sequence for your unit’s design.
Conclusion
Press the release button firmly while keeping the base stable on your counter. You should expect the pitcher to slide out of the locks smoothly without requiring significant force. If you feel heavy resistance or hear cracking, stop immediately and check for debris or misalignment before proceeding further.