How To Clean Bottom Of Ninja Blender: Easy Steps for a Sparkling Base
Keeping your Ninja blender clean is crucial for both hygiene and performance. Many people focus on cleaning the jar and blades, but the bottom of the Ninja blender often gets ignored. Over time, residue, food particles, and even mold can accumulate at the base, leading to odors, decreased efficiency, or mechanical issues. If you want your Ninja blender to last longer and work better, learning how to clean its bottom thoroughly is essential.
Many beginners assume a quick rinse is enough, but the bottom area requires special attention. This part includes the motor base, the drive socket, and sometimes the inside of the blade assembly—places where spills, leaks, and crumbs can hide. Proper cleaning helps prevent bacteria growth, keeps the blender smelling fresh, and avoids expensive repairs.
In this guide, you’ll discover step-by-step instructions, practical tips, and expert advice to help you clean the bottom of your Ninja blender safely and effectively.
Understanding The Bottom Of A Ninja Blender
Before cleaning, it’s important to know what makes up the bottom of your Ninja blender. This will help you focus on the right areas and avoid damaging sensitive parts.
Key Parts Of The Blender Bottom
- Motor Base: The main unit that powers the blender. This part contains electrical components and should never be submerged in water.
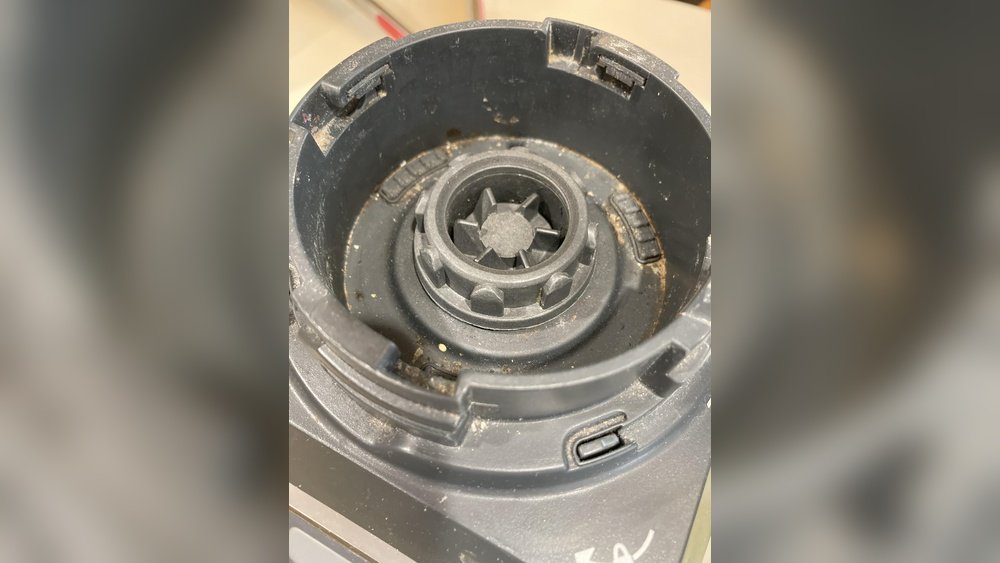
- Drive Socket: The area where the jar connects to the motor. Food particles can stick here, affecting performance.
- Blade Assembly Base: For some Ninja models, the blade assembly is attached to the jar’s bottom. It can trap debris and needs special cleaning.
- Rubber Gasket/Seal: Prevents leaks. If not cleaned, it can develop mold and odors.
Common Problems
- Sticky residue from spills or leaks
- Odors caused by trapped food
- Mold growth near the gasket or inside hidden crevices
- Reduced efficiency due to dirt blocking the drive socket
Knowing these areas will help you target your cleaning efforts and avoid mistakes.
Preparing For Cleaning
Cleaning the bottom of a Ninja blender is not difficult, but you need the right tools and a safe approach. Electrical safety is a top priority since the motor base contains sensitive parts.
Tools And Supplies Needed
- Soft sponge or microfiber cloth
- Toothbrush or small detailing brush
- Mild dish soap
- White vinegar
- Baking soda
- Cotton swabs
- Towel or absorbent cloth
- Compressed air (optional, for hard-to-reach areas)
Safety Precautions
- Unplug the blender: Always disconnect from power before cleaning the base.
- Avoid water exposure: Never immerse the motor base in water or let water drip into electrical parts.
- Read your model’s manual: Some Ninja blenders have unique features or cleaning instructions.

Credit: www.reddit.com
Step-by-step Cleaning Guide
Now, let’s walk through the process of cleaning each part of the bottom of your Ninja blender. This guide works for most Ninja models, but always check your manual for model-specific instructions.
1. Unplug And Disassemble
- Unplug the blender from the wall.
- Remove the jar and blade assembly.
- If your model allows, take out the rubber gasket/seal.
2. Cleaning The Motor Base
Surface Cleaning
- Wipe the exterior with a damp sponge and mild soap.
- Use a microfiber cloth to avoid scratches.
- Dry with a towel.
Cleaning The Drive Socket
- Use a toothbrush to remove crumbs or sticky residue.
- For stubborn dirt, dip the brush in vinegar.
- Avoid letting liquid drip into the socket.
Cleaning Vents And Crevices
- Use cotton swabs to clean inside vents and tight spots.
- Compressed air can blow out dust from the motor vents.
3. Cleaning The Blade Assembly Base
- Rinse under running water.
- Use dish soap and a brush to scrub the base.
- Pay attention to the area around the blades.
- If needed, soak in vinegar for 10 minutes to remove tough residue.
4. Cleaning The Rubber Gasket/seal
- Remove the gasket if possible.
- Wash with mild soap and warm water.
- Scrub gently with a toothbrush.
- Dry completely before reassembling.
5. Deep Cleaning For Odor And Mold
If you notice strong odors or mold, use a deep cleaning method:
- Mix 1 tablespoon baking soda with 1 cup white vinegar.
- Dip a cloth or brush in the mixture.
- Scrub the bottom areas carefully, especially around the gasket.
- Rinse with a damp cloth and dry thoroughly.
6. Drying And Reassembling
- Let all parts air dry fully.
- Wipe the motor base with a dry cloth—never leave moisture.
- Reassemble the blender once everything is dry.
Example Cleaning Routine
For a clearer picture, here’s an example of a weekly cleaning routine for the bottom of a Ninja blender:
- Unplug and remove all parts.
- Wipe the motor base with a damp cloth and mild soap.
- Clean the drive socket with a toothbrush.
- Wash the blade base and gasket with soap and water.
- Dry all parts completely.
- Reassemble and store.
Most users find that regular cleaning takes less than 15 minutes and prevents problems.
Common Mistakes And How To Avoid Them
Many beginners make mistakes that can damage the blender or make cleaning harder. Here are some pitfalls to avoid:
- Submerging the motor base: This can ruin the electrical parts.
- Using harsh chemicals: Bleach or strong cleaners can damage plastic and seals.
- Ignoring the gasket: Skipping this step leads to mold and leaks.
- Not drying thoroughly: Moisture can cause rust or electrical issues.
- Forgetting to unplug: Always disconnect from power before cleaning.
These mistakes are easy to avoid with careful attention and the right tools.
Comparing Cleaning Methods
Different cleaning methods work for different situations. Here’s a comparison of the most popular ways to clean the bottom of a Ninja blender:
| Method | Effectiveness | Safety | Time Needed | Best For |
|---|---|---|---|---|
| Wiping with damp cloth | Moderate | Very safe | 5 min | Daily cleaning |
| Deep cleaning with vinegar/baking soda | High | Safe if used correctly | 15 min | Odors, mold, tough residue |
| Compressed air | Low to moderate | Safe | 2 min | Dust in vents |
| Dishwasher (for blade/gasket) | High | Safe for removable parts | 30 min | Blade base, gasket |
Most users get the best results by combining regular surface cleaning with deep cleaning once a month.
How Often Should You Clean?
The frequency depends on how often you use your blender and what you blend. Here’s a general guideline:
- After every use: Wipe the motor base and wash blade/gasket.
- Weekly: Deep clean the bottom areas.
- Monthly: Check for mold, odors, or buildup.
If you blend sticky or thick ingredients, clean more often. If you only blend liquids, weekly cleaning is usually enough.
Troubleshooting Sticky Or Smelly Blender Bottoms
Sometimes, even after cleaning, the bottom of your Ninja blender remains sticky or smelly. Here’s how to fix these issues:
Sticky Residue
- Use warm water and dish soap.
- Let a damp cloth sit on the sticky area for 5 minutes, then scrub.
- For tough residue, use a vinegar-soaked cloth.
Persistent Odors
- Mix baking soda and water into a paste.
- Apply to the bottom area and let sit for 10 minutes.
- Wipe clean with a damp cloth.
Mold And Mildew
- Remove affected parts if possible.
- Wash with vinegar and baking soda.
- Air dry completely.
If the smell or stickiness persists, repeat deep cleaning or contact Ninja support for advice.
Data On Blender Hygiene And Performance
Studies show that regular cleaning not only improves hygiene but also extends the life of kitchen appliances. According to the National Sanitation Foundation (NSF), kitchen appliances like blenders can harbor more bacteria than some bathroom surfaces if not cleaned properly. A dirty blender bottom can reduce blending power by up to 10% due to debris blocking the drive socket.
Here’s a comparison of performance before and after cleaning:
| Condition | Blending Power | Noise Level | Odor |
|---|---|---|---|
| Dirty bottom | Low | High | Strong |
| Clean bottom | High | Low | None |
This data shows why cleaning the bottom is essential for both performance and comfort.
Practical Tips For Easier Cleaning
Cleaning doesn’t have to be a chore. Try these practical tips to make it easier:
- Keep cleaning supplies nearby: Store a sponge and mild soap next to your blender.
- Clean spills immediately: Don’t wait for residue to harden.
- Use a timer: Set a 10-minute timer to remind yourself to deep clean weekly.
- Check the gasket every time: Even if you don’t see leaks, mold can develop.
- Inspect drive socket monthly: Look for buildup or damage.
A non-obvious tip: Use a microfiber cloth instead of paper towels. Microfiber picks up more dirt and dries faster, preventing moisture buildup.
Extra Advice For Specific Ninja Blender Models
Ninja has several blender models, each with unique features. Here’s some extra advice for popular models:
Ninja Professional Bl610
- The blade assembly is removable. Clean thoroughly under the base.
- The gasket is easy to take out—wash it separately.
Ninja Foodi Power Blender
- The base has more ventilation. Use compressed air to clean vents.
- The drive socket is larger—check for hidden crumbs.
Ninja Nutri Auto-iq
- Smaller base, but the gasket can be tricky. Use a thin brush for tight spots.
- Blade assembly is dishwasher safe.
Check your manual for specific instructions and always follow them.
When To Replace Parts
Sometimes, cleaning isn’t enough. If the bottom of your Ninja blender is damaged, moldy, or smells even after deep cleaning, you may need to replace certain parts.
Signs You Need Replacement
- Cracked gasket: Causes leaks and lets mold grow.
- Damaged drive socket: Reduces blending power.
- Worn blade base: Can lead to poor blending.
Replacing these parts is easy and affordable. Ninja offers replacement parts on their website and through authorized retailers.
Environmental And Health Benefits Of Cleaning
Keeping your blender clean is not just about performance—it also improves health and reduces waste. Mold and bacteria can cause stomach problems or allergies. A clean blender means safer food and fewer health risks.
From an environmental perspective, regular cleaning prevents damage, so you won’t need to replace your blender as often. This reduces electronic waste and saves money.
Cleaning Ninja Blender Bottom In Shared Kitchens
If you use your Ninja blender in a shared kitchen (for example, at work or school), cleaning is even more important. Shared appliances get dirty faster and can spread germs.
Tips for shared kitchen cleaning:
- Label your blender: Helps prevent mix-ups.
- Clean after every use: Don’t rely on others.
- Store cleaning supplies nearby: Encourage others to clean too.
Data shows that shared kitchen appliances are 30% more likely to harbor bacteria if not cleaned regularly.
Credit: www.reddit.com
Comparison Of Ninja Blender Bottom Cleaning With Other Brands
Ninja blenders are popular, but how does cleaning their bottom compare to other brands?
| Brand | Ease of Cleaning | Removable Parts | Common Issues |
|---|---|---|---|
| Ninja | Easy | Blade, gasket | Mold under gasket |
| Vitamix | Moderate | Blade (some models) | Hard-to-reach drive socket |
| NutriBullet | Easy | Blade, base | Sticky residue |
| Oster | Moderate | Blade | Leaks around base |
Ninja blenders stand out for easy cleaning and removable parts. However, the gasket area needs special attention to prevent mold.
Expert Advice For Long-term Maintenance
Long-term care is just as important as regular cleaning. Here are expert tips for keeping the bottom of your Ninja blender in top shape:
- Inspect parts monthly: Look for cracks or wear.
- Lubricate the drive socket: Use food-safe lubricant if recommended by Ninja.
- Avoid blending hot liquids: Steam can damage the base.
- Store in a dry place: Moisture causes rust and mold.
Most users forget to check the drive socket for buildup, but this area can block power and cause overheating.
Cleaning For Different Types Of Blender Use
The cleaning routine changes depending on what you blend. Here’s how to adjust:
Smoothies And Juices
- Clean after every use.
- Check for sticky spills under the jar.
Soups And Sauces
- Deep clean weekly, as thicker liquids can seep into the gasket.
Dry Ingredients (nuts, Seeds)
- Check for crumbs in the drive socket.
- Use compressed air monthly.
For best results, tailor your cleaning routine to your blending habits.
Advanced Cleaning Techniques
If you want to take your cleaning to the next level, try these advanced techniques:
- Steam cleaning: Hold a steam cleaner near the base (but avoid direct contact). The steam loosens residue without soaking electrical parts.
- UV sanitizing: Use a UV light wand to kill bacteria after cleaning.
- Disassemble further: Some models allow you to take apart the blade base for deeper cleaning.
These methods are optional but useful for heavy blender users or those with allergies.
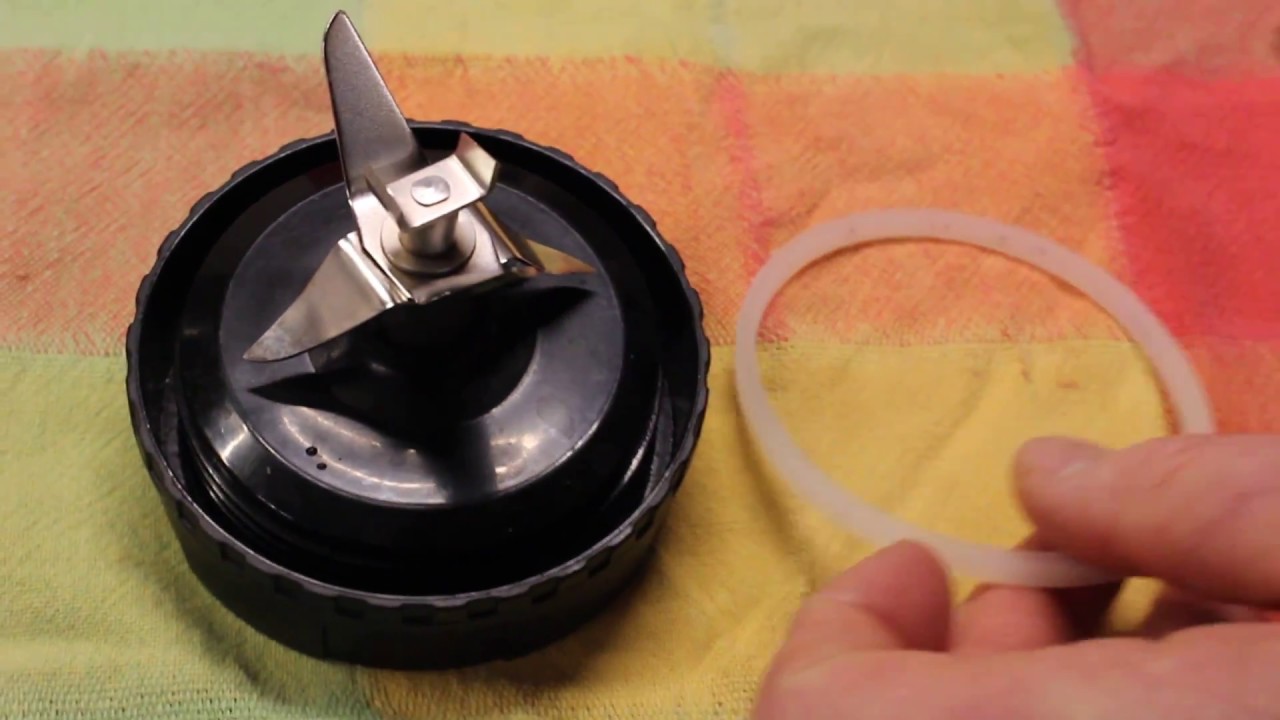
Credit: www.youtube.com
Frequently Asked Questions
How Do I Clean Under The Gasket Of My Ninja Blender?
Remove the gasket carefully. Wash with soap and water, then scrub with a toothbrush. Make sure to dry completely before reassembling. If mold is present, soak in vinegar for 10 minutes.
Can I Put The Motor Base In The Dishwasher?
No, the motor base should never go in the dishwasher or be submerged in water. Clean it only with a damp cloth and mild soap.
What Should I Do If My Blender Still Smells After Cleaning?
Try deep cleaning with baking soda and vinegar. If the odor persists, check for mold under the gasket or inside the drive socket. Replace parts if necessary.
How Often Should I Clean The Bottom Of My Ninja Blender?
Clean after every use for best hygiene. Deep clean weekly, especially if you blend sticky or thick ingredients. Check for mold or buildup monthly.
Is It Safe To Use Bleach For Cleaning?
No, bleach can damage plastic and rubber parts. Use mild dish soap, vinegar, or baking soda instead.
Keeping your Ninja blender clean, especially the bottom, is one of the best ways to ensure safe, tasty blends and a long-lasting appliance. With regular care, you’ll avoid common problems and enjoy better performance. For official advice and replacement parts, visit the Ninja Kitchen website. Your blender deserves a little attention—so start cleaning today and see the difference.