How To Clean Immersion Blender Quickly and Easily
Keeping your immersion blender clean is not just about looking good in the kitchen. It’s about safety, performance, and making your favorite recipes without any unwanted surprises. An immersion blender, also called a stick blender or hand blender, is a handy tool for soups, smoothies, sauces, and more.
But after you blend, food often sticks to the blades, shaft, and handle. If you don’t clean it properly, bacteria can build up, parts can rust, and the blender can even stop working. Many people don’t know the safest way to clean this tool, or they miss key steps that help their blender last longer.
Let’s explore how to clean an immersion blender step by step, including tips for tricky spots, how to avoid common mistakes, and the best ways to keep your blender working like new. Whether you use your blender daily or only once in a while, this guide will help you master cleaning and care.
Why Cleaning Your Immersion Blender Matters
Most people clean their immersion blender quickly after use, but few realize how important thorough cleaning is. Food residue, especially from soups or dairy, can stick to the blades and shaft. Over time, this can cause:
- Bacterial growth: Hidden food can lead to mold or bacteria.
- Rust and corrosion: Metal parts are at risk if moisture stays on them.
- Reduced performance: Dull blades and sticky shafts make blending harder.
- Bad odors: Old food smells, especially from milk or eggs.
According to a 2022 study from the Food Safety Institute, kitchen tools with hard-to-clean parts are one of the top sources of household bacteria. Immersion blenders, with their narrow shafts and sharp blades, need special attention.
Understanding Your Immersion Blender
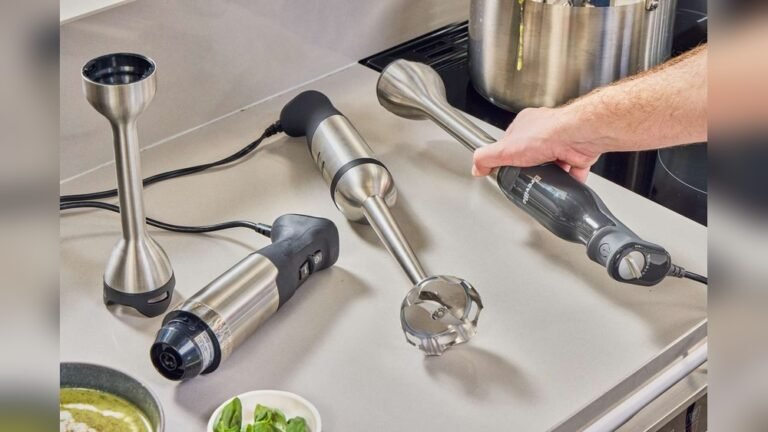
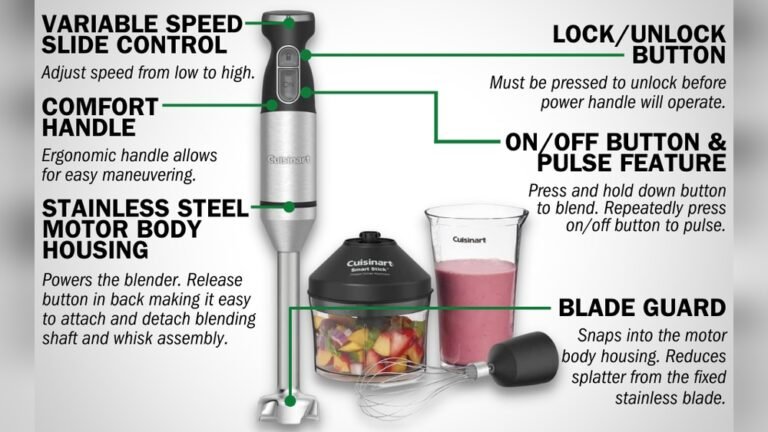
Before you start cleaning, it helps to know the parts of your immersion blender. Not all stick blenders are built the same, but most have:
- Detachable shaft: This is the long part with the blade at the end. Many blenders let you remove it for easy cleaning.
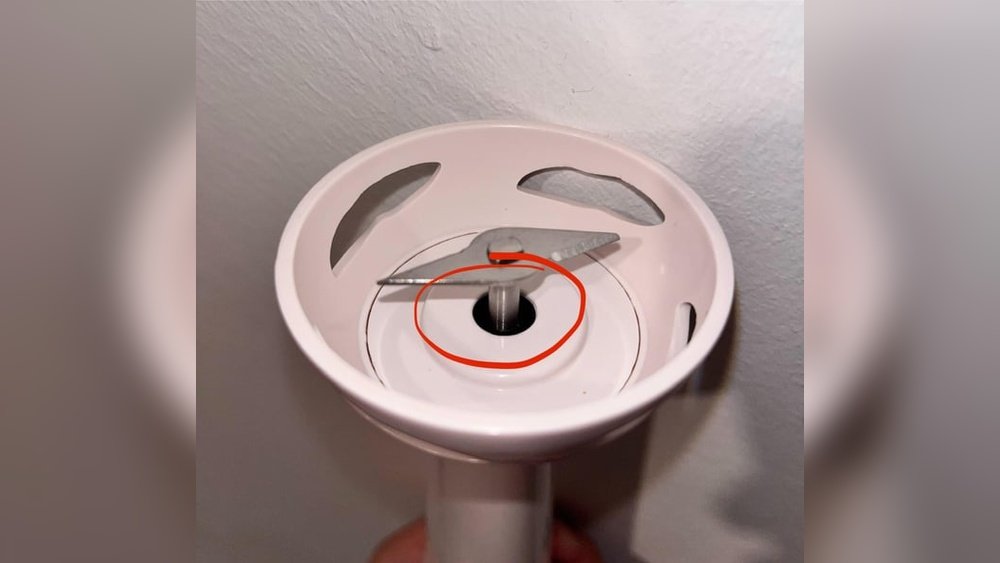
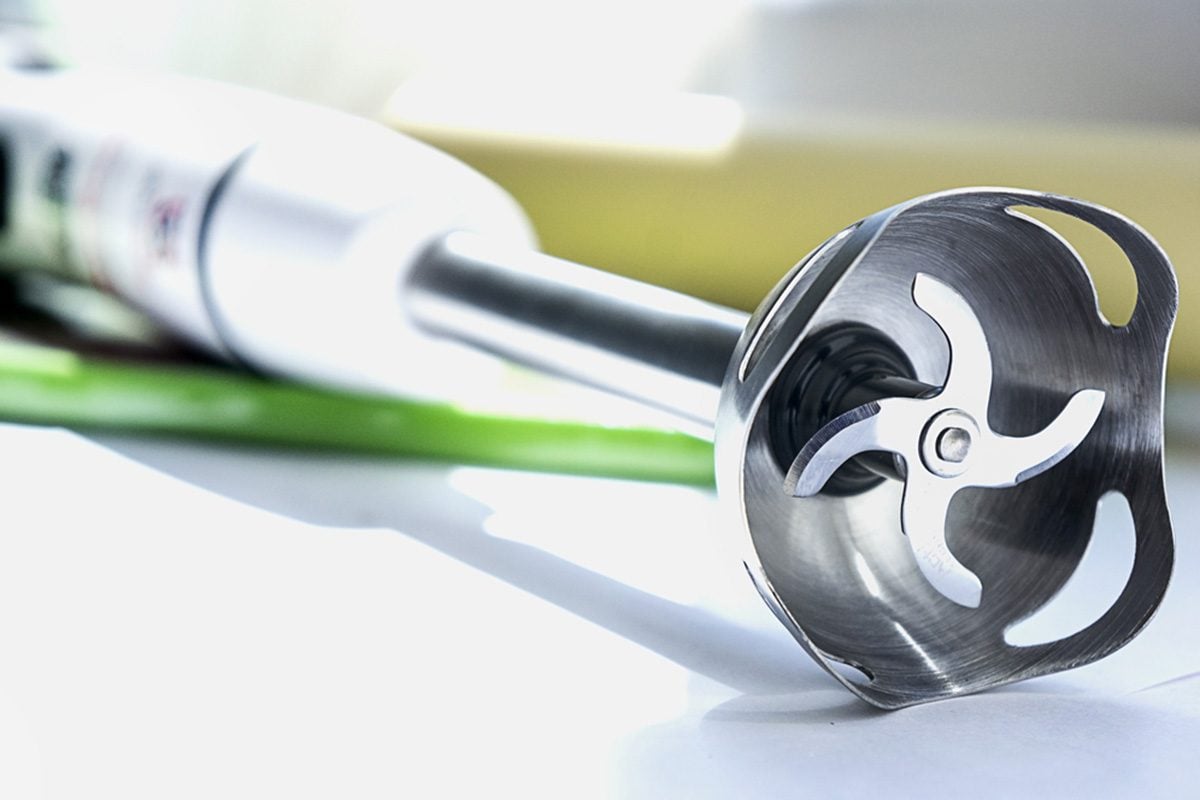
- Blade assembly: The sharp blades are usually at the bottom of the shaft.
- Motor housing: The top part with the controls. This part should never be submerged in water.
- Cord or battery: Some blenders plug into the wall; others are cordless.
Check your blender’s manual for specific instructions. For example, some brands have dishwasher-safe shafts, while others require hand washing.
Comparing Shaft Materials
Different immersion blenders use different materials for their shafts and blades. Here’s a quick comparison:
| Material | Cleaning Method | Durability | Dishwasher Safe? |
|---|---|---|---|
| Stainless Steel | Hand wash or dishwasher | High | Yes (usually) |
| Plastic | Hand wash only | Medium | No (usually) |
| Aluminum | Hand wash only | Low | No |
Most modern immersion blenders use stainless steel shafts and blades. They last longer and are easier to clean. Plastic shafts can stain and crack, while aluminum can corrode.
Step-by-step Cleaning Guide
Cleaning your immersion blender is easy if you follow the right steps. Don’t skip any stage, even if you’re in a rush. Here’s how to do it:
1. Unplug And Disassemble
Always unplug your immersion blender before cleaning. If it’s cordless, remove the battery or turn it off. Most blenders let you detach the shaft from the motor housing—do this before cleaning.
Non-obvious insight: The shaft can sometimes trap food inside. Gently twist and pull to check for hidden buildup.
2. Rinse Immediately
After blending, rinse the shaft and blade under warm water. This prevents food from drying and sticking. If you wait too long, you’ll need to scrub harder later.
Tip: Use a soft brush to remove food from around the blade, especially if you made thick soup or dough.
3. Wash With Soap
Fill a bowl with warm, soapy water. Dip the shaft and blade in, and use a sponge or brush to scrub all surfaces. Be careful around the sharp blades.
Practical example: For sticky foods like hummus or nut butter, let the shaft soak for 5–10 minutes. This softens residue and makes cleaning easier.
4. Clean The Motor Housing
The motor housing should never get wet. Use a damp cloth to wipe the exterior. Pay attention to buttons and seams, where flour or sauce can collect.
Common mistake: Some people run the motor under water, which can ruin the electronics. Always keep water away from this part.
5. Dry Thoroughly
Wipe all parts with a dry towel. Let the shaft and blade air dry before reassembling. Moisture can cause rust or mold if left on metal parts.
6. Reassemble And Store
Once dry, reattach the shaft to the motor housing. Store your immersion blender in a clean, dry place. If you use it often, keep it on your countertop; if not, store in a cabinet.
7. Deep Cleaning (weekly Or After Heavy Use)
Every week, or after blending strong-smelling foods, deep clean your blender. Mix equal parts water and white vinegar. Dip the shaft and blade in this solution for 10 minutes. Vinegar kills bacteria and removes odors.
Advanced tip: For tough stains or odors, use baking soda paste (1 tablespoon baking soda + a little water). Rub onto the shaft, let sit for 5 minutes, then rinse.
Cleaning Immersion Blender Attachments
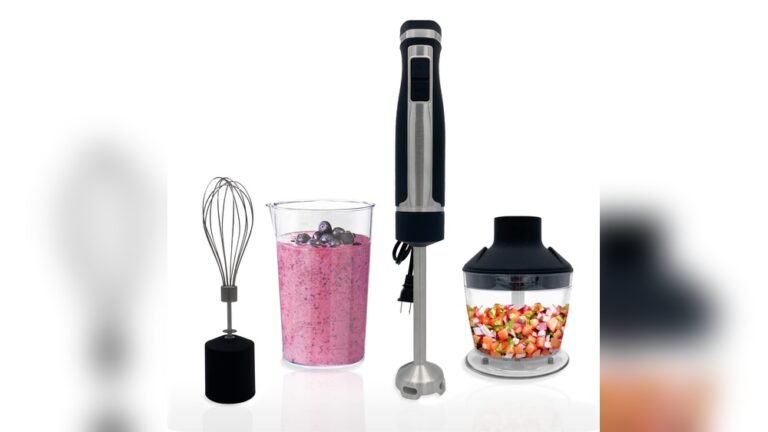
Many immersion blenders come with extra attachments: whisks, choppers, or cups. These parts also need cleaning.
- Whisk: Detach and wash with soap and water. Whisks can trap egg or cream—use a brush for tight spots.
- Chopper bowl: Remove the blade, wash the bowl and blade separately. Never submerge the motor base.
- Mixing cup: Most are dishwasher safe, but check the manual.
Here’s a comparison of cleaning different attachments:
| Attachment | Cleaning Difficulty | Best Cleaning Tool |
|---|---|---|
| Whisk | Medium | Bottle brush |
| Chopper bowl | Easy | Sponge |
| Mixing cup | Easy | Dishwasher |
How Often Should You Clean?
Cleaning frequency depends on how often you use your immersion blender. For most kitchens:
- After every use: Quick rinse and wash.
- Weekly: Deep clean, especially if you use it for sticky or strong-smelling foods.
- Monthly: Check for buildup inside the shaft or on the blades.
Some people forget to clean after blending just water or soft foods, but bacteria can still grow. Always wash after each use.
Common Cleaning Mistakes
Many people make errors when cleaning immersion blenders. Here are mistakes to avoid:
- Submerging the motor housing: This can ruin the blender and cause electrical problems.
- Using harsh scrubbers: Metal sponges can scratch blades and shafts.
- Leaving food on blades: Dried food is harder to remove and can dull blades.
- Ignoring attachments: Whisks and chopper bowls also need regular cleaning.
- Not drying properly: Moisture can cause rust or bad smells.
Non-obvious insight: The blade area is sharp, but also delicate. Scrubbing too hard can bend or dull the blades. Use gentle pressure.
Best Cleaning Tools For Immersion Blenders
Having the right tools makes cleaning easier. Consider these:
- Bottle brush: Reaches inside the shaft and around blades.
- Soft sponge: Good for exterior surfaces.
- Microfiber towel: Dries parts quickly.
- Cotton swab: Cleans around buttons and seams.
Avoid using metal brushes or abrasive pads; they damage the finish and blades.
Cleaning Immersion Blender In The Dishwasher
Some immersion blender shafts are dishwasher safe. Check your manual or look for a dishwasher symbol on the shaft. Usually, only the shaft and some attachments can go in the dishwasher—not the motor housing.
Dishwasher Safety Table
| Part | Dishwasher Safe? |
|---|---|
| Shaft | Yes (usually stainless steel) |
| Blade | Yes (if attached to shaft) |
| Motor Housing | No |
| Whisk | Sometimes |
| Chopper Bowl | Yes |
Even if your shaft is dishwasher safe, hand washing can help it last longer. Dishwashers use strong detergents and heat, which can wear out seals over time.
Special Tips For Tough Cleaning Challenges
Sometimes, cleaning your immersion blender isn’t straightforward. Here are solutions to common problems:
Removing Stuck-on Food
If food dries on the blade or shaft, soak it in warm, soapy water for 15–20 minutes. Use a bottle brush to loosen the residue. For extra stubborn spots, try baking soda paste.
Getting Rid Of Odors
Onion, garlic, and dairy smells can linger. Soak the shaft in a vinegar solution for 10 minutes. Rinse well. If odors persist, rub with lemon juice.
Preventing Rust
Always dry all parts thoroughly. If you see rust spots, scrub gently with baking soda. Avoid storing the blender in humid places.
Cleaning After Blending Hot Foods
Hot soup can cause food to splatter and stick. Let the shaft cool before cleaning. Sudden temperature changes can warp plastic or metal parts.
How To Clean Cordless Immersion Blenders
Cordless immersion blenders are popular for their flexibility. Cleaning is similar, but pay extra attention to battery safety. Do not let water touch charging ports. Use a dry cloth for these areas.
If your cordless blender has a sealed battery compartment, you can wash the shaft as usual. If the battery is removable, take it out before cleaning.

Credit: www.reddit.com
Quick Cleaning For Busy Kitchens
Sometimes you need to clean your immersion blender fast. Here’s a time-saving method:
- Fill a tall glass with warm, soapy water.
- Insert the shaft and blend for 10 seconds.
- Rinse under running water.
- Dry with a towel.
This method cleans the blade area efficiently. However, always do a deep clean once a week.
Safety Precautions During Cleaning
Immersion blenders are powerful tools. Always follow these safety steps:
- Unplug before cleaning: Prevents accidental starts.
- Handle blades carefully: They can cut skin.
- Keep water away from motor housing: Protects electrical parts.
- Do not use harsh chemicals: Stick to dish soap, vinegar, and baking soda.
Children should never clean immersion blenders without adult supervision.
Extending Your Immersion Blender’s Life
Proper cleaning helps your blender last longer. Most immersion blenders can work for 3–5 years if cleaned and stored well. Avoid overloading the blender, and don’t blend very hard ingredients unless your model is designed for it.
Non-obvious insight: Storing your immersion blender with food residue can attract bugs and cause odors. Always clean before storing.
Environmental Impact Of Cleaning
Using harsh chemicals or running the dishwasher too often can affect the environment. Stick to natural cleaning methods like vinegar and baking soda. If you wash by hand, use less water by rinsing all parts together.
Troubleshooting: When Your Blender Smells Or Looks Dirty
If your immersion blender smells bad or looks stained, try these steps:
- Deep clean with vinegar and baking soda.
- Scrub with a bottle brush.
- Let all parts air dry fully.
- If stains or smells remain, check your manual for safe cleaning tips.
Some stains will not come off if the shaft is plastic. In this case, replace the shaft if needed.
Immersion Blender Cleaning Statistics
- According to the Food Safety Institute, 25% of home cooks admit to skipping cleaning after quick blending jobs.
- A 2021 survey found that 40% of immersion blenders show signs of rust or odor after two years, mostly from improper cleaning.
- Stainless steel shafts last 30% longer than plastic when cleaned regularly.

Credit: www.reddit.com
Real-life Example: Cleaning After Making Soup
Imagine you’ve made tomato soup with your immersion blender. The shaft is red and smells of garlic. Here’s what to do:
- Immediately rinse under warm water.
- Soak in vinegar solution for 10 minutes.
- Scrub with a bottle brush.
- Dry with a towel.
- If the smell remains, rub with lemon juice and rinse again.
This routine keeps your blender fresh and ready for the next meal.
When To Replace Blender Parts
If your shaft is cracked, blades are dull, or attachments don’t fit, it’s time to replace. Most brands sell replacement shafts and blades. Do not use the blender if parts are damaged; this can be unsafe.
Immersion Blender Brands And Cleaning Features
Some brands offer special cleaning features:
- Braun: Dishwasher-safe shaft and blade.
- KitchenAid: Easy-to-remove shaft, dishwasher safe.
- Cuisinart: Attachments are dishwasher safe.
Always check your model’s manual for the best cleaning advice. For more details on cleaning kitchen appliances, see Wikipedia.
Frequently Asked Questions
How Do I Clean The Blade Area Safely?
Unplug the blender, detach the shaft, and use a bottle brush or soft sponge. Avoid touching blades directly. Soak in warm, soapy water if food is stuck.
Can I Put My Immersion Blender In The Dishwasher?
Usually only the shaft and some attachments are dishwasher safe. Never put the motor housing in water or the dishwasher. Check your manual for details.
What Should I Do If My Immersion Blender Smells Bad?
Deep clean using vinegar or lemon juice. Let the shaft soak for 10 minutes, then rinse and dry. If smells persist, scrub with baking soda paste.
How Often Should I Deep Clean My Immersion Blender?
Deep clean once a week or after blending strong-smelling or sticky foods. Daily cleaning is needed after each use, even for soft foods.
Is It Safe To Use Harsh Chemicals For Cleaning?
No, avoid harsh chemicals. Use dish soap, vinegar, baking soda, or lemon juice. Harsh cleaners can damage the shaft, blades, and attachments.
Keeping your immersion blender clean is simple if you follow these steps. Regular cleaning helps your blender work better, last longer, and keeps your food safe. With good habits, your stick blender will be one of your favorite kitchen tools for years to come.
Credit: www.tasteofhome.com