How To Assemble An Oster Blender Jar In Two Minutes
Assembling an Oster blender jar means fitting the blade assembly, sealing ring, and collar together, then twisting that unit onto the bottom of the jar until it locks — the whole job takes about two minutes and needs no tools. Most Oster jars follow the same basic design, so the sequence below works whether you have a classic glass jar, a plastic blender jar, or a stainless steel model.
Key Takeaways
- The correct stacking order, from top to bottom, is jar → sealing ring → blade assembly → collar, then twist the whole unit onto the jar base.
- The sealing ring must sit flat on the jar’s rim before the blade assembly goes in; a pinched or missing ring is the number one cause of leaks.
- Line up the tabs on the collar with the notches on the jar, push down, and turn clockwise until it stops — you should feel a firm click or resistance.
- Never run the blender without the collar locked; a loose collar lets the blade assembly spin free and can spray liquid.
- Hand wash the sealing ring and blade assembly separately; the ring warps in hot dishwasher cycles and the blade edges dull against other dishes.
- If the jar wobbles or leaks after assembly, the collar is cross-threaded — unscrew it fully and start the twist again.
What You Need Before You Start
Gather your parts on a clean, flat surface before you begin. Losing a sealing ring down a drain or rolling a blade assembly off the counter is the most common way this job goes wrong, and it’s entirely preventable.
You should have four components. If any are missing, stop and identify which one before assembling, because a jar assembled without a sealing ring will leak on the first blend.
| Component | What It Looks Like | Where It Goes |
|---|---|---|
| Blender jar | Glass, plastic, or stainless container with a handle | Top of the stack |
| Sealing ring | Thin rubber or silicone ring, round or slightly squared | Between jar rim and blade base |
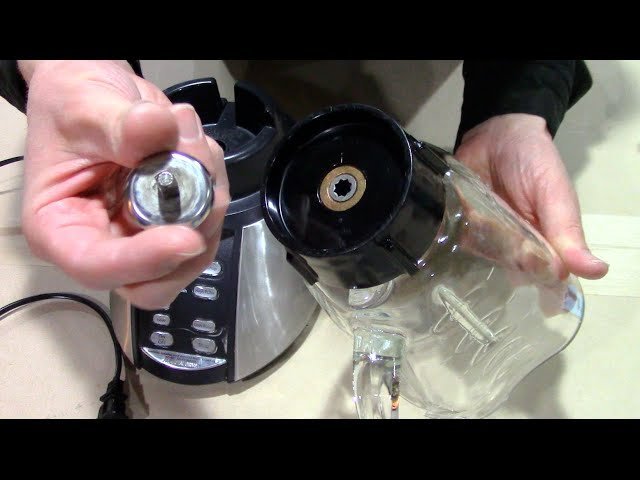
| Blade assembly | Metal disc with four blades and a central shaft | Sits on the sealing ring |
| Collar (base cap) | Plastic ring with internal threads or tabs | Screws onto the jar bottom, holding everything |
Pro Tip: Take a photo of your parts laid out before you assemble them the first time. When you disassemble for cleaning weeks later, the photo removes all guesswork about which piece goes where.
Identify Your Oster Model Type
Oster has made blender jars in a few distinct styles over the decades, and the assembly method differs slightly between them. Knowing which you have saves you from forcing a part that doesn’t belong.
- Classic Osterizer jars use a threaded collar that screws onto the jar’s molded threads. These are the most common and the easiest to assemble.
- Oster Pro and Oster Blend-N-Go style jars often use a tab-and-slot collar that pushes down and twists a quarter turn rather than screwing on.
- Oster Versa and Oster Master series jars typically use a locking collar with a visible arrow alignment mark.
- Oster stainless steel jars usually follow the classic threaded pattern but are heavier, so support the jar with one hand while twisting.
If you’re unsure which type you have, look at the inside of the collar. Visible spiral threads mean it screws on. Smooth interior walls with small raised tabs mean it twists and locks.
Step-by-Step: How to Assemble Your Oster Blender Jar
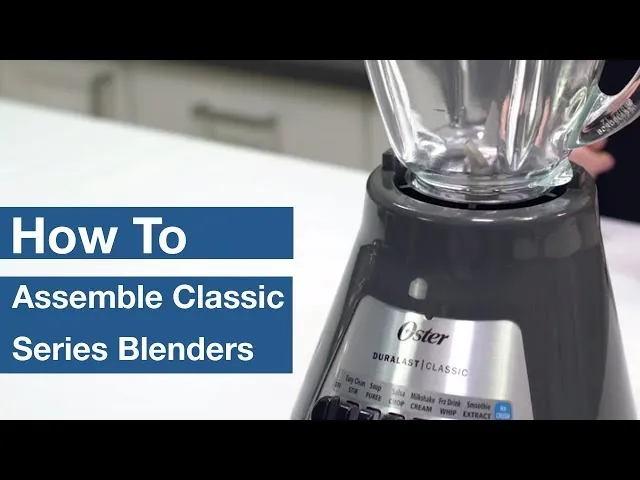
Work on a flat surface at waist height. Assembling a blender jar while holding it over a sink or in midair is how people drop blade assemblies and cut themselves.
Step 1: Wash and Dry Every Part
Wash the jar, sealing ring, blade assembly, and collar in warm soapy water before first use. Rinse thoroughly and dry each piece with a clean towel.
Warning: Never submerge the blade assembly’s central shaft in water for long periods if your model has a sealed bearing — moisture can work into the bearing and cause a grinding noise. A quick wash and immediate dry is fine.
Step 2: Place the Sealing Ring on the Jar Rim
Turn the jar upside down so its open mouth faces up toward you. Set the sealing ring flat on the rim. Press gently around the entire circumference so it seats evenly with no twists or folds.
Run a finger around the ring once. If you feel any bump or raised section, lift the ring and reseat it. A ring that’s even slightly off will let liquid escape under pressure.
Step 3: Set the Blade Assembly on the Ring
Lower the blade assembly onto the sealing ring with the blades facing down into the jar. The central shaft should point up toward you, away from the jar.
Don’t press hard. The blade assembly should rest flat on the ring under its own weight. If it rocks, the ring isn’t seated correctly — go back to Step 2.
Step 4: Fit the Collar Over the Blade Assembly
Place the collar over the blade assembly. On threaded models, the collar’s internal threads should meet the jar’s external threads. On tab-and-slot models, the collar’s tabs should align with the jar’s notches.
Hold the jar steady with one hand and the collar with the other. Don’t let go of either until the collar has caught.
Step 5: Twist Until It Locks
Turn the collar clockwise — to the right, like tightening a jar lid — until it stops. On threaded models this takes two or three full turns. On tab-and-slot models it takes about a quarter turn.
You should feel firm resistance at the end, not a soft stop. If the collar keeps spinning without tightening, it’s cross-threaded. Unscrew it completely and start again, making sure the collar sits level before you twist.
Step 6: Test the Seal Before Blending
Turn the assembled jar upright and fill it with one cup of water. Hold it over a sink and tilt it gently. Watch the seam where the collar meets the jar.
If water seeps out, the sealing ring is pinched or the collar isn’t fully tightened. Disassemble, reseat the ring, and reassemble. A properly assembled jar won’t leak a drop from a simple tilt.
| Step | Action | What Correct Feels Like |
|---|---|---|
| 1 | Wash and dry all parts | No grit or residue on any surface |
| 2 | Seat sealing ring on rim | Ring lies flat, no bumps under your finger |
| 3 | Place blade assembly on ring | Blade base rests flat, doesn’t rock |
| 4 | Fit collar over blade base | Collar sits level, threads or tabs engage |
| 5 | Twist clockwise to lock | Firm stop, no continued spinning |
| 6 | Water test over sink | No seepage at the seam |
How to Assemble the Lid
The lid is a separate assembly and often gets overlooked, but a lid that doesn’t seat properly causes splatter and, on some models, prevents the blender from starting.
Fitting the Two-Piece Lid
Most Oster jars use a two-piece lid: a clear plastic center cap and a flexible outer lid. Press the center cap into the outer lid until it snaps flat. Then set the outer lid on the jar and press down evenly around the rim.
If your lid has a pour spout or a vented corner, align that feature with the jar’s handle side. This keeps the spout clear of your hand while pouring.
Using the Feeder Cap Correctly
The small center cap is removable so you can add ingredients mid-blend. Twist or lift it out, add your oil, honey, or liquid, and replace it before increasing speed.
Pro Tip: Leave the center cap slightly loose when blending hot soups. Steam needs somewhere to escape, and a fully sealed hot jar can build pressure that pops the lid off.
Common Assembly Mistakes and Fixes
Almost every assembly problem comes down to one of five issues. Each has a quick fix.
| Problem | Likely Cause | Fix |
|---|---|---|
| Jar leaks at the base | Sealing ring pinched, missing, or worn | Reseat or replace the ring |
| Collar won’t tighten | Cross-threaded or wrong collar for the jar | Unscrew fully, realign, retwist |
| Blade assembly spins free | Collar not locked down | Twist collar further until it stops |
| Jar wobbles on the base | Collar not seated level | Disassemble and reassemble on a flat surface |
| Blender won’t start | Lid not fully seated on safety-interlock models | Press lid down evenly around the rim |
When the Sealing Ring Is the Problem
The sealing ring is the cheapest part to replace and the most common failure point. Over time it hardens, flattens, or develops small cracks. If your jar leaks even when everything is tightened correctly, replace the ring.
Replacement rings are sold in multi-packs and are usually labeled by jar size. Measure your jar’s opening diameter before ordering, or check the model number printed on the bottom of the jar or the base.
When the Collar Is the Problem
Cracked collars are common on older jars, especially plastic ones that have been dropped. Inspect the collar’s threads or tabs for chips. A collar with a broken tab will never lock securely, no matter how hard you twist.
Replacement collars are widely available and are usually sold with a new sealing ring included. Match the collar to your jar style — threaded versus tab-and-slot — not just to the Oster brand name.
Cleaning and Reassembly After Use
The way you disassemble and clean the jar determines how easily it goes back together next time.
Disassembly Order
Unscrew the collar counterclockwise. Lift off the collar, then the blade assembly, then peel the sealing ring off the jar rim. Set the blade assembly aside first, out of reach of children and away from the edge of the counter.
Washing Each Part
- Glass jars: Dishwasher-safe on the top rack, or hand wash with a bottle brush.
- Plastic jars: Hand wash only in most cases; check the bottom for a dishwasher symbol.
- Stainless steel jars: Hand wash to preserve the finish.
- Blade assemblies: Hand wash carefully with a long-handled brush, holding the blade hub away from your fingers.
- Sealing rings: Hand wash in warm water and air dry flat.
- Collars: Hand wash; hot dishwasher cycles can warp the plastic and ruin the fit.
Warning: Never put a blade assembly in the dishwasher if your model’s instructions say hand wash only. The heat and detergent can degrade the bearing seal, and a leaking bearing will eventually seize.
Drying and Storing
Air dry all parts completely before reassembling for storage. Moisture trapped between the sealing ring and the jar rim encourages mildew, which leaves a persistent smell.
Store the jar assembled with the collar only lightly tightened, or store the parts separately in a dry cabinet. A collar left cranked down for months can compress the sealing ring permanently.
Frequently Asked Questions
Does the sealing ring go above or below the blades?
The sealing ring goes between the jar rim and the blade assembly — so it sits below the blades, against the glass or plastic. The blade assembly rests on top of the ring, and the collar holds both against the jar. If you put the ring above the blade base, it won’t seal and the jar will leak immediately.
Why does my Oster blender jar leak after I assemble it?
The most common cause is a pinched, twisted, or missing sealing ring. The second most common cause is a collar that isn’t fully tightened. Disassemble the jar, check that the ring lies flat with no folds, then reassemble and twist the collar until it stops firmly. If it still leaks, replace the ring.
Can I use my Oster blender jar without the sealing ring?
No. The sealing ring creates the watertight barrier between the jar and the blade assembly. Without it, liquid will run straight out of the bottom of the jar and onto the motor base, which can damage the appliance. Always replace a lost or damaged ring before blending.
How do I know if my collar is cross-threaded?
A cross-threaded collar feels like it’s tightening but never reaches a firm stop, and the jar may wobble when you set it down. Unscrew the collar completely, set it level on the jar, and begin the twist again with light downward pressure. Cross-threading is almost always caused by starting the twist at an angle.
Can I put the whole assembled jar in the dishwasher?
Only if your model’s instructions say so, and even then, remove the sealing ring and blade assembly first. Most Oster jars are top-rack dishwasher-safe, but the blade assembly and sealing ring should be hand washed. Hot cycles warp sealing rings and can damage the blade bearing over time.
How tight should the collar be?
Tight enough that it stops firmly and the jar doesn’t leak when tilted, but not so tight that you need to strain. Hand-tight is the standard. Over-tightening compresses the sealing ring and shortens its life, and it makes the jar hard to disassemble for cleaning.
Conclusion
Once the collar is locked and the water test comes back dry, you’re ready to blend. Fill the jar no more than two-thirds full on your first run, start on the lowest speed, and work up — that habit protects both the seal you just assembled and the motor underneath it.