How To Start Ninja Blender: Quick Guide for Beginners
If you just bought a Ninja Blender, you might feel excited to make smoothies, sauces, or even soup. But starting a new kitchen appliance can feel confusing, especially if you’ve never used a blender like this before. You may wonder about the right way to assemble the parts, how to use the different settings, and how to clean it safely. Don’t worry—this guide will walk you through every step, from unboxing to blending your first recipe. You’ll also learn some key tips and safety advice that many new users miss. By the end, you’ll feel confident starting your Ninja Blender, whether you’re making a quick breakfast or preparing a meal for your family.
Getting To Know Your Ninja Blender
Before you can start blending, it’s important to understand the parts of your Ninja Blender. While models can differ, most Ninja Blenders share some basic features. Knowing what each part does will help you set up the blender the right way and avoid mistakes that could damage the machine or cause spills.
Main Parts Of A Ninja Blender
- Motor Base: This is the heavy bottom part that powers the blades.
- Pitcher or Jar: The large container where you put your ingredients.
- Lid: Covers the pitcher to keep everything inside while blending.
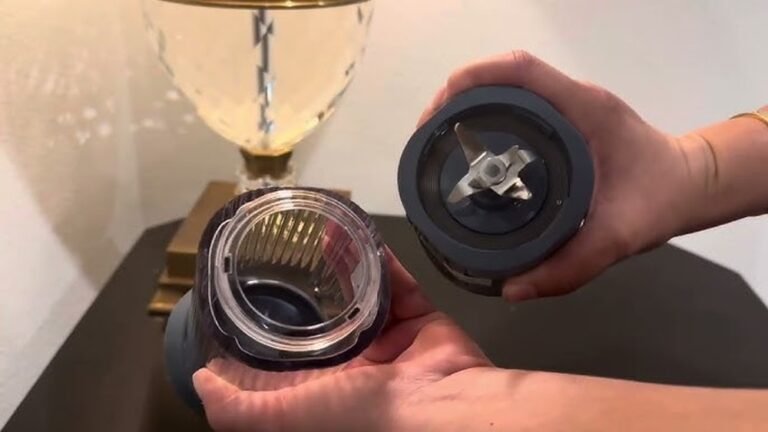
- Blade Assembly: Sharp, removable blades that fit inside the pitcher.
- Control Panel: Buttons or dials to choose blending speed and programs.
- Pour Spout: Some lids have a spout for easy pouring.
- Safety Lock Mechanism: Prevents the blender from running if not assembled correctly.
Some Ninja models include extra attachments like single-serve cups, food processor bowls, or dough hooks. Always check your specific model’s manual to see what’s included.
How Ninja Blenders Compare To Other Brands
Ninja Blenders are popular for their strong motors and sharp blades. They’re often compared to brands like Vitamix and NutriBullet. Here’s a quick comparison for context:
| Feature | Ninja Blender | Vitamix | NutriBullet |
|---|---|---|---|
| Motor Power | 900–1500 watts | 1200–1500+ watts | 600–1200 watts |
| Blade Design | Stacked, multi-level | Flat, 4-prong | Flat, 6-prong |
| Price Range | $$ | $$$ | $ |
| Program Options | Several presets | Variable speed, presets | Few presets |
Ninja is known for affordability and versatility, which makes it a good choice for home kitchens.
Unboxing And Assembling Your Ninja Blender
Unboxing a new blender is more than just taking it out of the box. You need to check all the parts and wash them before first use. Assembling it the right way is important for safety and performance.
Steps To Unbox And Inspect
- Take all parts out of the box and lay them on a clean surface.
- Check for the motor base, pitcher, lid, blade assembly, and any extra accessories.
- Remove any plastic or packaging from the parts.
- Make sure nothing is cracked or damaged. If something is missing or broken, contact Ninja customer support before using the blender.
Washing Before First Use
It’s important to wash the blender parts before using them for the first time. Some packaging chemicals or dust can stay on the parts from the factory.
- Wash the pitcher, lid, and blades in warm, soapy water.
- Rinse and dry all parts thoroughly.
- Never put the motor base in water. Wipe it with a damp cloth instead.
Assembling The Blender
Now, you’re ready to put the parts together. Here’s how:
- Place the motor base on a flat, dry surface near an electrical outlet.
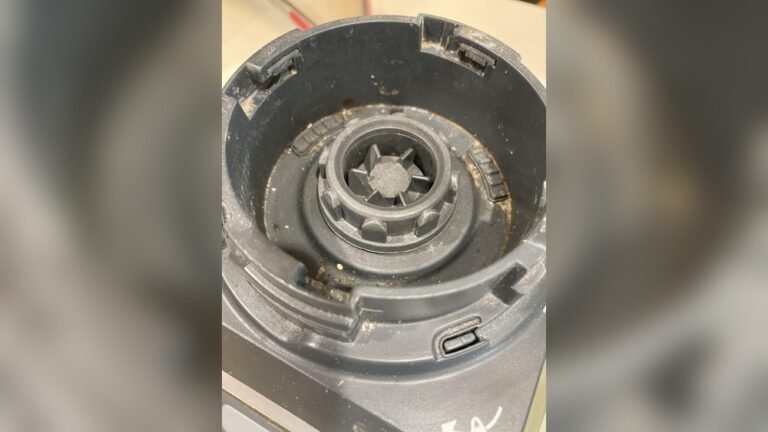
- Insert the blade assembly into the pitcher. The blades should sit securely on the drive gear at the bottom.
- Add your ingredients into the pitcher. Don’t overfill—use the maximum fill line as a guide.
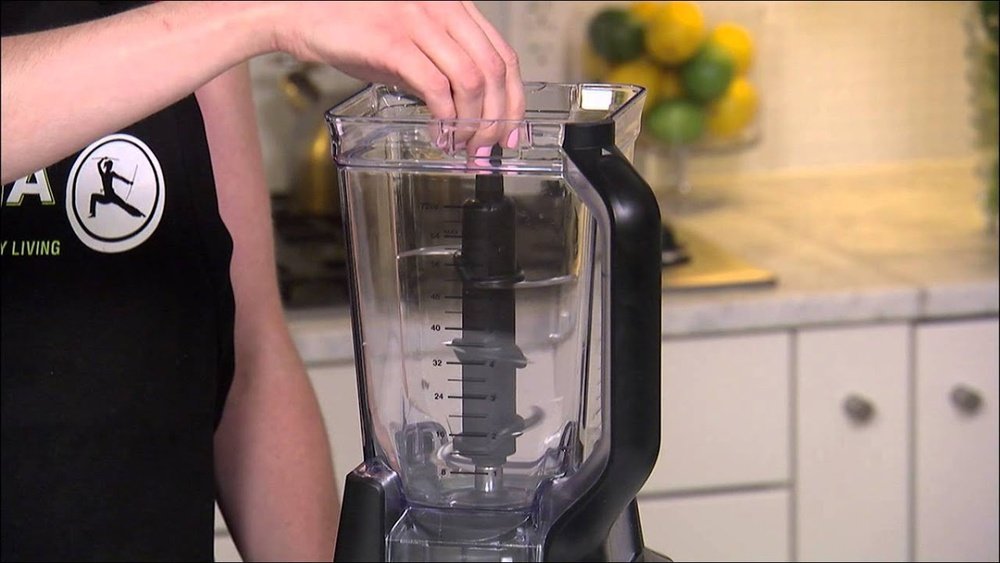
- Lock the lid onto the pitcher. Most Ninja lids have a locking handle or tab. Push down until you hear or feel a “click.”
- Place the pitcher onto the motor base. Align the handle with the front or side, depending on your model.
- Turn the pitcher clockwise until it locks into place. If the pitcher is not locked, the blender will not start.
Pro Tip: Many first-time users forget to align the lid and pitcher. If the safety locks are not engaged, the blender will not run. Double-check all locks before trying to start.
Powering Up: Plugging In And First-time Safety
Plugging in a blender seems simple, but a few safety steps can prevent accidents or damage. Here’s what you should know.
Electrical Safety Tips
- Plug the blender directly into a wall outlet. Avoid using extension cords or adapters, as they may not support the power needed.
- Keep the blender on a stable, flat surface. Never use it on a wet counter.
- Make sure your hands are dry when plugging in or touching any electrical parts.
- If your model has a resettable fuse or circuit breaker on the plug, make sure it’s set to “on.”
What To Expect When Plugging In
After plugging in, most Ninja Blenders show a light on the control panel. If nothing lights up, check:
- Is the pitcher fully locked onto the base?
- Is the lid secure and locked?
- Is the outlet working?
Non-Obvious Insight: Some Ninja models will not show any lights or respond until the pitcher and lid are perfectly aligned and locked. This safety feature confuses many beginners.
Understanding The Control Panel And Settings
Ninja Blenders have different control panels depending on the model. Some use simple dials, while others have digital buttons and pre-programmed settings. Understanding these controls will help you use the blender for many recipes.
Common Controls On Ninja Blenders
- Power Button: Turns the blender on or off.
- Pulse Button: Blends in short bursts for chopping or mixing.
- Speed Settings: Usually labeled as Low, Medium, and High.
- Preset Programs: Options like “Smoothie,” “Ice Crush,” “Dough,” or “Extract.”
- Timer Display: Some models show the time left in a preset program.
Example Control Panel Layout
Here’s a general idea of what you might see:
| Button | Function |
|---|---|
| Power | Activates the blender |
| Pulse | Short, quick blending bursts |
| Low/Med/High | Different speed levels for various textures |
| Preset Programs | Automatic blending for smoothies, ice, soups, etc. |
| Timer | Counts up or down, depending on the program |
Pro Tip: If your blender has many buttons, start with the Pulse and Low settings. These are easiest for beginners and help you learn the power of your machine.
Step-by-step: How To Start Your Ninja Blender
Now that you know the parts and controls, it’s time to start blending. Here’s a step-by-step guide for the first use:
- Place the Motor Base: Set it on a flat, stable surface close to a wall outlet.
- Assemble the Pitcher and Blade: Insert the blade into the pitcher and add your ingredients.
- Lock the Lid: Secure the lid until you hear a “click.”
- Attach the Pitcher to the Base: Align it with the arrows or marks and turn to lock.
- Plug in the Blender: Use a dry hand and plug it directly into the wall.
- Turn on the Power: Press the power button. Look for lights or display to turn on.
- Choose Your Setting: Pick a speed or preset program. If unsure, start with “Low” or “Smoothie.”
- Start Blending: Press the selected button. The blades will spin and blend your ingredients.
- Stop or Pause: Press the power or stop button when your blend looks done.
- Unlock and Pour: Remove the pitcher, take off the lid, and pour out your blend.
Example: Making A Basic Smoothie
If you want to blend a simple smoothie, here’s a quick recipe and process:
- 1 cup frozen fruit (berries or mango)
- 1 banana
- 1 cup milk or plant-based milk
- ½ cup yogurt (optional)
- 1 tablespoon honey (optional)
- Handful of ice cubes
Add the ingredients in this order: liquids first, then soft items, then frozen or hard items on top. This helps the blades spin freely.
- Lock the lid.
- Select “Smoothie” or “Low” speed.
- Blend for about 45–60 seconds.
- If needed, use the pulse button to break up chunks.
- Pour and enjoy.
Non-Obvious Insight: Adding liquid first helps prevent air pockets that can stop the blades. Many beginners make the mistake of adding ice or frozen fruit first.
Common Mistakes And How To Avoid Them
Many new Ninja Blender users make similar mistakes. Avoiding these will save you time, frustration, and even money on repairs.
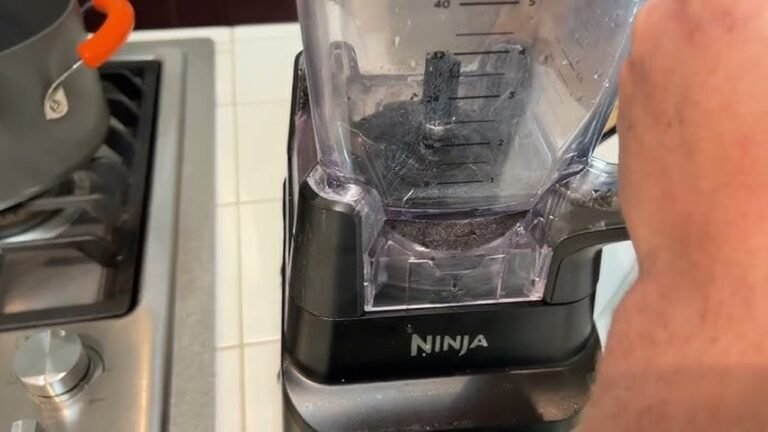
Overfilling The Pitcher
If you fill past the max line, the blender can leak or even stop working. Always leave some space for the ingredients to move.
Not Locking The Lid Or Pitcher
The blender has safety locks for a reason. If you don’t hear a “click,” it’s not locked. The machine won’t run until everything is secure.
Using Wrong Settings
Blending ice or nuts on “Low” may not work well. Use “High” or “Ice Crush” for tough ingredients.
Adding Hot Ingredients
Blending hot liquids in a sealed blender can cause pressure build-up. This is dangerous and can lead to spills or burns. Let hot foods cool slightly before blending.
Forgetting To Hold The Lid
For thick or tough blends, hold the lid down with your hand, especially at high speeds.
Washing The Motor Base
Never submerge or wash the motor base in water. Only wipe it with a damp cloth.
Pro Tip: If your blender stops working suddenly, unplug it and check for jams or overheating. Let it cool for 15-30 minutes before trying again.

Credit: www.youtube.com
Cleaning And Maintenance For Best Performance
Keeping your Ninja Blender clean is important for safety and taste. It also helps your blender last longer.
Daily Cleaning Steps
- After each use, remove the pitcher from the base.
- Take out the blade assembly—be careful, as the blades are sharp.
- Rinse the pitcher, lid, and blades in warm, soapy water.
- For tough stains, fill the pitcher halfway with warm water and a drop of dish soap. Blend on “Low” for 30 seconds, then rinse.
- Dry all parts before reassembling or storing.
Deep Cleaning Tips
- Once a week, soak the pitcher and lid in a mix of water and baking soda to remove odors.
- Clean under the blade assembly with a small brush.
- Check the gasket (rubber ring) under the lid or blades for trapped food.
Storing Your Blender
- Store the blender with the lid off to prevent smells.
- Keep the motor base in a dry spot, away from water or heat.
Pro Tip: Some Ninja parts are dishwasher-safe, but always check your model’s manual first. High heat can damage some plastics.
Using Different Ninja Blender Models
Ninja offers different blender models, from simple personal blenders to full-size countertop machines. Each has its own way to start and use.
Personal Ninja Blenders
Personal models like the Ninja Nutri Pro use single-serve cups. Steps:
- Add ingredients to the cup.
- Screw on the blade lid.
- Flip and press the cup into the motor base.
- Push down to start blending. Release to stop.
Countertop Ninja Blenders
Full-size models like the Ninja Professional or Ninja Foodi have larger pitchers and more settings. Steps:
- Assemble as described earlier.
- Use the control panel to choose speed or preset.
- Always lock the lid and pitcher for safety.
Ninja Food Processor Attachments
Some Ninja Blenders come with a food processor bowl. The process is similar but use the special blade and bowl for chopping, mixing dough, or slicing.
Comparison Of Common Ninja Models
Here’s a quick data table for some popular Ninja Blenders:
| Model | Type | Pitcher Size | Best For | Preset Programs |
|---|---|---|---|---|
| Ninja Professional 1000 | Countertop | 72 oz | Large batches, ice crushing | 3 |
| Ninja Nutri Pro | Personal | 24 oz | Single-serve smoothies | 1 |
| Ninja Foodi Power Pitcher | Countertop | 72 oz | Blending, food processing, dough | 6 |
| Ninja Compact System | Countertop + Food Processor | 72 oz + 40 oz | Multi-use | 4 |
Knowing your model helps you follow the right steps and use the best settings.
Troubleshooting: When Your Ninja Blender Won’t Start
Sometimes, you follow all the steps, but your Ninja Blender won’t turn on. This can be frustrating, but most problems are easy to fix.
Common Reasons And Fixes
- Pitcher Not Locked: Double-check that the pitcher is fully seated and turned until it “clicks.”
- Lid Not Secure: Make sure the lid is locked in place and any safety latches are closed.
- Power Not Connected: Check the wall outlet with another device to be sure it’s working.
- Overheated Motor: If the blender stopped during use, unplug it and let it cool for 15-30 minutes.
- Too Much Food: Remove some ingredients if the pitcher is overfilled.
- Broken Parts: If you see cracks or damage, do not use the blender. Contact customer support.
Non-Obvious Insight: Many people forget to check the small arrows or marks that must line up for the safety lock. Always look for these guides on your pitcher and lid.
When To Call For Help
If you’ve tried all the fixes and your blender still won’t start, it may be a deeper problem. Contact Ninja’s customer service or visit their official website for warranty and repair information.
Advanced Tips For Better Blending
Once you’re comfortable starting your Ninja Blender, you can get more from your machine with these advanced tips.
Layering Ingredients For Smooth Results
For smoother blends, add ingredients in this order:
- Liquids (milk, juice, water)
- Soft foods (yogurt, bananas)
- Hard foods (apples, carrots)
- Frozen foods (berries, ice)
This order helps the blades work better and reduces jams.
Using Pulse For Chunky Textures
If you want chunky salsa or chopped nuts, use the Pulse button. This gives you more control than a full blend.
Crushing Ice And Frozen Foods
Use the “Ice Crush” or “High” setting for the best results. Let ice or frozen foods sit out for a few minutes to soften before blending.
Avoiding Air Pockets (cavitation)
If your blender is spinning but not blending, an air pocket may have formed. Stop blending, open the lid, and stir the mix. Add a bit more liquid if needed.
Blending Hot Ingredients Safely
If your recipe needs blending hot soup or sauce:
- Allow the food to cool for a few minutes.
- Fill the pitcher only halfway.
- Remove the small cap from the lid (if available) to let steam escape.
- Cover the lid with a towel to catch any splatters.
Never blend boiling liquids, as steam can build pressure and cause burns.

Credit: www.wikihow.com
Recipes To Try With Your Ninja Blender
Now that you know how to start your Ninja Blender, here are some easy recipes to try.
Classic Green Smoothie
- 1 cup spinach
- 1 banana
- ½ apple, chopped
- 1 cup almond milk
- ½ cup ice
Blend until smooth. This recipe is packed with vitamins and tastes sweet, not bitter.
Quick Salsa
- 3 tomatoes, quartered
- ½ onion
- 1 jalapeño, seeded
- 1 handful cilantro
- Juice of 1 lime
- Salt to taste
Pulse until chunky. Serve with chips or on tacos.
Creamy Peanut Butter
- 2 cups roasted peanuts
- 1 tablespoon oil (optional)
- ¼ teaspoon salt
Blend on high for 2-3 minutes until smooth. Store in a jar.
Protein Shake
- 1 scoop protein powder
- 1 cup milk
- 1 tablespoon cocoa powder
- ½ cup frozen berries
Blend until creamy. Great for breakfast or post-workout.
Frozen Margarita (adults Only)
- 1 cup ice
- 2 ounces tequila
- 1 ounce triple sec
- 1 ounce lime juice
- 1 tablespoon sugar
Blend until slushy. Enjoy responsibly.
Keeping Your Ninja Blender Safe And Long-lasting
Your Ninja Blender can last for years with the right care. Here are key tips:
- Never force the pitcher or lid—if they don’t fit, check for misalignment.
- Always unplug before cleaning or moving the blender.
- If you smell burning or see smoke, stop using the blender and call customer support.
- Replace blades or gaskets if they show signs of wear.
Pro Tip: Many users forget to check the bottom of the pitcher for stuck-on food. Clean this area regularly to prevent smells and bacteria.
Where To Find More Information
If you need more help or want to see video tutorials, the official Ninja website offers manuals, FAQs, and recipes. For deep technical information, you can also check the Wikipedia page on Blenders.
Frequently Asked Questions
How Do I Know If My Ninja Blender Is Locked Correctly?
Look for the locking arrows or marks on the pitcher and lid. When both are aligned and you hear a “click,” the blender is locked and ready to use. If the control panel lights up, that’s another sign it’s secure.
Can I Put My Ninja Blender Parts In The Dishwasher?
Most Ninja pitchers, lids, and blades are top-rack dishwasher safe, but always check your manual. The motor base should never go in the dishwasher or be submerged in water.
Why Isn’t My Ninja Blender Turning On?
The most common reasons are incorrect assembly or the pitcher/lid not being locked. Double-check that all parts are secure. If still not working, check the power outlet, try another device, and let the blender cool if it overheated.
What’s The Best Way To Blend Ice Or Frozen Fruit?
Use the Ice Crush or High setting. Add a small amount of liquid to help the blades move. Let frozen items sit out for a minute or two before blending for smoother results.
How Do I Clean Under The Ninja Blender Blades?
Carefully remove the blade assembly from the pitcher. Use a small brush or sponge to reach under the blades and the gasket area. Always handle blades with care, as they are very sharp.
Starting a Ninja Blender is simple once you know the steps. With the right assembly, safety checks, and cleaning habits, your Ninja Blender will become a trusted tool in your kitchen. Try new recipes, experiment with settings, and enjoy the convenience of fast, powerful blending every day.

Credit: www.express-careclinic.com