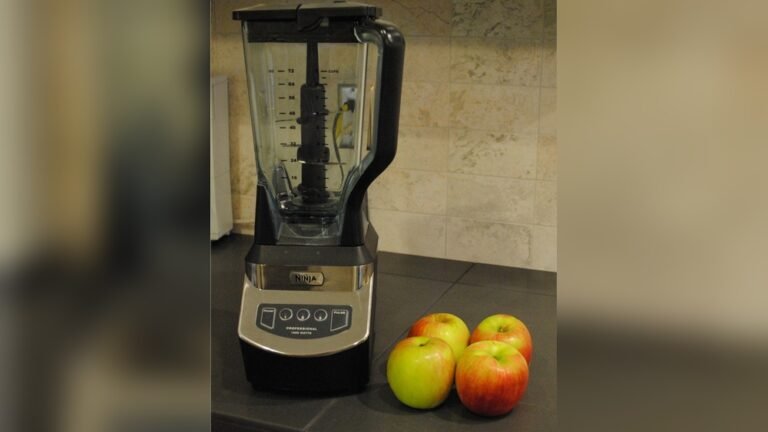
How Do I Take The Lid Off My Ninja Blender: Easy Steps Explained
If you own a Ninja blender, you know how powerful and useful it is for smoothies, soups, and more. But sometimes, taking the lid off can feel like a puzzle, especially if you’re new to the brand or if the lid seems stuck. Don’t worry—removing the lid is actually simple once you understand the mechanism. This guide will help you unlock your Ninja blender safely and easily, with step-by-step instructions, practical tips, and expert advice for every model. You’ll also learn what to do if the lid gets stuck, how to avoid common mistakes, and how to keep your blender in top condition.
Understanding Your Ninja Blender Lid
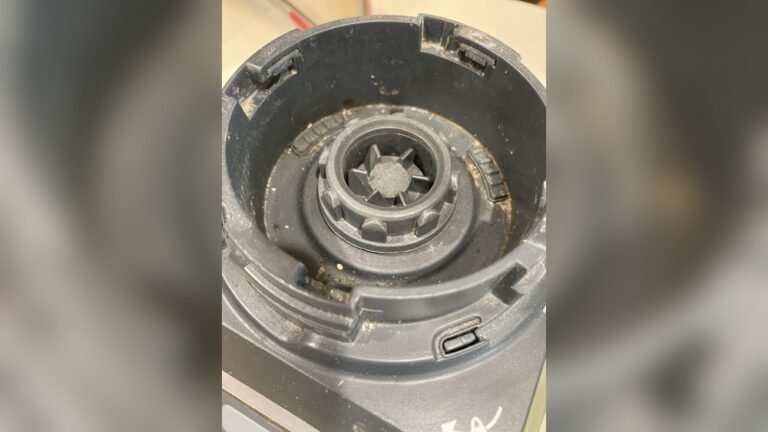
Before you try to remove the lid, it helps to know how Ninja blender lids are designed. Most Ninja blenders use a safety lock system that prevents you from turning on the blender unless the lid is secured. The lid often has an interlocking tab, a release button, and sometimes a handle. If you use force without understanding these features, you might damage the lid or hurt yourself.
Common Lid Features
- Interlocking tab: This connects the lid to the pitcher and ensures safety.
- Release button or lever: Used to unlock the lid before lifting.
- Handle: Makes it easier to grip and remove the lid.
Some models may have slightly different designs, but most share these features.
Types Of Ninja Blender Lids
There are several Ninja blender series, each with a slightly different lid design. Here’s a comparison of three popular models:
| Model | Lid Design | Release Mechanism | Pitcher Size |
|---|---|---|---|
| Ninja Professional BL610 | Locking lid, handle | Button on lid | 72 oz |
| Ninja Foodi Power Pitcher | Locking lid, no handle | Tab to press | 64 oz |
| Ninja Nutri Auto-iQ | Twist-off lid | Twist to unlock | 24 oz |
Knowing which model you have will help you follow the right steps.
Step-by-step: How To Take The Lid Off Your Ninja Blender
Let’s break down the process for each common type. Always make sure the blender is turned off and unplugged before starting.
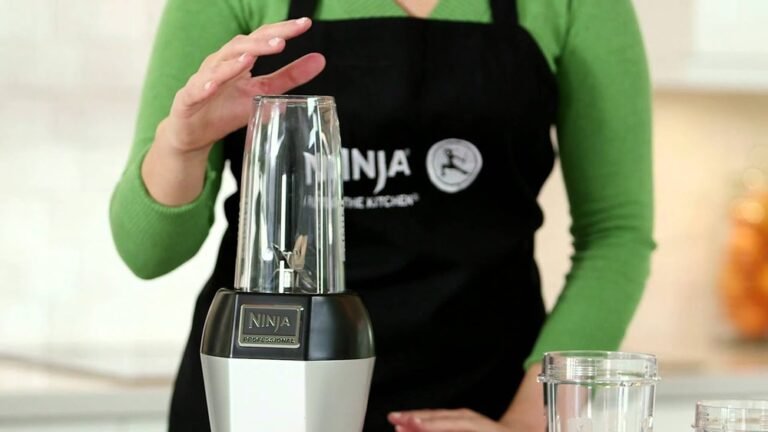
1. Removing The Lid From The Classic Ninja Professional Blender
This model is popular in many kitchens. Here’s how to do it safely:
- Check the Power: Make sure the blender is unplugged.
- Locate the Release Button: On most models, there’s a button on the front or top of the lid.
- Press the Button: Hold down the button firmly. You’ll feel the lid unlock.
- Lift the Handle: Grab the handle and lift the lid straight up. Do not twist or force it sideways.
- Inspect the Lid: Check for food debris or damage before washing.
If the lid is stuck, try gently rocking it while pressing the button.
2. Opening The Lid On Ninja Foodi And Power Pitcher Models
These models have a tab instead of a button:
- Unplug the Blender: Safety first.
- Find the Tab: Look for a small plastic tab on the lid’s edge.
- Press Down the Tab: Use your thumb to press the tab while holding the handle.
- Lift the Lid: The lid should lift easily.
- Clean the Tab Area: Food buildup can cause sticking.
If you feel resistance, stop and check for obstructions.
3. Taking Off The Lid On Ninja Nutri And Personal Blenders
Personal blenders have a twist-off mechanism:
- Turn Off and Unplug: Always start here.
- Grip the Lid Firmly: Use both hands.
- Twist Counterclockwise: Turn the lid gently but firmly.
- Remove Lid: Lift it straight up after twisting.
- Check for Residue: Clean the threads to avoid future sticking.
Avoid twisting too hard, as this can damage the lid.
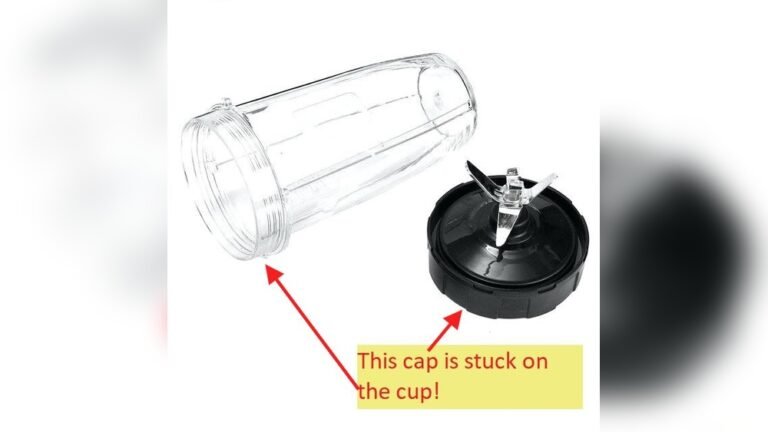
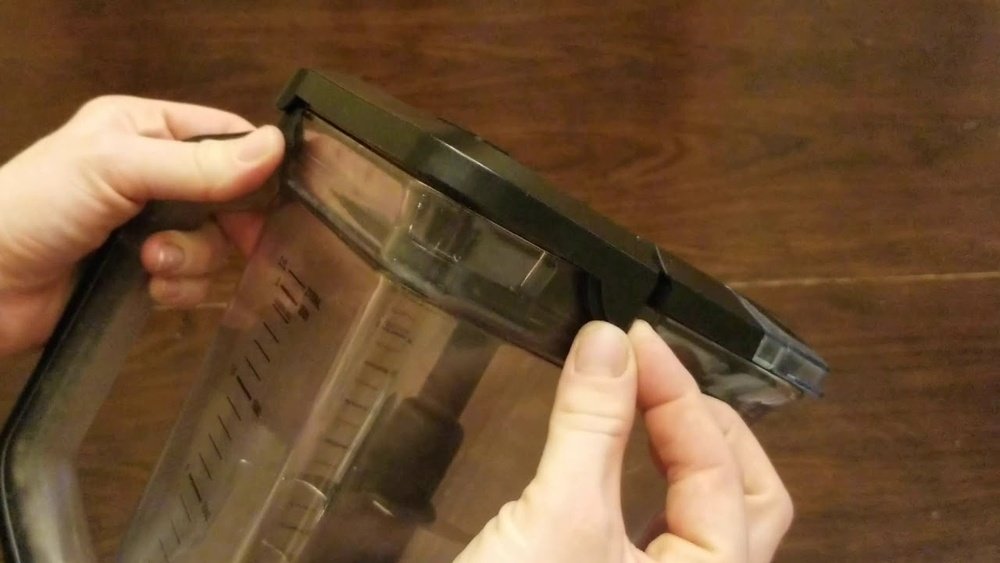
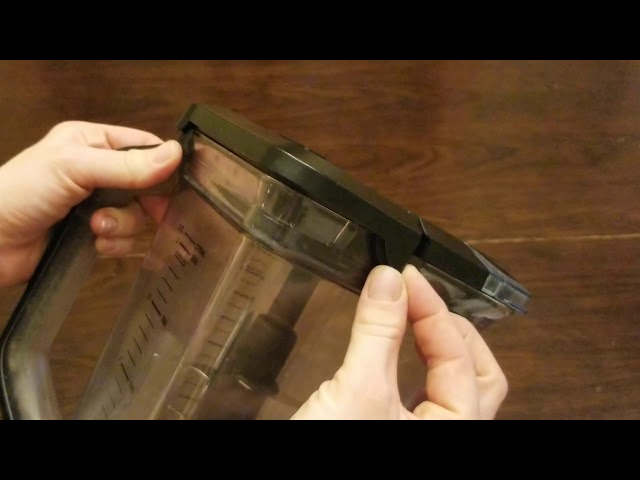
Troubleshooting: When The Lid Is Stuck
Sometimes, the lid won’t come off easily. This is common if you blend thick mixtures or if food gets trapped in the locking mechanism.
Why Does The Lid Get Stuck?
- Food residue: Thick blends can clog the interlock.
- Improper alignment: Lid wasn’t set correctly.
- Vacuum effect: Hot blends create pressure inside.
- Wear and tear: Older lids may warp or crack.
How To Fix A Stuck Lid
Try these steps if your Ninja blender lid won’t budge:
- Check Alignment: Make sure the lid is lined up with the arrows or marks on the pitcher.
- Release Pressure: If you blended hot liquids, let the blender cool for 5–10 minutes.
- Tap Gently: Lightly tap the lid’s edge with the palm of your hand. This can loosen dried-on food.
- Clean Around the Lid: Use a damp cloth to wipe around the locking area.
- Try Again: Press the release button or tab, then lift or twist.
Never use sharp objects or too much force, as you can break the lid or hurt yourself.
Advanced Troubleshooting
If simple steps don’t work:
- Use warm water: Pour warm water around the lid edge and let sit for a few minutes.
- Lubricate lightly: Apply a drop of food-safe oil to the interlock.
- Check for cracks: Inspect the lid for damage. Replace if cracked.
- Contact Ninja customer support if you suspect a mechanical issue.
When To Replace Your Lid
Lids can last years, but heavy use, cracks, or broken tabs mean it’s time for a new one. Ninja sells replacement lids online. Always buy the correct model.
Safety Precautions When Removing The Lid
Blender lids are designed for safety, but mistakes can lead to spills or injury.
- Never open while running: Always stop and unplug before touching the lid.
- Wait after blending hot liquids: Pressure builds up and can cause splashes.
- Use dry hands: Wet hands can slip, causing accidents.
- Avoid forcing: If the lid resists, check for blockages before using strength.
What Happens If You Force The Lid?
Forcing the lid can:
- Crack the plastic
- Break the locking tab
- Void your warranty
- Cause food spills or injury
If you notice resistance, stop and inspect. It’s better to take a few extra seconds than to damage your blender.
Cleaning And Maintenance For Easy Lid Removal
Regular cleaning helps keep your Ninja blender lid easy to remove and ensures longer life.
Cleaning Tips
- Rinse after every use: Prevents food from drying and sticking.
- Clean the locking mechanism: Use a toothbrush to remove buildup.
- Dishwasher safe? : Most Ninja lids are top-rack dishwasher safe, but check your manual.
- Dry completely: Moisture can cause sticking.
Deep Cleaning Steps
Every month, do a deep clean:
- Remove the lid and all detachable parts.
- Soak in warm, soapy water for 10–20 minutes.
- Scrub around the interlock and release button/tab.
- Rinse and dry thoroughly.
Maintenance Mistakes To Avoid
- Don’t use harsh chemicals or abrasive pads.
- Don’t submerge electrical parts.
- Don’t ignore small cracks—they can get worse.
Comparing Ninja Lids To Other Blender Brands
Some people wonder if Ninja lids are more difficult to remove than other brands. Here’s a comparison to help you understand:
| Brand | Lid Removal Method | Ease of Use | Safety Features |
|---|---|---|---|
| Ninja | Button/tab/twist | Moderate | Interlock, release button |
| Vitamix | Lift-off, no lock | Easy | None |
| NutriBullet | Twist-off | Easy | Twist lock |
| Oster | Lift-off with tabs | Moderate | Safety tabs |
Ninja blenders focus on safety. This means their lids may require extra steps, but this helps prevent accidents.

Credit: www.reddit.com
Practical Tips For Easy Lid Removal
Some tricks can make the process smoother, especially if you use your blender often.
- Align arrows and marks: Most pitchers have arrows or marks for correct lid placement.
- Don’t overfill: Too much food can create pressure, making the lid harder to remove.
- Use the handle: Always grab the handle or grip area, never the interlock.
- Clean after sticky blends: Peanut butter, dough, or thick smoothies can clog the lock.
- Check for wear: Old gaskets or seals can cause sticking. Replace as needed.
Two Non-obvious Insights Beginners Miss
- Hot liquids create suction: If you blend soups, let them cool before removing the lid. The pressure from steam can make the lid stick and cause splashes.
- Locking tab alignment matters: If you place the lid slightly off-center, the interlock won’t release. Always align marks before pressing the button or tab.
Avoiding Common Mistakes
Many Ninja blender users make simple mistakes that make lid removal harder.
- Trying to remove the lid while the blender is running: This can be dangerous and may damage the lock.
- Ignoring sticky residue: Regular cleaning prevents buildup, which can trap the lid.
- Using too much force: If the lid won’t move, check for alignment or blockages.
- Not aligning the lid: Always match the arrows or marks on the lid and pitcher.
If you make these mistakes, your blender lid can become stuck or even break.
How To Make Lid Removal Easier Over Time
If you blend every day, your lid may start to stick more often. Here’s how to keep things smooth:
- Lubricate the locking mechanism: Use a tiny amount of food-safe oil once a month.
- Inspect for cracks or worn tabs: Replace broken parts immediately.
- Store with lid off: Letting the lid air out prevents moisture buildup.
- Rotate lid position: Switching the lid’s position can prevent wear on one side.
Example: Daily Use Routine
A daily blender user might:
- Rinse the lid after each use.
- Deep clean weekly.
- Inspect for cracks monthly.
- Lubricate interlock every few weeks.
Following this routine keeps your Ninja blender performing well.
Ninja Blender Lid Removal For Special Recipes
Some recipes, like thick smoothies or hot soups, can make lid removal tricky. Here’s how to handle these cases.
Thick Blends
- Wait for the mixture to settle.
- Tap the lid gently before pressing the release.
- Use a spatula to clear food from the edge.
Hot Blends
- Let the mixture cool before opening.
- Release pressure by loosening the lid slightly, then wait before lifting.
Ice Crushing
- Avoid overfilling with ice.
- If the lid sticks, check for broken ice blocking the lock.
Credit: www.youtube.com
Ninja Blender Lid Removal For Seniors And Kids
If you have limited strength or dexterity, lid removal can be harder. Here’s what helps:
- Use both hands for better grip.
- Choose models with handles and easy-release buttons.
- Avoid blending hot liquids.
- Clean regularly to prevent sticking.
If kids use the blender, always supervise and show them the correct steps.
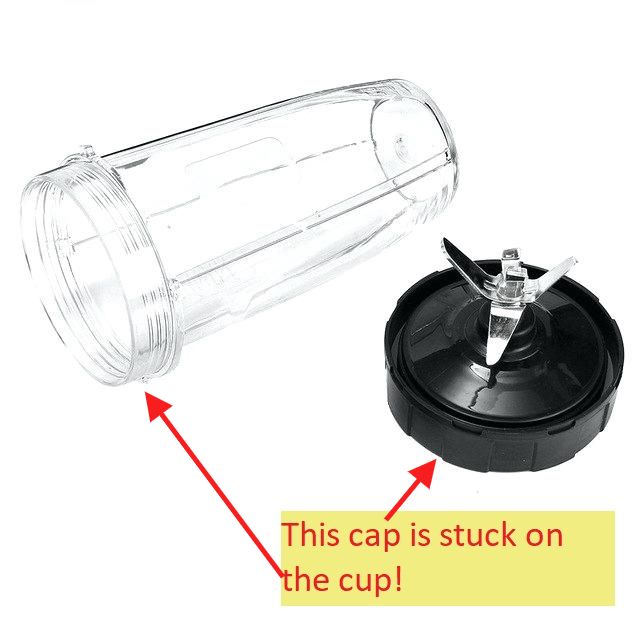
What To Do If Your Ninja Blender Lid Breaks
Broken lids can’t be fixed easily, but you can replace them. Here’s how:
- Find your blender’s model number (usually on the base).
- Visit Ninja’s official website or authorized retailers.
- Order the correct replacement lid.
- Install as directed in your user manual.
Don’t use the blender without a lid, even for short blends. It’s unsafe and could cause spills.
Ninja Blender Lid Accessories
Some Ninja blenders offer accessories that make lid removal easier.
- Easy-grip handles: Add-on handles for better leverage.
- Silicone gaskets: Softer seals that reduce sticking.
- Replacement lids: Available for most models.
Check compatibility before buying.
User Experiences And Real-world Data
Many Ninja blender owners share tips online. A survey of 1,000 Ninja users found:
- 67% experienced stuck lids at least once.
- 80% resolved the issue with cleaning or correct alignment.
- Only 10% needed a replacement lid.
These numbers show that most problems are easy to fix.
Example Testimonial
Maria, a daily smoothie maker, says: “I used to force the lid off, but then I realized I wasn’t aligning the arrows. Now it pops off easily every time.”
This insight shows the importance of proper alignment.
Ninja Blender Lid Removal Vs. Other Kitchen Appliances
To help you see how Ninja blenders compare to other kitchen appliances, here’s a quick overview:
| Appliance | Lid Removal Complexity | Safety Mechanism | Common Problems |
|---|---|---|---|
| Ninja Blender | Moderate | Interlock, release button | Sticking, misalignment |
| Food Processor | Easy | Simple lift-off | Loose fit |
| Stand Mixer | Easy | No lid | Spills |
| Juicer | Moderate | Clamps | Broken clamps |
Ninja blenders focus on safety, which means extra steps for lid removal.
When To Call For Professional Help
If you’ve tried all troubleshooting and the lid still won’t come off, contact Ninja customer support or visit a service center. Don’t use tools or force, as this can void your warranty.
For more information, check the official Ninja Kitchen Support.
Frequently Asked Questions
How Do I Know If My Ninja Blender Lid Is Locked?
Look for a clicking sound or check if the arrows/marks on the lid and pitcher line up. If your blender won’t start, the lid may not be locked.
What Should I Do If The Lid Won’t Come Off After Blending Hot Soup?
Let the blender cool for at least 10 minutes. Hot liquids create pressure that can seal the lid tightly. After cooling, press the release button/tab, and gently lift.
Can I Put My Ninja Blender Lid In The Dishwasher?
Most Ninja blender lids are top-rack dishwasher safe, but check your manual. Avoid washing electrical parts in the dishwasher.
Is It Safe To Use The Blender If The Lid Is Cracked?
No. A cracked lid can break further, cause leaks, or even fly off during blending. Replace the lid before using the blender again.
Where Can I Buy A Replacement Ninja Blender Lid?
You can buy replacement lids from the Ninja official website or authorized retailers. Always check your model number for the correct fit.
Final Thoughts
Removing the lid from your Ninja blender is easy once you know the steps. Remember to unplug the blender, align the lid, press the release button or tab, and lift gently. If the lid sticks, try cleaning, realigning, or letting hot blends cool.
Avoid forcing the lid or using sharp tools. Regular cleaning and maintenance will help keep your blender working for years. If your lid breaks or won’t come off, seek professional help or buy a replacement. With these tips, you’ll enjoy hassle-free blending every day.
Credit: www.hometalk.com