How To Clean Ninja Blender Gasket: Quick and Easy Steps
Keeping your Ninja blender in top shape is not just about rinsing the jar after each use. The gasket—that small, flexible ring sealing the blade assembly—holds the secret to real hygiene. This part traps food, liquid, and bacteria if ignored, leading to smells and even health risks. Many people overlook gasket cleaning because it feels tricky or unnecessary. But once you learn the right approach, it becomes easy, safe, and routine.
This guide reveals how to clean the Ninja blender gasket properly, step by step. You’ll learn the tools you need, how to remove and clean the gasket, and ways to prevent future buildup. We’ll also compare cleaning methods, share expert tips, and answer common questions.
If you want your Ninja blender to last longer and stay fresh, mastering gasket cleaning is essential.
Why Cleaning The Ninja Blender Gasket Matters
The gasket is a rubber or silicone ring inside the blade assembly. Its job is to create a tight seal, preventing leaks. However, every time you blend, tiny bits of smoothie, soup, or juice slip under the gasket. Over time, this hidden buildup can:
- Cause unpleasant smells
- Lead to mold and bacteria growth
- Affect blender performance
- Make the blender leak
Research shows that kitchen appliances with hidden parts (like gaskets) can harbor up to 400 times more bacteria than visibly clean surfaces. Neglecting gasket cleaning risks both your health and the flavor of your food.
Common Signs Your Gasket Needs Cleaning
- Persistent odor even after washing the jar
- Visible black or green spots near the blade base
- Leaking during blending
- Sticky residue around the blade assembly
If you notice any of these, it’s time to deep-clean your gasket.
Understanding Your Ninja Blender Gasket
Before cleaning, it helps to know where the gasket is and how it fits into your model. Ninja blenders have several designs, but most share these features:
- The gasket sits inside the blade assembly, often under the rotating blades.
- It may be black, gray, or clear.
- Some models have removable gaskets, others do not.
Here’s a quick comparison of Ninja blender models and their gasket features:
| Model | Gasket Location | Removable? | Cleaning Difficulty |
|---|---|---|---|
| Ninja Professional (BL610) | Blade assembly base | Yes | Medium |
| Ninja Auto-iQ (BL642) | Under blade | Yes | Easy |
| Ninja Nutri Pro (BL456) | Inside blade cap | No | Hard |
| Ninja Foodi Power Pitcher (SS401) | Blade base | Yes | Easy |
Check your model’s user manual if you’re unsure. Removable gaskets are much easier to clean, but even fixed ones can be cleaned with patience.
Tools And Materials Needed
You don’t need fancy gear to clean the gasket. Most supplies are available at home:
- Mild dish soap (avoid harsh chemicals)
- Warm water
- Small brush (a toothbrush or bottle brush works well)
- Cotton swabs for tight corners
- White vinegar (for deep cleaning)
- Paper towels or a clean cloth
- Tweezers (for removing stubborn gaskets)
- Rubber gloves (optional, for protection)
Avoid abrasive cleaners or metal brushes—these can damage the gasket or blade assembly.
Step-by-step: Cleaning The Ninja Blender Gasket
Proper cleaning means more than a quick rinse. Here’s how to clean the Ninja blender gasket safely and thoroughly.
1. Unplug And Disassemble
Safety first. Always unplug your blender before cleaning. Remove the jar from the base, unscrew the blade assembly, and set aside all parts.
2. Locate And Remove The Gasket
- Look for the rubber ring inside the blade assembly.
- If it’s removable, gently lift it out using your fingers or tweezers.
- For fixed gaskets, use a cotton swab or brush to clean around it.
Be careful not to stretch or tear the gasket.
3. Wash The Gasket
- Fill a bowl with warm soapy water.
- Drop the gasket in and let it soak for 10–15 minutes.
- Use a brush to scrub both sides, focusing on any sticky spots.
If you see mold or tough stains, add a splash of white vinegar to the water. Vinegar kills bacteria and removes odors.
4. Clean The Blade Assembly
- Wash the blade assembly in warm soapy water.
- Use a brush to scrub the area where the gasket sits.
Pay extra attention to grooves and corners.
5. Rinse And Dry
- Rinse the gasket and blade assembly under running water.
- Dry thoroughly with a paper towel or clean cloth.
Moisture left behind can cause mold, so make sure all parts are dry before reassembling.
6. Reassemble Carefully
- Place the dry gasket back in its position.
- Ensure it sits flat and snug—misalignment can cause leaks.
- Reattach the blade assembly to the jar.
7. Test For Leaks
Fill the jar with water, attach to the base, and blend for a few seconds. Check for leaks at the bottom. If you see drips, recheck the gasket placement.
Deep Cleaning Methods For Stubborn Buildup
Sometimes, regular cleaning isn’t enough. If your gasket has stubborn stains or smells, try these deeper methods.
Using Baking Soda
- Make a paste with baking soda and water.
- Apply to the gasket and let sit for 15 minutes.
- Scrub gently, then rinse.
Baking soda lifts odors and loosens dried-on residue.
Vinegar Soak
- Submerge the gasket in pure white vinegar for 30 minutes.
- Rinse well and dry.
Vinegar’s acidity kills germs and dissolves buildup. Avoid leaving the gasket in vinegar overnight—it can weaken the rubber.
Dishwasher Use
Some Ninja gaskets are dishwasher safe. Place them on the top rack and run a hot cycle. Always check your model’s manual first, as high heat may damage some gaskets.
Comparing Deep Cleaning Methods
Here’s how the main deep cleaning methods stack up:
| Method | Effectiveness | Time Needed | Risk of Damage |
|---|---|---|---|
| Baking Soda Paste | High | 15–20 min | Low |
| Vinegar Soak | Very High | 30 min | Medium |
| Dishwasher | Medium | 1 cycle | Medium |
For tough buildup, start with baking soda. Only use vinegar or dishwasher if baking soda doesn’t work.
Preventing Future Gasket Buildup
Once you’ve cleaned your gasket, keeping it clean is easier than starting from scratch. Here’s how to avoid future problems:
- Rinse immediately after use—don’t let food dry inside the jar.
- Disassemble and wash weekly—even if it looks clean.
- Dry all parts before reassembling—prevents mold.
- Avoid thick, sticky blends—these stick under the gasket. If you use nut butters or dough, clean the gasket right after.
- Store blender assembled—keeps dust out, but always dry first.
These habits keep your blender smelling fresh and working smoothly.
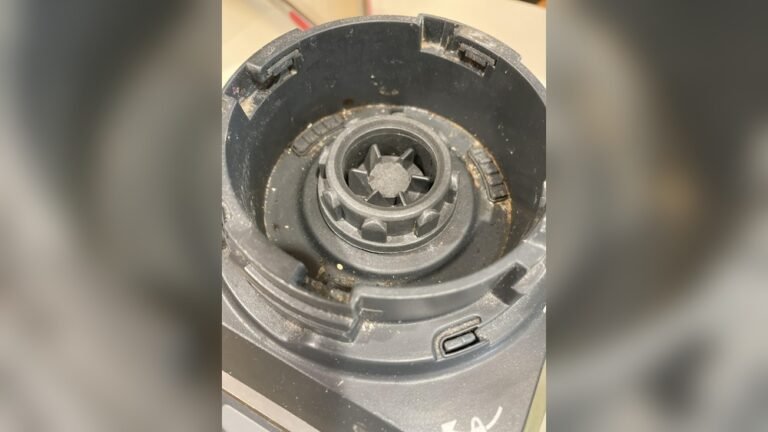
Credit: www.reddit.com
Common Mistakes To Avoid
Many people make errors when cleaning their Ninja blender gasket. Avoid these mistakes:
- Using bleach or harsh chemicals: These can weaken the gasket and harm your health.
- Scrubbing with metal tools: Scratches can trap bacteria and cause leaks.
- Skipping drying: Moisture leads to mold.
- Forcing the gasket: If it doesn’t come out easily, don’t pull hard—check your manual.
- Ignoring the blade assembly: Food often hides here, so always clean both gasket and blade.
If you’re unsure, take a photo before disassembling, so you know how to reassemble later.
How Often Should You Clean The Ninja Blender Gasket?
Frequency depends on how often you use your blender and what you blend. Here are general guidelines:
- Daily use (smoothies, shakes): Clean gasket weekly.
- Heavy use (nut butters, soups): Clean after every use.
- Occasional use: Clean gasket monthly.
A survey of home cooks found that blenders used for sticky foods needed gasket cleaning twice as often as those used for liquids only. Regular checks prevent buildup.
Ninja Blender Gasket Replacement: When And How
Gaskets wear out over time. If you see cracks, warping, or persistent leaks, it’s time to replace the gasket.
Signs You Need A New Gasket
- Visible cracks or tears
- Gasket feels loose or stretched
- Persistent leaks despite cleaning
- Loss of flexibility
Buying A Replacement
- Find your model number (on the bottom of the blender).
- Buy genuine Ninja parts from official retailers or the manufacturer.
- Avoid generic gaskets—they may not fit or seal properly.
Installing A New Gasket
- Remove the old gasket and clean the blade assembly.
- Place the new gasket in the same position.
- Press gently to ensure a snug fit.
A new gasket restores performance and prevents leaks.
Cleaning Ninja Blender Gaskets: Real-life Examples
Seeing how others handle gasket cleaning can inspire confidence. Here are two real-life stories:
Example 1: The Daily Smoothie Maker
Anna blends green smoothies every morning. She noticed a sour smell from her blender despite washing the jar daily. After removing the gasket, she found sticky spinach residue. A soak in warm soapy water and scrubbing with a toothbrush removed the buildup.
Now, Anna cleans the gasket weekly and her blender stays odor-free.
Example 2: The Nut Butter Fan
James makes almond butter monthly. His Ninja blender started leaking from the base, and the blade felt sticky. He discovered hardened nut residue under the gasket. Baking soda paste loosened the gunk, and a vinegar soak removed the smell. James learned to clean the gasket after every nut butter batch.
These stories show that regular cleaning solves common problems and prevents expensive repairs.
Expert Tips For Effective Gasket Cleaning
Experienced users and appliance repair pros share these tips:
- Use soft brushes: Old toothbrushes reach tight spaces without scratching.
- Check for hidden buildup: Shine a flashlight inside the blade assembly.
- Avoid heat: High temperatures can warp the gasket—use warm, not hot, water.
- Label parts: If you have multiple blenders, mark gaskets to avoid confusion.
- Keep a spare gasket: Having an extra speeds up cleaning and avoids downtime.
One non-obvious insight: Sometimes, leaks are caused by incorrect gasket placement after cleaning—not by damage. Always check alignment.
Comparing Ninja Blender Gasket Cleaning To Other Brands
Ninja blenders are popular, but how does their gasket cleaning compare to other brands?
| Brand | Gasket Removal | Cleaning Ease | Replacement Cost |
|---|---|---|---|
| Ninja | Often removable | Medium | $8–$15 |
| Vitamix | Fixed | Hard | $15–$25 |
| NutriBullet | Removable | Easy | $7–$12 |
| Oster | Removable | Easy | $6–$10 |
Ninja blenders offer a balance between ease of cleaning and gasket durability. Vitamix models are harder to clean but last longer. NutriBullet and Oster gaskets are easier to handle, but may need more frequent replacement.
Safety Precautions During Gasket Cleaning
Blender blades are sharp, and gaskets are delicate. Follow these safety tips:
- Unplug the blender before cleaning.
- Wear gloves if you have sensitive skin or are using vinegar.
- Handle blades carefully—never grab them directly.
- Don’t use excessive force—if the gasket sticks, soak in warm water first.
- Keep parts out of reach of children—small parts can be a choking hazard.
Safety ensures you avoid injury and keep your blender running smoothly.
Environmental Considerations
Gaskets are usually made from synthetic rubber or silicone. When replacing, recycle or dispose responsibly. Some local recycling centers accept silicone parts. Avoid flushing old gaskets down the drain.
Using gentle, eco-friendly cleaners (like baking soda and vinegar) is safer for both your blender and the environment. Avoid harsh chemicals—they pollute water and damage appliance parts.

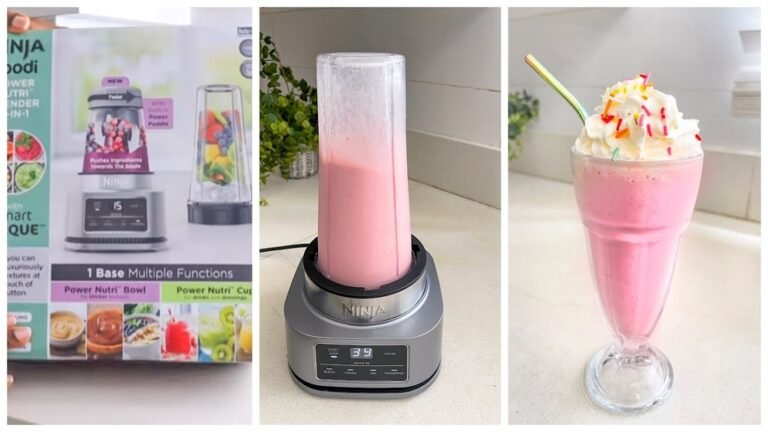
Credit: simplicityandastarter.com
Troubleshooting After Cleaning
Sometimes, issues arise after gasket cleaning. Here’s how to handle common problems:
- Leak persists: Check if the gasket is seated properly. Remove and reposition.
- Odor remains: Repeat cleaning with vinegar or baking soda.
- Gasket sticks: Rub a tiny bit of vegetable oil around the gasket to ease placement.
- Blade won’t fit: Check for leftover debris—clean again.
If problems persist, contact Ninja customer support or check their troubleshooting guides.
The Science Behind Gasket Cleaning
Why does food stick under the gasket? The answer lies in surface tension and capillary action. Liquids and soft foods seep into tiny spaces under the gasket, where air and moisture create a perfect environment for bacteria. Regular cleaning breaks this cycle.
Studies on kitchen hygiene show that rubber seals in appliances often have higher levels of E. coli and mold than cutting boards or countertops. Cleaning gaskets reduces this risk, making your kitchen safer.

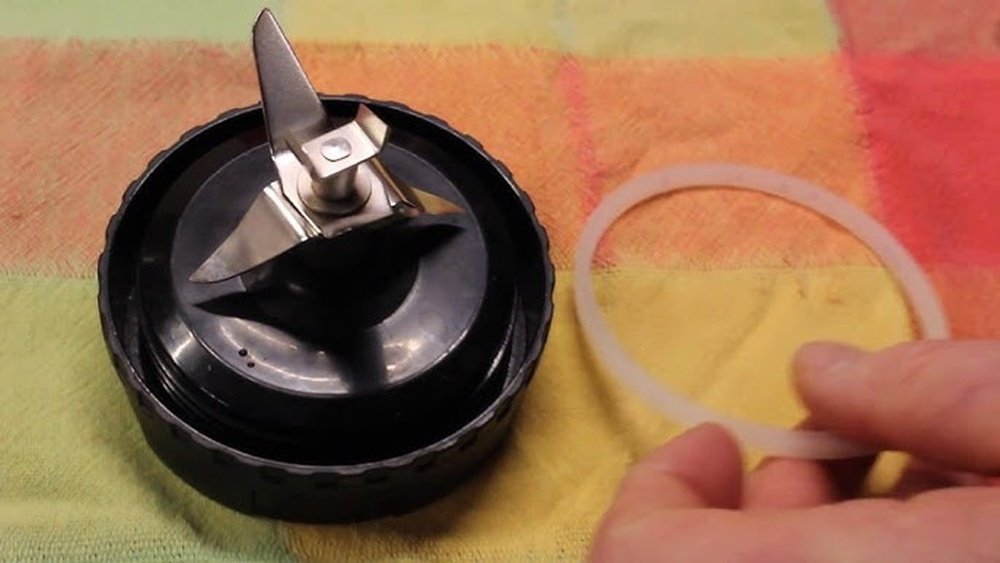
Credit: www.youtube.com
Frequently Asked Questions
How Do I Know If My Ninja Blender Gasket Is Removable?
Check your model’s user manual or look for a visible seam around the gasket. If you can lift it gently without resistance, it’s likely removable. Some models require special tools or instructions.
Can I Use Bleach To Clean The Gasket?
It’s not recommended. Bleach can damage the rubber or silicone and leave harmful residues. Stick to mild dish soap, baking soda, or white vinegar.
What If My Gasket Is Stained Or Discolored?
Stains are common after blending colored foods. Soak the gasket in a mixture of baking soda and water for 20 minutes, then scrub. If stains persist, consider replacing the gasket.
Are Ninja Blender Gaskets Dishwasher Safe?
Some gaskets are safe in the dishwasher, but not all. Always check your user manual. Place gaskets on the top rack and use a gentle cycle. Avoid high heat.
Where Can I Find Official Ninja Replacement Gaskets?
Buy from the official Ninja website or certified retailers. For more details, visit Ninja Kitchen.
Final Thoughts
Cleaning your Ninja blender gasket is a simple step that makes a big difference. It keeps your blender smelling fresh, prevents leaks, and protects your health. Most people neglect this part, but with the right tools and habits, gasket cleaning becomes quick and easy.
Remember to check your model’s features, clean regularly, and replace the gasket when needed. If you follow the steps in this guide, your Ninja blender will deliver safe, tasty blends for years.