How To Clean Ninja Blender Blades: Quick and Easy Guide
Keeping your Ninja blender blades clean isn’t just about hygiene—it’s about keeping your blender running smoothly and lasting longer. Many people rinse their blender after use and think it’s enough, but food particles and residue can stick, dulling the blades and even affecting taste. If you want your Ninja blender to work at its best, you need to clean the blades thoroughly and regularly.
This guide will show you everything you need to know about cleaning Ninja blender blades. You’ll learn the best cleaning methods, what tools to use, how often to clean, mistakes to avoid, and even how to handle tough stains or odors.
With simple instructions, practical advice, and expert tips, you’ll be able to keep your blender sparkling—and safe for every smoothie, soup, or sauce you make.
Why Cleaning Ninja Blender Blades Matters
Blender blades touch everything you blend. If they’re not clean, leftover food, bacteria, or odors can affect new recipes. Clean blades also mean your blender works better, giving you smooth textures and preventing mechanical problems.
A study by the NSF International found that blenders are among the kitchen appliances most likely to harbor germs. The area under the blade is especially risky, since food particles get trapped and are hard to see. A dirty blender can even cause cross-contamination, making you sick.
Here’s why cleaning Ninja blender blades is important:
- Removes bacteria and mold that can cause illness
- Prevents buildup that can dull blades and reduce performance
- Keeps flavors fresh by avoiding leftover odors
- Extends lifespan of your blender
If you use your Ninja blender often—especially for raw foods like smoothies—it’s important to clean the blades after every use.
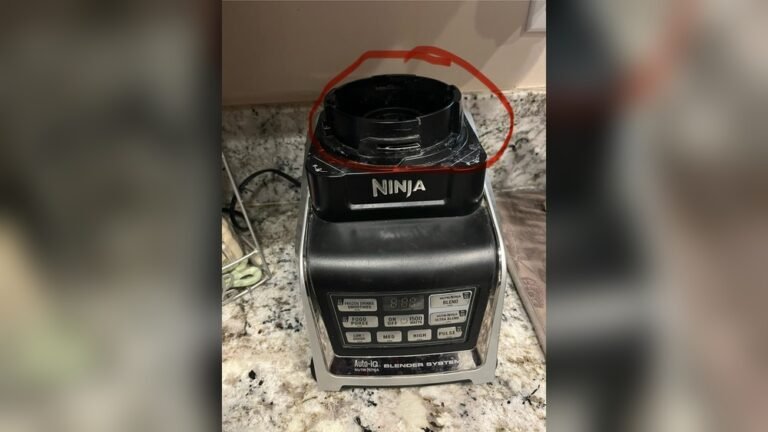
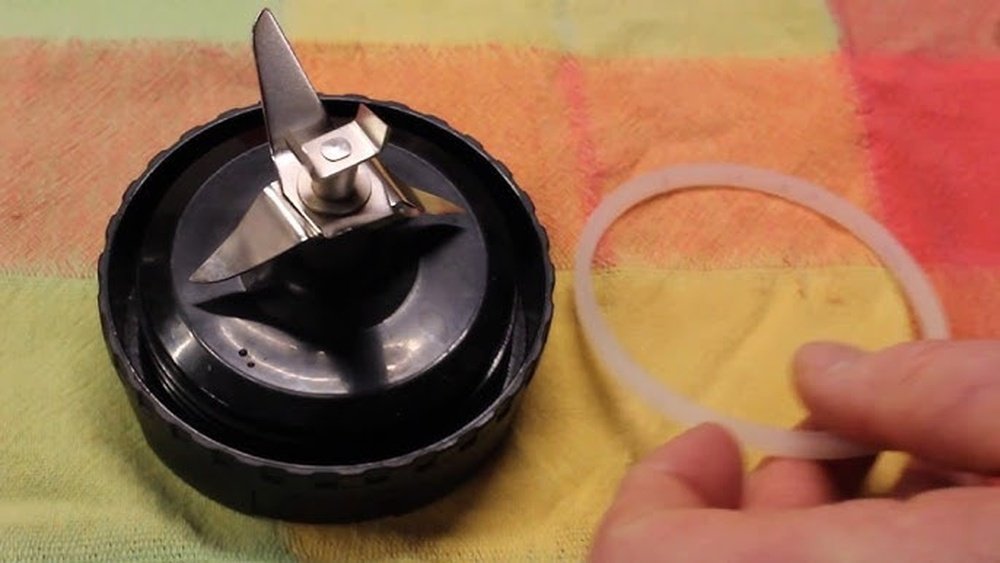
Understanding Your Ninja Blender Blade Design
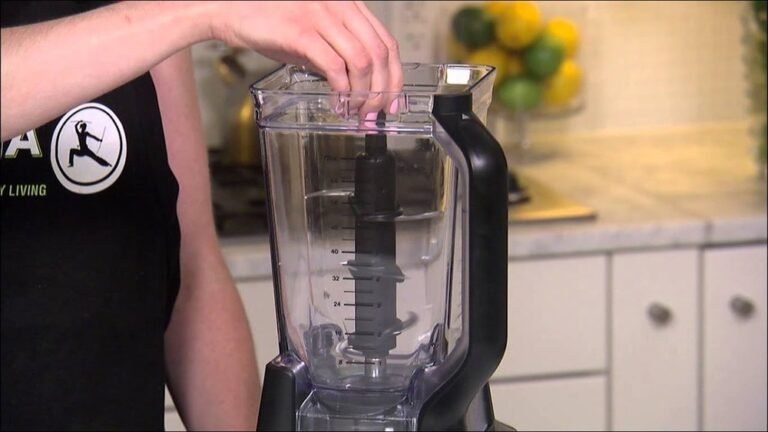
Before cleaning, it helps to know how Ninja blender blades are built. Ninja blenders are known for their stacked blade assembly. Unlike traditional blenders with one blade at the bottom, Ninja’s blades are arranged vertically, making them sharp and effective for chopping, crushing, and blending.
Ninja blade assemblies usually have:
- Multiple sharp blades stacked in layers
- Central spindle that locks into the blender base
- Plastic or metal housing for structural support
Some models have removable blade assemblies, while others are fixed. Always check your blender’s manual to see if the blades are removable, as this affects cleaning steps.
Common Ninja Blender Models And Blade Types
Here’s a quick comparison of popular Ninja blender models and their blade features:
| Model | Blade Type | Removable? | Special Notes |
|---|---|---|---|
| Ninja Professional BL610 | Stacked 6-blade | Yes | Easy to remove for cleaning |
| Ninja Foodi Power Nutri DUO | Pro Extractor Blades | Yes | Designed for smoothies & nut butters |
| Ninja Mega Kitchen System | Stacked 6-blade + dough blade | Yes | Multiple blade types for versatility |
| Ninja Compact Personal Blender | Single blade | No | Fixed blade assembly |
Knowing your blender model helps you follow the right cleaning steps. Removable blades are easier to clean, while fixed blades need extra care.
Tools And Materials Needed For Blade Cleaning
You don’t need fancy equipment to clean Ninja blender blades, but using the right tools makes the process safer and more effective. Here’s what you’ll need:
- Soft brush (like a bottle brush or toothbrush): Reaches under and around blades
- Dish soap: Cuts grease and removes food particles
- Warm water: Helps dissolve residue
- Sponge or cloth: For wiping the blade housing
- White vinegar or baking soda: For tough stains or odors
- Rubber gloves: Protects hands from sharp blades
- Towel: For drying
If your blender’s blades are removable, you may also want:
- Small bowl: For soaking blades
- Cotton swabs: To clean tight spaces
Avoid using abrasive pads or harsh chemicals, as these can damage the blade’s metal or the plastic housing.
Step-by-step Guide: Cleaning Removable Ninja Blender Blades
Most Ninja blenders have removable blade assemblies. This makes cleaning easier and safer. Here’s a detailed process for cleaning removable blades:
1. Unplug And Disassemble
Safety first. Always unplug your blender before cleaning. Remove the pitcher from the base. If the blades are removable, twist or lift them out carefully. Check your manual if you’re unsure how to remove the blade assembly.
2. Rinse Immediately
Rinse the blade assembly under warm water right after use. This prevents food from drying and sticking. Hold the blades by the base, not the sharp edges.
3. Wash With Soap
Fill a bowl or sink with warm, soapy water. Place the blade assembly inside. Use a soft brush or sponge to scrub around the blades, spindle, and housing. Pay special attention to crevices where food can hide.
- Brush under the blades where buildup often occurs
- Use a toothbrush for tight spaces
4. Tackle Stubborn Residue
If you see dried-on food or stains, soak the blades for 10–15 minutes in warm water with a splash of white vinegar. Then scrub again with your brush.
For tough stains, sprinkle a little baking soda on the brush for extra scrubbing power.
5. Rinse And Dry
Rinse the blade assembly thoroughly under running water. Shake off excess water. Dry the blades immediately with a towel to prevent rust.
Tip: Let the blades air dry completely before reassembling. Moisture left inside the blender can cause odors or mold.
6. Reassemble
Once dry, place the blade assembly back into the pitcher. Make sure it locks securely. Store the blender with the lid off to allow airflow.
Cleaning Fixed Ninja Blender Blades
Some Ninja blenders have blades that cannot be removed. Cleaning these blades requires more care, as you must reach inside the pitcher.
1. Unplug And Empty
Unplug the blender. Remove any leftover food or liquid from the pitcher.
2. Fill With Soapy Water
Fill the pitcher halfway with warm water. Add a few drops of dish soap.
3. Blend For Self-cleaning
Place the pitcher on the base and secure the lid. Pulse or blend for 30–60 seconds. The motion helps loosen food and residue from the blades.
4. Rinse
Pour out the soapy water. Rinse the pitcher and blades thoroughly with clean water.
5. Scrub Manually
Use a soft brush or sponge to clean under and around the fixed blades. Be careful—blades are sharp and hard to reach. If needed, use a cotton swab or toothbrush for tight spots.
6. Dry
Shake out excess water. Use a towel to dry the pitcher and blades. Let air dry before storing.
Deep Cleaning And Odor Removal
If your Ninja blender blades have stubborn stains or lingering odors, regular washing may not be enough. Here’s how to deep clean:
Vinegar Soak
- Fill a bowl with equal parts white vinegar and warm water
- Remove the blade assembly and soak for 15–30 minutes
- Scrub with a brush, rinse, and dry
Vinegar kills bacteria and removes odors.
Baking Soda Paste
- Mix baking soda and water to form a paste
- Apply paste to stained areas of the blade
- Scrub gently, rinse, and dry
Baking soda lifts tough stains and neutralizes smells.
Lemon Juice Wash
- Squeeze fresh lemon juice into warm water
- Soak blades or fill pitcher, blend for 30 seconds
- Rinse and dry
Lemon juice cuts grease and leaves a fresh scent.
How Often Should You Clean Ninja Blender Blades?
Proper cleaning frequency depends on how often you use your blender and what you blend.
- After every use: Basic cleaning with soap and water
- Once a week: Deep cleaning with vinegar or baking soda (if used daily)
- Monthly: Inspect for stains, odors, or wear
If you blend raw foods, dairy, or sticky ingredients, clean more often. Neglecting blade cleaning can lead to buildup, bacteria growth, and even mechanical failure.
Common Mistakes To Avoid
Many people make errors when cleaning Ninja blender blades. Avoid these mistakes to protect your blender:
- Using abrasive pads: Scratches blades and housing
- Leaving blades wet: Causes rust and odors
- Handling blades carelessly: Risk of cuts and injuries
- Ignoring crevices: Food hides under blades
- Using harsh chemicals: Damages materials, leaves residue
- Not unplugging blender: Risk of electric shock
Always follow safe practices. If you’re unsure, check your Ninja blender manual for cleaning advice.
Ninja Blender Blade Maintenance Tips
Cleaning is only part of blade care. To keep your Ninja blender blades sharp and efficient, follow these maintenance tips:
- Dry thoroughly after washing: Prevents rust and corrosion
- Store with lid off: Airflow avoids mold and odors
- Inspect for damage: Look for nicks, dullness, or rust
- Sharpen blades (if possible): Some models allow sharpening, but check your manual first
- Replace blades when worn: Most Ninja models offer replacement blades
Blades last longer with regular care. If you notice blending isn’t as smooth, check if the blades are dull or damaged.
Comparing Cleaning Methods: Manual Vs Self-cleaning
There are two main ways to clean Ninja blender blades: manual cleaning and self-cleaning (blending soapy water). Each has pros and cons.
| Method | Pros | Cons |
|---|---|---|
| Manual Cleaning | Thorough, reaches crevices, removes tough stains | Time-consuming, risk of cuts, can miss spots if rushed |
| Self-Cleaning (Blending) | Quick, easy, safe for hands | May not clean under blades, less effective on tough stains |
For best results, use both methods. Start with self-cleaning, then manually scrub as needed.

Credit: www.youtube.com
Safety Precautions When Cleaning Blender Blades
Blender blades are sharp. To avoid injuries, follow these safety tips:
- Wear rubber gloves: Protects from cuts
- Hold blades by the base: Never touch sharp edges
- Unplug blender before cleaning: Prevents accidents
- Keep blades away from children: Store safely
- Handle broken blades carefully: Dispose properly
If you cut yourself, wash the wound and apply a bandage. Seek medical help if needed.
Troubleshooting: Dealing With Common Blade Cleaning Issues
Sometimes, cleaning Ninja blender blades isn’t straightforward. Here are solutions to common problems:
Blade Assembly Won’t Come Out
- Check if there’s a lock or release mechanism
- Refer to your blender’s manual
- Don’t force—this can break the blade or pitcher
Rust Spots
- Clean with vinegar and dry thoroughly
- Replace blades if rust persists
Persistent Odors
- Soak in vinegar or lemon juice
- Blend with baking soda and water
Food Stuck Under Blades
- Use a toothbrush or cotton swab
- Soak in warm soapy water
If problems continue, contact Ninja customer support for advice or replacement parts.
Cleaning Ninja Blender Blades After Blending Different Foods
Some foods leave more residue or odor than others. Here’s how to clean blades after blending:
- Dairy: Wash immediately with hot, soapy water. Dairy can spoil quickly.
- Raw meat: Clean and sanitize with vinegar to remove bacteria.
- Spicy ingredients: Use lemon juice or baking soda to neutralize odors.
- Nut butters: Scrape out residue, soak, and scrub thoroughly.
Cleaning right after blending keeps blades fresh and prevents stains.
Blade Cleaning For Ninja Blender Accessories
Ninja blenders often come with extra accessories, like food processor bowls, dough hooks, or single-serve cups. These also need cleaning.
- Removable blades: Clean separately with soap and water
- Fixed blades: Use self-cleaning method, then scrub
- Accessories: Check if dishwasher-safe (most Ninja parts are, but blades often require hand washing)
Always dry accessories fully before storing.
Dishwasher Safety And Ninja Blender Blades
Many Ninja blender parts are dishwasher-safe. However, blades often last longer with hand washing.
- Top rack only: If using dishwasher, place blade assembly on top rack
- Avoid high heat: Extreme temperatures can warp plastic or dull blades
- Dry immediately: Remove from dishwasher and dry by hand
Check your blender manual to see which parts are safe for the dishwasher.
Environmental Impact: Cleaning Blades With Eco-friendly Methods
If you want to clean your Ninja blender blades sustainably, try these eco-friendly tips:
- Use biodegradable soap
- Clean with vinegar or baking soda instead of harsh chemicals
- Air dry instead of using paper towels
- Reuse cleaning brushes for multiple appliances
Eco-friendly cleaning protects your health and the planet.
Credit: www.reddit.com
When To Replace Ninja Blender Blades
Blades won’t last forever. Over time, they get dull, rusty, or chipped. Here’s when to replace:
- Blender struggles with food: Blades may be dull
- Visible rust or damage: Replace immediately
- Odors won’t go away: Blade assembly may be contaminated
- Over three years old: Consider replacement for best performance
Replacement blades are available from Ninja and online retailers. Always buy genuine parts.
Comparing Ninja Blender Blade Cleaning With Other Brands
How does cleaning Ninja blender blades compare to other brands like Vitamix or NutriBullet?
| Brand | Blade Design | Ease of Cleaning | Removable? |
|---|---|---|---|
| Ninja | Stacked, vertical | Moderate; requires brush | Usually yes |
| Vitamix | Flat, horizontal | Easy; self-cleaning effective | No |
| NutriBullet | Flat, removable | Easy; blade comes out | Yes |
Ninja’s stacked blades are powerful but need more careful cleaning, especially under the blades. Other brands often have simpler designs.

Credit: simplicityandastarter.com
Expert Tips For Effortless Blade Cleaning
Cleaning Ninja blender blades doesn’t have to be a chore. Here are expert tips for saving time and effort:
- Clean immediately after use: Prevents buildup
- Keep a dedicated brush nearby: Makes cleaning faster
- Use warm water: Helps dissolve food residue
- Don’t overfill blender: Avoids spills and sticky messes
- Check for leftover particles: Inspect after rinsing
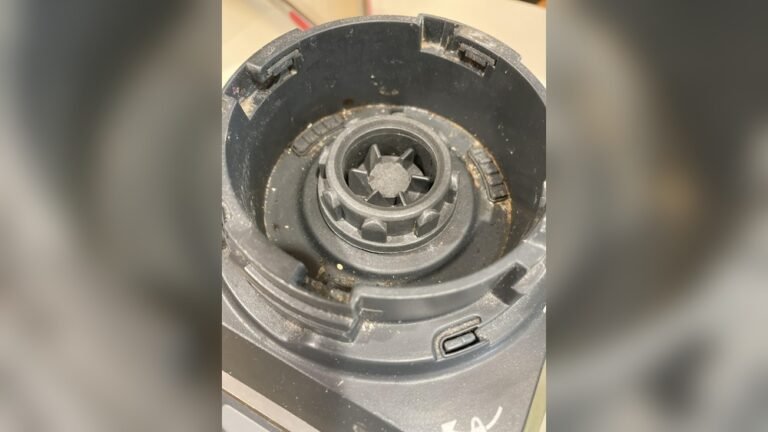
Many people miss cleaning under the blade assembly, where food hides. Always check this area.
Real-world Example: Cleaning Ninja Blender Blades After Making Green Smoothies
Let’s walk through a real example. You’ve just made a green smoothie with spinach, banana, and almond milk in your Ninja Professional BL610.
- Unplug and remove pitcher
- Twist out blade assembly
- Rinse blades under warm water
- Fill bowl with soapy water, soak blades for 5 minutes
- Scrub under blades with toothbrush
- Rinse thoroughly
- Dry with towel, air dry for 10 minutes
- Reassemble
Green smoothies often leave small bits of leaf under the blades. Scrubbing and soaking ensures nothing is left behind.
Quick Cleaning Hacks For Busy Days
If you don’t have time for a full clean, try these quick hacks:
- Add warm water and soap, blend for 30 seconds
- Rinse and air dry
- Use a brush to remove visible residue
- Deep clean later when you have time
These hacks keep your blender fresh between full cleanings.
Frequently Asked Questions
How Do I Clean Ninja Blender Blades Without Removing Them?
Fill the pitcher halfway with warm, soapy water. Secure the lid, blend for 30–60 seconds, then rinse. Use a brush to scrub any remaining residue under the blades.
Are Ninja Blender Blades Dishwasher Safe?
Most Ninja blade assemblies are top-rack dishwasher safe, but hand washing is gentler and extends blade life. Always check your model’s manual for dishwasher instructions.
How Can I Remove Tough Stains Or Odors From Ninja Blender Blades?
Soak blades in a mixture of white vinegar and warm water for 15–30 minutes. Scrub with a brush and rinse thoroughly. Lemon juice or baking soda also help neutralize odors.
Is It Safe To Use Bleach To Clean Ninja Blender Blades?
Avoid bleach. It can damage metal and plastic parts, leave harmful residue, and isn’t food-safe. Use dish soap, vinegar, or baking soda instead.
How Often Should I Deep Clean Ninja Blender Blades?
If you use your blender daily, deep clean the blades weekly. For occasional use, deep clean monthly. Always wash after blending sticky, raw, or strong-smelling foods.
Taking care of your Ninja blender blades is simple but important. Clean them after every use, deep clean regularly, and avoid common mistakes. With the right tools and techniques, your blender will stay safe, efficient, and ready for every recipe. If you need more tips, check the official Ninja website or trusted sources like Consumer Reports for expert guidance.
A clean blender means better flavors, safer blending, and a longer-lasting appliance. Now you know exactly how to keep your Ninja blender blades spotless—every time.