How To Clean Ninja Blender Cup: Quick and Easy Steps
Keeping your Ninja blender cup clean is more important than many people realize. Clean equipment not only prevents odors and stains but also protects your health by stopping bacteria and mold from growing. If you use your Ninja blender daily—whether for smoothies, protein shakes, or meal prep—knowing how to clean it quickly and thoroughly will save you time, money, and hassle. Many owners struggle with stuck-on residue, cloudy cups, or lingering smells, but with the right methods, you can keep your cup looking and smelling like new.
In this article, you’ll learn step-by-step cleaning instructions, the best cleaning tools and products, how to deal with tough stains and odors, and how to avoid common cleaning mistakes. You’ll also find data tables to compare cleaning methods, practical tips for daily and deep cleaning, and answers to the most common questions about maintaining your Ninja blender cup.
Why Keeping Your Ninja Blender Cup Clean Matters
A dirty blender cup isn’t just unpleasant—it can be a health risk. Leftover food particles and moisture create the perfect environment for bacteria, yeast, and mold to grow. Studies have shown that kitchen blenders can be among the most contaminated items in a home if not cleaned properly. Even small amounts of residue can attract pests or cause cross-contamination.
A clean cup also preserves the taste and smell of your drinks. Residue from previous blends, especially protein powders or green smoothies, can make your next drink taste off. Regular cleaning keeps your blender cup clear and odor-free, extending its lifespan and helping you get the most from your investment.
Understanding Your Ninja Blender Cup
Before you start cleaning, it helps to understand the design of your Ninja blender cup. Most Ninja blender cups are made from BPA-free plastic, which is durable but can absorb stains and odors if not cared for properly. The threading on the cup and lid, the rubber gasket, and the blade assembly are the parts that need the most attention.
There are several types of Ninja blender cups, but cleaning steps are similar for most models:
- Standard cups: 16, 18, 24, or 32 ounces, usually with a screw-on lid or blade assembly
- Double-walled cups: For hot and cold drinks, with insulation
- Cups with spout lids: Feature more parts to disassemble
It’s important to check your cup’s manual for dishwasher safety and recommended cleaning instructions, as some parts may need special care.
Essential Cleaning Tools And Products
You don’t need fancy gadgets to clean your Ninja blender cup, but a few tools can make the job much easier and more effective:
- Bottle brush: Reaches the bottom and corners of the cup
- Soft sponge: For general wiping and gentle scrubbing
- Dish soap: Breaks up oils and food residue
- White vinegar: Removes stains and odors
- Baking soda: A gentle abrasive for tough spots
- Toothbrush or small brush: Cleans threads, gaskets, and tight spots
- Microfiber towel: Dries without leaving lint
- Rubber gloves: Protect your hands from hot water and cleaning agents
Avoid using steel wool or abrasive pads, as these can scratch the plastic and create places for bacteria to hide.
Daily Cleaning Routine
Cleaning your Ninja blender cup right after use is the best way to prevent stains, smells, and build-up. Here’s a simple daily cleaning routine:
- Rinse Immediately: Right after blending, rinse the cup with warm water to remove most residue. This prevents food from drying and sticking.
- Add Soap and Water: Fill the cup halfway with warm water and a drop of dish soap.
- Blend to Clean: Place the blade assembly on the cup, attach to the base, and blend for 30 seconds. This motion helps clean the blade and inside surface.
- Rinse Thoroughly: Remove the blade and rinse all parts with fresh water.
- Dry Completely: Use a microfiber towel or air-dry on a rack.
This method is quick, uses few resources, and keeps your cup fresh every day.
Step-by-step Deep Cleaning Process
Even with daily cleaning, your Ninja blender cup needs a deep clean at least once a week, especially if you blend sticky or protein-rich foods. Follow these steps for a thorough clean:
1. Disassemble All Parts
Take apart the cup, lid, gasket, and blade assembly. Most odors and residues hide in the threads and rubber gasket.
2. Soak In Warm, Soapy Water
Fill your sink or a large bowl with warm water and a few drops of dish soap. Soak all parts for 10-15 minutes. This loosens dried-on food and makes scrubbing easier.
3. Scrub Each Part
Use a bottle brush for the cup’s inside, a soft sponge for the outside, and a toothbrush for the threads and gasket. Pay special attention to any grooves or crevices where residue collects.
4. Clean The Gasket Thoroughly
The gasket (rubber ring) can hold hidden mold or old food. Remove it if possible, and scrub both sides with dish soap. Rinse well. If the gasket is damaged or smells bad, replace it.
5. Rinse With Clean Water
Rinse each part under running water to remove all soap. Residue can cause foam or bad taste in future blends.
6. Sanitize If Needed
If you notice a musty smell or suspect bacteria, mix a solution of 1 part white vinegar to 3 parts water. Soak the cup and lid for 5-10 minutes. Rinse thoroughly afterward.
7. Dry Completely
Leave all parts to air dry separately, or use a clean towel. Assemble only when fully dry to prevent mold growth.
Here’s a quick comparison of daily and deep cleaning routines:
| Cleaning Method | Time Needed | Tools Used | How Often |
|---|---|---|---|
| Daily Clean | 2-3 minutes | Soap, water, bottle brush | After each use |
| Deep Clean | 15-20 minutes | Soap, brush, toothbrush, vinegar | Weekly or as needed |
How To Remove Stubborn Stains And Odors
Sometimes, your Ninja blender cup might develop cloudy spots, stains, or bad smells—especially if you blend coffee, turmeric, berries, or protein powders. These are not just cosmetic problems; they can affect the taste and safety of your drinks.
Removing Cloudy Residue
Plastic can become cloudy from minerals in water or repeated blending of certain foods. To clear up your cup:
- Fill the cup with equal parts white vinegar and warm water.
- Let it soak for 2-4 hours, or overnight for tough stains.
- Scrub with a bottle brush, focusing on cloudy areas.
- Rinse well and dry.
Fighting Odors
If your cup smells even after cleaning, try this method:
- Sprinkle 2 tablespoons of baking soda inside the cup.
- Add warm water to fill halfway.
- Let sit for at least 1 hour.
- Scrub and rinse thoroughly.
Removing Tough Stains
For stubborn stains (e.g., turmeric, coffee):
- Make a paste of baking soda and a little water.
- Apply to the stained area.
- Let it sit for 10-15 minutes.
- Scrub gently with a soft brush, then rinse.
You can repeat these treatments as needed, but avoid using bleach or harsh chemicals, which can damage the plastic and affect your health.
Dishwasher Cleaning: Is It Safe?
Many Ninja blender cups are labeled top-rack dishwasher safe, but there are important details to consider before tossing all parts into the machine.
Pros Of Dishwasher Cleaning
- Saves time and effort
- Hot water sanitizes the cup
- Good for routine cleaning
Cons And Cautions
- High heat can warp plastic over time
- Strong detergents may dull the cup or fade printed measurements
- Gaskets can become loose or cracked
Check the bottom of your cup or the product manual for dishwasher symbols. Only put cups and lids on the top rack. Avoid putting blades or gaskets in the dishwasher unless the manual says it’s safe.
Here’s a quick table comparing manual and dishwasher cleaning:
| Cleaning Method | Pros | Cons |
|---|---|---|
| Manual | Gentle, thorough, gaskets last longer | Takes more time, needs effort |
| Dishwasher | Easy, hot sanitizing | Can warp plastic, fade markings |
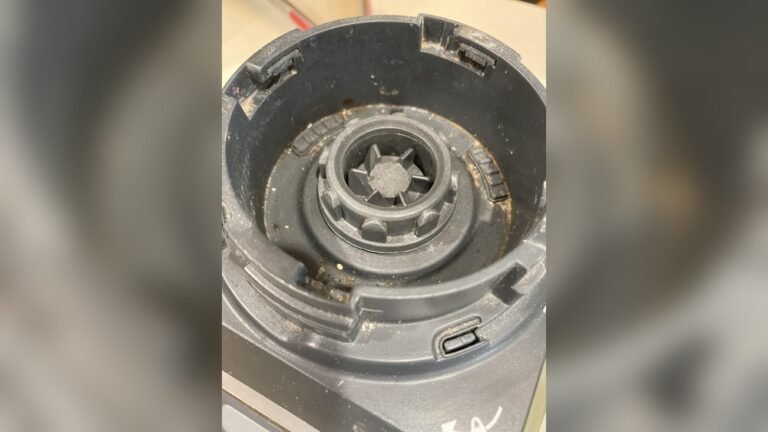
Cleaning The Blade Assembly Safely
The blade assembly is sharp and can collect stubborn residue. Clean it with care to avoid injury:
- Always disassemble the blade from the cup before cleaning.
- Rinse under warm water immediately after use to prevent build-up.
- Use a small brush or toothbrush to scrub around and under the blades.
- If the blade is sticky or stained, soak it in warm, soapy water for 10 minutes before scrubbing.
- Dry thoroughly to prevent rust or mold.
Never put your fingers near the blade edges. If the blade is dull or damaged, consider replacing it for best performance.

Credit: www.reddit.com
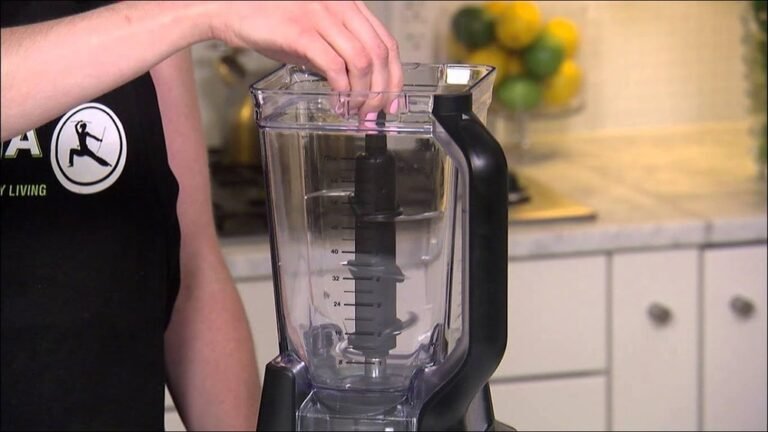
Cleaning The Lid, Spout, And Gasket
The lid and spout can trap liquid and small bits of food, leading to mold or odors. Here’s how to clean them well:
- Remove the gasket if possible. Wash all parts separately.
- Use a small brush or toothpick to clean inside the spout.
- Soak the lid and gasket in warm, soapy water for at least 10 minutes.
- Rinse and dry completely before reassembling.
If you see black spots or notice a musty smell, clean with a vinegar-water solution (1:3 ratio) and rinse well. Replace the gasket if it remains stained or sticky.
Tips For Preventing Future Stains And Odors
Prevention is easier than constant deep cleaning. Here’s how to keep your Ninja blender cup fresh every day:
- Rinse Right Away: Don’t leave your cup dirty for hours, especially after protein shakes or smoothies.
- Dry Upside Down: Air drying prevents water spots and mold.
- Rotate Use: If you have multiple cups, use them in rotation to allow full drying between uses.
- Store with Lid Off: This allows airflow and prevents trapped moisture.
- Avoid Strong Stain Culprits: If possible, blend coffee or turmeric in a different container.
These habits take little effort but make a huge difference in long-term cup condition.
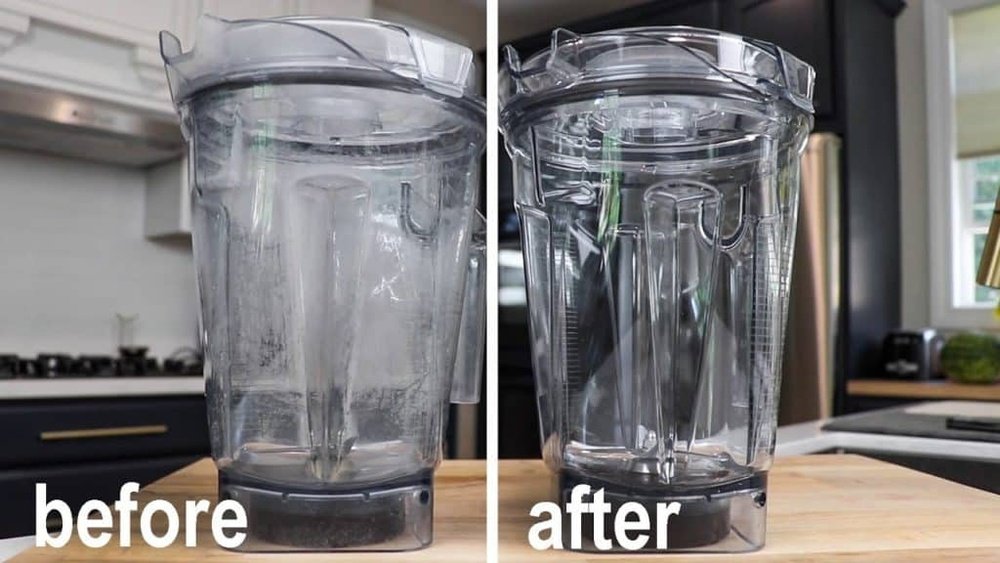
How To Clean A Cloudy Or Scratched Blender Cup
Over time, your Ninja blender cup may look cloudy or scratched. Scratches usually can’t be removed, but you can minimize cloudiness.
- For mild cloudiness: Soak in vinegar, then scrub with baking soda.
- For tough spots: Use a mix of lemon juice and salt as a gentle abrasive.
- If the cup is deeply scratched: Replace it, as scratches can harbor bacteria.
What Not To Do: Common Cleaning Mistakes
Avoid these errors that can damage your Ninja blender cup or make cleaning harder:
- Using boiling water: Can warp plastic and ruin the cup.
- Soaking the blade too long: Prolonged soaking can dull or rust the blade.
- Bleach or harsh chemicals: These break down plastic and are unsafe for food contact.
- Skipping the gasket: The gasket must be cleaned, or mold will grow.
- Putting everything in the dishwasher: Not all parts are dishwasher safe.
Learning from these mistakes can help extend the life of your blender cup and keep your drinks safe.
Credit: www.reddit.com
Ninja Blender Cup Cleaning: Fast Troubleshooting Guide
If you run into problems, use this quick reference:
| Problem | Quick Solution |
|---|---|
| Stuck-on food | Soak with hot soapy water, scrub with bottle brush |
| Cloudy cup | Soak in vinegar, scrub with baking soda |
| Bad odor | Soak with baking soda solution, rinse well |
| Mold on gasket | Remove and scrub gasket, soak in vinegar |
| Blade won’t come clean | Soak in hot soapy water, scrub with toothbrush |
When To Replace Your Ninja Blender Cup Or Parts
Even with the best care, blender cups and parts wear out over time. Here are signs it’s time to replace:
- Deep scratches: Bacteria can hide, and cleaning becomes difficult.
- Permanent odor: Smell remains after repeated deep cleans.
- Cracks or leaks: Unsafe for use.
- Damaged gasket: Causes leaks or collects mold.
- Dull or rusty blade: Reduces blending performance.
Genuine Ninja replacement parts are available online and often cost less than replacing the entire blender.

Credit: www.youtube.com
Eco-friendly Cleaning Tips
If you want to clean your Ninja blender cup in a more environmentally friendly way:
- Use baking soda and vinegar instead of harsh chemicals.
- Choose biodegradable dish soap.
- Reuse cleaning cloths rather than paper towels.
- Air dry instead of using electric dryers.
These small changes help the environment and keep your kitchen safer.
How To Store A Clean Ninja Blender Cup
Proper storage helps keep your cup clean between uses:
- Store with the lid off to allow airflow and prevent trapped moisture.
- Keep in a dry, cool place away from direct sunlight.
- If stacking cups, make sure each is fully dry to avoid mold growth.
Cleaning Ninja Blender Cup For Different Uses
If you blend different types of foods, you might need to adjust your cleaning routine:
- Smoothies with dairy: Clean immediately, as milk can sour and cause strong odors.
- Protein shakes: Protein can leave sticky residue—use hot water and soap right after blending.
- Soups or hot drinks: Some cups aren’t designed for hot liquids; always check the manual and clean with care.
- Baby food: Sanitize more often and dry completely.
Tips For Cleaning On The Go
If you use your Ninja blender cup at the gym or office, cleaning can be a challenge:
- Bring a small bottle of dish soap and a travel brush.
- Rinse with hot water immediately after use.
- Dry with a clean towel or napkin if you can’t air dry.
Don’t leave dirty cups in bags or cars, as this promotes bacteria growth.
How To Keep Measurements Visible
Ninja blender cups often have printed or molded measurement lines. To keep them readable:
- Avoid abrasive cleaning tools that can rub off markings.
- Don’t use strong chemicals or bleach.
- Hand wash when possible.
If markings fade, use a permanent marker to add your own as a temporary fix.
How Cleaning Affects Blender Performance
A clean Ninja blender cup isn’t just about hygiene—it can affect how well your blender works. Sticky residue or hidden food bits can throw off blade balance or cause leaks. Regular cleaning keeps the seal tight and the motor working smoothly.
You’ll notice fewer leaks, smoother blends, and less strain on your blender’s base.
Real-world Example: Cleaning Time And Effort
Let’s look at a practical case. If you blend a smoothie every morning and clean your cup as recommended:
- Daily cleaning: 3 minutes/day × 7 days = 21 minutes/week
- Deep clean: 15 minutes/week
- Total: 36 minutes/week
This small time investment saves you from scrubbing tough stains, replacing parts, or dealing with unpleasant smells.
Trusted Resources For More Information
For more details on Ninja blender care, visit the official Ninja Kitchen Support page. You’ll find manuals, replacement parts, and more cleaning tips.
Frequently Asked Questions
How Often Should I Deep Clean My Ninja Blender Cup?
Deep clean your cup at least once a week, or more often if you blend sticky, high-protein, or dairy-based drinks. This keeps bacteria, mold, and odors away.
Can I Put My Ninja Blender Cup In The Dishwasher?
Most Ninja blender cups are top-rack dishwasher safe, but always check your manual. Avoid putting blades or gaskets in the dishwasher unless the manual says it’s safe, as high heat can damage these parts.
What Should I Do If My Cup Still Smells After Cleaning?
Try soaking the cup with a mixture of baking soda and water or vinegar and water for several hours. Scrub well and rinse. If the smell persists, it may be time to replace the cup or gasket.
How Do I Remove Stains From My Ninja Blender Cup?
For tough stains, make a paste of baking soda and water and let it sit on the stain for 15 minutes. Scrub gently and rinse. For persistent stains, soaking in vinegar or lemon juice can help.
Is It Safe To Use Bleach To Clean My Blender Cup?
No, avoid using bleach or harsh chemicals. They can damage the cup’s plastic and are unsafe for food contact. Stick to dish soap, baking soda, and vinegar for safe and effective cleaning.
Taking good care of your Ninja blender cup protects your health, saves money, and keeps your drinks tasting fresh. A few minutes of cleaning after each use, plus a deeper clean once a week, is all it takes. With the right habits, your cup will last longer and work better—helping you enjoy every blend, every time.