How To Make A Snow Cone With A Ninja Blender: Easy Steps
Making a snow cone at home is simple, fun, and a great way to cool down during hot days. You don’t need a fancy machine—just a Ninja Blender and some basic ingredients. This guide will show you step-by-step how to create delicious snow cones, including how to get the right ice texture, make sweet syrups, and serve them with style. Along the way, you’ll get practical advice, common mistakes to avoid, and expert tips for perfect results. Whether you’re making snow cones for a party or just want a treat for yourself, you’ll find everything you need right here.
Why Use A Ninja Blender For Snow Cones?
If you already own a Ninja Blender, you’re in luck. Ninja blenders are known for their strong blades and powerful motors. These features make them ideal for crushing ice to a fine, snow-like texture. Unlike many regular blenders, Ninja models can handle tough jobs, including making snow cones, smoothies, and frozen drinks.
Many people worry that their blender might break if they use it for ice. But Ninja blenders are built for this. They can crush ice cubes quickly without overheating or getting stuck. You get soft, fluffy ice that tastes just like snow cones from a street vendor.
Here are some reasons to use a Ninja Blender for snow cones:
- Strong blades cut through ice easily
- Powerful motor prevents overheating
- Easy to clean and assemble
- Affordable compared to snow cone machines
While some other blenders claim to crush ice, the Ninja often gives better results. For snow cones, texture matters—a Ninja Blender delivers the right consistency.
What You Need To Make Snow Cones
Before you start, gather these items. Having everything ready will make the process smooth and enjoyable.
Essential Equipment
- Ninja Blender (any model with ice-crushing ability)
- Ice cubes (about 2 cups per snow cone)
- Measuring cups
- Serving cups or bowls (paper cones, plastic cups, or glass bowls)
- Spoon or scoop
Ingredients
- Ice cubes (fresh, clean, and not too large)
- Snow cone syrup (store-bought or homemade)
- Optional: Fresh fruit, condensed milk, or candy for toppings
Homemade Syrup Ingredients
If you want to make syrup at home, you’ll need:
- 1 cup granulated sugar
- 1 cup water
- 1 teaspoon flavor extract (e.g., cherry, orange, lemon)
- Food coloring (optional)
You’ll find syrup recipes later in the article.
Safety And Preparation Tips
- Clean your blender before use.
- Use filtered or bottled water for ice if your tap water tastes odd.
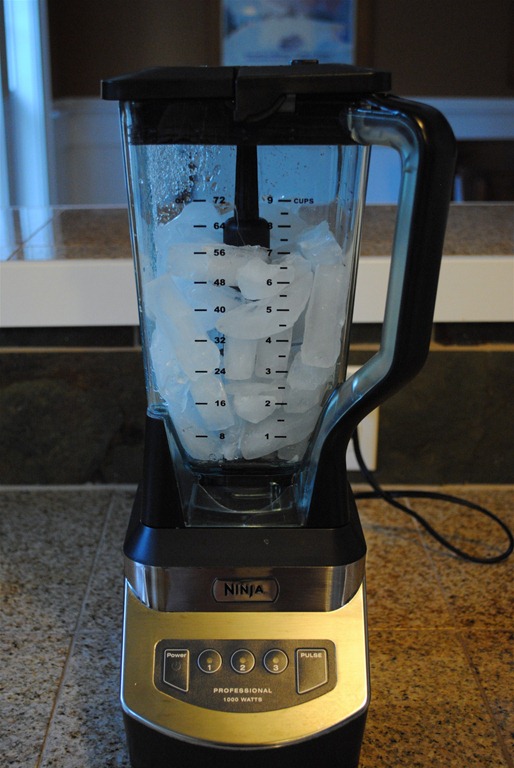
- Make sure ice cubes fit easily in the blender jar.
Having the right equipment and ingredients sets you up for success. Don’t skip these steps—many beginners miss the importance of fresh, clean ice.
Credit: testkitchentuesday.com
Crushing Ice: Getting The Perfect Snow Cone Texture
The key to a great snow cone is the ice texture. It should be soft, fluffy, and easy to scoop. If the ice is too chunky or watery, your snow cone won’t taste right.
How Ninja Blenders Crush Ice
Ninja blenders use sharp blades and a powerful motor to break down ice. Unlike older blenders, which can leave big chunks, Ninja blenders produce a finer texture. Here’s how to do it:
- Add 2 cups of ice cubes to the blender.
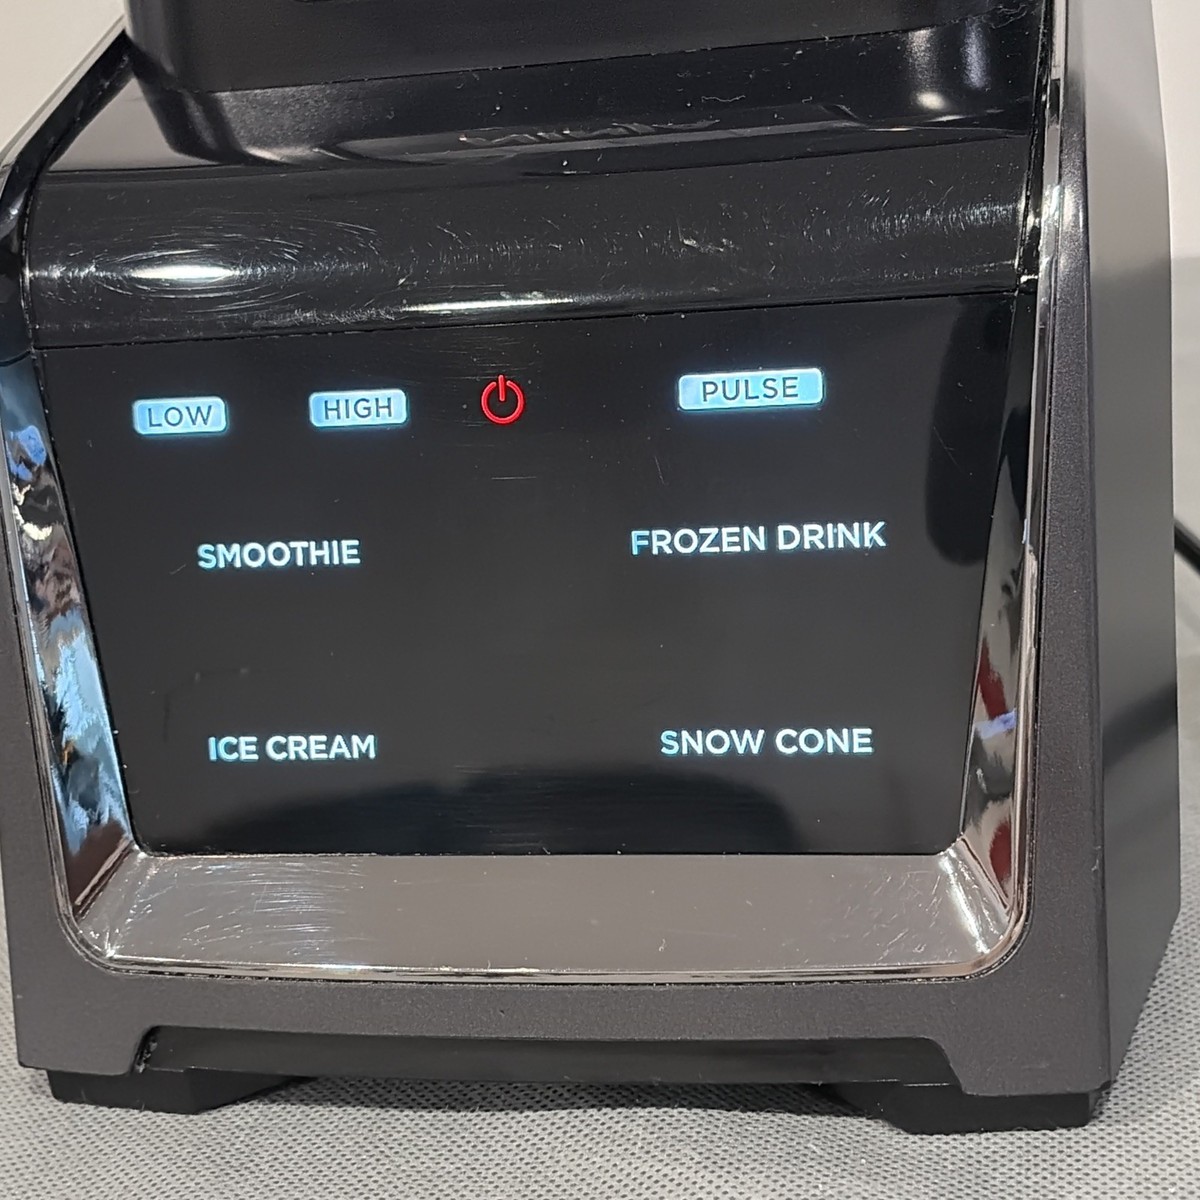
- Use the “crush” or “pulse” setting. Start with short bursts.
- Stop and check the texture after a few seconds.
- If needed, scrape down the sides and blend again.
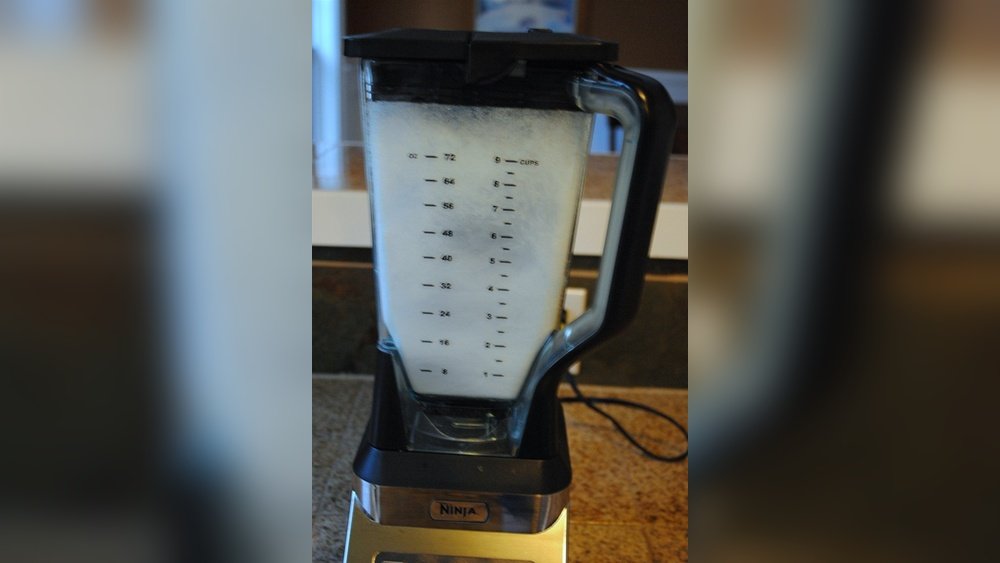
- Continue until the ice looks like soft snow.
Common Mistakes
- Over-blending: If you blend too long, the ice melts and becomes watery.
- Too little ice: Small amounts may spin around without crushing properly.
- Using old or freezer-burned ice: This can make your snow cone taste stale.
Practical Tips
- Use fresh ice cubes. Avoid ice that’s been sitting in the freezer for months.
- Work in small batches. Too much ice can jam the blender.
- If the ice is sticking, add a tablespoon of water—just enough to help movement, not so much that it melts.
Most beginners don’t realize the importance of batch size and pulse blending. It’s tempting to fill the blender all the way, but this usually gives worse results.
Making Homemade Snow Cone Syrup
Store-bought syrups are easy, but homemade syrups taste fresher and let you control the sweetness and flavor. Plus, you can make unique flavors not found in stores.
Basic Syrup Recipe
- Combine 1 cup sugar and 1 cup water in a saucepan.
- Heat on medium, stirring until sugar dissolves completely.
- Remove from heat. Let cool for a few minutes.
- Add 1 teaspoon flavor extract (cherry, orange, lemon, etc. ).
- Add food coloring if desired.
- Pour syrup into a bottle and refrigerate.
This makes enough syrup for about 6–8 snow cones.
Popular Flavor Ideas
- Cherry: Red food coloring + cherry extract
- Blue raspberry: Blue coloring + raspberry extract
- Lemon: Yellow coloring + lemon extract
- Orange: Orange coloring + orange extract
- Pineapple: Yellow coloring + pineapple extract
Advanced Flavor Tips
- Mix two extracts for unique flavors (e.g., lemon-lime).
- Add a small amount of citric acid for a tangy kick.
- Use real fruit juice instead of extract for natural flavors.
Many people don’t realize how easy it is to customize syrup. Just a few drops of different extracts or juice can change the whole experience.
Storing Syrup
- Keep syrup in the fridge for up to 2 weeks.
- Use clean bottles or jars to prevent contamination.
- Shake before use—some extracts settle at the bottom.
If you want to try store-bought options, look for brands that use real fruit and avoid artificial dyes. Homemade syrup is usually healthier and more flavorful.
Step-by-step: Making Snow Cones With Your Ninja Blender
Now let’s put it all together. Follow these steps for perfect snow cones every time.
- Prepare your syrup first. Make sure it’s cool.
- Fill your blender jar with 2 cups of fresh ice cubes.
- Use the “crush” or “pulse” function. Blend in short bursts.
- Stop and check the texture. If it’s not fluffy, blend again.
- Spoon the crushed ice into serving cups or cones.
- Pour syrup over the ice. Use about 2–3 tablespoons per cone.
- Add toppings if you like: Fruit, condensed milk, candy, etc.
- Serve immediately. Snow cones melt quickly!
Pro Tips For Serving
- Use chilled cups to keep the snow cone cold longer.
- Don’t pour syrup all at once. Add a little, then more as needed.
- Layer different syrups for a rainbow effect.
- Garnish with mint leaves, fruit slices, or sprinkles.
One non-obvious insight: Many people pour too much syrup, which makes the ice melt faster. Pour slowly and let the syrup soak in.
Comparing Ninja Blender Models For Snow Cones
If you’re thinking about buying a Ninja Blender or want to upgrade, it helps to know which models are best for snow cones. Here’s a comparison of popular models:
| Model | Ice Crushing Power | Jar Size | Price (Approx.) | Best For |
|---|---|---|---|---|
| Ninja Professional BL610 | High | 72 oz | $90 | Large batches |
| Ninja Compact BL450 | Medium | 24 oz | $60 | Single servings |
| Ninja Foodi Power Pitcher | Very High | 72 oz | $140 | Frequent use |
The Ninja Professional BL610 is the most popular for snow cones because it handles large amounts of ice and is affordable. The Foodi Power Pitcher is best if you make snow cones often or want to try other frozen recipes.
How Snow Cones Compare To Other Frozen Treats
Snow cones are different from shaved ice, slushies, and granitas. Understanding these differences helps you get the right texture and flavor.
| Treat | Ice Texture | Syrup Type | Serving Style |
|---|---|---|---|
| Snow Cone | Chunky, fluffy | Sweet, colorful | Paper cone or cup |
| Shaved Ice | Fine, powdery | Often fruit-based | Bowl or cup |
| Slushie | Semi-liquid | Mixed in | Cup with straw |
| Granita | Crystalline | Light, often coffee or fruit | Bowl, spoon |
Snow cones have a fluffy, chunky ice texture and are usually served with sweet syrups. Shaved ice is finer and absorbs syrup better. Knowing these differences helps you set expectations.
Creative Snow Cone Ideas And Advanced Tips
Once you master the basics, try these creative ideas for more fun and flavor.
1. Layered Snow Cones
Make a rainbow snow cone by layering different syrups. Start with a base flavor, add another color, and repeat. Use small amounts to avoid melting.
2. Healthy Snow Cones
- Use real fruit juice instead of syrup.
- Add chopped fruit as toppings.
- Skip added sugar for a lighter treat.
3. Party Snow Cones
- Set up a snow cone bar with different syrups and toppings.
- Provide spoons, straws, and napkins.
- Use themed cups for kids’ parties.
4. Adult Snow Cones
- Add a splash of rum or vodka for grown-up versions.
- Use coffee syrup for a unique twist.
- Garnish with lemon zest or mint.
5. Unique Toppings
- Mini marshmallows
- Gummy bears
- Chocolate chips
- Coconut flakes
Many people stick to classic flavors, but experimenting with toppings and syrups can make your snow cones stand out.
Common Problems And How To Fix Them
Snow cones are simple, but things can go wrong. Here are solutions to common issues:
Ice Is Chunky, Not Fluffy
- Try smaller ice cubes.
- Blend in shorter bursts.
- Don’t overload the blender.
Ice Melts Too Fast
- Use chilled cups.
- Pour syrup slowly.
- Serve immediately.
Syrup Is Too Thin
- Boil longer to reduce water.
- Add more sugar for thickness.
- Use less syrup per serving.
Blender Gets Stuck
- Add a tablespoon of water.
- Use the pulse function, not continuous blend.
- Clean blades regularly.
These simple fixes help you avoid frustration and get better results.
How Many Snow Cones Can You Make At Once?
Most Ninja blenders hold 24–72 ounces. One serving uses about 2 cups (16 ounces) of ice. Here’s a quick reference:
| Blender Size | Ice Capacity | Servings Per Batch |
|---|---|---|
| 24 oz | 1.5 cups | 1 |
| 48 oz | 3 cups | 2 |
| 72 oz | 6 cups | 3–4 |
If you need more, do multiple batches. Don’t fill the blender past the max line.
Credit: www.youtube.com
Safety And Cleaning Tips
Snow cones are safe to make, but always follow these tips:
- Don’t put hands or utensils in the blender while it’s running.
- Clean blades and jar after each use.
- Use caution with hot syrup—let it cool before pouring.
- Store syrup in clean bottles.
One overlooked tip: Don’t leave crushed ice in the blender for long. It melts and sticks to the blades, making cleaning harder.
Nutrition Facts And Health Tips
Snow cones are mostly ice and syrup. Here are basic nutrition facts for a standard serving (about 8 oz ice, 2 tablespoons syrup):
- Calories: 70–120 (depending on syrup)
- Sugar: 15–25 grams
- Fat: 0 grams
- Sodium: 0–5 mg
Health tips:
- Use fruit juice or natural sweeteners for fewer calories.
- Limit syrup for kids.
- Add fresh fruit for vitamins.
If you’re watching sugar intake, try homemade syrups with less sugar or natural flavors.
Storing And Reusing Syrup And Ice
If you make extra syrup, store it in the fridge. It lasts up to 2 weeks. Ice can be kept in a cooler or insulated bag if you’re making snow cones at a party.
Never refreeze melted ice—it becomes cloudy and hard to crush. Always use fresh ice for best results.
Real-life Examples: Ninja Blender Snow Cones
Here are some experiences from people who use Ninja blenders for snow cones:
- Lisa from Texas: “I make snow cones for my kids every summer. The Ninja crushes ice perfectly. We use fresh fruit syrup—so much better than store-bought.”
- Mike from California: “Tried making snow cones at a party. The blender jammed because I used old ice. Switched to fresh cubes, and it worked great.”
- Jen from Florida: “I set up a snow cone bar for my daughter’s birthday. Ninja blender made it easy. Kids loved mixing flavors.”
These examples show that with a Ninja blender, you can make snow cones for family, parties, or just a treat.
Making Snow Cones For Special Diets
If you have dietary restrictions, snow cones can still be enjoyed.
Diabetic-friendly snow cones:
- Use sugar-free syrups.
- Sweeten with stevia or monk fruit.
Vegan snow cones:
- Use plant-based syrups and toppings.
- Avoid condensed milk or dairy-based toppings.
Allergy-friendly snow cones:
- Use natural flavors.
- Avoid nuts or gluten-based toppings.
Many people don’t realize how easy it is to adapt snow cones for different diets. Making your own syrup gives you full control.
Environmental Tips
Snow cones are a low-waste treat, but you can do even better:
- Use reusable cups instead of paper cones.
- Compost fruit scraps from homemade syrup.
- Clean blender parts with eco-friendly soap.
Small changes make a difference, especially if you make snow cones often.
Credit: www.ebay.com
Where To Find More Snow Cone Recipes
If you want more inspiration, check out Food Network for creative recipes and flavor ideas. They offer dozens of unique syrups and toppings to try.
Frequently Asked Questions
Can I Use Any Blender For Snow Cones?
Not all blenders crush ice well. Ninja blenders are designed for ice and frozen drinks, so they work best. Other brands might leave big chunks or even break. Always check your blender’s manual for ice-crushing ability.
How Do I Make Snow Cone Syrup Without Sugar?
Use fruit juice or natural sweeteners like stevia. Boil 1 cup juice with 1 tablespoon stevia and simmer until slightly thick. This gives a healthier syrup with fewer calories.
Can I Store Crushed Ice For Later?
It’s best to use crushed ice right away. If you store it, it melts and forms clumps, making the texture worse. For parties, keep whole ice cubes in a cooler and crush as needed.
What’s The Difference Between Snow Cones And Shaved Ice?
Snow cones use chunky, fluffy ice and sweet syrup. Shaved ice uses fine, powdery ice and absorbs syrup better. Shaved ice is smoother, while snow cones have more texture.
How Long Does Homemade Syrup Last?
Homemade syrup lasts about 2 weeks in the fridge. Always use clean bottles and shake before use. If it smells or looks odd, throw it out.
Making snow cones with a Ninja Blender is simple, fun, and customizable. With just a few ingredients and basic steps, you can create tasty treats for any occasion. Remember to use fresh ice, pulse blend for the best texture, and experiment with homemade syrups and toppings.
Whether you’re making snow cones for kids, parties, or yourself, the Ninja Blender is your best tool for getting great results every time. Enjoy your snow cone adventure!