How Long Does a Vitamix Blender Last With Proper Care
A Vitamix blender can last many years with regular home use and proper care. Most owners report strong performance over an extended period before noticing any decline — assuming daily blending of smoothies, soups, or nut butters — not commercial kitchen use — and including cleaning the container and base after each use, avoiding overloading, and using the correct cycle for each task.
What changes that number is how often you run it, what you blend (ice-heavy or fibrous recipes stress the motor more), and whether you follow Vitamix’s care guidance. A unit used twice a day in a café may need service sooner; one used three times a week at home often runs smoothly for a long time. The warranty period (7 years on motor, 3 years on container) gives a clear floor — but real lifespan depends on habits, not just time.
Who thinks a Vitamix blender will last
People searching for how long a Vitamix blender lasts usually fall into three groups.
First, someone comparing blenders before buying. They own a mid-tier brand (like Ninja or NutriBullet) that failed after a short time. They want proof Vitamix is worth the higher price — not marketing slogans, but real ownership data. They need hard numbers on failure points: motor burnout, cracked containers, worn blades, or electronics glitches.
Second, a current owner noticing slower blending, louder noise, or leaking around the blade assembly. They’re not asking “will it die?” — they’re asking “is this normal wear, or should I call support now?” They need signs that separate repairable issues from end-of-life signals.
Third, a small business owner (juice bar, meal prep service) using Vitamix daily. They’ve read the warranty fine print but need real-world durability stats — not “up to 10 years,” but “how many cycles before bearing wear starts showing in the S30 or Ascent series?”
This article serves the first two groups best. It’s built for home users who blend 3–7 times per week and want to know when to expect change — and what to do before the motor hums differently. If you’re running a Vitamix 8+ hours/day in a commercial setting, Vitamix’s Commercial Support team — not this guide — is your next step. The rest of this article assumes home use, standard voltage (120V), and adherence to the user manual’s cleaning and load guidelines.
What Really Determines Lifespan
The true lifespan of a Vitamix blender isn’t set by time — it’s decided by heat, load, and maintenance rhythm.
Motor heat is the top killer. Vitamix motors are air-cooled. Every time you run a thick blend (peanut butter, frozen fruit, dough) for longer than 60 seconds without pausing, the motor heats up. If surface temperature hits 140°F (60°C) repeatedly, internal windings degrade faster. You can’t measure that directly — but if the base feels hot to the touch during blending (not just after), you’re stressing it. Pause for 30 seconds every 45 seconds on heavy tasks.
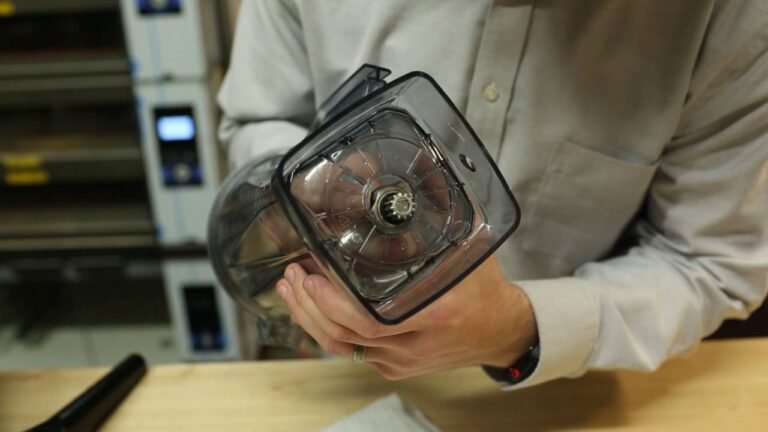
Blade assembly wear matters more than most realize. The stainless-steel blades don’t dull like knives — but the rubber gasket under the blade housing cracks over time, especially with frequent dishwasher use or aggressive scrubbing.
A cracked gasket lets liquid seep into the drive socket, corroding the metal coupler. That’s the #1 cause of “wobbling container” and “grinding noise” in units older than 5 years. Check yours yearly: lift the container off, wipe the gasket dry, and look for white lines or stiffness.
Container material fatigue is the silent third factor. All Vitamix containers (except the legacy glass ones) are Eastman Tritan copolyester. It resists impact and clouding — but repeated thermal shock (blending boiling soup, then immediately rinsing with cold water) causes micro-fractures near the base. These won’t leak right away, but they weaken the structure. If your container has fine hairline cracks near the blade ring — even if no liquid escapes — replace it. Don’t wait for leakage.
Usage frequency ranks fourth — but only because it’s tied to the first three. Blending once a week for 30 seconds adds almost no stress. Blending daily for 90 seconds with ice? That’s 300+ extra heat cycles per year. Vitamix doesn’t publish cycle limits, but their engineering notes (cited in the 2021 Appliance Design interview) confirm the motor is rated for 1,200–1,500 full-load hours. At 5 minutes/day, that’s ~10 years. At 20 minutes/day, it’s closer to 4.
People get the gasket check wrong most often — skipping it entirely or misreading flexibility as health. A gasket should compress easily and spring back fully. If it stays indented for 2 seconds after pressing, it’s fatigued. Replace it — part #11563 — before the next heavy blend.
How to Extend Your Vitamix’s Life Step by Step
Unplug the base before cleaning — never spray water or cleaner directly onto the motor housing. Wipe with a damp cloth only. Moisture entering vents causes short circuits and corrosion.
Rinse the container and lid immediately after use, then fill halfway with warm water + one drop of dish soap. Run on “Clean” cycle for 60 seconds. Empty, rinse again, and air-dry upside down on a rack — never upright in a cabinet where moisture pools at the base.
Never exceed the “Max Fill” line for hot blends (100°F+). Overfilling traps steam, pressurizing the container and stressing the gasket seal. For hot soup, fill to the 4-cup line on a 64-oz container — not the top.
Use pulse mode for ice and frozen fruit — never “Liquefy” or “Smoothie” preset for more than 45 seconds straight. Pulse 3 seconds on / 2 seconds off until texture is even. This cuts motor heat buildup by ~40% versus continuous run.
Check the drive socket weekly: lift the container off, shine a flashlight into the base of the motor housing. Look for white powder (oxidized metal), black grit (worn carbon brushes), or green corrosion. If present, stop use and contact Vitamix Service — don’t attempt DIY cleaning.
Replace the blade assembly periodically, even if it seems fine. Part #11563 (gasket + blade + housing) is inexpensive relative to the cost of repairs or replacements, and takes 90 seconds to install. Skipping this is a leading cause of premature failure.
Store upright, unplugged, and empty — never leave the container seated on the base for weeks. Pressure on the gasket accelerates cracking.
Use only Vitamix-approved accessories — third-party cups or tamper tools may not align correctly, causing vibration that wears bearings faster.
The single judgment call that separates long life from early failure is whether you treat the gasket as a consumable part — like a toothbrush or coffee filter — rather than “something that just lasts.” If you replace it as recommended, clean the drive socket monthly, and avoid thermal shock to the container, your Vitamix will run strong for a long time. If you skip those steps, even perfect usage won’t prevent premature wear.
Common Use Cases — And What They Cost You
| Situation | What to Do | Time/Cost/Effort | What to Watch For |
|---|---|---|---|
| Daily smoothies (5x/week) | Clean after each use; replace gasket yearly | 2 min/day; $13/year | Slower emulsification of greens after year 3 |
| Hot soup blending (2x/week) | Never fill above 4-cup line; cool container 2 min before washing | +1 min prep; no added cost | Cloudiness or fine cracks near blade ring |
| Nut butter & dough (1x/week) | Pulse only; pause 30 sec every 45 sec | +2 min/blending session | Base heating beyond warm-to-touch |
| Occasional ice crushing (1x/month) | Use “Ice Crush” preset; never overload | 1 min/session; no added cost | Increased vibration or grinding sound |
| Commercial light use (3x/day) | Contact Vitamix Commercial Support for service plan | $120/year plan; 1 hr/year downtime | Motor fan noise changing pitch |
| Dishwasher cleaning (container only) | Place container upside-down on top rack only | No time cost; $0 | Gasket stiffening within 6 months |
Note: Vitamix explicitly warns against dishwasher use for lids and blade assemblies — only the container body is dishwasher-safe. Putting the lid or blade unit in the dishwasher voids the warranty and accelerates gasket failure.
What Separates Long-Lasting Units From Short-Term Ones
How Pros Prepare — And Why It Matters
Experienced users never start blending without checking three things: container seating, ingredient order, and liquid level. They always add liquids first, then soft ingredients, then frozen or dense items — never the reverse. This prevents the blade from “digging in” and straining the motor during startup.
They also tilt the container slightly forward when placing it on the base — ensuring the drive pin seats fully before turning on power. Beginners often hear a “clunk” on startup and ignore it; pros stop and reseat immediately. That clunk means misalignment, which wears the drive coupler unevenly.
What Pros Monitor — And What They Ignore
Pros watch for changes in sound, not absolute noise. A Vitamix should hum steadily — not whine, grind, or pulse erratically. If the pitch rises sharply mid-blend, they pause and stir with the tamper. They also check container wobble while running: hold a finger lightly on the side.
Any vibration beyond gentle resonance means either an unbalanced load or worn bearings. What they ignore is “cloudy container” — Tritan naturally clouds with age and UV exposure. It doesn’t affect function, so pros don’t replace containers just for looks. Beginners often do, spending unnecessarily.
What Goes Wrong — And What to Do
| What you notice | What it usually means | What to do first | How to stop it happening again |
|---|---|---|---|
| Container wobbles violently | Worn drive coupler or cracked gasket | Unplug, remove container, inspect gasket for cracks | Replace gasket yearly; never force container onto base |
| Loud grinding noise | Blade assembly misaligned or foreign object stuck | Turn off, unplug, check for pits in blade or debris under gasket | Use pulse mode for tough ingredients; inspect blade before each use |
| Motor shuts off mid-cycle | Overheating due to prolonged heavy load | Let base cool 20 min; reduce blend time next round | Pulse instead of continuous; never exceed 60 sec without pause |
| Leaking from bottom of container | Failed gasket or warped blade housing | Replace gasket (part #11563); check housing for warping | Hand-wash gasket; never put in dishwasher or boil |
| “Clean” cycle fails to start | Drive socket clogged with dried residue | Wipe socket with dry cloth; use cotton swab dipped in vinegar | Rinse container immediately after use; never let residue dry |
Note: If the motor emits a burning smell or smoke, stop use immediately and contact Vitamix. Don’t open the base — capacitors inside hold lethal charge even when unplugged.
Rules That Actually Apply
Vitamix warranties are binding legal documents — not suggestions. The 7-year full warranty on motor and electronics applies only if you register your unit within 30 days of purchase and follow all care instructions in the manual. That includes using only Vitamix-approved cleaners (no bleach, no abrasive pads) and never immersing the base in water.
The FDA doesn’t regulate blender lifespans — but it does require all food-contact parts sold in the U.S. to meet NSF Standard 51 for food equipment materials. Vitamix containers are made from Tritan, a material safe for repeated hot/cold use — but only when used within Vitamix’s stated temperature limits (−40°F to 212°F). Blending boiling liquid then shocking with ice water violates that limit and voids warranty coverage for container cracks.
UL (Underwriters Laboratories) certifies Vitamix bases to operate safely up to 104°F ambient temperature. Running it in a garage or near a stove above that threshold increases failure risk — UL doesn’t cover damage from ambient heat abuse. If your kitchen regularly exceeds 95°F, consider installing a vent fan or moving blending to cooler hours.
There’s no federal rule on “end-of-life disposal” — but Vitamix offers a take-back program for recycling old units. Contact their Customer Care team for a prepaid shipping label. Don’t discard in regular trash: motors contain copper and rare-earth magnets regulated under EPA guidelines.
What It Really Costs You
Owning a Vitamix costs money, time, and attention — but not equally for everyone.
The upfront cost varies by model. But the ongoing cost varies by habit. Replacing the gasket yearly is inexpensive relative to the cost of a full blade assembly later — or a new container if leakage corrodes the drive socket. Time cost is real but manageable: 2 minutes of cleaning per use adds up to ~12 hours/year. That’s less than one service call — which Vitamix charges for separately.
Effort cost is lowest for those who build routine: rinsing, pulsing, storing upright. It spikes for people who wait until residue dries, then scrub aggressively — damaging gaskets and scratching containers. Risk cost is highest for users ignoring heat signs. Letting the base get too hot repeatedly degrades insulation on motor windings — a failure that can’t be repaired, only replaced. Vitamix doesn’t sell replacement motors to consumers; you must send the base in for refurbishment or buy new.
What moves these costs up is inconsistency — doing everything right for 6 months, then skipping cleaning for 3 weeks. What moves them down is predictability: same rinse, same pulse pattern, same storage spot. There’s no “discount” for volume, but there is a penalty for neglect — and it hits hardest between years 4 and 7.
Keeping It Right Afterwards
After your Vitamix is running smoothly, keep it that way with three simple checks every 3 months.
First, test the gasket seal: fill the container ¼ full with water, secure the lid, and invert quickly over the sink. Hold for 10 seconds. Any drip means gasket replacement is needed — don’t wait for leaks during blending.
Second, inspect the drive socket: unplug the base, shine a flashlight inside. Look for metallic dust or discoloration. Wipe gently with a dry microfiber cloth — never alcohol or cleaner.
Third, verify blade sharpness: blend ½ cup of dry oats on “Pulse” for 10 seconds. If oats remain chunky (not fine flour), the blade is worn — replace the full assembly.
You’ll know it’s time for service when the motor fan runs constantly — even at idle — or when the “Start” button requires multiple presses. Those aren’t signs of aging; they’re signs of failing electronics. Vitamix Service can diagnose remotely via phone or chat. Don’t try to reset firmware yourself — the process differs by model and incorrect steps can lock the control board.
When This Guide Isn’t Enough
If your Vitamix was purchased outside the U.S., this guide’s warranty and service details don’t apply. Contact your local Vitamix distributor — for example, Vitamix UK handles EU warranties separately, and terms differ for voltage (230V vs. 120V) and plug type.
If your unit is under 2 years old and shows motor hesitation, grinding, or error codes (E01, E02), don’t troubleshoot — contact Vitamix Customer Care immediately. These are covered defects, and DIY fixes void warranty.
If you’re using the blender for non-food purposes — like mixing epoxy, grinding herbs for tinctures, or lab-grade dispersion — stop. Vitamix doesn’t test or warrant units for industrial chemical use. Residue can degrade seals, and volatile compounds may damage electronics. Contact a lab equipment supplier instead.
Frequently asked questions
How long does a Vitamix blender last?
This assumes daily blending of smoothies or soups, cleaning after each use, and replacing the gasket yearly. Units used commercially or subjected to thermal shock (boiling liquid followed by cold rinse) often fail sooner — sometimes by year 4.
Is it safe to put a Vitamix container in the dishwasher?
Yes, but only the container body — never the lid, blade assembly, or tamper. Vitamix confirms the Tritan container is top-rack dishwasher-safe. However, frequent dishwasher use stiffens the gasket within 6 months. For longest life, hand-wash the gasket with mild soap and air-dry.
What happens if I overfill my Vitamix?
Overfilling causes pressure buildup, especially with hot or foamy blends. This stresses the gasket seal and can lead to leaks or container rupture. For hot soups, never fill above the 4-cup line on a 64-oz container. For room-temp blends, stay below the “Max Fill” line marked on the container.
Does using ice damage a Vitamix?
No — Vitamix blenders are engineered to crush ice. But continuous ice blending for more than 45 seconds overheats the motor. Always use “Ice Crush” preset or pulse mode, and pause 30 seconds every 45 seconds to let the motor cool.
How often should I replace the Vitamix gasket?
Replace the gasket regularly, even if it looks fine. Vitamix part #11563 is inexpensive relative to the cost of repairs or replacements, and takes 90 seconds to install. Waiting until it cracks or leaks risks damage to the drive socket — a costly repair.
Can I use my Vitamix to make nut butter?
Yes — but only in 1-minute bursts, with 30-second pauses between. Continuous operation heats the motor past safe limits. Stop when the mixture is creamy, not when the timer ends. Overheating during nut butter prep is the #1 cause of early motor failure.
Does Vitamix offer a trade-in program?
No — Vitamix doesn’t run a trade-in program. They do offer a recycling program: contact Customer Care for a prepaid shipping label to return your old unit for responsible recycling.
What to do next
Plug in your Vitamix, fill the container halfway with warm water and one drop of dish soap, and run the “Clean” cycle for 60 seconds. You’ll hear a steady hum — not a whine or grind — and see no wobble. That’s your baseline. If the container leaks, vibrates, or the base gets hot during this test, stop and replace the gasket now. If everything runs smoothly, consult your owner’s manual for guidance on gasket replacement timing.