How To Blend Ninja Creami: Expert Tips for Perfect Results
If you’ve ever wanted to make the creamiest, most delicious frozen treats at home, you’ve probably heard about the Ninja Creami. It’s not just another blender or ice cream maker—it’s a unique machine designed to turn simple ingredients into rich ice cream, gelato, sorbet, and more. But blending with the Ninja Creami isn’t as simple as pressing a button. There are special steps, tricks, and details you need to know to get that perfect texture and flavor. Many beginners think they can just toss in their favorite ingredients and go, but using the Ninja Creami the right way takes a little practice and know-how.
In this guide, you’ll learn exactly how to blend with the Ninja Creami, what makes it different from other machines, and how to avoid the most common mistakes. You’ll discover tips for choosing the best ingredients, how to prep your base, and what to do if your blend doesn’t turn out as expected.
Whether you want to make classic vanilla ice cream or experiment with wild flavors, you’ll find everything you need here. Let’s dive in and unlock the secrets of blending with the Ninja Creami.
What Is The Ninja Creami?
The Ninja Creami is a modern kitchen appliance made specifically for frozen desserts. Unlike traditional blenders or ice cream makers, it uses a special blade and motor to “spin” frozen bases into smooth, creamy treats. This spinning action breaks down ice crystals and mixes ingredients thoroughly, creating textures similar to premium ice cream shops.
Key Features
- Spinning Blade: Unlike regular blenders, the Ninja Creami spins vertically inside the container, shaving and mixing the frozen base.
- Multiple Functions: It can make ice cream, gelato, sorbet, milkshakes, and even mix-ins (like adding cookie pieces).
- Single-Serve Containers: Most models use pint-sized containers, allowing you to make small batches and experiment with flavors.
Why Is It Different?
Traditional ice cream makers use churning and freezing, which can take hours and often require pre-chilled bowls. The Ninja Creami starts with a fully frozen base and turns it into dessert in just a few minutes. This means you can prepare your base ahead of time, freeze it overnight, and blend when you’re ready to eat.
Types Of Ninja Creami Models
Choosing the right model can affect your blending experience. Here’s a quick comparison:
| Model | Functions | Container Size | Special Features |
|---|---|---|---|
| Creami Deluxe | Ice Cream, Sorbet, Gelato, Mix-In, Lite Ice Cream | 24 oz (Deluxe Pint) | More capacity, “Pour-In” mix-ins |
| Creami Original | Ice Cream, Sorbet, Gelato, Milkshake, Mix-In | 16 oz (Pint) | Standard features, smaller size |
| Creami Breeze | Ice Cream, Sorbet, Gelato, Mix-In | 16 oz (Pint) | Lightweight, simple controls |
Key Insight: The Deluxe model lets you make bigger batches and has more functions, but all models use the same “spin” technology for blending.
Preparing Your Base For Blending
A perfect Ninja Creami dessert starts with a well-prepared base. The base is the mixture you freeze before blending.
Common Base Types
- Dairy-Based: Milk, cream, sugar, flavorings (for ice cream or gelato)
- Non-Dairy: Plant milks (almond, oat, coconut), sugar, stabilizers
- Fruit-Based: Pureed fruit, juice, sometimes sugar (for sorbets)
Why Freezing The Base Matters
The Ninja Creami blends frozen bases. If your base isn’t fully frozen, it won’t blend correctly. Always freeze your base for at least 24 hours. This ensures the machine can shave and mix the ice crystals properly.
Basic Ice Cream Base Recipe
Here’s a simple recipe to get started:
- 1 cup heavy cream
- 1 cup whole milk
- 3/4 cup sugar
- 1 tsp vanilla extract
Mix all ingredients until the sugar dissolves. Pour into a Ninja Creami container and freeze for 24 hours.
Non-Obvious Insight: Many beginners skip dissolving the sugar completely. Undissolved sugar can cause gritty texture after blending. Always stir well before freezing.
How To Blend With Ninja Creami: Step-by-step Guide
Now let’s get into the actual blending process. This is where the magic happens.
Step 1: Freeze Your Base
Prepare your mixture and pour it into the Ninja Creami pint container. Place the lid on tightly. Freeze upright for at least 24 hours. Make sure your freezer is set to 0°F (-18°C) for proper freezing.
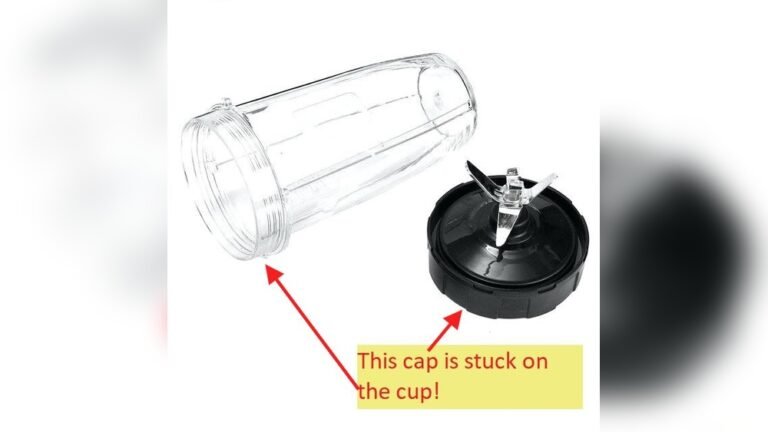
Step 2: Assemble The Machine
Remove the frozen pint from the freezer. Take off the lid. Place the pint into the outer bowl, attach the Creami’s blade assembly, and lock the bowl into the machine.
Step 3: Select The Right Program
Choose the program that matches your base:
- Ice Cream: For dairy bases
- Sorbet: For fruit bases
- Gelato: For richer, dense bases
- Lite Ice Cream: For low-fat bases
- Mix-In: For adding cookie, candy, or fruit pieces
Press the button and let the machine spin. This usually takes 1-3 minutes.
Step 4: Check Texture
After spinning, open the bowl and check the texture. Sometimes the blend looks crumbly. Don’t worry—this is normal. If your dessert isn’t creamy enough, use the “Re-spin” function. This mixes it again and makes it smoother.
Step 5: Add Mix-ins (optional)
If you want to add pieces like chocolate chips or fruit, make a small hole in the blended dessert. Add your mix-ins. Use the “Mix-In” function to blend them in gently.
Step 6: Serve Immediately
Ninja Creami desserts are best eaten right after blending. The texture is soft and creamy. If you wait too long, they may harden again.
Expert Tip: If your blend is too hard, let it sit at room temperature for 2-5 minutes before blending or re-spinning. This helps soften the base for smoother results.
Choosing Ingredients For Ninja Creami
Ingredients can make or break your dessert. Here’s how to pick the best options.
Dairy And Non-dairy Choices
- Milk: Whole milk gives the creamiest texture. Skim milk results in lighter, less rich desserts.
- Cream: Heavy cream adds richness. For lighter options, use half-and-half.
- Non-Dairy Milks: Almond, oat, coconut, and soy milk can be used, but may need stabilizers (like guar gum) for smoothness.
Sweeteners
- Sugar: Plain granulated sugar works well.
- Honey/Agave: Good for sorbets and some ice creams. Adjust quantity, as these are sweeter than sugar.
- Sugar Substitutes: Monk fruit, stevia, erythritol can be used, but may alter texture.
Flavorings
- Extracts: Vanilla, almond, peppermint
- Fruit Purees: For sorbets or flavored ice creams
- Chocolate, cocoa powder: Mix with milk or cream for chocolate bases
Practical Advisor Insight: For best results, avoid adding large chunks of fruit or chocolate before freezing. They may not blend smoothly. Instead, add them as mix-ins after the first spin.
Common Mistakes When Blending Ninja Creami
Even experienced users make errors. Here are mistakes to avoid:
- Not Freezing Long Enough: Bases need a full 24 hours in the freezer.
- Overfilling the Container: Fill only to the max line. Overfilling can block the spinning blade.
- Using Unblended Ingredients: If your base has lumps or undissolved sugar, the final dessert will feel gritty.
- Wrong Program Selection: Using the sorbet setting for dairy bases or vice versa affects texture.
- Skipping the Re-spin: Sometimes one spin isn’t enough. Re-spin for smoother texture.
- Adding Mix-Ins Too Early: If you add mix-ins before blending, they get chopped up or lost. Always add after the first spin.
Beginner Tip: Always clean the blade and bowl between batches. Sticky residue can affect performance and flavor.

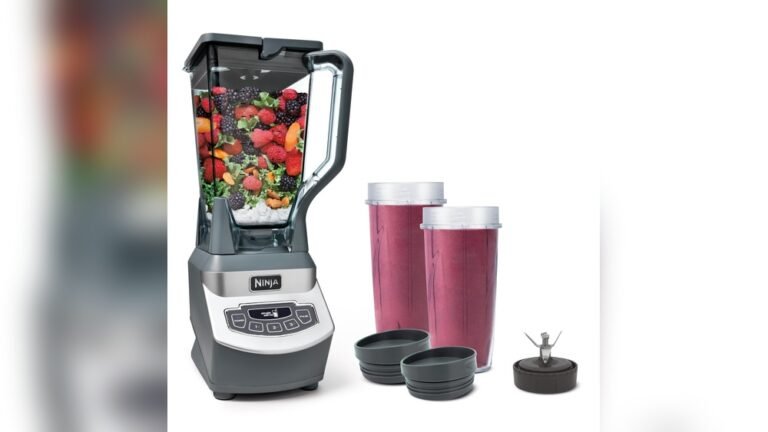
Credit: www.sharkninja.com
Advanced Techniques For Perfect Blending
If you want to take your Ninja Creami blending to the next level, try these advanced strategies.
Layering Flavors
Make two or more bases (e. g. , chocolate and vanilla). Freeze separately. After blending, layer them in the container and use the Mix-In function for swirls.
Using Stabilizers
Ingredients like guar gum, xanthan gum, or cornstarch help make ice cream smoother. Add a small amount (1/4 teaspoon per pint) to your base before freezing.
Alcohol For Texture
Adding a tablespoon of alcohol (like vodka or rum) can make ice cream softer and easier to scoop. It lowers the freezing point, but don’t add too much or the dessert won’t freeze properly.
Protein Powders
For high-protein treats, add whey or plant protein to your base. Mix well to avoid clumps.
Non-Obvious Insight: If you want to make “lite” desserts, avoid using water as the main liquid. It freezes too hard and makes the texture icy. Use milk or milk alternatives instead.
Troubleshooting: Fixing Blend Problems
Sometimes, things don’t go as planned. Here’s how to fix common issues.
Crumbly Or Dry Texture
- Use the Re-spin function once or twice.
- Add a tablespoon of milk or cream to the base and re-spin.
Too Hard To Spin
- Let the pint sit at room temperature for 2-5 minutes before blending.
- Make sure your freezer isn’t set colder than 0°F (-18°C).
Base Didn’t Freeze Properly
- Check your freezer temperature.
- Don’t use hot ingredients; cool the base before freezing.
Mix-in Not Blending Well
- Chop mix-ins into small pieces before adding.
- Don’t overload the pint; stick to a handful of mix-ins.
Straight-to-the-Point Helper Insight: If your blade gets stuck or the machine stops, immediately unplug and check for overfilling or hard chunks. Never force the blade.
Comparing Ninja Creami To Other Dessert Makers
Is the Ninja Creami really better than traditional machines? Let’s compare:
| Feature | Ninja Creami | Traditional Ice Cream Maker | Standard Blender |
|---|---|---|---|
| Prep Time | Base freezes overnight; blends in minutes | Churns 20-40 min; bowl pre-freeze required | Immediate blending; not ideal for ice cream |
| Texture | Very smooth, creamy | Good, but can be icy | Chunky, icy |
| Batch Size | Small (16-24 oz) | Large (up to 2 quarts) | Varies |
| Mix-In Capability | Easy with Mix-In function | Manual, after churning | Limited |
| Cleaning | Simple, dishwasher safe | Multiple parts, more cleaning | Simple |
Key Takeaway: The Ninja Creami is best for quick, small batches and experimenting with flavors. Traditional makers are better for larger quantities and classic recipes.
Ninja Creami Recipes: Examples And Tips
Let’s look at some classic recipes you can try, with practical advice for each.
Classic Vanilla Ice Cream
- 1 cup heavy cream
- 1 cup whole milk
- 3/4 cup sugar
- 1 tsp vanilla extract
Mix, freeze, blend on “Ice Cream” setting. Re-spin if needed.
Chocolate Sorbet
- 1 cup water
- 1/2 cup cocoa powder
- 3/4 cup sugar
- 1 tsp vanilla extract
Mix, freeze, blend on “Sorbet” setting. Use re-spin for smoother texture.
Strawberry Gelato
- 1 cup strawberries (pureed)
- 1 cup whole milk
- 1/2 cup sugar
- 1/2 cup heavy cream
Mix, freeze, blend on “Gelato” setting. Add sliced strawberries as mix-ins.
Dairy-free Mango Sorbet
- 1 cup mango puree
- 1/2 cup coconut milk
- 1/2 cup sugar
Mix, freeze, blend on “Sorbet” setting.
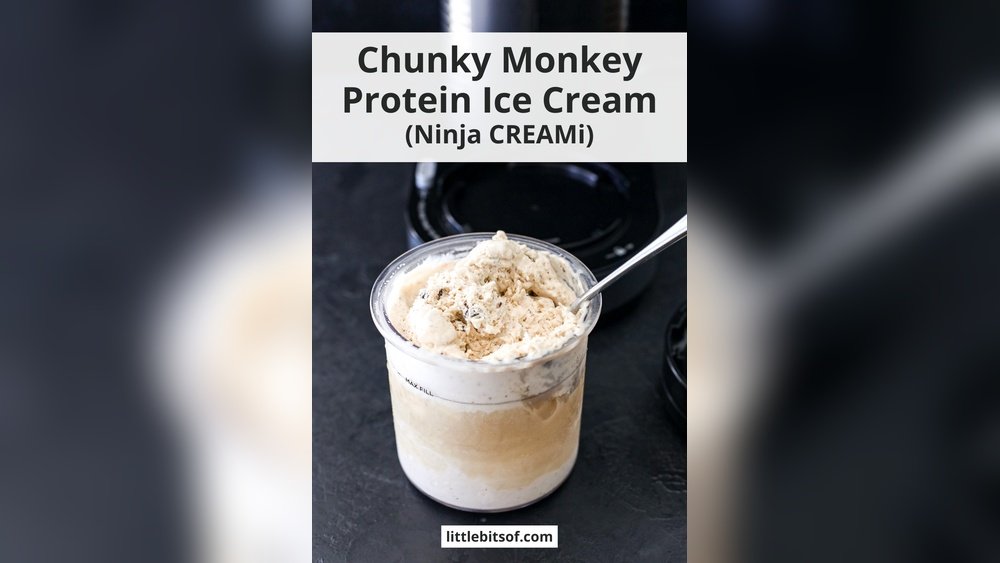
Protein Ice Cream
- 1 cup milk
- 1 scoop vanilla protein powder
- 1/2 cup Greek yogurt
- 1/4 cup sugar
Mix, freeze, blend on “Lite Ice Cream” setting.
Experience-Based Guide Tip: For fruit sorbets, always puree the fruit before freezing. Whole fruit pieces will freeze solid and won’t blend smoothly.
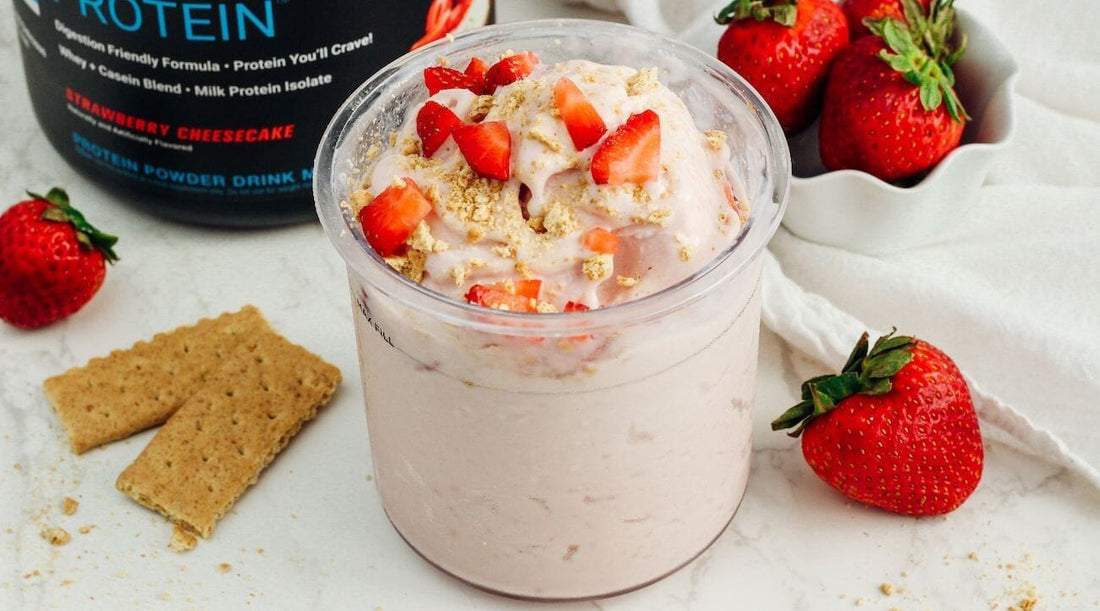
Credit: pescience.com
Cleaning And Maintaining Your Ninja Creami
Keeping your Ninja Creami in top shape is important for blending performance and food safety.
Cleaning Steps
- Remove the blade assembly carefully after blending.
- Wash all parts (pint, bowl, blade) with warm, soapy water.
- Rinse thoroughly to remove any residue.
- Dry completely before storing. Moisture can cause odors or mold.
Many parts are dishwasher safe, but always check your model’s manual.
Maintenance Tips
- Check blade for damage regularly.
- Store pints upright to avoid leaks.
- Avoid using abrasive cleaners on plastic parts.
Calm Expert Insight: If you use sticky ingredients like honey or nut butter, soak parts in warm water before washing to make cleaning easier.
Making Healthier Desserts With Ninja Creami
You can use the Ninja Creami to make healthier frozen treats. Here’s how:
Low-sugar Bases
- Use sugar substitutes like stevia or monk fruit.
- Add fruit for natural sweetness.
Lower Fat Options
- Use skim milk or plant milks.
- Substitute Greek yogurt for cream.
High-protein Bases
- Add protein powder or Greek yogurt.
- Mix well to avoid lumps.
Allergy-friendly Recipes
- Use coconut or oat milk for dairy-free desserts.
- Check labels for allergens before adding mix-ins.
Friendly Mentor Tip: When making healthier bases, expect slightly different textures. Light bases may need extra re-spin to achieve creaminess.
Creative Ways To Use Ninja Creami
The Ninja Creami isn’t just for ice cream. Try these creative uses:
- Frozen cocktails: Blend fruit bases with a splash of alcohol.
- Breakfast smoothies: Freeze smoothie ingredients and blend for thick, cold smoothies.
- Frozen yogurt: Use yogurt as the main base for a tangy, creamy treat.
- Dessert bowls: Layer blended ice cream with fruit, granola, or nuts.
Non-Obvious Insight: You can blend savory bases—like frozen tomato soup—for unique appetizers. Just use the “Sorbet” setting.
Storing Ninja Creami Desserts
Because Ninja Creami desserts are best right after blending, storing can be tricky.
Best Practices
- Store blended ice cream in the freezer for up to 2 weeks.
- Always use airtight containers to prevent freezer burn.
- Let frozen desserts sit at room temperature for 5-10 minutes before serving.
Beginner Mistake: Don’t refreeze after serving. Repeated freezing and thawing ruin texture.
Ninja Creami Accessories And Extras
Enhance your blending experience with accessories:
- Extra pints: Useful for making multiple flavors at once.
- Replacement blades: Handy if yours becomes dull or damaged.
- Recipe books: Official Ninja Creami recipe books provide inspiration.
For official accessories and recipes, check the company’s site: Ninja Kitchen.
Frequently Asked Questions
How Long Should I Freeze My Base Before Blending?
Freeze your base for at least 24 hours at 0°F (-18°C). This ensures the right texture and prevents the blade from getting stuck during blending.
Can I Use The Ninja Creami For Non-dairy Desserts?
Yes! The Ninja Creami works well with plant-based milks like almond, oat, coconut, and soy. You may need to add a stabilizer like guar gum for smoother texture.
What Should I Do If My Ice Cream Is Too Crumbly?
Use the Re-spin function. If still crumbly, add a tablespoon of milk or cream to the base and re-spin. Letting the pint sit out for a few minutes also helps.
How Do I Clean The Ninja Creami Blade Safely?
Remove the blade carefully after blending. Wash it in warm, soapy water, rinse well, and dry completely. Avoid using abrasive cleaners or scrubbing pads.
Can I Make Mix-ins With The Ninja Creami?
Yes, use the Mix-In function to add cookie pieces, fruit, or candy after the first spin. Always chop mix-ins into small pieces and add them only after the base is blended.
Blending with the Ninja Creami is more than just pressing a button—it’s about understanding the process, choosing the right ingredients, and following the best practices. Once you get the hang of it, you can create amazing desserts that rival what you find in stores.
Experiment with flavors, try healthier options, and use these tips to avoid common mistakes. With the Ninja Creami in your kitchen, every dessert becomes an adventure.

Credit: www.amazon.com