How To Change Blade On Vitamix Blender: Twist And Pull Fix
You can replace the blade assembly on a Vitamix blender in about 15 minutes without tools if you follow the correct twist-and-pull method. This process works for most standard containers, but the exact steps change if your model has a special locking mechanism or if the base is damaged.
The time and effort depend on whether your container uses a threaded ring or a push-lock design. You also need to check if the gasket is still intact before reassembling. If the blade is stuck due to old food, you may need extra soaking time first.
Who needs to change the Vitamix blender blade

This page helps owners of older Vitamix models with removable blades who want to save money on repairs. It serves people who have noticed their blender running louder or leaking from the bottom after heavy use. These users usually have the basic tools at home and want to avoid sending their machine away for weeks.
It doesn’t help those with modern “self-cleaning” containers that have sealed bases, as these can’t be opened safely by users. It also skips the repair path for anyone whose container is cracked near the blade housing, since replacing the whole unit is safer than trying to fix it. The guide assumes you’re working with a standard 64-ounce or 48-ounce container found in most home kitchens.
If your blender is under warranty, you should contact support first rather than attempting this yourself. Opening the blade assembly often voids the manufacturer’s coverage immediately. We assume you have read the manual for your specific model number to confirm the type of lock you have before starting.
What decides the outcome
The biggest factor is the type of locking mechanism your specific Vitamix container uses. Some models rely on a simple threaded ring that unscrews by hand, while others use a push-to-release tab that requires force. If you try to force a threaded ring like a push-lock, you’ll strip the plastic threads and ruin the container permanently.
The second deciding factor is the condition of the rubber gasket inside the blade housing. A dried-out or torn seal will cause leaks even if you install the new blade perfectly. You must inspect this part carefully; if it’s brittle, no amount of tightening will stop the liquid from seeping out during blending. Many users miss this detail and blame the blade installation when the leak actually comes from the seal.
Temperature and age of the container also play a role in how easily the parts separate. Old plastic becomes brittle over time, making the blade assembly harder to remove without cracking the housing. If your container is quite old, expect the parts to be tighter and proceed with extra caution to avoid breaking the plastic.
Step by step instructions
- Unplug the blender base and remove the container from the motor to ensure safety.
- Fill the container with warm water and a drop of dish soap, then let it sit for 10 minutes to soften any stuck residue around the blade.
- Place the container upside down on a clean towel and hold the base firmly with one hand.
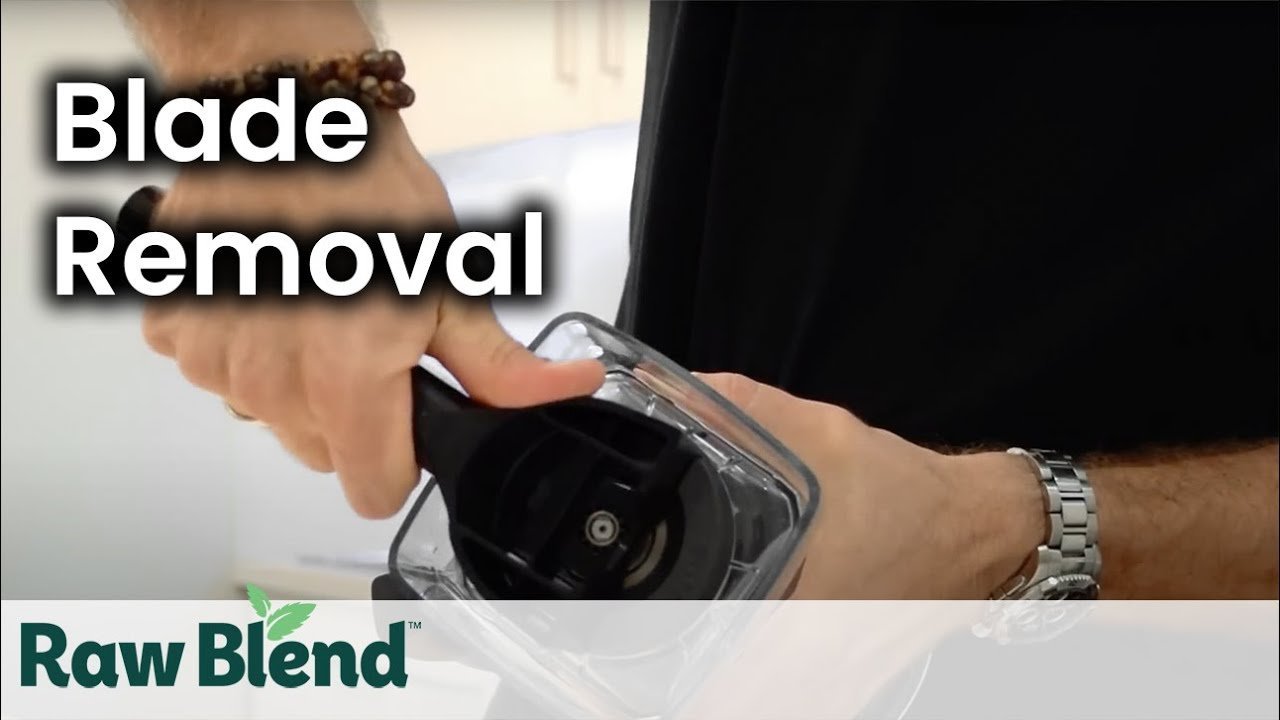
- For threaded models, grip the blade assembly with your other hand and turn counter-clockwise until the ring releases.
- For push-lock models, press the release tab located on the side of the blade housing while pulling the assembly straight down.
- Remove the old blade assembly and discard the old rubber gasket completely.
- Clean the inside of the container where the blade sits to remove any debris or old grease.
- Insert the new rubber gasket into the groove, ensuring it sits flat and evenly all around.
- Align the new blade assembly with the container threads or tabs and press or screw it into place until it clicks or feels tight.
- Wipe the outside of the blade area dry and run a small amount of water through the blender to check for leaks.
The single judgement call here is knowing when to stop tightening. If you overtighten a threaded model, you risk cracking the plastic housing; if you under-tighten a push-lock, the seal won’t hold. Stop as soon as the blade feels secure and the gasket is compressed evenly without visible gaps.
The variations at a glance
| Situation | What to do | Time/Cost | Watch for |
|---|---|---|---|
| Standard threaded model | Unscrew ring by hand | 15 min / $20 | Stripped threads |
| Push-lock model | Press tab and pull down | 10 min / $25 | Broken release tab |
| Stuck blade assembly | Soak in warm soapy water | 30 min / $0 | Cracked plastic |
| Leaking after repair | Replace gasket only | 10 min / $10 | Misaligned seal |
| Damaged container base | Buy new container | 0 min / $100 | Safety hazard |
| Warranty active | Call support first | 0 min / Free | Voided warranty |
| Old brittle plastic | Use gentle heat only | 20 min / $0 | Shattered housing |
Good vs poor results
Preparation matters
Experienced users always soak the blade area before trying to remove it. They know that frozen food particles act like glue over time. Beginners often skip this step and apply too much force immediately. This leads to stripped threads or cracked plastic that ruins the whole container. A proper soak softens the residue and makes removal smooth.
Sealing the new part
Pros always inspect the rubber gasket for tiny tears before installing the new blade. They check that the groove is clean and free of old grease. Amateurs often reuse an old, stretched gasket or forget to seat it correctly. This causes leaks that appear days later. A perfect seal requires a fresh gasket and a clean surface every single time.
Common problems and fixes
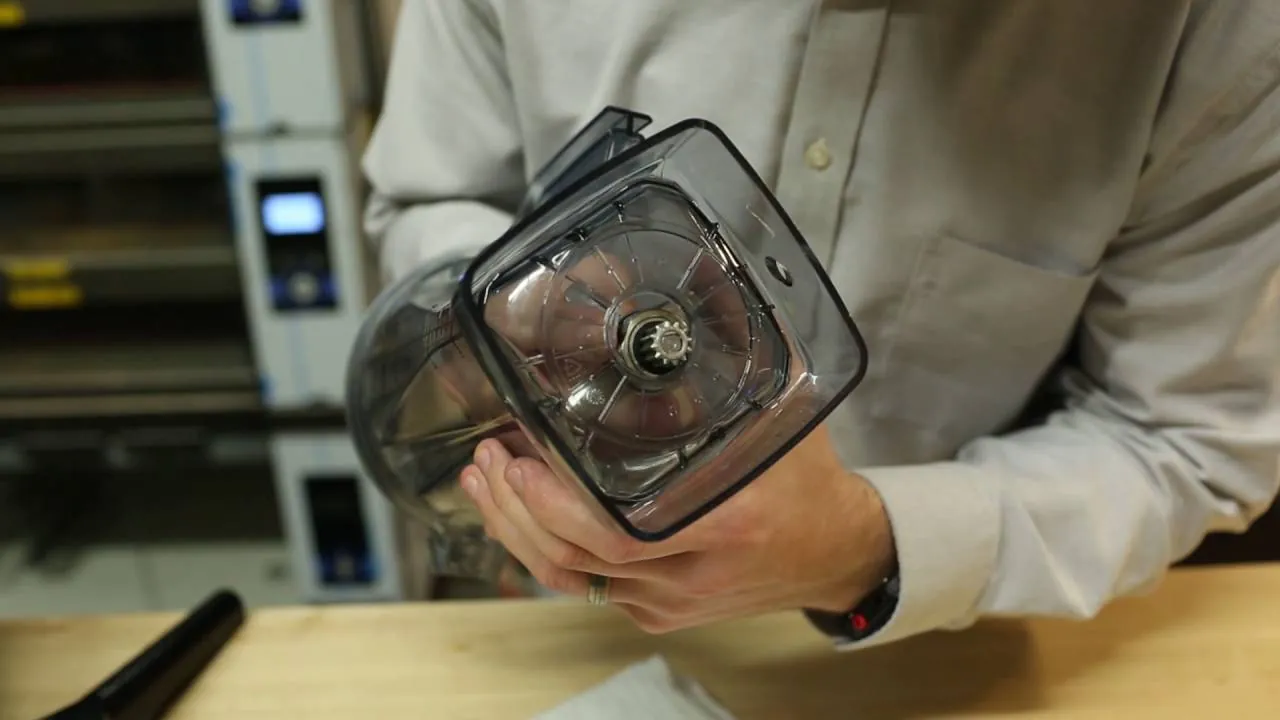
Water leaking from the base usually means the gasket sits slightly off-center rather than being torn. When you re-seat the seal, press firmly around the entire rim until it clicks into place, ensuring no food particles block the groove. If water still seeps after a few cycles, inspect the plastic housing for hairline fractures that only appear under pressure; these require immediate replacement of the entire unit.
A blade spinning loosely indicates the threads inside the container have stripped away from repeated force. Don’t attempt to tighten this further as the metal will shear completely, sending shards into your food. You must replace the container immediately and never use a wrench or pliers on the ring during assembly. Hand-tighten only until resistance meets your fingers, then stop.
Loud grinding noises often signal a loose blade assembly where the nut has vibrated free over time. Tighten it securely with the provided tool, but don’t overtighten, which can warp the shaft. Check the torque setting monthly if you process hard ingredients like nuts or ice daily. A loose blade creates friction heat that dulls the motor faster than any other single issue.
Plastic cracking near the blade is frequently caused by overtightening an old container that has lost its structural integrity. Stop using the blender immediately once you see any spiderweb fracture, even if it doesn’t leak yet. The stress concentrates at the crack tip, causing sudden shattering during high-speed operation. Buy a new container before attempting another blend cycle.
Hard-to-remove blades result from dried food buildup sealing the threads in place. Soak the assembly in hot, soapy water for ten minutes to dissolve the residue without scrubbing. Rinse thoroughly immediately after every use to prevent future sticking. Never let thick mixtures sit in the jar overnight, as they cure into a glue-like substance that requires chemical solvents to remove.
Rules you must follow
Vitamix states that opening the blade assembly voids the warranty unless done by an authorized service center. You must check your specific warranty terms on the official Vitamix website before starting. If your container is less than five years old, unauthorized repair likely cancels your coverage.
The National Sanitation Foundation recommends replacing rubber gaskets periodically to prevent bacterial growth. They note that old seals can harbor bacteria even after cleaning. Always use a new gasket whenever you replace a blade assembly to meet these hygiene standards.
Never attempt to open a container that shows visible cracks or chips near the blade housing. Structural damage compromises the integrity of the blend chamber and creates a safety risk. If you see any cracks, stop immediately and replace the entire container instead of trying to repair it.
Real costs involved
Replacing the blade assembly typically costs relatively little compared to the alternative. This includes the new blade unit and the necessary rubber gasket. Labor costs are zero if you do it yourself, but hiring a technician could add a significant amount depending on your location.
Time is the real currency here. A straightforward swap takes about 15 minutes, but a stubborn, stuck blade can take up to an hour with soaking and patience. If you break the container during the process, the cost jumps significantly for a full replacement unit. Buying a high-quality third-party blade kit might save money initially but risks fitment issues.
Always compare the price of a new blade kit against the cost of a brand-new container. Sometimes buying a fresh container is cheaper and safer than repairing an old one. The decision depends on the age and condition of your current blender.
Keeping it right afterwards
After installation, run a full test cycle using warm water and a single drop of dish soap to verify there are no leaks. Check the seal after every few uses to ensure it hasn’t shifted out of its groove. If you notice any moisture accumulating under the blade housing, stop using the blender immediately and disassemble the unit to inspect the gasket for cracks or tears.
Clean the blade area thoroughly with a soft brush and warm soapy water after every use to prevent food buildup from hardening in the crevices. Don’t leave wet food sitting in the container overnight, as this accelerates corrosion on the metal shaft and causes stubborn sticking that can damage the seal. Regular maintenance extends the life of the new blade and keeps the seal tight against high-pressure forces during operation.
Replace the rubber gasket periodically even if the blade still works perfectly. Old seals lose their elasticity over time and become prone to leaking, especially when blending hot liquids or thick mixtures.
A proactive replacement prevents messy accidents in your kitchen and keeps your blender hygienic for daily use by stopping bacteria from hiding in worn gaps. If the gasket feels brittle or shows visible wear before the recommended interval, swap it out right away rather than waiting for a failure.
When to stop
Don’t attempt this repair if your container is cracked anywhere near the blade housing. The plastic structure is compromised and could shatter during operation, sending sharp shards into your food or onto your hands. In this case, buy a new container instead of risking injury. A hairline fracture that seems harmless today will likely widen under the vibration of high-speed blending, turning a minor crack into a catastrophic failure within minutes of use.
Avoid the repair if your blender is still under an active warranty. Opening the unit yourself will void your protection immediately, leaving you without recourse for future motor failures or part replacements. Contact Vitamix support for a certified repair or replacement to keep your coverage intact. They can often replace just the damaged component at no cost, whereas a DIY fix forces you to pay for the entire machine later when the seal fails.
Skip the DIY route if the blade assembly is rusted or severely corroded. Rust indicates long-term exposure to moisture and potential internal damage to the drive shaft or bearings. A professional inspection is needed to determine if the whole unit is safe to use. If the metal shows pitting or flaking, the structural integrity is gone, and tightening the bolt will only accelerate the corrosion until the blades seize or detach completely.
Related guides
Frequently asked questions
Can I change the blade myself?
Yes, you can change the blade yourself on most standard Vitamix models without special tools. Just follow the twisting or pushing steps carefully to avoid damaging the plastic housing.
Why is my blade stuck?
Food residue builds up over time and acts like glue, making the blade hard to remove. Soaking the container in warm soapy water for 10 minutes usually loosens it enough to unscrew.
How long does it take to change?
A typical replacement takes about 15 minutes if the blade isn’t stuck. If the blade is seized, you may need an extra 30 minutes for soaking and gentle prying.
Is it safe to use a used blade?
No, you should never use a used blade assembly because the metal can be dull or corroded. Always install a brand new blade and gasket for safety and performance.
What happens if I don’t replace the gasket?
Using an old gasket will almost certainly cause leaks because the rubber loses its shape. You must install a new seal to ensure a watertight connection every time.
Does changing the blade void the warranty?
Yes, opening the blade assembly usually voids the manufacturer’s warranty unless done by an authorized service center. Check your warranty terms before starting any work.
How do I know if the seal is bad?
Look for white residue or water droplets forming under the blade housing after blending. If you see moisture, the gasket is likely worn or misaligned and needs replacement.
Can I use a third-party blade?
Third-party blades often fit poorly and may not seal correctly, leading to leaks. Stick to genuine Vitamix parts to ensure safety and proper function.
Next steps
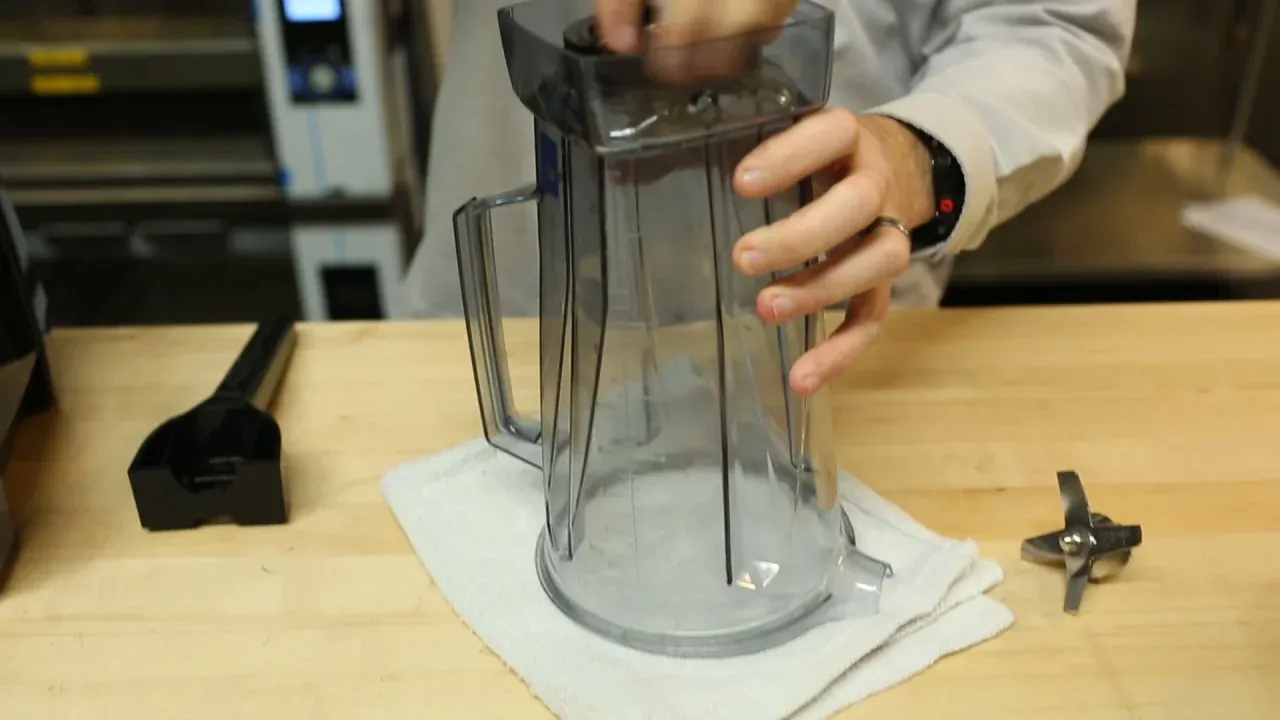
Start by unplugging your blender and gathering a new blade kit and some warm soapy water. Expect the job to finish in 15 minutes with a secure, leak-free result. If the blade refuses to budge after soaking, stop and contact a professional to avoid breaking the container.
You’ll know the seal is good when no water drips from the base during a test run with cold liquid. A loose gasket often causes leaks even if the blades are tight, so inspect that rubber ring for cracks before you reassemble anything.
If the motor hums but the jar doesn’t spin, the drive socket inside the base may be stripped and requires replacement rather than just tightening the blade assembly. Don’t force the blade if it feels stuck; this usually means the threads are cross-threaded or damaged, which happens if you tried to twist it too hard previously.
Use a flathead screwdriver to gently pry up any old food debris trapped under the blade flange, as this prevents a proper seal. Check that the plastic nut on the bottom of the jar is fully seated before turning the unit on.
If the blender vibrates excessively during operation, the blade might be bent from a previous impact, requiring a full kit swap instead of a simple cleaning. Always dry the threads completely before applying the new gasket to ensure they don’t slip while blending thick mixtures.
Conclusion
Once you’ve got that new blade locked in, give your blender a quick test run with just water to make sure everything spins smoothly. If it sounds right, you’re all set to start blending again without any worries about leaks or loose parts.