How To Clean Ninja Personal Blender: Quick and Easy Guide
Cleaning your Ninja Personal Blender is simple, but doing it right makes a big difference. Many people just rinse their blender, but a proper cleaning keeps it safe, smells fresh, and performs better. If you use your Ninja blender for smoothies, soups, or protein shakes, you know how quickly residue can build up. Sticky fruit pulp, dried greens, and stubborn protein powder can collect in hard-to-reach spots. Over time, this can cause odor, dull blades, and even make your blender less effective. In this guide, you’ll learn step-by-step how to clean your Ninja Personal Blender, inside and out. You’ll discover tips, common mistakes, and answers to questions that new users often miss. Whether you use your blender daily or only sometimes, this cleaning routine will help you keep it in top shape for years.
Why Cleaning Matters For Your Ninja Personal Blender
Keeping your blender clean is not just about looks. It’s about health and performance. When you clean your blender regularly:
- You remove bacteria, mold, and leftover food that can cause illness.
- You prevent smells and stains from building up.
- You protect the motor and the blades from damage.
- You extend the life of your blender.
According to the NSF International, kitchen blenders are one of the top five germ hotspots in the home. Most people don’t realize that mold can grow under the blade assembly, especially if liquid seeps in. Regular cleaning also ensures your smoothies taste fresh and your blender works smoothly.
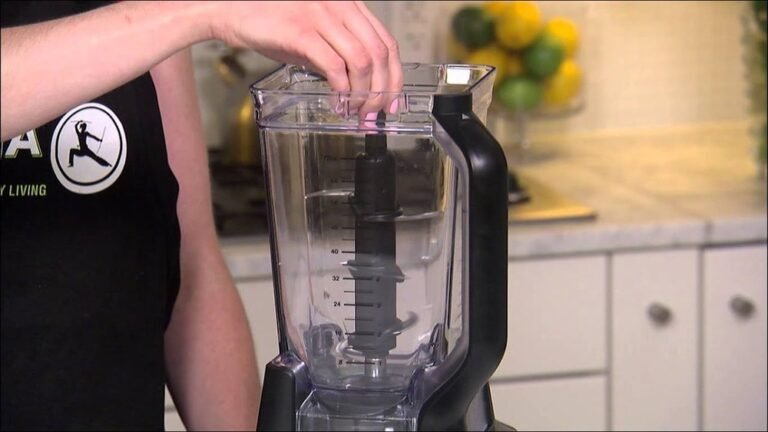
Quick Overview: Ninja Personal Blender Parts
Before you start cleaning, it’s important to know the main parts of your Ninja Personal Blender. Understanding each part helps you clean more effectively and avoid mistakes.
| Part Name | Function | Cleaning Note |
|---|---|---|
| Cup | Holds ingredients | Can be washed by hand or dishwasher |
| Blade Assembly | Blends food | Remove and clean separately |
| Lid | Seals cup | Check for gasket, rinse well |
| Motor Base | Powers blade | Wipe only, never submerge |
| Gasket/Seal | Prevents leaks | Remove and clean if possible |
Knowing the parts means you won’t accidentally damage them or miss a spot where bacteria can hide.

Credit: www.amazon.com
Step-by-step: How To Clean Ninja Personal Blender
Cleaning your Ninja Personal Blender involves both daily and deep cleaning. Here’s how to do both, without missing any important steps.
Daily Cleaning Routine
If you use your blender often, a quick clean after each use keeps it fresh and ready.
- Unplug the blender: Always unplug before cleaning to avoid accidents.
- Disassemble the parts: Remove the cup, blade assembly, and lid. Don’t force anything; Ninja parts are designed to come apart smoothly.
- Rinse immediately: Rinse the cup and blade under warm water as soon as possible. This prevents food from drying and sticking.
- Wash with soap: Use a soft sponge or brush with mild dish soap. Scrub all surfaces, especially around the blade and gasket.
- Rinse thoroughly: Soap residue can affect taste, so rinse well.
- Dry completely: Use a towel to dry or let parts air-dry. Moisture can cause mold if left inside.
Most Ninja blender cups and lids are dishwasher safe (top rack only). But the blade assembly should be hand-washed to protect the sharp edges and seal.
Deep Cleaning Routine (weekly Or After Tough Blends)
Sometimes, sticky or oily blends need extra care. A deep clean removes hidden residue and keeps your blender odor-free.
- Disassemble everything: Take apart all removable parts, including the gasket if possible.
- Soak in warm soapy water: Fill a basin and soak the cup, lid, and blade for 10–15 minutes.
- Scrub hard-to-reach spots: Use a small brush or toothbrush to clean around the blade, inside the cup threads, and under the gasket.
- Clean the motor base: Wipe the outside with a damp cloth. Never submerge or let water touch the buttons.
- Sanitize with vinegar solution: For stubborn smells, mix one part white vinegar with three parts water. Soak parts for 5–10 minutes, then rinse.
- Dry thoroughly: Make sure all parts are fully dry before reassembling.
Cleaning Tips For Specific Problems
Sometimes you face special cleaning challenges. Here’s how to deal with the most common ones.
Removing Stains And Odors
Blenders can absorb smells from garlic, onion, or protein powder. To remove:
- Blend a mix of lemon juice and water for 30 seconds, then rinse.
- For tough stains, scrub with baking soda paste.
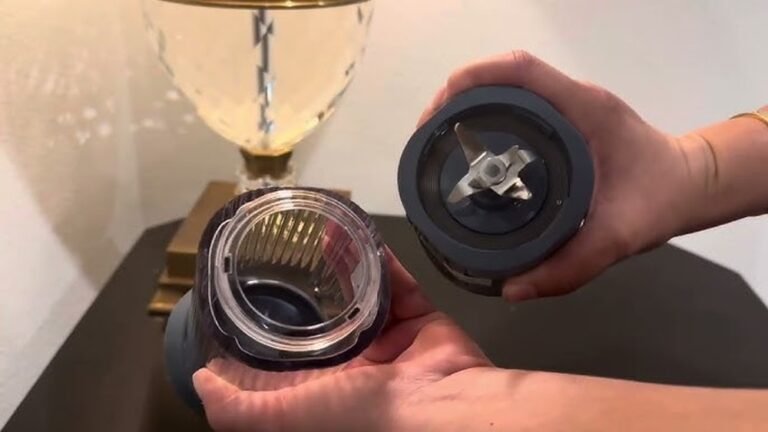
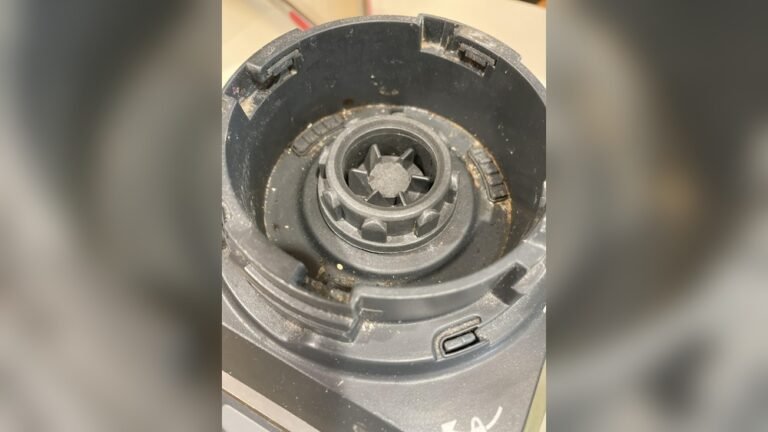
Cleaning The Blade Assembly
The blade area is a hotspot for bacteria. Always:
- Remove it from the cup and soak in soapy water.
- Use a brush to reach under the blades.
- Check for residue under the gasket.
Dealing With Mold
If you notice black spots or a musty smell:
- Soak parts in a vinegar solution (see above).
- Scrub all surfaces, especially hidden crevices.
- If mold persists, replace the gasket or blade assembly.
Cleaning The Gasket/seal
Many users forget the gasket. This rubber ring seals the lid and cup.
- Remove carefully (use a toothpick if needed).
- Wash and dry separately.
- Reinsert fully before reassembling.
Motor Base Care
The motor base powers your blender. Never put it in water. Instead:
- Wipe with a damp cloth.
- Dry with a towel.
- Clean the buttons gently; use a cotton swab if needed.
Common Mistakes When Cleaning Ninja Personal Blender
People often make errors that can damage their blender or leave it dirty. Here are mistakes to avoid:
- Submerging the motor base: This can ruin the electronics.
- Using harsh cleaners: Bleach or abrasive cleaners can scratch and damage plastic parts.
- Not drying parts fully: Trapped moisture causes mold and smells.
- Forgetting the gasket: This part collects residue and needs regular cleaning.
- Ignoring blade safety: The blades are sharp. Always handle with care and wash separately.
A less obvious mistake is not checking for hidden buildup under the blade or in the cup threads. These areas can collect old food, leading to odors and bacteria.
How Often Should You Clean Your Ninja Personal Blender?
Cleaning frequency depends on how you use your blender.
- After every use: Quick rinse and wash.
- Weekly: Deep clean, especially if you blend sticky or protein-heavy foods.
- Monthly: Check for mold, stains, and deep clean all parts.
If you use your blender for raw eggs, dairy, or meat, always do a deep clean after each use. These foods can harbor bacteria.
Are Ninja Personal Blender Parts Dishwasher Safe?
Most Ninja Personal Blender cups and lids are dishwasher safe on the top rack. The blade assembly is best washed by hand to prevent dulling and protect the gasket. Always check your model’s manual for specific instructions.
Here is a quick comparison of dishwasher safety for Ninja blender parts:
| Part | Dishwasher Safe? | Notes |
|---|---|---|
| Cup | Yes (Top rack) | High heat can warp plastic over time |
| Lid | Yes (Top rack) | Remove gasket for deep cleaning |
| Blade Assembly | No | Hand wash only for blade sharpness |
| Motor Base | No | Wipe with cloth only |
| Gasket/Seal | Yes | Hand wash recommended |
Even if a part is dishwasher safe, hand washing helps it last longer and avoids hidden residue.
Simple Cleaning Tools That Make A Difference
You don’t need fancy equipment to keep your blender clean. But a few simple tools help you reach every spot:
- Soft sponge or cloth: For cups and lids.
- Small brush or toothbrush: For blades, gasket, and cup threads.
- Cotton swab: For buttons and tight spots on the motor base.
- Dish soap: Mild is best; avoid strong chemicals.
- White vinegar: For deodorizing and sanitizing.
Non-obvious tip: A pipe cleaner works well for narrow gaps, especially under the blade assembly.
Cleaning Ninja Blender After Sticky Or Protein Blends
If you make protein shakes or sticky fruit smoothies, residue can build up quickly. Here’s how to clean after these blends:
- Rinse immediately: Don’t let the blend dry. Rinse the cup and blade right away.
- Soak in warm soapy water: Protein powder especially can stick to the cup walls.
- Scrub thoroughly: Use a brush for any dried spots.
- Check for hidden residue: Protein blends often leave a film under the gasket and in cup threads.
- Sanitize monthly: Use vinegar or lemon water to prevent smells.
Many beginners miss the need to check for protein buildup under the blade. This can affect taste and cause odors.

Credit: www.zelenaliska.cz
Deep Cleaning With Vinegar Or Baking Soda
For tough stains or odors, vinegar and baking soda are safe and effective.
- Vinegar soak: Mix 1 part vinegar with 3 parts water. Soak parts for 10 minutes.
- Baking soda scrub: Make a paste and scrub stained areas.
- Rinse well: Both vinegar and baking soda can leave a taste if not rinsed.
This method is especially useful after blending strong-smelling foods.
What To Do If Your Ninja Blender Smells Bad
If your blender develops a bad smell, don’t ignore it. Here’s what you can do:
- Disassemble and clean all parts: Check under the gasket and blade area.
- Soak in vinegar solution: Remove odor-causing bacteria.
- Blend lemon water: Run the blender with water and lemon juice, then rinse.
- Air dry fully: Moisture can cause smells if parts are reassembled wet.
Most odors come from hidden residue or trapped moisture. Regular deep cleaning prevents this.
Keeping Your Ninja Blender Clean Long-term
A few smart habits keep your blender in great shape:
- Clean immediately after use
- Deep clean weekly
- Check for hidden residue monthly
- Replace worn gaskets or blades
- Store with lid off: Prevents moisture buildup
These habits mean you won’t have to deal with tough stains or bad smells in the future.
How To Clean Ninja Blender Motor Base Safely
The motor base is the heart of your blender. It needs special care:
- Always unplug before cleaning
- Wipe with damp cloth only
- Never submerge in water
- Clean buttons gently
If liquid spills on the base, unplug and dry immediately. Let it air out before plugging back in.
Ninja Personal Blender Vs Other Blenders: Cleaning Comparison
How does cleaning a Ninja Personal Blender compare to other brands? Here’s a helpful comparison:
| Brand | Ease of Cleaning | Dishwasher Safe Parts | Common Issues |
|---|---|---|---|
| Ninja | Easy | Cup, lid | Gasket buildup |
| NutriBullet | Moderate | Cup, lid | Blade leaks |
| Magic Bullet | Easy | Cup, lid | Stain retention |
| Oster | Moderate | Some cups | Plastic wear |
Ninja stands out for easy cleaning, but the gasket area needs special attention.
Signs You Need To Replace Blender Parts
Cleaning helps, but sometimes parts need replacement for safety and performance.
- Gasket is cracked or moldy
- Blade is dull or rusty
- Cup is warped or stained
- Lid won’t seal
Replacement parts are available from Ninja. Don’t wait if you see damage; old parts can cause leaks or unsafe blending.
Real-world Example: Cleaning Ninja Blender After Green Smoothie
Imagine you’ve just made a green smoothie with spinach, banana, and almond milk. Here’s how you’d clean up:
- Rinse cup and blade immediately: Spinach can dry and stain.
- Soak for 10 minutes: In warm soapy water.
- Scrub blade area: Use a brush to remove green residue.
- Check gasket: Remove and wash if stained.
- Dry fully: Let all parts air dry before storing.
This routine prevents stains and keeps your next smoothie tasting fresh.
Troubleshooting: Blender Still Looks Dirty After Cleaning
If your Ninja blender still looks dirty after cleaning, try these steps:
- Soak in vinegar overnight
- Use baking soda paste on tough stains
- Check hidden areas: Under blade, inside cup threads
- Replace gasket if mold persists
Sometimes, old residue needs extra effort. Don’t give up; a deep clean usually solves the problem.
Health And Safety: Why Cleaning Is Essential
A dirty blender can cause health risks. Mold, bacteria, and old food can contaminate your drinks. According to the CDC, kitchen appliances with food residue are a common cause of foodborne illness. Regular cleaning keeps you safe and makes your blender last longer.
For more on food safety in the kitchen, check out CDC Food Safety.
Frequently Asked Questions
How Do I Remove Mold From The Gasket?
Remove the gasket from the lid or blade assembly. Soak it in a vinegar solution for 10–15 minutes, then scrub with a brush. Rinse and dry fully. If mold remains, replace the gasket.
Can I Put The Blade Assembly In The Dishwasher?
No. Always hand wash the blade assembly. Dishwasher heat can dull the blades and damage the seal.
Why Does My Blender Still Smell After Cleaning?
Check for hidden residue under the blade and gasket. Soak parts in vinegar, and blend lemon water to deodorize. Air dry all parts before reassembling.
How Often Should I Deep Clean My Ninja Blender?
Deep clean your blender weekly if you use it often. If you blend sticky or protein foods, deep clean after each use.
What Should I Do If My Blender Leaks?
Check the gasket and blade assembly for cracks or wear. Make sure all parts are assembled correctly. Replace damaged parts as needed.
Cleaning your Ninja Personal Blender is easy when you know what to do. Regular rinsing, weekly deep cleaning, and attention to hidden spots keep your blender safe, fresh, and ready for any recipe. With these steps, your Ninja blender will stay in top condition, giving you smooth blends and healthy drinks every time.

Credit: www.youtube.com