How To Grind Meat In A Ninja Blender: Quick and Easy Guide
Grinding meat at home has become popular for many reasons. People want to control what goes into their meals, avoid preservatives, and enjoy fresher flavors. But not everyone owns a dedicated meat grinder. If you have a Ninja blender, you might wonder if it can help you grind meat efficiently. The answer is yes, with some important techniques and safety steps. This guide will show you everything you need to know to grind meat in a Ninja blender—so you can make burgers, sausages, tacos, or meatballs right in your kitchen, even if you’re new to the process.
Why Grind Meat At Home?
When you grind meat at home, you decide what goes into your food. Store-bought ground meat often contains additives, fillers, or lower-quality cuts. By grinding your own, you use fresh cuts, avoid unwanted extras, and can even blend different meats for unique flavors.
Food safety is another key reason. Ground meat from the store may come from many animals, increasing the risk of contamination. Grinding your own lets you use clean, quality meat and reduce bacteria risks.
Some studies show that home-ground meat is often safer and tastier. According to the USDA, about 70% of ground beef recalls are due to contamination during processing. Grinding at home lowers this risk.
Can You Use A Ninja Blender For Meat Grinding?
A Ninja blender is designed for blending, not grinding. But it’s powerful enough to handle meat if you follow the right steps. The blades are sharp, and the motor is strong, but the process is different from a dedicated grinder.
Here’s why it works:
- Ninja blenders have multiple blades and strong motors (usually 1000 watts or more).
- They can chop, pulse, and break down meat into small pieces.
- You can control the texture by adjusting the blending time.
However, there are limits:
- You must cut meat into small chunks first.
- Over-blending can turn meat into paste.
- Fat distribution may not be as perfect as with a grinder.
For most home cooks, these trade-offs are minor. Many recipes work well with Ninja-blended meat, especially when you need ground beef, chicken, pork, or turkey.
Choosing The Right Meat
The quality and type of meat you select affect the final result. Here’s how to pick the best:
1. Fat Content
Fat adds flavor and moisture. For burgers or meatballs, use meat with 15–20% fat. Too little fat, and the meat may turn out dry.
- Beef: Chuck roast is a favorite for grinding, with about 20% fat.
- Pork: Shoulder or butt cuts work well.
- Chicken: Use thigh meat for juicier results.
If you want leaner blends, choose cuts like sirloin or chicken breast, but expect a drier texture.
2. Freshness
Fresh meat gives better flavor and safer results. Avoid pre-frozen or processed cuts. If you must use frozen meat, thaw it fully before grinding.
3. Cut Size
Cut meat into 1-inch cubes before blending. This helps the blender process evenly and prevents jams.
4. Quality
Choose meat from trusted sources. Look for bright color, firm texture, and no odor. Organic or grass-fed meats are often higher quality.
Preparing Meat For Grinding
Proper preparation ensures safety and good texture.
Step 1: Trim Excess Fat And Connective Tissue
Remove tough sinews, silver skin, and excess fat. Leaving some fat is good, but too much can cause uneven grinding.
Step 2: Chill The Meat
Cold meat grinds better and prevents the blades from heating up and melting fat. Place your cubed meat in the freezer for 20–30 minutes until it’s firm but not frozen solid.
Step 3: Prepare Blender Components
Wash and dry the blender jar, blades, and lid. Cold components also help keep meat cool during blending.
Step 4: Portion The Meat
Do not overload the blender. Work in batches of 8–12 ounces for most Ninja models. This prevents jamming and ensures even grinding.

Credit: www.reddit.com
Step-by-step Guide: Grinding Meat In A Ninja Blender
Follow these steps for best results:
1. Load The Blender
Place chilled, cubed meat in the jar. If grinding more than one type (like beef and pork), mix cubes evenly.
2. Secure The Lid
Make sure the lid is tightly locked. Ninja blenders often have safety locks—check before starting.
3. Use Pulse Function
Start with the pulse setting. Pulse in short bursts (1–2 seconds) to chop meat without turning it to mush. Repeat 10–15 times, shaking the jar between pulses if needed.
4. Check Consistency
Open the jar and inspect the texture. For coarse grind (good for chili or tacos), stop early. For finer grind (burgers), pulse a few more times. Do not run the blender continuously—this heats up the meat and ruins texture.
5. Remove And Clean
Scoop out ground meat with a spatula. Do not use your fingers near the blades. Wash all parts with hot, soapy water after use.
Practical Tips For Success
Grinding meat in a Ninja blender is easy with these tips:
- Keep meat cold: This prevents fat from melting and maintains texture.
- Work in small batches: Overloading causes uneven results.
- Pulse, don’t blend: Continuous blending turns meat into paste.
- Shake or stir: Between pulses, shake the jar or stir to redistribute chunks.
- Add flavorings after grinding: Mix spices, herbs, or onions into ground meat by hand.
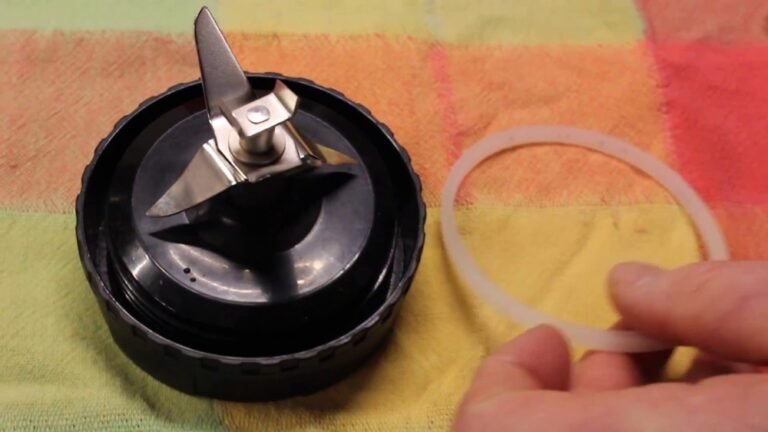
- Use right blade: Ninja blenders often have a four-blade assembly—this is best for meat.
Common Mistakes To Avoid
Beginners often make these errors:
- Grinding warm meat: Causes fat to smear and texture to suffer.
- Overfilling the jar: Leads to jams and uneven grind.
- Over-blending: Turns meat into paste, which is bad for burgers.
- Ignoring blade safety: Blades are sharp—use tools, not hands.
If you notice pink paste, you’ve blended too much. For chunky, juicy ground meat, use short pulses and check often.
Comparing Ninja Blender Grinding To Dedicated Meat Grinders
A Ninja blender is not a professional meat grinder, but it does a good job for home cooking. Here’s a comparison:
| Feature | Ninja Blender | Meat Grinder |
|---|---|---|
| Texture Control | Pulsing allows coarse or fine grind, but less uniform | More precise, multiple plates for different textures |
| Batch Size | Small batches only | Can handle larger quantities |
| Ease of Cleaning | Quick, dishwasher safe | Requires more cleaning, parts |
| Safety | Sharp blades, need caution | Safe if used correctly, fewer blade risks |
| Cost | Already owned by many, no extra cost | Requires purchase, $50–$300 |
Most home cooks find Ninja blenders good enough for occasional meat grinding. If you grind meat often, a dedicated grinder is better for texture and speed.

Credit: www.youtube.com
Which Ninja Blender Models Work Best?
Not all Ninja blenders are equal. Some are more powerful or have better blade designs. Here’s a quick overview:
| Model | Power (Watts) | Blade Type | Grinding Ability |
|---|---|---|---|
| Ninja Professional BL610 | 1000 | Stacked 4-blade | Good for small batches |
| Ninja Mega Kitchen System BL770 | 1500 | Stacked & dough blade | Excellent, handles tough cuts |
| Ninja Foodi Power Nutri Duo | 1200 | Pro Extractor blade | Works, but smaller jar |
Choose models with at least 1000 watts and strong, multi-blade assemblies for best results.
Safety And Hygiene Tips
Grinding meat means handling raw proteins. Here’s how to stay safe:
- Wash hands and surfaces before and after handling meat.
- Clean blender parts thoroughly after use.
- Keep meat cold to reduce bacteria growth.
- Cook ground meat to safe temperatures: 160°F for beef, 165°F for poultry.
- If storing ground meat, refrigerate within 30 minutes and use within 1–2 days.
Food safety is crucial. According to CDC, improper handling of ground meat is a leading cause of foodborne illness.
What Can You Make With Ninja-ground Meat?
Once you’ve ground meat in your Ninja blender, the possibilities are endless. Here are some recipe ideas:
- Burgers: Shape ground beef or pork into patties. Add spices, cheese, or onions for flavor.
- Meatballs: Mix ground meat with breadcrumbs, egg, and herbs. Bake or fry.
- Tacos: Cook ground beef or chicken with taco seasoning. Serve in shells.
- Sausages: Blend pork and spices. Stuff into casings or shape into patties.
- Meatloaf: Combine ground beef, breadcrumbs, ketchup, and spices. Bake in a loaf pan.
If you want to explore more recipes, check out Serious Eats for creative ground meat dishes.
How To Clean Your Ninja Blender After Grinding Meat
Cleaning is important for safety and for keeping your blender in good shape.
Step 1: Disassemble
Remove the jar, blade, and lid. Be careful—blades are sharp.
Step 2: Rinse
Rinse all parts with warm water to remove meat residue.
Step 3: Wash
Wash with hot, soapy water. Use a brush to reach corners and blade edges.
Step 4: Sanitize
If desired, soak parts in a solution of 1 tablespoon bleach per gallon of water for 5 minutes. Rinse well.
Step 5: Dry
Dry completely before reassembling. Store with lid off to prevent odors.

Credit: www.reddit.com
Ninja Blender Meat Grinding: Real-life Examples
Many home cooks have successfully used Ninja blenders for grinding meat. Here are a few examples:
- Jenny from Texas: She grinds chuck roast for burgers. She freezes cubes for 30 minutes, pulses 10 times, and gets juicy, chunky beef.
- Mark in California: Uses Ninja Mega Kitchen System for pork sausage. He adds garlic and spices after grinding. Sausages are flavorful and moist.
- Sofia from New York: Blends turkey thigh for meatballs. She pulses in small batches, mixes with breadcrumbs, and bakes.
These stories show that with the right steps, your Ninja blender can handle meat grinding for many recipes.
Troubleshooting Common Problems
Sometimes things go wrong. Here’s how to fix the most common issues:
Meat Turns To Paste
- Solution: Use shorter pulses. Keep meat colder. Work in smaller batches.
Blender Jams
- Solution: Cut meat into smaller cubes. Don’t overload. Check blade assembly for clogs.
Uneven Grind
- Solution: Shake jar between pulses. Stir chunks with a spatula (when blender is off).
Meat Smears Or Gets Sticky
- Solution: Chill meat and blender parts longer. Avoid blending continuously.
Grinding Meat For Special Diets
Home grinding lets you customize blends for diets:
- Low fat: Use sirloin, chicken breast, or turkey breast.
- Keto: Use fattier cuts, add pork belly or brisket.
- Gluten-free: Mix meat with gluten-free binders (like rice or potato starch).
- Allergy-friendly: Avoid store-bought meat with fillers.
You can also add vegetables, herbs, or spices to meat after grinding for flavor and nutrition.
Ninja Blender Vs Other Kitchen Appliances
Some people use food processors or stand mixers for grinding meat. Here’s how Ninja blenders compare:
| Appliance | Grinding Ability | Texture Control | Ease of Use |
|---|---|---|---|
| Ninja Blender | Good for small batches | Decent, with pulsing | Easy, quick cleaning |
| Food Processor | Better for bigger batches | More uniform | Easy, but more parts |
| Stand Mixer (with grinder attachment) | Best for large quantities | Excellent | More setup, more cleaning |
For most home cooks, Ninja blenders offer a good balance of convenience and performance.
Non-obvious Insights For Beginners
Many guides miss these useful points:
- Chilling the blender jar: Not just the meat—cold blender parts help keep fat solid and prevent smearing.
- Mixing different meats: You can combine beef and pork, or chicken and turkey, for unique flavor and moisture.
- Grinding vegetables with meat: Add onions, garlic, or peppers to meat cubes before pulsing for instant flavor blends.
Try these tricks to make your ground meat tastier and easier to handle.
Frequently Asked Questions
Can I Grind Frozen Meat In A Ninja Blender?
No. Frozen meat is too hard and can damage the blender blades. Always thaw and chill meat before grinding.
How Much Meat Can I Grind At Once?
Most Ninja blenders handle 8–12 ounces per batch. Larger models may allow more, but avoid overfilling to prevent jams and uneven grinding.
Is It Safe To Grind Raw Chicken In A Ninja Blender?
Yes, but you must follow strict hygiene. Clean all parts before and after use, and cook chicken to 165°F to kill bacteria.
Can I Grind Cooked Meat?
You can, but the texture will be different. Cooked meat may turn mushy. For recipes like pâté or spreads, blending cooked meat is fine.
What Should I Do If Meat Sticks To The Blades?
Turn off and unplug the blender. Use a spatula to remove stuck meat. Never use your fingers near the blades. Clean blades thoroughly after each use.
Grinding meat in a Ninja blender is a simple, safe, and practical way to control what goes into your meals. With the right steps, you can enjoy fresher, tastier ground meat at home—even if you don’t own a dedicated grinder.
Try different cuts, keep everything cold, and pulse for perfect texture. The process is easy to master, and your homemade burgers, sausages, or tacos will taste better than store-bought every time.