How To Make Banana Ice Cream In A Ninja Blender: Easy Recipe
Making banana ice cream at home feels like magic. With just a few ingredients and a Ninja blender, you can turn frozen bananas into a creamy, delicious treat that rivals store-bought ice cream. It’s simple, healthy, and perfect for anyone who wants dessert without the guilt or complicated steps. Whether you’re new to blending or a kitchen pro, this guide will walk you through every detail, from picking bananas to perfecting texture, so you get smooth, sweet banana ice cream every time.
You’ll discover how to create classic banana ice cream, ways to add flavors and toppings, and even how to troubleshoot common blending problems. Along the way, you’ll learn practical tips that most beginners overlook, such as how ripeness affects taste and how to avoid over-blending.
Plus, you’ll find comparison tables to help you choose the best bananas and Ninja blender model for your needs. By the end, you’ll have the confidence and skills to whip up banana ice cream anytime, impressing friends and family with your homemade dessert.
Why Make Banana Ice Cream In A Ninja Blender?
Banana ice cream is sometimes called “nice cream” because it’s dairy-free, vegan, and naturally sweet. When you use a Ninja blender, you get several advantages:
- Fast preparation: Ready in minutes, no waiting for freezing or churning.
- Smooth texture: The Ninja’s strong blades break down frozen bananas into a creamy consistency.
- Healthy ingredients: No added sugar, artificial flavors, or preservatives unless you choose to add them.
- Customizable flavors: You can blend in cocoa, vanilla, peanut butter, berries, or nuts.
- Easy cleanup: Ninja blenders are designed for quick cleaning.
Compared to traditional ice cream makers, Ninja blenders offer speed and versatility. You don’t need special skills or expensive machines. Most recipes call for only bananas, but you can experiment endlessly. If you’re lactose intolerant, vegan, or just want a lighter dessert, banana ice cream is a perfect choice.
Choosing The Right Bananas For Ice Cream
Not all bananas are equal when it comes to ice cream. The ripeness of your bananas will shape the flavor, texture, and sweetness. Here’s how to pick the best:
- Ripeness: Use bananas that are fully yellow with brown spots. They’re sweeter and creamier.
- Avoid green bananas: These are starchy and won’t blend smoothly.
- Don’t use overripe (black) bananas: They can taste fermented and may be too mushy.
- Organic vs. conventional: Organic bananas tend to have a richer flavor but aren’t required.
Banana Ripeness Comparison
Below is a comparison of banana ripeness and how it affects your ice cream:
| Ripeness | Sweetness | Texture After Blending | Best For Ice Cream? |
|---|---|---|---|
| Green | Low | Grainy, starchy | No |
| Yellow (no spots) | Medium | Smooth, less sweet | Okay |
| Yellow (brown spots) | High | Creamy, sweet | Yes |
| Black (overripe) | Very high | Soft, mushy | No |
Tip: Most beginners use bananas that are too green or too black. For the best flavor and texture, wait until your bananas are yellow with plenty of brown spots.
Preparing Bananas For Blending
Preparation is key to great banana ice cream. Follow these steps:
- Peel bananas: Never freeze bananas with the peel. It’s hard to remove later.
- Slice bananas: Cut each banana into ½-inch pieces. This helps your Ninja blender process them easily.
- Freeze slices: Place banana pieces in a single layer on a tray or plate. Freeze for at least 2-3 hours, or overnight for best results.
- Store properly: After freezing, transfer slices to an airtight bag or container. This prevents freezer burn and keeps them fresh.
Practical insight: Slicing bananas before freezing speeds up blending and prevents stress on your blender’s motor. Many people freeze whole bananas, but this can cause uneven blending and damage blades.
The Ninja Blender: Which Model Is Best For Banana Ice Cream?
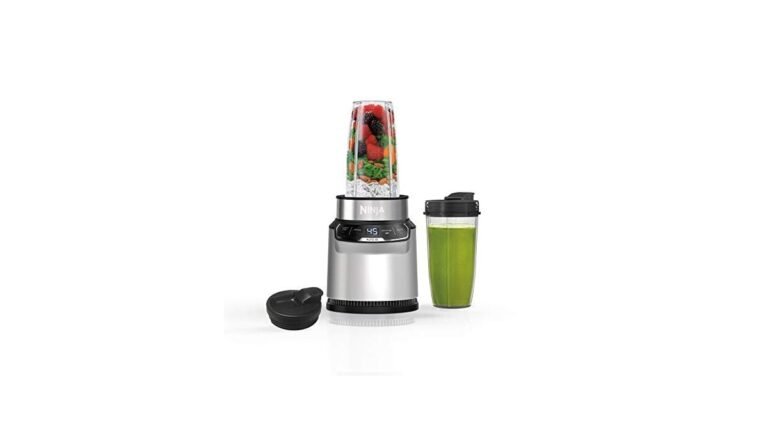
Ninja blenders come in several models. While all can make banana ice cream, some are better suited due to motor strength and jar design.
Ninja Blender Model Comparison
Here’s a quick comparison of popular Ninja models for making banana ice cream:
| Model | Motor Power (Watts) | Jar Size | Ice Cream Ability | Price Range |
|---|---|---|---|---|
| Ninja Professional BL610 | 1000 | 72 oz | Excellent | $90-$120 |
| Ninja Foodi Power Nutri DUO | 1200 | 24 oz (single serve) | Excellent | $110-$150 |
| Ninja Compact Personal Blender | 700 | 16 oz | Good | $60-$90 |
| Ninja Mega Kitchen System | 1500 | 72 oz + 16 oz | Outstanding | $170-$200 |
Advice: For families or frequent use, choose a model with at least 1000 watts. For single servings or small kitchens, the personal blender is fine but may require more blending time and scraping.
Essential Ingredients And Add-ins
The basic banana ice cream recipe needs only one ingredient: bananas. But you can add others for more flavor, creaminess, or nutrition.
Basic Banana Ice Cream Ingredients
- Bananas: 3-4 medium, sliced and frozen
Optional Add-ins
- Milk (dairy or plant-based): 2-4 tablespoons, for smoother texture
- Vanilla extract: 1 teaspoon, for rich flavor
- Peanut butter: 1-2 tablespoons, for creaminess and taste
- Cocoa powder: 1-2 tablespoons, for chocolate flavor
- Sweeteners: Honey, maple syrup, or agave, to taste (usually not needed if bananas are ripe)
- Berries: ½ cup frozen raspberries or strawberries, for fruity taste
- Nuts or chocolate chips: ¼ cup, for crunch
Insight: Adding a small amount of liquid (milk or water) can help your Ninja blender process the bananas. But too much will make the ice cream runny. Beginners often add too much liquid and end up with a smoothie instead of ice cream.
Step-by-step: Making Banana Ice Cream In A Ninja Blender
Follow these steps for creamy, delicious banana ice cream:
Step 1: Gather Ingredients
- 3-4 medium ripe bananas, sliced and frozen
- Optional: 2-4 tablespoons milk, 1 teaspoon vanilla, other add-ins
Step 2: Prepare Your Ninja Blender
- Assemble the blender base and jar.
- Make sure blades are clean and sharp.
- If using a personal blender, attach the single-serve cup.
Step 3: Add Frozen Bananas
- Place frozen banana slices in the blender jar.
- Add any optional ingredients (milk, vanilla, cocoa, etc. ).
Step 4: Blend
- Pulse the blender for 5-10 seconds to break up bananas.
- Blend on high for 30-60 seconds.
- Stop and scrape down the sides with a spatula as needed.
- Blend again until smooth and creamy.
Tip: If the mixture is too thick and won’t blend, add 1 tablespoon of milk at a time. Avoid adding too much.
Step 5: Check Consistency
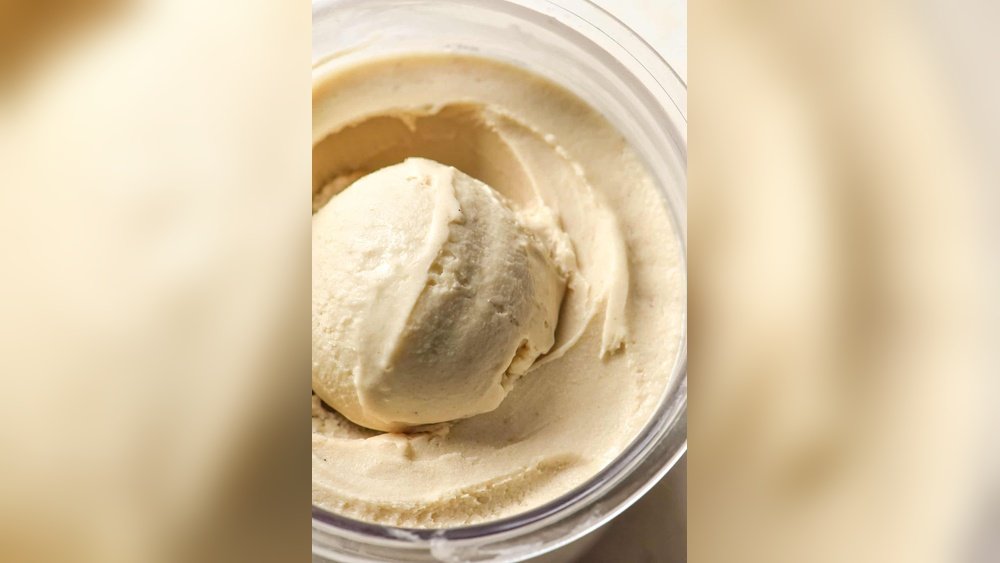
- The ice cream should be thick, creamy, and scoopable.
- If it’s too soft, place the mixture in the freezer for 30-60 minutes to firm up.
Step 6: Serve
- Scoop into bowls or cones.
- Add toppings if desired: Nuts, chocolate chips, fruit, whipped cream.
Step 7: Store Leftovers
- Transfer any extra ice cream to an airtight container.
- Freeze for up to 1 week. Let it sit at room temperature for 5-10 minutes before scooping.

Credit: sheshared.com
Variations And Flavor Ideas
Banana ice cream is versatile. Here are some popular variations:
- Chocolate Banana Ice Cream
- Add 2 tablespoons cocoa powder to the blender.
- Optional: 1 tablespoon chocolate chips.
- Peanut Butter Banana Ice Cream
- Add 2 tablespoons peanut butter.
- Top with crushed peanuts.
- Berry Banana Ice Cream
- Add ½ cup frozen berries.
- Blend until smooth.
- Mint Chocolate Banana Ice Cream
- Add ¼ teaspoon mint extract.
- Stir in mini chocolate chips.
- Cinnamon Banana Ice Cream
- Add 1 teaspoon ground cinnamon.
- Top with walnuts.
- Banana Nut Ice Cream
- Add ¼ cup chopped nuts.
- Blend or use as topping.
Practical tip: For a swirl effect, add chocolate or berry sauce after blending and gently stir with a spoon. Most beginners miss this, but it creates a beautiful, professional look.
Texture Troubleshooting And Tips
Sometimes banana ice cream doesn’t turn out as expected. Here’s how to fix common problems:
Problem: Ice Cream Is Too Runny
- Cause: Added too much liquid or bananas not fully frozen.
- Solution: Freeze mixture for 1 hour or use less milk next time.
Problem: Ice Cream Is Too Hard
- Cause: Over-frozen bananas or left in freezer too long.
- Solution: Let sit at room temperature for 10 minutes before scooping.
Problem: Lumpy Or Chunky Texture
- Cause: Blender not strong enough or didn’t blend long enough.
- Solution: Scrape down sides, blend longer, add small amounts of liquid.
Problem: Bland Flavor
- Cause: Bananas not ripe enough or missing flavor add-ins.
- Solution: Use riper bananas, add vanilla, cocoa, or sweetener.
Hidden tip: Blending bananas when they’re just out of the freezer (very cold) gives a firmer ice cream texture. If you wait too long, they soften and the ice cream becomes mushy.
Nutritional Benefits Of Banana Ice Cream
Banana ice cream is not only tasty but also healthy. Here’s what you get in one serving (about 1 cup):
- Calories: 100-120 (without add-ins)
- Fat: 0g (unless you add nuts or peanut butter)
- Sugar: 14-16g (natural fruit sugar)
- Fiber: 3-4g
- Potassium: 400-450mg
- Vitamin C: 10% Daily Value
No cholesterol, no dairy, and low sodium. If you add peanut butter or nuts, fat and calories go up, but so does protein.
Insight: Most store-bought ice creams have 200-300 calories, lots of fat, and added sugar. Banana ice cream offers a lighter, more nutritious option.
Comparing Banana Ice Cream To Store-bought Ice Cream
Is homemade banana ice cream really better? Here’s a side-by-side comparison:
| Feature | Banana Ice Cream (Homemade) | Store-Bought Ice Cream |
|---|---|---|
| Main Ingredients | Bananas, optional add-ins | Milk, cream, sugar, additives |
| Calories (per cup) | 100-120 | 200-300 |
| Fat | 0-2g | 10-18g |
| Sugar | 14-16g (natural) | 20-30g (added) |
| Vegan | Yes | No (usually) |
| Customization | Easy | Limited |
| Preservatives | No | Often added |
| Cost (per serving) | $0.50-$1 | $2-$3 |
Key takeaway: If you want a healthier, affordable, and customizable dessert, banana ice cream is hard to beat.
Common Mistakes Beginners Make
Many first-timers struggle with banana ice cream. Here are mistakes to avoid:
- Using unripe or overripe bananas: Leads to bad flavor and texture.
- Freezing whole bananas: Makes blending harder and stresses the motor.
- Adding too much liquid: Turns ice cream into a smoothie.
- Over-blending: Causes the mixture to become runny.
- Not scraping down the sides: Leaves chunks and uneven texture.
- Skipping flavor add-ins: Results in bland taste.
- Not storing properly: Causes freezer burn or icy texture.
Expert tip: Freeze banana slices in a single layer before storing in a bag. This prevents them from sticking together and ensures even blending.
Cleaning And Maintaining Your Ninja Blender
After making ice cream, it’s important to clean your blender well. Here’s how:
- Rinse immediately: Don’t let banana residue dry in the jar.
- Disassemble blades and jar: Clean each part separately.
- Use warm, soapy water: Scrub with a soft sponge.
- Dry thoroughly: Prevents odors and mold.
- Avoid harsh cleaners: Ninja blender parts are mostly dishwasher safe, but gentle washing extends their life.
Practical tip: For tough banana stains, blend a mix of water, lemon juice, and baking soda in the jar. Rinse and dry.

Credit: georgeats.com
Serving Ideas And Presentation Tips
Banana ice cream can look as good as it tastes. Try these ideas:
- Scoop into bowls: Use an ice cream scoop for perfect rounds.
- Serve in cones: Kids love this classic look.
- Layer with fruit: Add sliced strawberries, blueberries, or kiwi.
- Drizzle sauces: Chocolate, caramel, or berry sauce adds flavor and color.
- Sprinkle toppings: Chopped nuts, coconut flakes, granola, or mini marshmallows.
- Make parfaits: Layer ice cream with yogurt and fruit for a fancy dessert.
Pro insight: Presentation matters. Even simple banana ice cream feels special when served with toppings and in a nice dish.
Making Banana Ice Cream Ahead Of Time
If you want to prepare banana ice cream in advance, follow these steps:
- Blend and freeze: After blending, transfer ice cream to an airtight container.
- Freeze for up to 1 week: Longer freezing may cause ice crystals and change texture.
- Soften before serving: Let the container sit at room temperature for 5-10 minutes.
- Stir before scooping: For best texture, stir with a spoon to break up any ice.
Hidden insight: Banana ice cream loses some creaminess after freezing, but stirring and softening restores most of it. Some people add a tablespoon of honey or syrup before freezing to help retain texture.
Scaling Up: Making Large Batches
For parties or family gatherings, you might want to make more. Here’s how:
- Use a larger Ninja blender jar: The Mega Kitchen System is ideal.
- Blend in batches: Don’t overload the jar; bananas blend better in smaller amounts.
- Store in multiple containers: Freeze in single-serving containers for easy access.
- Label flavors: If you make several variations, label each container.
Expert tip: For large batches, keep add-ins separate. Let guests mix in their own toppings for a custom dessert bar.
Banana Ice Cream For Special Diets
Banana ice cream is naturally:
- Vegan
- Gluten-free
- Dairy-free
- Nut-free (unless you add nuts)
You can tailor it for other dietary needs:
- Low-sugar: Use only bananas, skip sweeteners.
- High-protein: Add peanut butter or protein powder.
- Allergy-friendly: Avoid nuts, use oat or rice milk.
Pro tip: Check labels on add-ins for hidden dairy, gluten, or allergens. For strict diets, homemade is safer than store-bought.
Banana Ice Cream Vs. Other Fruit Ice Creams
Bananas aren’t the only fruit you can blend into ice cream. Here’s how banana compares to other popular fruit bases:
| Fruit Base | Creaminess | Sweetness | Blending Difficulty | Flavor Versatility |
|---|---|---|---|---|
| Banana | High | High | Easy | Excellent |
| Mango | Medium | Medium | Medium | Good |
| Avocado | High | Low | Medium | Good |
| Strawberry | Low | Medium | Hard | Fair |
| Pineapple | Low | High | Hard | Fair |
Bananas stand out for their creamy texture and easy blending. Most other fruits need extra ingredients or more powerful blenders to achieve the same results.
Environmental Impact And Cost Savings
Making banana ice cream at home helps the environment and your wallet:
- Less packaging waste: No plastic tubs or wrappers.
- Lower food waste: Use ripe bananas that might otherwise be thrown out.
- Cheaper: Bananas cost $0.20-$0.30 each, making ice cream affordable.
According to USDA data, Americans waste nearly 30% of fresh fruit. Using ripe bananas for ice cream reduces this waste and saves money.

Credit: www.pbfit.com
Inspiration: Creative Ways To Use Banana Ice Cream
Besides eating it as dessert, banana ice cream can be used in:
- Smoothie bowls: Top with granola and fruit.
- Breakfast parfaits: Layer with yogurt and nuts.
- Filling for crepes or pancakes: Add a scoop inside.
- Healthy milkshakes: Blend with milk and cocoa.
Hidden insight: You can freeze banana ice cream into popsicles or sandwich between cookies for homemade ice cream sandwiches.
Resources And Further Reading
Want to learn more about banana ice cream, nutrition, or Ninja blenders? The official Ninja website has recipes and product details: Ninja Kitchen Recipes.
Frequently Asked Questions
How Many Bananas Do I Need For One Serving Of Banana Ice Cream?
For one serving, use one large banana (about 100-120 grams). If you want a thicker or bigger serving, use two bananas. Slice and freeze before blending.
Can I Use Bananas That Are Not Fully Frozen?
You can, but the ice cream will be softer and less creamy. Fully frozen bananas give the best texture. If your bananas are only partly frozen, chill the finished ice cream in the freezer for 30-60 minutes.
Is Banana Ice Cream Suitable For People With Diabetes?
Banana ice cream has natural sugars from fruit. For people with diabetes, use smaller portions and avoid extra sweeteners. Consult a doctor for personal advice.
How Long Does Homemade Banana Ice Cream Last In The Freezer?
It stays fresh for up to 1 week in an airtight container. After that, texture and flavor may decline due to freezer burn.
Can I Make Banana Ice Cream Without A Ninja Blender?
Yes, but a powerful blender or food processor works best. Hand blenders or cheap models may struggle with frozen bananas and produce a chunky result.
Banana ice cream in a Ninja blender is simple, quick, and endlessly customizable. Whether you want a classic scoop, a chocolate twist, or a nutty crunch, all you need is ripe bananas and your blender. With careful preparation, the right model, and creative add-ins, you can enjoy a healthy, creamy dessert anytime.
Give it a try—you’ll never look at bananas the same way again!