How To Remove Blade From Nutribullet Blender
Removing the blade from a NutriBullet is usually as simple as unscrewing the blade assembly counterclockwise from the cup — grip the base of the blade housing firmly and turn it left. The blade and cup separate, and you’re ready to clean or replace the part. The trouble comes when dried smoothie residue, overtightening, or worn gaskets make the blade stick, which is exactly what this guide covers.
Key Takeaways
- The blade assembly on every NutriBullet model unscrews counterclockwise from the cup — no tools are needed in most cases.
- Never twist the cup off the motor base while the blade is still under power or immediately after blending; let it stop completely first.
- Stuck blades are almost always caused by dried food residue gluing the threads together — warm soapy water loosens them in 10–15 minutes.
- The extractor blade and rubber gasket should be inspected monthly and replaced roughly every 6 months with daily use.
- NutriBullet recommends against putting the blade assembly in the dishwasher, as heat degrades the gasket and bearings.
- Never submerge the motor base in water or attempt to remove the blade from the motor base itself — the blade isn’t detachable from its housing.
How To Remove Blade From Nutribullet Blender, Step by Step
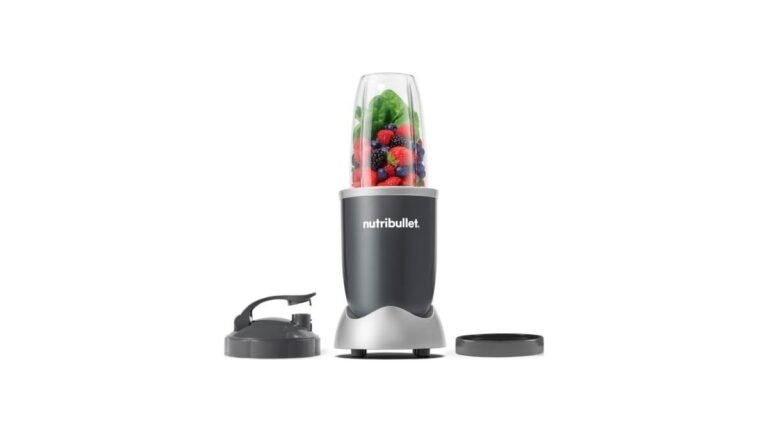
This section walks through the standard removal process that applies to the NutriBullet 600, 900 (Pro), Rx, and the larger NutriBullet Blender Combo. The process takes under a minute once you know the trick: hold the blade housing, not the cup.
- Unplug the motor base. This matters more than it sounds. NutriBullet models activate when the cup is twisted into the base, and a stray spoon or finger near the blade while the unit is live is a genuine hazard.
- Empty the contents into a glass or container. A full cup is heavy and slippery, and you’ll have less control over the twist.
- Flip the cup upside down so the blade assembly faces up. This gives you the best grip angle.
- Grip the plastic blade housing — the wide, ribbed base of the extractor blade — with your dominant hand. Wrap your other hand around the cup.
- Twist counterclockwise (lefty-loosey). On the 600 and 900 models the blade screws into the cup threads, so a quarter to a half turn should free it, then it lifts straight out.
- Inspect the gasket and threads before reassembly. This is the moment to spot a cracked seal or dried smoothie in the threads.
Pro Tip: If the blade housing is slippery or hard to grip, put on a dry kitchen glove or use a rubber jar-opener pad. The ribbed plastic is designed for hand torque, but wet hands lose traction fast.
Why the Blade Gets Stuck in the First Place
Understanding the cause makes the fix obvious. NutriBullet cups and blades seal by compression: you twist the blade assembly down until the gasket compresses against the cup rim. Three things work against that seal over time:
- Dried residue. Smoothie ingredients — banana, dates, protein powder, nut butter — are effectively glue. Residue seeps into the threads and hardens, cementing the blade to the cup.
- Overtightening. Many users crank the blade down “for safety.” The gasket only needs to be snug. Excess torque deforms the plastic threads and makes the next removal a fight.
- Heat expansion. Blending for long stretches warms the cup and blade. Warm plastic threads grip tighter; letting the cup cool for a few minutes often makes the blade turn easily.
A fourth cause is cross-threading — if the blade was seated crookedly, the threads bind. If you feel grinding resistance rather than smooth unscrewing, stop and go to the stuck-blade section below.
Removing a Stuck Blade: Five Methods That Work
Work through these in order. Each is safe for the plastic housing; the later ones add more force.
The warm water soak
Fill the cup with the hottest tap water you can, add a drop of dish soap, and let it sit upside down (blade up, sealed with the blade assembly) for 10–15 minutes. The warm water dissolves the dried residue in the threads. Flip it over, drain, and twist the blade off. This alone solves the majority of stuck-blade cases.
The rubber grip twist
Use a rubber jar opener, a thick rubber band wrapped around the blade housing, or a dish glove. The extra friction often provides the grip your hands couldn’t. Keep the force steady and downward-angled — pulling the blade away from the cup while twisting prevents the threads from binding against each other.
The hot-and-cold contrast
Run hot water over the cup’s threads while keeping the blade housing cool under cold water. The cup threads expand slightly, the blade housing contracts, and the fit loosens. Two or three minutes of contrast is usually enough.
The strap wrench
A rubber strap wrench (sold at any hardware store for plumbing) wraps around the blade housing and multiplies your grip without marring the plastic. This is the best tool-based option because it applies even pressure around the full circumference. Avoid channel-lock pliers or pipe wrenches directly on the plastic — they will crack the housing.
The last resort: penetrating the residue
If nothing else works, soak the sealed cup-and-blade in a sink of warm water with dish soap overnight. In the morning, twist while the assembly is still wet and warm. As a final measure, a thin spatula handle tapped gently around the rim of the blade housing can break the residue bond — tap, don’t pry, and never insert anything metal between the blade and cup.
Warning: Never use a torch, boiling water, or an open flame to loosen the blade. The housing is plastic and the bearing assembly inside is lubricated; excessive heat warps the housing and ruins the blade permanently.
Removing the Blade From Different NutriBullet Models
Not every NutriBullet comes apart the same way. Use this table to find your model.
| Model | Blade type | Removal method | Notes |
|---|---|---|---|
| NutriBullet 600 | Extractor blade, screw-on | Twist counterclockwise from cup | Most common; standard process |
| NutriBullet 900 Pro | Extractor blade, screw-on | Twist counterclockwise from cup | Same as 600, larger cup sizes |
| NutriBullet Rx | Grip-style blade with handle | Twist counterclockwise; handle helps grip | Easiest to remove by hand |
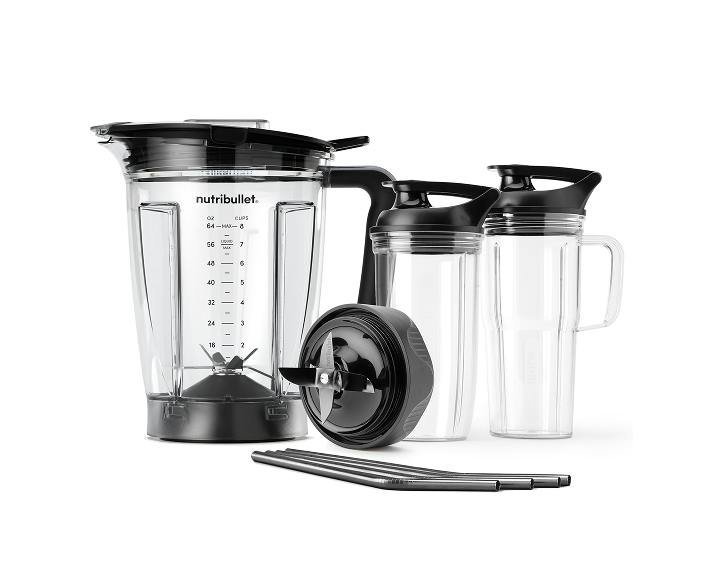
| NutriBullet Blender Combo | Removable blade with pour spout | Twist off cup, then blade from cup | Blade also detaches for pitcher cleaning |
| NutriBullet Lean | Extractor blade, screw-on | Standard counterclockwise twist | Same hardware family as 600/900 |
One important distinction: on all NutriBullet models, the blade itself is riveted and sealed inside the blade housing. You’re removing the blade assembly from the cup — you should never try to separate the actual stainless blade from its plastic housing. There’s no user-serviceable connection there, and forcing one destroys the unit and exposes the bearing grease.
Warning: If the blade assembly wobbles, leaks from the top, or grinds when it spins, the internal bearing has failed. Don’t keep using it — replace the whole blade assembly. Replacement extractor blades typically cost $10–20 depending on the model.
Cleaning the Blade Once It’s Off
With the blade assembly in hand, clean it properly so the next removal is easy:
- Rinse immediately under warm water after every use. Residue that dries is the enemy of both hygiene and future removal.
- Scrub under the blade with a dish brush. Dried particles collect in the crevice where the blade meets the housing.
- Hand wash only. NutriBullet’s care guidance says the blade assembly should be hand-washed; dishwasher heat and detergent degrade the rubber gasket and can loosen the bearing.
- Clean the threads on both the blade housing and the cup rim with an old toothbrush. This is where the cement forms.
- Dry fully before storing. Trapped moisture under the gasket breeds mildew and makes the seal smell.
Deep cleaning the gasket
Once a week, gently lift the edge of the rubber gasket on the underside of the blade housing with a toothpick and clean beneath it. Food hides there. If the gasket is cracked, flattened, or missing, the blade can leak and won’t seal — replacement gaskets are sold separately for a few dollars, or come with new blade assemblies.
When To Replace the Blade Instead of Removing It
Blades are wear items. Inspect yours each time you clean it and replace it when you notice:
| Symptom | What it means | Recommended action |
|---|---|---|
| Smoothies come out chunkier than before | Dulled blade edge | Replace the blade assembly |
| Blade wobbles visibly when spun | Worn bearing inside housing | Replace immediately |
| Leaking from the blade-cup seam | Cracked or flattened gasket | Replace gasket, or whole assembly |
| Grinding or squealing noise | Bearing failure or debris | Clean first; if noise persists, replace |
| Cracks in the plastic housing | Fatigue from overtightening | Replace — risk of sudden failure |
With daily use, most households replace the extractor blade every 6 months. Occasional users can stretch that to a year or more. Replacement blade assemblies for the 600 and 900 are widely available from NutriBullet directly and from general retailers, usually sold in single or multi-packs.
Safety Rules for Blade Removal
A few rules prevent the most common injuries and breakages:
- Unplug before anything else. The NutriBullet 600 and 900 have no off switch — the motor runs whenever the cup is engaged and pressed down.
- Wait for the blade to stop completely after lifting the cup from the base. The blade keeps spinning briefly on momentum.
- Never grab the blade edge. The extractor blade has multiple sharp flanges; hold only the plastic housing.
- Keep the cup upright when twisting. Twisting with the cup on its side can spill residue into the motor base if the blade was leaking.
- Never put the blade assembly on the motor base without a cup. There’s no reason to, and it risks damaging the activation prongs.
Troubleshooting Common Removal Problems
| Problem | Likely cause | Fix |
|---|---|---|
| Blade spins but won’t unscrew | Threads jammed with residue | Warm soapy soak, then twist |
| Blade housing cracks while twisting | Overtightened previously, plastic fatigue | Stop, use strap wrench for even force; order replacement |
| Cup spins instead of blade | You’re gripping the cup, not the housing | Hold the blade housing, twist the cup clockwise relative to it |
| Blade leaks after reassembly | Gasket missing, flipped, or worn | Reseat or replace the gasket |
| Blade won’t seat back into cup | Cross-threading | Back off, align threads, twist gently until it catches |
| Residue under the blade after cleaning | Debris under gasket | Lift gasket edge and clean beneath weekly |
Frequently Asked Questions
Is the NutriBullet blade dishwasher safe?
NutriBullet recommends hand-washing the blade assembly. The cups are generally top-rack dishwasher safe on most models, but dishwasher heat and detergent accelerate gasket wear and can affect the bearing lubrication inside the blade housing. A quick hand rinse after each use keeps the blade in good shape.
How do I remove the blade if it’s completely stuck?
Soak the sealed cup and blade in hot soapy water for 15 minutes, then dry your hands, grip the blade housing with a rubber jar opener, and twist counterclockwise while pulling slightly away from the cup. For extreme cases, a rubber strap wrench gives the grip needed without cracking the plastic.
Can I take the actual blade out of the blade housing?
No. The stainless blade is permanently sealed inside the plastic housing with the bearing assembly. Only the whole blade-and-housing unit is removable, and only from the cup. If the blade is damaged, replace the entire blade assembly rather than attempting to disassemble it.
Why does my NutriBullet blade leak?
Leaking almost always comes from the rubber gasket on the underside of the blade assembly. Check that the gasket is present, seated flat, and not cracked or flattened. Also confirm you haven’t overfilled the cup past the max line, and that the blade is tightened snugly against the cup rim.
How often should I replace my NutriBullet blade?
With daily use, replace the extractor blade about every 6 months; light users can go longer. Replace sooner if blending results decline, the blade wobbles, the unit gets noisy, or the gasket leaks. Replacement assemblies are inexpensive and widely available for all major NutriBullet models.
Are NutriBullet 600 and 900 blades interchangeable?
No. The 600 and 900 use different blade assemblies with different thread patterns and diameters, even though they look similar. Always buy a blade marked for your specific model. Using the wrong blade can strip the cup threads or fail to seal, causing leaks and poor blending.
Conclusion
Blade removal becomes second nature after the first few times: unplug, empty, grip the housing, twist left. If yours is stuck right now, start with the hot soapy soak — it fixes most cases without force. Then set a recurring reminder to check the gasket and blade condition every six months, and order a replacement assembly before the old one fails mid-smoothie.