How to Repair an Oster Blender: Fix Motor and Jar Leaks
You can repair an Oster blender at home for most common faults: a dead motor often means a bad wall outlet, a blown fuse in the plug, or a worn carbon brush, and a leaking jar usually means a loose base nut or a cracked gasket. A full repair takes 15 to 45 minutes.
Three things change that answer. Your model matters, because Oster sells both push-button and toggle-switch versions with different parts inside. Your fault matters, because a jammed blade and a burnt-out motor need different fixes. And your skill level matters, because some jobs are safe for anyone and some belong with a technician.
Start with the cord and the outlet before you touch a screw. Plug a lamp into the same outlet. If the lamp lights, the outlet is fine and the fault is in the blender.
Unplug the machine and turn the jar upside down. If the base nut is loose, tighten it by hand and run a test blend. If the leak continues, the gasket is cracked and needs replacing.
Carbon brushes are the one motor part most owners can swap. They sit under two small caps on the motor housing. If a brush is worn down to the manufacturer’s minimum length, replace both, not one, so the motor wears evenly.
If the motor hums but the blades won’t turn, stop. That usually means a seized bearing or a stripped drive coupling, and forcing it can burn out the winding.
Who should repair an Oster blender themselves
Three kinds of people search for this. The first owns a basic Oster with a simple on-off toggle and a motor that hums but won’t spin. They’ve had it a few years, they know the jar and blade, and they need one clear fix — usually a loose base or a stripped drive coupling.
The second owns a multi-speed Oster with a keypad or dial. They’ve already checked the outlet and the cord, and the unit still won’t start. They need to know whether the fault sits in the switch, the fuse, or the motor itself, and whether that’s worth fixing at all.
The third is fixing a blender for someone else — a thrift-store find, a hand-me-down, a rental unit. They don’t know its history, so they need a diagnostic order rather than a single answer.
This page serves the first two best. It assumes you have a screwdriver, a multimeter is optional, and you’re willing to unplug the unit and work on the outside of the housing only. If your blender is under warranty, or the motor smells burnt and the unit is a sealed modern model, read the warranty terms first — the third reader should check the model number plate before spending anything.
What decides whether your repair works
The model number decides almost everything. Oster has made blenders for decades, and the internal layout changed across generations — older units use a removable base plate and a replaceable fuse, newer ones often seal the motor housing. Find the plate on the bottom or back, read the model, then check Oster’s own parts page for that number before you buy anything.
The fault type is the second big one. A blender that won’t turn on at all points to power, switch, or fuse. A blender that runs but won’t blend points to the blade, the coupling, or the jar seating. A blender that leaks points to the gasket or the base nut. People get this wrong most often by replacing the motor when the real problem is an inexpensive drive coupling.
The age of the unit decides whether parts exist. Current models have parts listed on Oster’s site. Discontinued models may not, and that’s the point where repair stops making sense.
Your tool access is the fourth. A basic screwdriver set and a pair of pliers cover most external jobs. A multimeter helps you test continuity, but you can often diagnose by swapping the jar or trying a different outlet first.
Step-by-step repair for an Oster blender
- Unplug the blender and set it on a towel. Wait 60 seconds before touching anything. The sign it worked: the cord is fully out of the wall and the unit is cool to the touch.
- Test the outlet with another appliance — a lamp or phone charger. If the lamp lights, the outlet is fine and the fault is in the blender. If not, you’ve found the problem without opening anything.
- Check the cord and plug for damage. Run your fingers along the full length. A frayed cord or a bent prong is a stop-and-replace job — don’t tape it and keep using it.
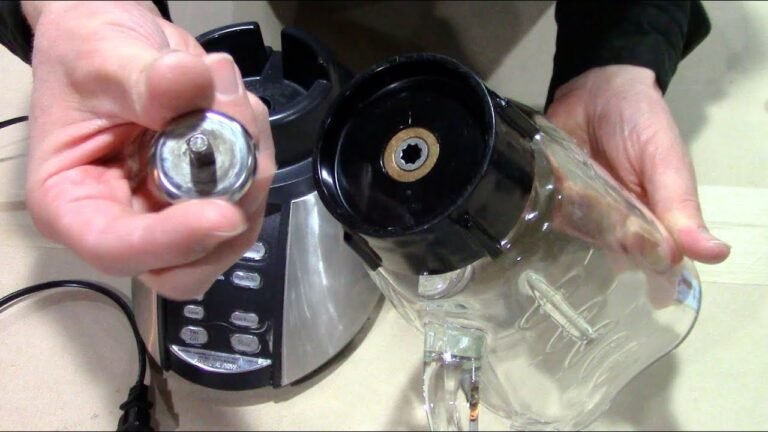
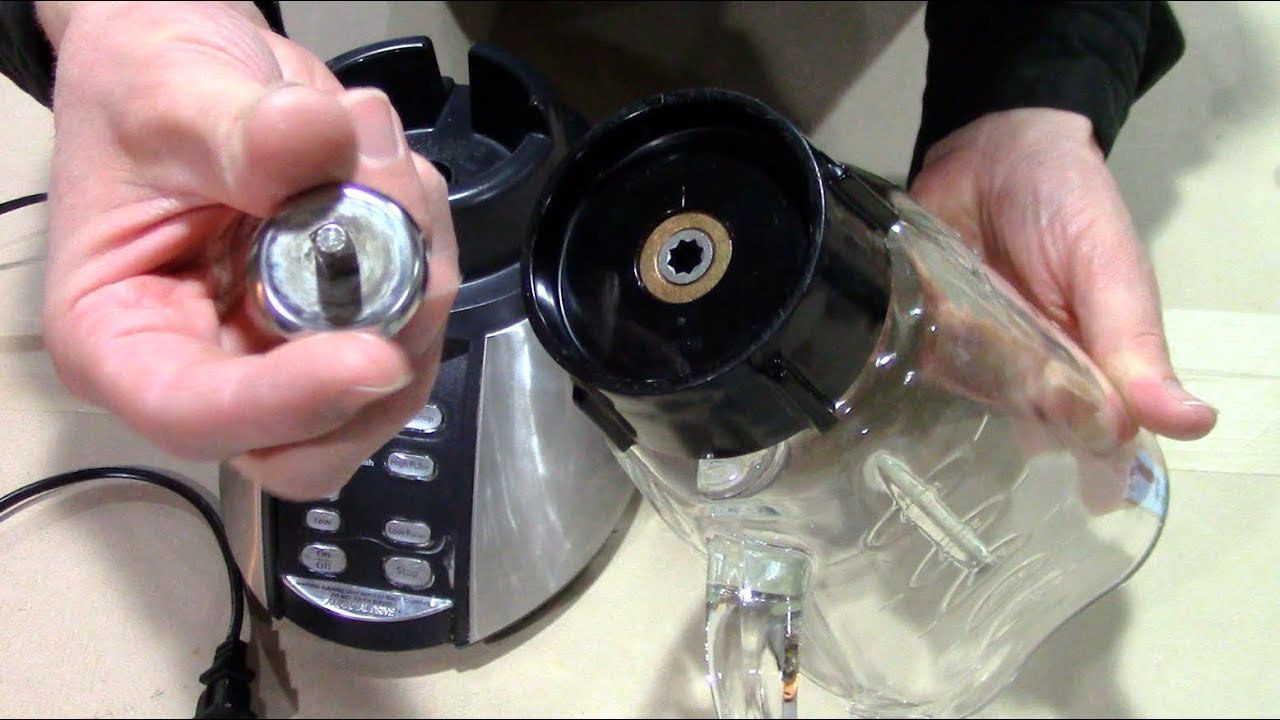
- Remove the jar and blade assembly. Twist the base collar counterclockwise. Lift the blade out and set it aside. The sign it worked: the blade separates cleanly from the jar.
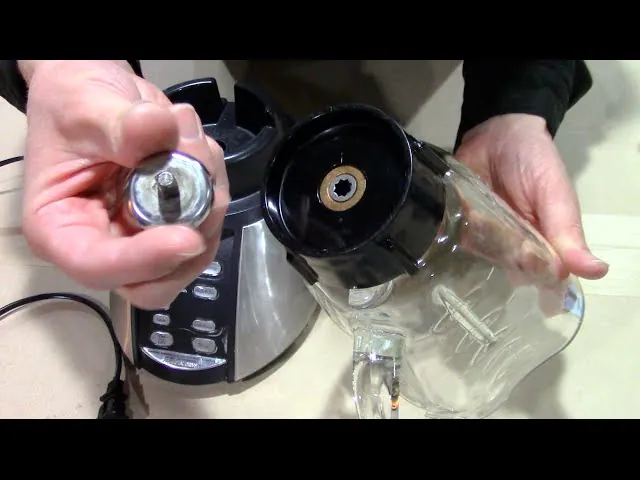
- Inspect the drive coupling — the rubber or plastic piece that connects the motor to the blade. Look for stripped teeth, cracks, or a worn center. A bad coupling is the most common cause of “motor runs, blade doesn’t.”
- Check the base nut under the jar. If it’s loose, tighten it by hand plus a quarter turn with pliers. If the gasket underneath is cracked or stiff, replace it — a new gasket costs a few dollars and stops most leaks.
- Open the base only if your model allows it. Remove the screws on the bottom plate. Never touch the capacitor or any wiring inside — a capacitor can hold a lethal charge even when unplugged.
- Look for a fuse in the plug or the base. Some Oster models have a replaceable fuse. If yours does and it’s blown, swap it with the same rating printed on the old one.
- Reassemble in reverse order. Tighten the base nut firmly but don’t overtighten — you’ll crack the jar collar. The sign it worked: the jar sits flush with no wobble.
- Test with 1 cup of water, not food. Run it for 5 seconds on low. If it spins smoothly with no rattle or leak, the repair held.
The judgement call is knowing when to stop. If the motor hums but won’t turn, and the coupling is fine, the fault is inside the motor or the switch — that’s technician territory, not a kitchen-table job.
Repair options at a glance
| Situation | What to do | Time and effort | What to watch for |
|---|---|---|---|
| Won’t power on at all | Test outlet, then cord and fuse | 10 minutes, easy | Frayed cord means replace, not repair |
| Motor runs, blade doesn’t spin | Replace drive coupling | 15 minutes, easy | Match coupling to model number |
| Jar leaks at the base | Tighten base nut, replace gasket | 10 minutes, easy | Overtightening cracks the collar |
| Blade feels dull or bent | Replace blade assembly | 5 minutes, easy | Don’t try to sharpen blender blades |
| Burning smell from the base | Stop using it, check warranty | Varies | Motor damage is usually terminal |
| Switch doesn’t click or respond | Check model parts page | 30 minutes, moderate | Sealed models may not open |
| Unit under warranty | Contact Oster support first | Varies | Opening it may void coverage |
What separates a good repair from a poor one
A proper repair starts with the cheapest possible cause and works up. Experienced fixers test the outlet, then the cord, then the coupling, then the gasket — in that order. They don’t open the housing until they’ve ruled out everything outside it.
Diagnose before you buy parts
Buy the part that matches the fault, not the part that sounds most likely. If the motor runs and the blade doesn’t, you need a coupling, not a motor. If the unit is silent and the outlet works, you need to test the switch or fuse. Write down what you observe before ordering anything.
Know which parts to leave alone
Blender blades are sharp and don’t sharpen well at home — replace them. The motor, capacitor, and internal wiring aren’t DIY territory; a capacitor holds a charge that can injure you even with the cord out. If your model is sealed, don’t force it open. That’s the line where a repair shop takes over.
What goes wrong, and what to do
Most failed repairs come from fixing the wrong part or overtightening during reassembly. Match what you notice to the cause before you spend anything.
| What you notice | What it usually means | What to do first | How to stop it happening again |
|---|---|---|---|
| Nothing happens when you press start | No power reaching the unit | Test the outlet with a lamp | Test the outlet whenever the blender fails to start |
| Motor hums, blade stays still | Worn drive coupling | Replace the coupling | Don’t overload with hard frozen food |
| Liquid leaks from the base | Loose base nut or bad gasket | Tighten nut, replace gasket | Check the base nut periodically and tighten by hand if loose |
| Loud rattling while blending | Loose jar or worn bearing | Reseat the jar, check the collar | Seat the jar fully before starting |
| Burning smell during use | Motor overheating or damage | Stop, unplug, check warranty | Run thick mixes in short bursts and give the motor time to cool |
| Blade spins but food stays whole | Dull or bent blade | Replace the blade assembly | Don’t blend ice without liquid |
The rules that apply to this repair
Oster’s own warranty terms decide whether you should open the unit at all. In the US, most Oster blenders carry a limited warranty that covers defects in materials or workmanship for a set period, and opening the housing yourself can void it. Check the card in the box or Oster’s official warranty page for your model’s exact term before you pick up a screwdriver.
Electrical safety rules matter too. General electrical safety guidance is to stop using appliances with damaged cords, and any mains-powered appliance should be treated as live until it’s unplugged. Never work on a plugged-in blender.
If your unit is under warranty, or the fault is inside the motor housing, that’s a job for Oster support or a qualified appliance technician. Don’t open a sealed motor housing yourself.
What this repair really costs you
The money is small if you fix the right part. A drive coupling, gasket, or blade assembly is inexpensive compared with the alternative, depending on your model — check Oster’s parts page or a retailer like Amazon for today’s price, since it changes.
The bigger cost is time and the risk of buying the wrong part. A misdiagnosis means you’ve spent money on a coupling when the motor was dead, and the unit still doesn’t work. That’s why the diagnostic order matters more than the part price.
If you take it to a repair shop, expect a bench fee plus labor, which often runs close to the price of a new basic Oster. For a basic blender, that math rarely works. For a higher-end model, it might. Compare the quote to the current price of your model before deciding.
Keeping your Oster blender working
After a repair, run the unit for short bursts for the first few uses — 30 seconds at a time — and listen for new rattles. Stop if you hear grinding; that usually means the coupling isn’t seated right.
Wash the jar and blade by hand rather than in the dishwasher if your model’s manual says the parts aren’t dishwasher-safe. Heat and detergent can stiffen the gasket and shorten its life.
Check the base nut periodically and tighten it by hand if it has worked loose. Check the gasket for cracks each time you remove the jar — a stiff or split gasket is the sign it needs replacing, and it’s a five-minute job. Store the blender with the jar off if you have counter space, so the coupling isn’t under load.
When repairing an Oster blender is the wrong choice
If the motor is burnt out on a sealed modern model, this page can’t help you. The motor housing isn’t meant to open, and replacing the motor usually costs more than a new unit. Buy a replacement instead.
If your blender is still under warranty, don’t touch it. Contact Oster support and use the warranty — opening the unit yourself can void it, and you’d pay for a repair that was free.
If you’ve already opened the housing and seen a swollen capacitor or burnt wiring, stop. That’s a technician’s job, and a capacitor can hold a dangerous charge even when unplugged. Take it to a qualified appliance repair shop or dispose of it safely.
Age matters as much as the fault. Many older Oster blenders have repairable motors, though parts availability varies by model. If yours is a vintage all-metal base, a new motor or switch is often worth fitting. If it’s a plastic-bodied model from recent years, the same repair rarely makes sense.
Count the cost before you commit. Add the part, shipping, and a shop’s hourly rate. If that total lands anywhere near the price of a comparable new blender, replace it. A repair only wins when the part is cheap and you’re doing the work yourself.
One common mistake: buying a motor before confirming the fault. A blender that won’t spin is often a worn coupler, a bad switch, or a broken drive socket — all far cheaper than a motor. Test those first, or you’ll spend on the wrong part and still have a dead blender.
Related guides
- How To Remove the Bottom Of an Oster Blender Jar
- Oster Mason Jar Blender Review
- How To Fix Ninja Blender Motor: Easy Troubleshooting Guide
Frequently asked questions
Can I repair an Oster blender myself?
Yes, for most external faults. Couplings, gaskets, base nuts, blades, cords, and plug fuses are all DIY jobs with basic tools. Anything inside the motor housing — the motor, capacitor, or internal wiring — is not, and belongs with a technician.
Why won’t my Oster blender turn on?
Start with the outlet: plug in a lamp to confirm it works. If it does, check the cord for damage, then look for a fuse in the plug or base. If all three are fine and the unit is still silent, the switch or motor is the likely fault.
How long does an Oster blender repair take?
Most external repairs take 10 to 30 minutes — a coupling swap is about 15 minutes, a gasket change about 10. Add time if you’re waiting on a part. Motor or switch repairs take longer and often aren’t worth doing at home.
Is it safe to open the base of my Oster blender?
Only if your model has a removable base plate and you’ve unplugged it. Never touch the capacitor or internal wiring — a capacitor can hold a lethal charge even when the blender is unplugged. If the housing is sealed, don’t force it open.
What happens if I use a blender with a bad coupling?
The motor spins but the blade doesn’t, so food stays whole and the motor overheats from running under load. Left long enough, that heat can damage the motor. Replace the coupling as soon as you notice the blade stalling.
How much does it cost to fix an Oster blender?
Parts like couplings, gaskets, and blades are usually inexpensive compared with the alternative, depending on the model — check Oster’s parts page for today’s price. A repair shop bench fee plus labor often runs close to the price of a new basic unit.
Does it matter which Oster model I have?
Yes, a lot. Model number decides which parts fit, whether the base opens, and whether a fuse is replaceable. Read the plate on the bottom or back, then check that exact number on Oster’s parts page before ordering anything.
Can I replace just the blade on an Oster blender?
Yes. The blade assembly unscrews from the jar collar and is sold as a separate part. Match it to your jar size and model number. Don’t try to sharpen the old blade — replace it instead, since home sharpening rarely works on blender blades.
Start with the outlet, then work inward
Plug in a lamp to rule out the outlet, then check the cord, coupling, and gasket before opening anything. Most Oster blender faults are one of those four, and a coupling or gasket swap takes about 15 minutes.
Work in that order because each step is cheaper and faster than the one after it. A dead outlet costs nothing to test. A new cord is a few dollars. A coupling or gasket is a small part you can fit yourself in about 15 minutes.
You’ll know it worked when the blade spins smoothly on a 5-second water test with no rattle or leak. Run the test with warm water and a drop of dish soap, and watch the base for drips while it runs.
If you smell burning or see damaged wiring inside, stop and call a qualified appliance technician.