How To Remove the Bottom Of an Oster Blender Jar
The base cap on an Oster blender jar unscrews counterclockwise once you grip the blade assembly from inside the jar, but on most models you first have to remove a retaining ring or collar that locks the two pieces together. That single fact is what trips most people up: they twist the base, feel it spin freely, and assume it’s broken or permanently sealed. In reality, almost every Oster jar comes apart with ordinary household tools and about ten minutes of patience.
Key Takeaways
- Twist counterclockwise first. On classic Oster jars, the base cap unscrews from the jar in the opposite direction of the blade spin.
- Look for a retaining ring. Many models hide a thin metal or plastic ring under the base that must be pried off before the cap will turn.
- Never grip bare blades. Wrap the blade assembly in a thick towel or wear cut-resistant gloves before applying force.
- Soak before you fight it. Fifteen to thirty minutes in warm soapy water dissolves dried smoothie residue that acts like thread lock.
- Replace worn gaskets. A leaking or seized base usually means a flattened rubber seal, a part that costs a few dollars.
- Stop if the jar is cracked. A fractured jar threads unevenly and can shatter under twisting force.
Know Which Oster Jar You Have
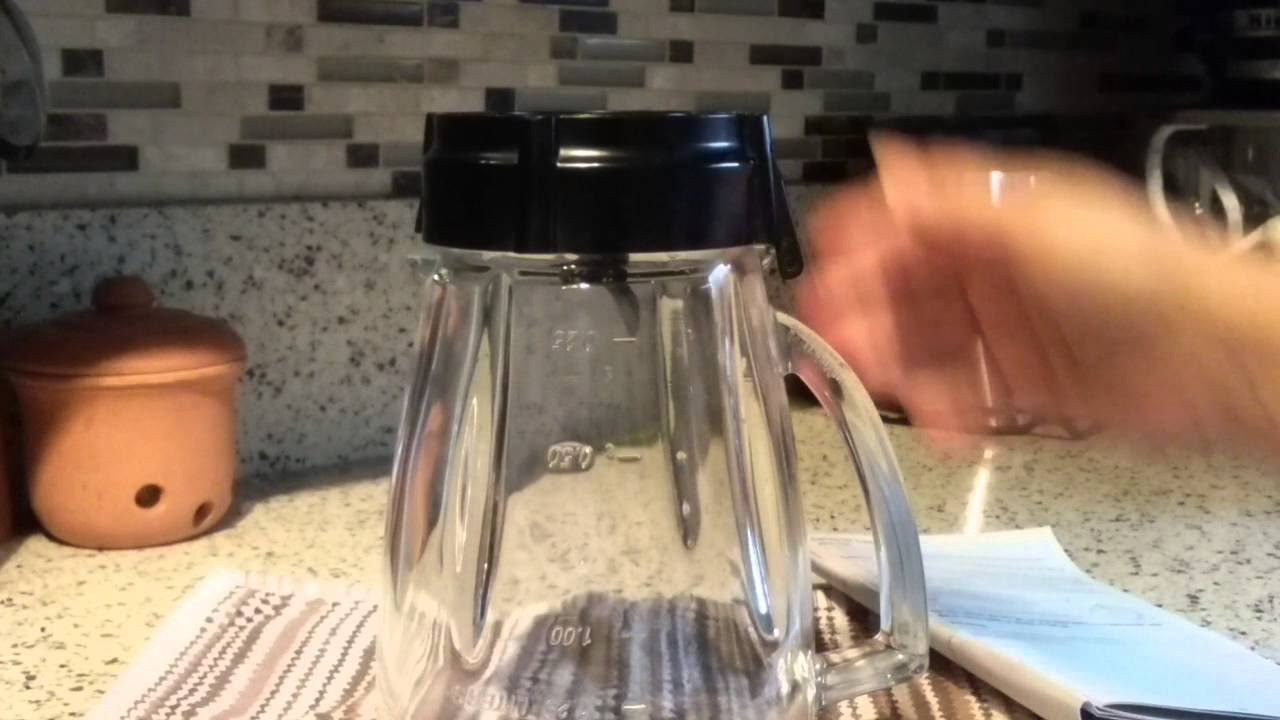
Oster has sold roughly three families of blender jars over the decades, and the disassembly method differs for each. Before you pick up a tool, identify what is sitting on your counter. The easiest way is to look at the bottom of the base cap: a single flat cap with a molded hex or square recess is the classic threaded design, while a cap with visible screws or a snap-fit seam belongs to a newer press-fit or assembled style.
The Classic Threaded Jar
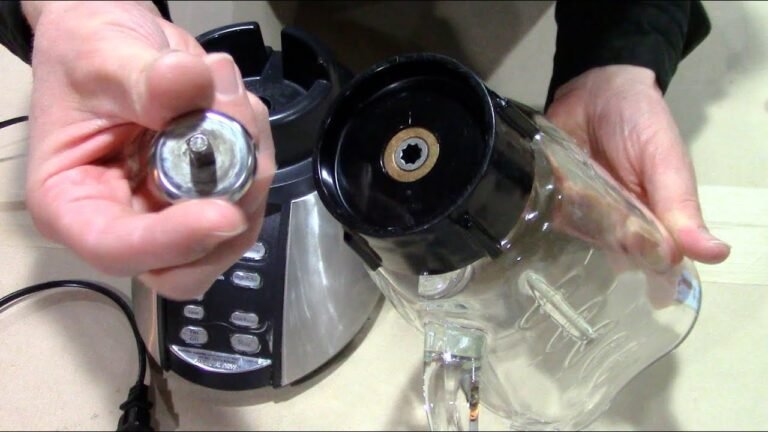
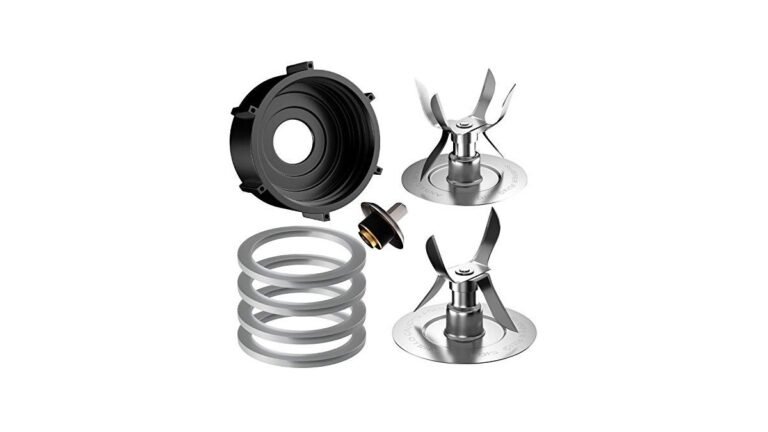
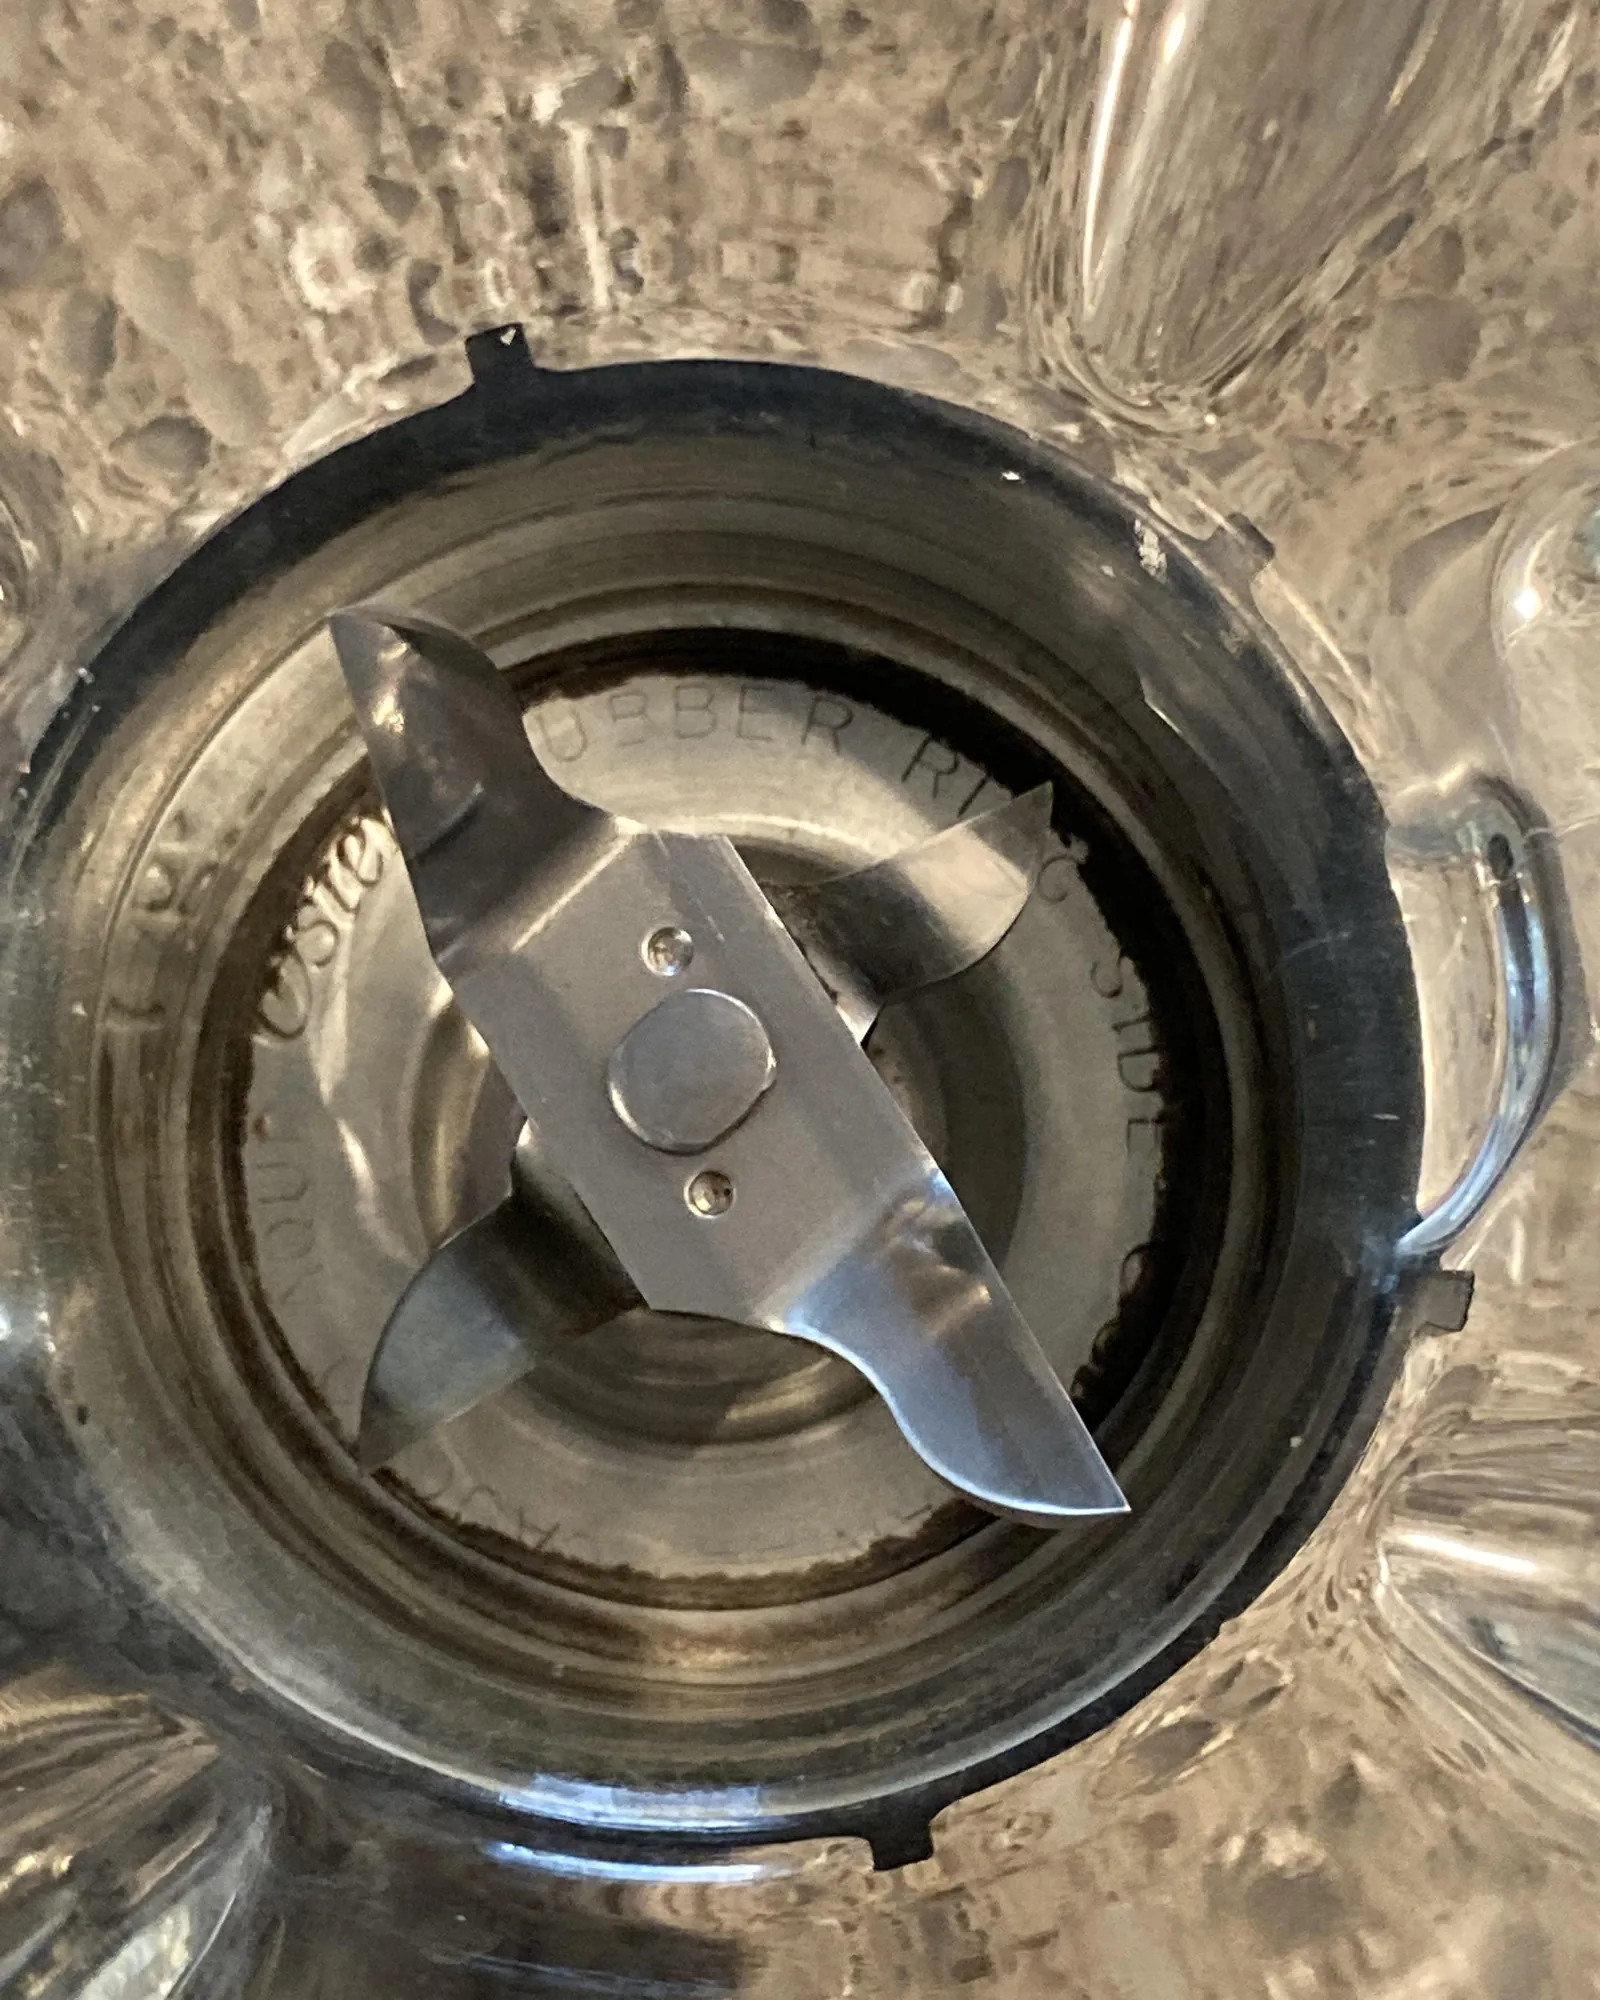
This is the jar most people picture when they hear “Oster blender.” It has a glass or plastic container, a four-point star blade, and a metal or hard plastic base cap that threads onto the bottom of the jar. The blade shaft passes through a rubber gasket, and the whole sandwich is held tight by the cap. On these units, the cap itself is the nut.
The Retaining-Ring Style
Some Oster jars, particularly older glass models and several commercial variants, add a thin stamped-metal retaining ring or a plastic collar that sits between the jar threads and the base cap. This ring prevents the cap from backing off during heavy use. You can’t unscrew the cap until the ring is removed, and the ring usually has a small tab or notch you can catch with a flathead screwdriver.
The Press-Fit and Sealed Base
A number of budget and newer Oster models use a base that’s pressed or ultrasonically welded into place rather than threaded. If you see no seam, no flats for a wrench, and no retaining ring, you likely have a sealed base. These are generally not meant to be disassembled by the owner, and forcing them usually destroys the jar.
| Jar Type | How to Identify | Removal Method | Reusable? |
|---|---|---|---|
| Classic threaded | Flat cap with hex recess, no screws | Unscrew counterclockwise | Yes |
| Retaining-ring | Thin metal/plastic ring under cap | Pry ring off, then unscrew | Usually yes |
| Press-fit / sealed | No seam, no flats, no ring | Not serviceable | No |
| Screwed base plate | Visible Phillips screws | Remove screws | Yes |
Gather the Right Tools First
You don’t need a specialty kit, but the wrong tool is how jars get scratched and knuckles get cut. Lay everything out before you start so you aren’t hunting for a screwdriver with a slippery jar in your hands.
- Cut-resistant gloves or a thick folded towel
- Flathead screwdriver with a thin blade for prying retaining rings
- Rubber jar opener or a silicone pot holder for grip
- Adjustable wrench or channel-lock pliers for stubborn caps
- Warm water and dish soap in a sink or basin
- Small bowl for loose parts so nothing rolls into the disposal
- Replacement gasket if yours is flattened or torn
Pro Tip: Photograph the base from two angles before you take anything apart. Reassembly is much faster when you can see exactly how the gasket, blade shaft, and cap were stacked.
How To Remove the Bottom Step by Step
Work over a towel-lined counter or a sink with the drain covered. Small retaining rings and gaskets love to disappear down a drain, and a replacement can take days to arrive.
- Empty and rinse the jar. Dump any contents, then rinse loose debris. Don’t fill it with water yet.
- Soak the base. Stand the jar upside down in two to three inches of warm water with a squirt of dish soap for fifteen to thirty minutes. This softens dried fruit, protein powder, and nut butter.
- Dry the outside. Wipe the jar and base dry so your grip doesn’t slip.
- Put on gloves. Cut-resistant gloves or a folded towel around the blade assembly.
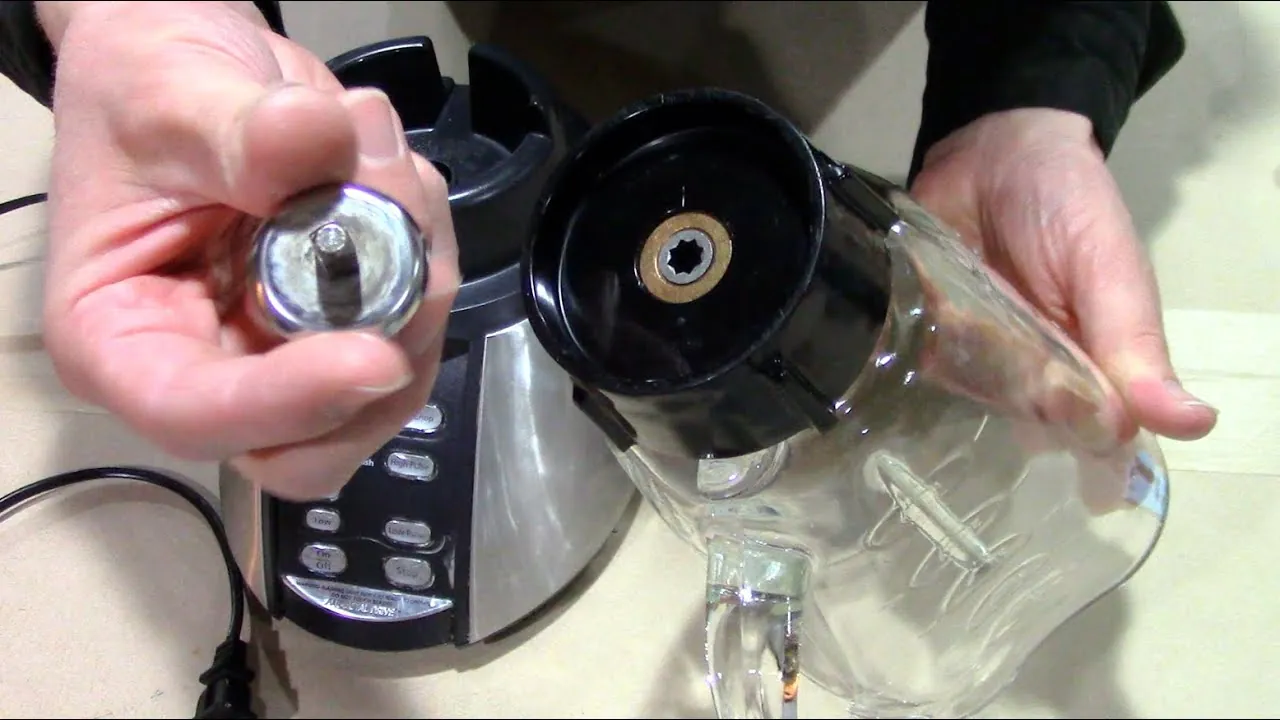
- Hold the blade from inside. Reach into the jar and grip the blade assembly hub, not the blades themselves.
- Twist the base counterclockwise. With your other hand, turn the base cap to the left. Remember: righty-tighty, lefty-loosey.
- If it won’t budge, check for a retaining ring. Look for a thin ring seated just above the cap. Pry it up gently with a flathead screwdriver, working around the circumference a little at a time.
- Apply penetrating oil if needed. A drop of food-safe penetrating oil or a few minutes in hot water can break a stubborn seal. Let it sit, then try again.
- Separate the parts. Once the cap turns, the blade assembly and gasket lift free. Set them in your parts bowl.
- Wash everything. Hand wash the jar, cap, blade, and gasket in warm soapy water, then air dry completely before reassembly.
If the Cap Still Will Not Turn
Some caps are genuinely seized from years of sugar and mineral buildup. Try these in order: a longer hot-water soak, a rubber strap wrench, then a brief application of heat from a hair dryer on the cap only. Avoid open flame and avoid hammering on the cap, which can crack glass jars and deform plastic threads. If nothing works after twenty minutes of effort, the jar may be a sealed design or the threads may be stripped.
Removing a Stuck Retaining Ring
Slide the flathead under the ring’s tab and lift just enough to clear the jar lip. Work your way around in small increments rather than prying one spot hard. Metal rings can crease and become impossible to reseat if you bend them sharply. If the ring is plastic and brittle, expect it to snap, and plan to replace it.
Clean and Inspect Every Part
Once the base is off, you have a rare chance to inspect parts that normally stay hidden. This is where you catch the problems that cause leaks, burning smells, and wobbling blades.
- Gasket: Look for flat spots, cracks, or a stretched shape. A gasket that no longer springs back is the number one cause of a leaking base.
- Blade assembly: Check for bent blades, a wobbly shaft, or rust at the bearing. A shaft with play will eventually leak.
- Base cap threads: Inspect for cross-threading, stripped plastic, or hardened residue packed into the grooves.
- Jar threads: Run a finger around the bottom rim. Chips and hairline cracks here mean the jar is done.
- Jar body: Hold it up to light and look for stress cracks, especially near the handle and the bottom curve.
| Part | What to Look For | Typical Replacement Cost |
|---|---|---|
| Rubber gasket | Flattening, cracks, hardening | $3–$8 |
| Blade assembly | Bent blades, shaft play, rust | $10–$25 |
| Base cap | Stripped or cracked threads | $8–$20 |
| Complete jar | Cracks, chips, cloudiness | $20–$45 |
Reassembly Without Leaks
Putting it back together is the reverse of removal, with one critical difference: alignment matters more than torque. A gasket that’s pinched or a cap that’s cross-threaded will leak on the first blend.
- Set the gasket into the base cap groove, flat side down.
- Lower the blade assembly onto the gasket, shaft pointing down through the cap.
- Seat the jar onto the assembly, lining up the threads by hand.
- Turn the cap clockwise until it’s snug, then stop. Hand-tight is enough.
- Reinstall the retaining ring if your model uses one.
- Fill with water to the two-cup line and run a ten-second test blend over a sink.
- Check for drips at the base. If it weeps, tighten another quarter turn and retest.
Warning: Never run the blender with the base cap loose to “check” for leaks. A loose cap can spin off mid-blend and send blades and hot liquid across the kitchen.
Troubleshooting Common Problems
Most failures at the base fall into a handful of predictable categories. Match your symptom to the table below before you buy parts.
| Symptom | Likely Cause | Fix |
|---|---|---|
| Base leaks during blending | Worn or pinched gasket | Replace gasket, reseat flat |
| Cap spins but won’t release | Stripped threads or sealed base | Replace cap or jar |
| Burning rubber smell | Gasket melting against hot jar | Stop, cool, replace gasket |
| Blade wobbles or rattles | Worn shaft bearing | Replace blade assembly |
| Jar rocks on the base | Warped cap or cracked jar rim | Replace the damaged part |
| Cap fused to jar | Dried sugar or mineral scale | Hot soak, then retry |
When To Replace Instead of Repair
If the jar itself is cracked, chipped at the rim, or clouded from years of hot liquids, replacement is the honest answer. Glass jars can fail suddenly under load, and a repaired crack isn’t a repair at all. Similarly, if the base cap threads are stripped, no amount of gasket swapping will stop the leak.
Safety Around the Blade Assembly
The four-point blade on a classic Oster jar is sharp on every edge and doesn’t care whether the motor is running. Handle it by the hub only. Never leave a bare blade assembly sitting in a sink of soapy water where someone reaching in can’t see it. Wash it with a brush, not a sponge, and store it assembled on the jar.
Where To Find Replacement Parts
Oster still supports a wide range of its jar designs, and aftermarket parts are widely available. Your best sources, in rough order of reliability:
- Oster’s own parts site for genuine gaskets and blade assemblies matched to your model number
- Appliance repair shops that stock blender consumables
- Large online marketplaces for aftermarket gaskets and caps, where you should match the model number carefully
- Thrift stores and estate sales for complete donor jars, often cheaper than a single new blade assembly
Find your model number on the rating plate, usually on the bottom of the motor base or the back of the housing. Searching that number plus “jar gasket” or “blade assembly” is far more reliable than searching by the blender’s marketing name, which often covers several jar generations.
Pro Tip: Buy two gaskets at once. They’re inexpensive, they’re the part most likely to fail again, and shipping usually costs more than the part itself.
Frequently Asked Questions
Does the bottom of an Oster blender unscrew?
On classic threaded models, yes. The base cap unscrews counterclockwise from the jar once you grip the blade assembly from inside. Some models add a retaining ring that must be pried off first, and a few newer budget jars use a sealed press-fit base that isn’t designed to come apart at all.
Which way do I turn the base to loosen it?
Turn the base cap counterclockwise, the same direction you would loosen any standard screw. Hold the blade assembly stationary from inside the jar while you turn the cap. If it spins freely without releasing, you almost certainly have a retaining ring still in place.
Why is my Oster blender base stuck?
The usual culprit is dried residue, especially sugar, protein powder, or nut butter, acting like adhesive in the threads. A fifteen- to thirty-minute soak in warm soapy water solves most cases. Less often, the threads are cross-threaded or stripped, which means the cap or jar needs replacing.
Can I run the blender without the gasket?
No. The gasket seals the blade shaft opening and absorbs vibration between the jar and cap. Running without it will leak liquid directly onto the motor base, which can cause electrical damage or a shock hazard. Replace a missing or flattened gasket before your next blend.
How do I stop the base from leaking after reassembly?
Check three things in order: the gasket is seated flat with no twists, the blade assembly is centered on the gasket, and the cap is hand-tight rather than barely snug. If it still weeps, the gasket is likely compressed and past its useful life. A new gasket typically costs a few dollars.
Is it worth repairing an old Oster jar?
Usually yes if the jar body is intact. Gaskets and blade assemblies are inexpensive and widely available, and a classic Oster jar can last decades with occasional part swaps. If the glass is cracked, chipped at the rim, or the cap threads are stripped, replace the jar instead of repairing it.
One Last Check Before You Blend
Removing the bottom of an Oster blender comes down to identifying your jar style, soaking the base to break dried residue, and turning the cap counterclockwise while you hold the blade assembly steady. If a retaining ring is present, it has to come off first, and if the base is sealed, the honest answer is that it was never meant to open.
Once the parts are apart, inspect the gasket and blade shaft, replace anything worn, and reassemble hand-tight. Your next step: find your model number on the motor base, order a spare gasket, and run a water test blend before you trust the jar with a full smoothie.