How To Fix Oster Blender Problems: 4 Common Causes
Most Oster blender problems come down to four things: a safety interlock that isn’t engaged, a worn jar gasket, a dull or cracked blade assembly, or a motor that’s overheating because of how it’s being used. Work through those in order and you’ll fix the large majority of failures — no repair shop required. This guide covers every common Oster symptom, from a jar that won’t seat to a motor that smells hot, with the specific parts, tools, and steps that resolve each one.
Key Takeaways
- Check the interlock first. On most Oster models, the jar must be fully seated and twisted so the tabs lock into the base before the motor will spin. A blender that “won’t turn on” is often just a jar that isn’t clicked in.
- Replace the jar gasket if you see leaking, black specks in smoothies, or a blade that spins loosely. It’s a $3–$8 part and the single most common fix.
- Let a hot motor cool 15–30 minutes before retrying. Oster’s thermal overload protector resets itself; forcing it just deepens the damage.
- Never submerge the base. Wash the jar, lid, and blade assembly only. The motor base wipes clean with a damp cloth.
- Match your model to its part. Oster sells several jar and blade generations (5-cup, 6-cup, 8-cup, Blend-N-Go, Pro, and the classic Beehive), and parts aren’t always interchangeable.
- Most fixes cost under $25. A full blade assembly runs roughly $10–$20, a gasket $3–$8, and a replacement jar $15–$35 — far less than a new blender.
Safety: Inside a mains-powered machine, the parts behind the outer cover can hold a dangerous electrical charge even after it has been unplugged — that’s why they sit behind a cover. Opening the housing, or testing or replacing anything behind it, is a job for a qualified technician, never a home repair.
The Oster Blender Won’t Turn On
A dead Oster is almost never a dead motor. Start with the cheapest and most likely cause and work down.
Check the Jar Interlock
Oster’s safety system requires the jar to be twisted clockwise until it stops. On the classic Osterizer and Beehive designs, the jar base has tabs that press a plunger inside the motor base. If the jar is sitting on top but not rotated fully, nothing happens when you press a button.
Test it: lift the jar, set it back down, and twist firmly until you feel resistance. Then press a speed button. If the motor hums, the interlock was the problem.
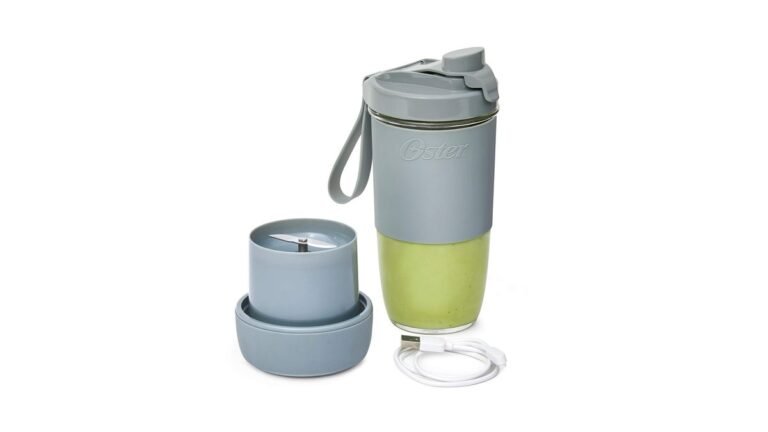
On Blend-N-Go and personal-size cups, the cup itself is the actuator — it must be screwed onto the blade base tightly, then inverted onto the motor.
Test the Outlet and Cord
Plug a lamp or phone charger into the same outlet. If that’s dead, check your kitchen’s GFCI outlet — the reset button on the receptacle or on a nearby outlet. Kitchen circuits trip constantly.
Then inspect the cord along its full length for cuts, kinks, or a bent plug. A cord that’s been pinched under the base or run over by a chair is a genuine fire risk and the unit should be retired, not repaired.
Look for a Tripped Thermal Protector
If the blender ran, got hot, and then quit, the thermal overload protector has tripped. This is a self-resetting safety device built into the motor. Unplug the blender, empty the jar, and let it sit for 15–30 minutes in a cool spot. Plug it back in and try again.
If it runs and immediately dies again, you’re overloading it — see the overheating section below.
Rule Out the Switch Panel
On older Osterizers with push buttons, a single button can fail while others work. Test each speed. If only one or two speeds are dead, the switch assembly is the culprit. Replacement switch panels for classic Osterizers typically run $12–$25 and are a screwdriver-and-spade-connector job.
If every button is dead and the outlet, cord, and interlock are all fine, the motor or its internal wiring has failed. At that point, compare the cost of a new base against a new blender.
Diagnosing the Problem by Symptom
Use this table to jump straight to your fix.
| Symptom | Most Likely Cause | Fix | Typical Part Cost |
|---|---|---|---|
| Won’t turn on at all | Jar not locked in; dead outlet; tripped thermal protector | Reseat jar, test outlet, cool 15–30 min | $0 |
| Motor hums, blades don’t spin | Stripped drive socket or worn blade assembly | Replace blade assembly or jar base | $10–$20 |
| Leaks from the bottom of the jar | Failed jar gasket or cracked jar base | Replace gasket or jar base | $3–$8 (gasket) |
| Black specks in the smoothie | Deteriorating gasket or worn blade bearing | Replace gasket and blade assembly | $12–$25 |
| Burning smell | Overheating motor or food jammed under blades | Stop, unplug, cool, clear the jam | $0 |
| Shuts off mid-blend | Thermal overload protector tripped | Reduce load, cool down, blend in batches | $0 |
| Loud grinding or rattling | Loose blade nut or failing bearing | Tighten or replace blade assembly | $10–$20 |
| Jar won’t seat on base | Warped jar base or damaged interlock tab | Replace jar base or jar | $8–$35 |
| Blender walks across the counter | Worn rubber feet | Replace feet or set on a damp towel | $5–$10 |
How To Fix an Oster Blender That Leaks
Leaks almost always trace to the jar gasket — the rubber ring that sits between the blade assembly and the bottom of the jar. Over time it hardens, flattens, or tears.
Step-by-Step Gasket Replacement
- Unplug the blender.
- Empty and rinse the jar.
- Unscrew the jar base collar from the bottom of the jar (most Oster jars twist off counterclockwise).
- Lift out the blade assembly and the gasket beneath it.
- Inspect the gasket: it should be pliable and free of cracks. If it’s stiff, flattened, or torn, replace it.
- Wipe the jar threads and the collar clean of old food residue.
- Seat the new gasket flat against the blade assembly.
- Reinsert the blade assembly into the jar, gasket side against the glass or plastic.
- Screw the collar back on firmly — hand-tight, not gorilla-tight. Overtightening warps the gasket and causes new leaks.
Pro Tip: Coat a new gasket with a thin film of food-safe silicone grease or a drop of cooking oil before installing. It seats better and lasts longer.
When the Jar Itself Is the Problem
If a new gasket doesn’t stop the leak, inspect the jar’s bottom rim for chips, hairline cracks, or a warped edge. Glass jars chip; plastic jars warp if they’ve been in a dishwasher’s heated drying cycle. A warped or chipped jar will never seal. Replace the jar.
Oster replacement jars are sold by capacity and thread pattern. Measure yours or note the model number on the base’s underside label before ordering.
Fixing Blade and Drive Problems
The blade assembly does two jobs: it chops, and it transfers torque from the motor to the food. When it fails, you get either no spinning or terrible blending.
Symptoms of a Worn Blade Assembly
- The blade spins freely by hand with no resistance
- Food at the bottom of the jar stays whole while the top liquefies
- A grinding or scraping noise under the jar
- Black or gray residue in the blend
- The blade wobbles when you wiggle it
Any of these means replace the assembly. Oster blade assemblies are typically $10–$20 and drop in without tools beyond the jar collar.
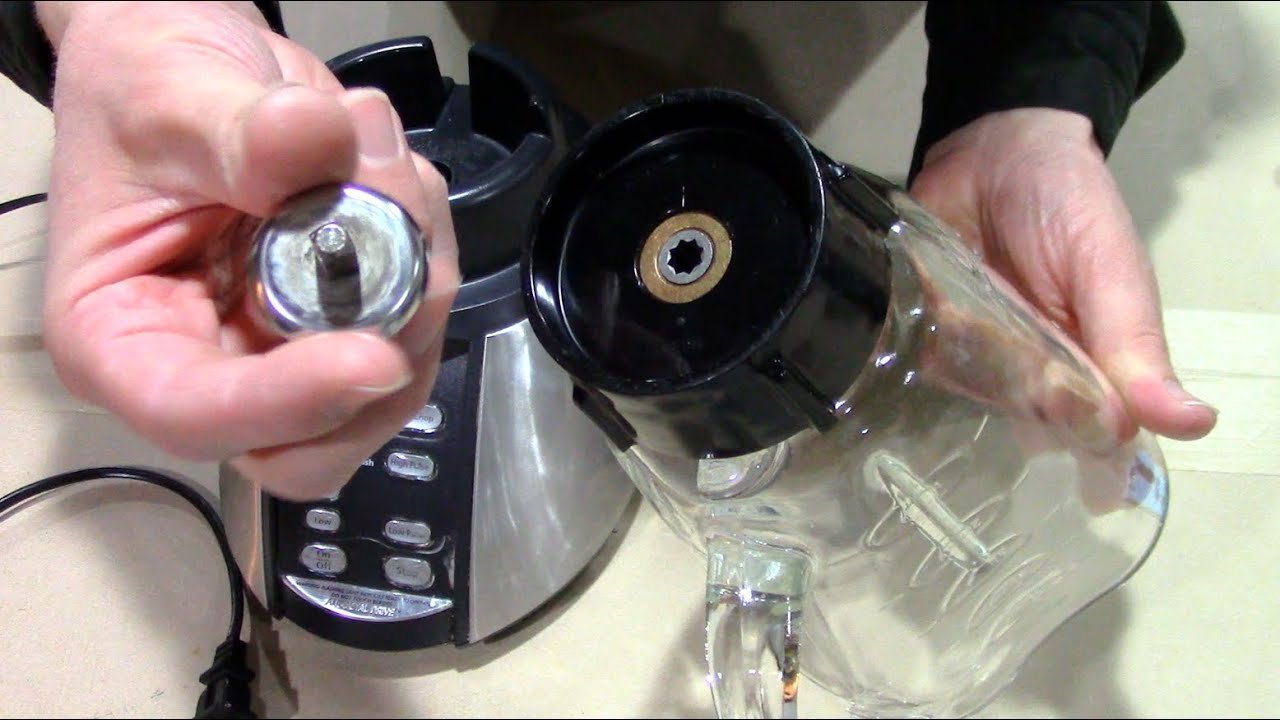
The Drive Socket
The drive socket is the splined plastic or metal piece at the bottom of the blade assembly that meshes with the motor’s shaft. It strips over time, especially if you’ve been running thick mixtures like frozen fruit or nut butter.
Shine a flashlight into the motor base’s center. The shaft should have crisp splines or a clean square drive. If it’s rounded off, the motor side is damaged and the base needs replacing.
Reassembling Correctly
Order matters: gasket against the jar, then blade assembly, then collar. Reversing the gasket and blade is a common mistake that produces immediate leaks and poor blending.
Tighten the collar by hand. If it backs off during blending, the collar threads are worn — replace the jar base collar.
Why Your Oster Blender Overheats
Oster blenders are built for short bursts, not continuous running. The manual for most models recommends running no more than 1–2 minutes at a time, then letting the motor rest.
Common Overheating Causes
- Too much frozen food. Ice and frozen fruit create enormous resistance. Add liquid first.
- Packing the jar too full. Fill no more than two-thirds for thick blends.
- Running on low speed for thick mixtures. Use the highest speed for thick or frozen loads.
- Blending dry ingredients. Nut flours and spices create heat and dust. Do them in small batches.
- A dull blade. A dull blade forces the motor to work harder. Replace it.
The Reset Procedure
- Stop the blender immediately when you smell hot plastic or the motor quits.
- Unplug it.
- Empty the jar and remove it from the base.
- Let the base cool in open air for 15–30 minutes.
- Plug in, reseat the jar, and run a small test batch.
Warning: Never run a blender that smells like burning wiring or shows melted plastic near the cord. That’s an electrical fault, not an overload. Retire the unit.
Blending Order That Prevents Overheating
Load the jar in this order, every time:
- Liquids (water, milk, juice, yogurt)
- Soft ingredients (fresh fruit, leafy greens, peanut butter)
- Powders (protein, cocoa, spices)
- Ice and frozen fruit on top
This lets the blades pull food down rather than fighting a frozen block at the bottom.
Matching Your Model to the Right Parts
Oster has made blenders for decades, and parts vary by generation. Identify your model from the label on the bottom of the motor base, then match it to the correct jar and blade.
| Oster Line | Typical Capacity | Jar Type | Blade Assembly Notes |
|---|---|---|---|
| Osterizer Classic / Beehive | 5 cup | Glass, 4-point thread | Round or 4-point blade; gasket is a flat ring |
| Oster 6-Cup Glass Jar | 6 cup | Glass | Standard 6-cup blade and gasket set |
| Oster 8-Cup / Blender Pro | 8 cup | Glass or plastic | Larger collar; check thread count |
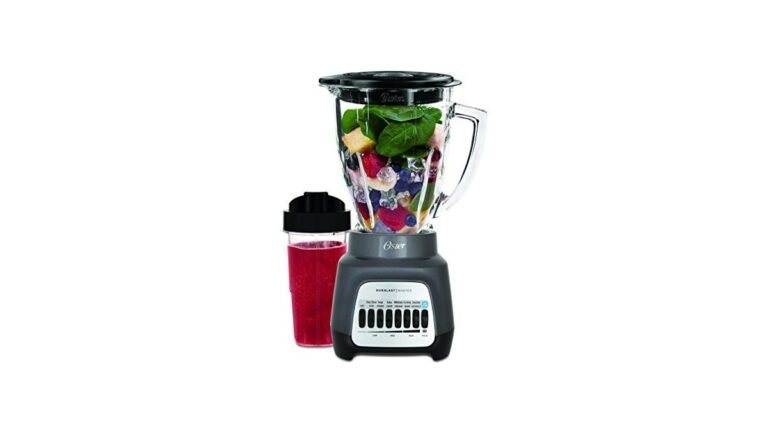
| Oster Blend-N-Go | 16–20 oz cup | Plastic sport cup | Blade base screws onto the cup, not a jar collar |
| Oster Personal Blender | 20–24 oz | Plastic | Integrated blade base; often sold as a unit |
| Oster Pro 1200 / Versa | 6–8 cup | Plastic or glass | Model-specific; verify before ordering |
How To Find Your Model Number
Flip the base over. There’s a label with the model number (often starting with “BLST” or a numeric code) and sometimes a serial number. Photograph it before you shop. If the label is worn, search for your blender’s appearance plus “Oster” — the shape of the base is often enough to identify the generation.
Parts You Can Realistically Replace Yourself
- Jar gasket
- Blade assembly
- Jar base collar
- Complete jar
- Lid and filler cap
- Rubber feet
- Power cord (only if you’re comfortable with basic wiring)
Parts Better Left to a Pro or the Trash
- Motor brushes
- Switch panel on sealed bases
- Internal wiring harnesses
For sealed modern bases, replacement parts often cost more than a new unit. Use the decision table below.
Repair or Replace?
| Situation | Recommended Action | Typical Cost |
|---|---|---|
| Leaking jar | Replace gasket | $3–$8 |
| Black specks in food | Replace gasket + blade assembly | $12–$25 |
| Blades won’t spin | Replace blade assembly | $10–$20 |
| Cracked or warped jar | Replace jar | $15–$35 |
| Motor dead, unit under 3 years old | Contact Oster support for warranty | $0 |
| Motor dead, unit over 5 years old | Replace blender | $30–$80 |
| Burning smell or melted wiring | Retire the unit | — |
| Vintage Osterizer with a dead motor | Replace base if you love the jar | Varies |
Pro Tip: Oster’s limited warranty typically covers 1–3 years depending on the model, and it covers defects, not wear items like gaskets. Keep your receipt and the model number handy before you call.
Cleaning Mistakes That Cause Failures
A surprising share of “broken” blenders are actually dirty blenders. Residue in the wrong place causes jams, smells, and stuck parts.
What You Can Wash
- Glass jar
- Plastic jar (top rack, low heat — heat warps plastic)
- Lid and filler cap
- Blade assembly (careful — the blades are sharp)
- Jar base collar
What You Must Never Wash
- The motor base
- The cord
- Any part with an electrical connection
The 30-Second Self-Clean
Fill the jar one-third with warm water, add a drop of dish soap, and run on low for 10–15 seconds. Rinse. For sticky residue, add a tablespoon of baking soda and repeat.
Deep Cleaning the Blade Assembly
Soak the blade assembly in warm soapy water for 10 minutes, then scrub the underside with a bottle brush. Food trapped under the blade is what causes that sour smell and the black specks.
Warning: Never put your hand inside the jar to clean around the blades. Use a long-handled brush. Blender blades cause serious cuts even when the unit is unplugged.
Drying Matters
Let every part air-dry completely before reassembling. Trapped moisture under the gasket grows mold and degrades the rubber faster.
When the Motor Is Truly Dead
If you’ve confirmed the outlet works, the jar is locked in, the thermal protector has had time to reset, and the unit still won’t run, the motor has likely failed.
Signs of a Failed Motor
- No sound at all on any speed
- A single click then nothing
- A burning smell that persists after cooling
- Visible scorch marks or melted plastic near the vents
Warranty Check
Oster’s warranty terms vary by model and by when you bought it. Before you buy anything, find your receipt or order confirmation and the model number. If you’re inside the warranty window, contact Oster customer support directly — they can authorize a replacement base or unit.
When To Let It Go
A base-only replacement for a modern Oster often runs $25–$45, and complete new Oster blenders start around $30–$80. If your unit is more than five years old and the motor is dead, replacement is usually the smarter call — you get a new jar, gasket, and blade along with it.
If you have a vintage Osterizer with a metal base and a dead motor, that’s a different calculation. Those bases are prized for their durability, and used working bases show up regularly at thrift stores and online marketplaces for $15–$40.
Preventing the Next Breakdown
Most Oster failures are wear-and-tear events that you can slow down considerably.
Habits That Extend Blender Life
- Add liquid first. Always.
- Respect the 1–2 minute run limit. Give the motor a rest between batches.
- Don’t crush ice alone. Add a splash of liquid.
- Hand-tighten the collar. Overtightening kills gaskets.
- Replace the gasket at the first sign of stiffness. It’s cheap insurance.
- Keep the vents clear. Don’t shove the blender against a wall or under a cabinet lip.
- Never run it empty. The blades need something to move.
A Simple Maintenance Schedule
| Interval | Task |
|---|---|
| After every use | Rinse jar, wash lid, air-dry |
| Weekly | Deep clean blade assembly and gasket |
| Monthly | Inspect gasket for cracks or stiffness |
| Every 6 months | Check cord, plug, and rubber feet |
| Annually | Replace gasket as preventive maintenance |
Keeping Spare Parts on Hand
A gasket and a blade assembly in a drawer will save you a mid-smoothie crisis. Both are inexpensive and don’t expire.
Frequently Asked Questions
Why did my Oster blender suddenly stop working?
The most common reasons are a jar that isn’t fully locked into the base, a tripped thermal overload protector after overheating, or a dead outlet or GFCI. Reseat the jar with a firm clockwise twist, test the outlet with another appliance, and if the motor felt hot, unplug it and let it cool for 15–30 minutes before trying again.
How do I know if my Oster blender blade needs replacing?
Replace the blade assembly if it spins freely with no resistance, if food at the bottom of the jar stays whole, if you hear grinding, or if you see black or gray specks in your blend. A dull or wobbly blade forces the motor to work harder and can damage the drive socket over time.
Can I put my Oster blender jar in the dishwasher?
Glass jars, lids, and blade assemblies are generally dishwasher-safe on the top rack. Plastic jars should go on the top rack only with heated drying off, because high heat warps them and a warped jar will never seal properly. Never put the motor base or cord in the dishwasher.
Why is my Oster blender leaking from the bottom?
A leaking Oster blender almost always has a failed jar gasket — the rubber ring between the blade assembly and the jar. Gaskets harden, flatten, and tear over time. Replace it, and check the jar’s bottom rim for chips or warping. If the jar is warped or cracked, no gasket will seal it.
How long should I run my Oster blender at a time?
Most Oster models are designed for runs of 1–2 minutes maximum, followed by a rest period. Running longer builds heat in the motor and trips the thermal protector. For large batches, blend in smaller portions and let the motor cool between them.
Is it worth repairing an old Oster blender?
It depends on the model. If it’s a vintage Osterizer with a metal base and the motor is dead, a used replacement base for $15–$40 can be worth it. For modern sealed bases over five years old, a new blender at $30–$80 is usually the better value than a $25–$45 base replacement.
Conclusion
If you’ve worked through the interlock, the gasket, the blade assembly, and the cooling reset and your Oster still won’t run, the next step is to photograph the model label on the bottom of the base and contact Oster support — or price a replacement against the cost of a new base. Either way, you’ll know exactly what’s wrong and what it’s worth spending.