How To Make Slushie With Ninja Blender: The Perfect Ratio
You achieve the best consistency when you How To Make Slushie With Ninja Blender by combining two cups of ice with one cup of liquid and two tablespoons of sweetener in a high-speed pulse cycle. The quality of your slushie depends on the ratio of solid ice to liquid, as too much fluid creates a watery drink while too little prevents the blades from circulating the mixture. Adjust your ratios based on your specific machine’s power level and the desired thickness of your final frozen treat.
Achieving the perfect texture requires balancing your ingredient density against the blade speed of your specific model. While the basic method remains constant, the final result shifts depending on whether you use fresh fruit, syrups, or frozen juice cubes. These factors determine how much extra ice you need to add to reach that signature icy consistency.
Who this is really for
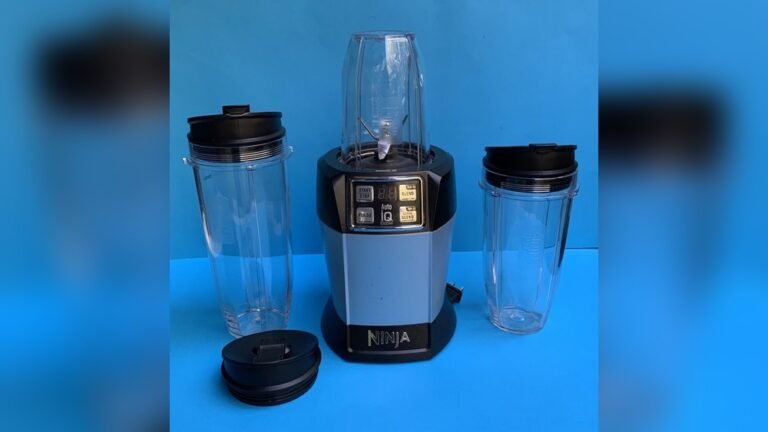
This page serves home cooks who own a Ninja blender and want to create frozen beverages without buying expensive specialty machines. It assumes you already have a standard Ninja base with a pitcher or single-serve cup attachment. You likely have a freezer stocked with ice and basic pantry items like fruit juice, soda, or simple syrup.
If you’re looking for a professional-grade commercial slushie machine that maintains a constant temperature for hours, this content isn’t for you. This guide focuses on immediate consumption, as home blenders can’t replicate the continuous cooling systems found in convenience store units. We also assume you’re using a standard household power supply and that your blender blades are sharp and free of damage. If your unit is currently leaking or the motor smells like burning plastic during basic tasks, stop using it immediately and contact the manufacturer for a repair assessment. This page is perfect for someone who wants a quick, refreshing drink in under five minutes using the equipment they already have on their kitchen counter.
Factors that influence consistency
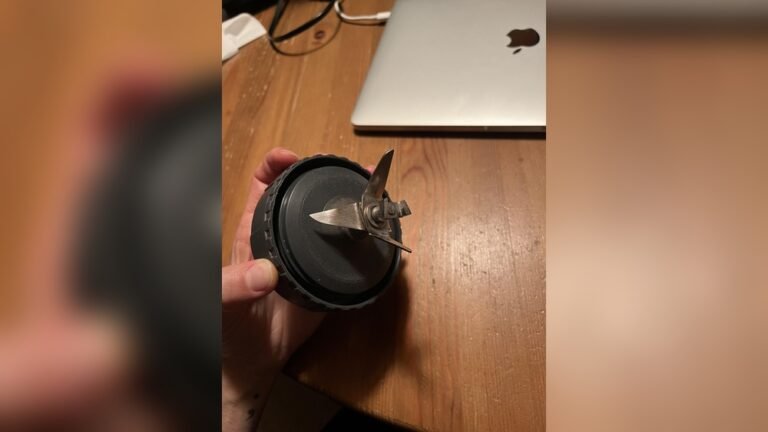
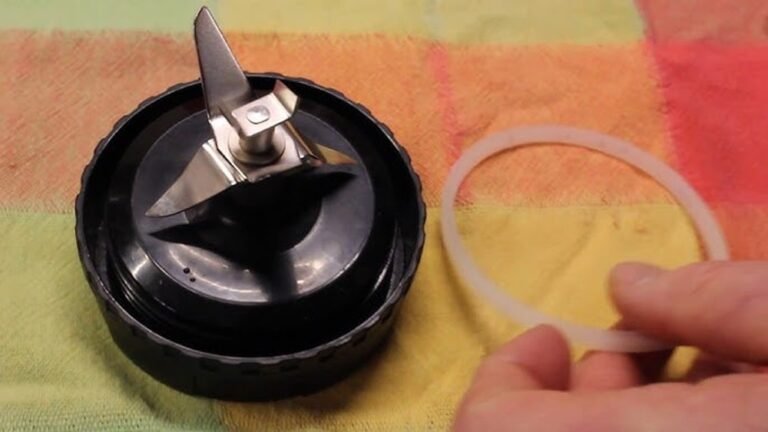
The blade design in Ninja blenders is unique because it features a vertical tower of blades rather than just one set at the bottom. This design allows for even processing, but it requires enough volume to ensure the top blades can pull ingredients down into the center. If you fill the container less than halfway, the ingredients will likely spin without blending properly.
The ratio of ice to liquid is the most significant factor in achieving a smooth slushie. A standard starting point is two parts ice to one part liquid by volume. If you prefer a thinner drink, increase the liquid slightly; for a thicker, spoonable consistency, add an extra half-cup of ice. People often make the mistake of adding too much liquid at the start, which makes it impossible to recover the frozen texture without adding significantly more ice.
Temperature plays a major role in how the mixture sets. Using ice that has been sitting at room temperature for five minutes is better than using ice straight from a deep freeze, as it’s slightly less brittle and easier for the motor to crush. Always ensure your liquid base is chilled before you begin.
The power setting of your blender dictates how long you need to run the motor. If you have a model with a “Crush” or “Ice” button, use that specific setting first. Avoid running the machine for more than 60 seconds at a time to prevent the motor from overheating, which is a common issue when processing high volumes of ice. Always check the manual for your specific model to see the maximum recommended run time for frozen ingredients.
Step by step
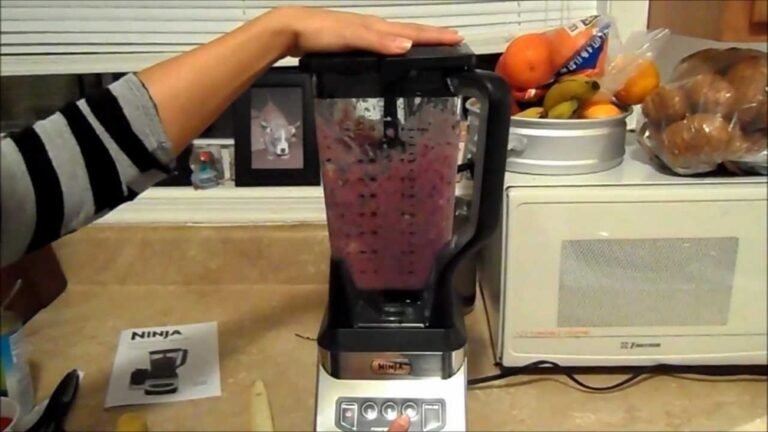
- Measure two cups of ice cubes and place them into the blender pitcher. Ensure the ice is fresh and not clumped together from frost.
- Pour one cup of your chosen liquid, such as fruit juice or flavored soda, over the ice.
- Add two tablespoons of sweetener, like simple syrup or honey, if your base liquid isn’t already sweetened.
- Secure the lid tightly, ensuring the locking mechanism clicks into place.
- Use the “Pulse” function for five seconds to break the large ice chunks into smaller pieces.
- Switch to the “Crush” or “High” setting and blend for 30 seconds.
- Stop the blender and check the texture; if it’s too runny, add half a cup of ice and pulse again for 10 seconds.
- Pour the mixture immediately into a chilled glass to prevent rapid melting.
- Serve with a straw or spoon while the texture remains slushy.
The judgement call that separates a professional result from a watery mess is the sound of the machine. When the ice is fully crushed and the mixture reaches the right density, the motor sound will change from a high-pitched grinding to a lower, more consistent hum. If the blades are spinning freely without moving the ice, turn the machine off, scrape the sides with a plastic spatula, and add two tablespoons of liquid to help the circulation. Never use metal utensils while the power is connected.
The variations at a glance
The following table outlines how different base ingredients change your preparation method and final result.
| Situation | What to do | What it takes | What to watch for |
|---|---|---|---|
| Fruit juice | Use chilled juice | 2 minutes | Avoid over-blending |
| Soda base | Pulse gently | 1 minute | Excessive foam |
| Fresh fruit | Blend fruit first | 3 minutes | Pulp texture |
| Frozen cubes | Reduce ice amount | 2 minutes | Motor strain |
| Cream base | Add slowly | 2 minutes | Thickening speed |
When using frozen cubes, the most common mistake is ignoring the sound of the motor. If the pitch drops or the blades stall, stop immediately and add two tablespoons of liquid to prevent overheating.
For cream bases, the decision rule is simple. If you want a pourable consistency, add the cream during the final thirty seconds of blending. If you prefer a whipped, stable texture, add it at the start and blend on a low speed.
Finally, distinguish between fresh fruit and juice by checking the fiber content. If your fruit contains high pectin, like berries, pulse it separately to avoid a gummy texture. If the fruit is watery, like melon, blend it directly with the base to ensure a smooth, uniform consistency.
What separates a good result from a poor one
Preparation and technique
Successful preparation starts with the temperature of your pitcher. Experienced users often place their blending container in the freezer for ten minutes before adding ingredients, which helps keep the slushie frozen for longer once it’s poured. Always add your ice first to ensure the vertical blade tower is properly engaged with the solids. If you add the ice first and then the liquid, the ice often packs into the bottom, forcing the blades to struggle and potentially causing the motor to stall.
Monitoring the process
Keep a close eye on the texture while the machine is running rather than relying on a timer. The ideal consistency is reached when the mixture looks uniform and no large chunks of ice remain visible against the side of the pitcher. If you see air pockets forming around the blades, stop the motor, remove the lid, and stir the contents with a silicone spatula. Never use your hands or metal tools near the blades while the blender is plugged in. Following the guidance on FoodSafety.gov’s chart for keeping your ingredients at the right temperature ensures you aren’t introducing bacteria during the preparation phase.
What goes wrong, and what to do
| What you notice | What it usually means | What to do first | How to stop it happening again |
|---|---|---|---|
| Liquid at bottom | Too much fluid | Add more ice | Measure liquid carefully |
| Large ice chunks | Dull blades | Check blade sharpness | Use fresh ice cubes |
| Motor struggling | Overloaded pitcher | Remove some ice | Blend in smaller batches |
| Foam overflowing | High carbonation | Pulse slowly | Let soda go flat |
| Stuck ingredients | Air pockets | Stir with spatula | Add a splash liquid |
The rules that apply
Safety standards for household blenders are governed by bodies like Underwriters Laboratories (UL), which set requirements for thermal protection and blade housing. Never attempt to bypass the safety interlock switch on the lid; this mechanism is designed to prevent the motor from starting if the lid isn’t fully secured, protecting you from flying debris. If your blender base shows signs of electrical damage, such as frayed cords or sparks, stop using it immediately. These repairs require a certified technician, as a capacitor can hold a lethal charge even when the unit is unplugged. Always check your specific model’s manual for the manufacturer’s recommended capacity limits, as overloading the pitcher can void your warranty and cause permanent damage to the drive coupling. If you’re using your blender in a professional or commercial setting, ensure your equipment meets the local health department requirements for food-grade materials and regular sanitation protocols.
What it costs you
The cost of making a slushie at home is primarily measured in time and electricity rather than expensive ingredients. A standard cycle takes less than three minutes of active effort. The financial cost is minimal, usually amounting to the price of a cup of juice and a small amount of ice. You can reduce this cost by using bulk-frozen fruit or home-brewed tea instead of pre-packaged syrups. The biggest “cost” is the wear on your blender’s motor. Ninja blenders are designed for short bursts of high-intensity work, so running the machine for extended periods to achieve a smooth texture will shorten the lifespan of the drive gear. If you notice a change in the motor’s sound or an increase in the time needed to crush ice, it’s a sign that the blades may need sharpening or replacement. Compare the cost of your ingredients against the price of a commercial slushie in your area to see your savings per serving.
Keeping it right afterwards
Cleaning your blender immediately after use is the most important step for maintaining the unit’s performance. Food particles and sugar residue can harden around the blade assembly, creating a breeding ground for bacteria and making it difficult to rotate the blades in the future. To clean, fill the pitcher halfway with warm water and two drops of dish soap, then run the blender on the lowest speed for 30 seconds. Rinse the pitcher and blade assembly thoroughly with clean water and let them air dry completely before reassembling. Never submerge the motor base in water, as this will damage the electrical components. Check the rubber seal on the lid periodically for cracks or debris; if the seal is damaged, it will leak during the next use, so replace it with a genuine part from the manufacturer to ensure a proper vacuum.
When this is the wrong approach
If you need to produce slushies for a large party of ten or more people, using a home blender is the wrong approach. The constant starting and stopping will lead to motor fatigue and won’t provide a consistent texture for all your guests. For high-volume needs, consider renting a commercial slushie machine that uses a refrigerated barrel to keep the mixture at the perfect consistency without constant monitoring. Additionally, if you’re trying to make a slushie using ingredients that aren’t compatible with high-speed blending, such as delicate soft fruits that turn into mush, you should look into a manual shaved ice tool instead. Don’t attempt to modify your blender’s internal housing to increase speed or power, as this poses a severe risk of injury and will immediately void your warranty. If you require a specific medical diet that demands precise ingredient breakdown, consult a nutritionist rather than relying on a standard kitchen appliance to ensure your nutritional needs are met.
Frequently asked questions
Can I make a slushie with frozen fruit instead of ice?
Yes, you can use frozen fruit as a substitute for ice. Frozen berries or mangoes provide a thicker texture and more flavor, but you may need to add a small amount of water or juice to help the blades move. Start with one cup of fruit and a quarter-cup of liquid.
How long does a slushie last in the freezer?
A homemade slushie will last for about two hours in the freezer before it turns into a solid block of ice. Because these drinks lack the stabilizers used in commercial products, they don’t retain their slushy texture once they reach a deep freeze. Consume them within 30 minutes for the best experience.
Is it safe to blend hot liquids in my Ninja?
No, you should never blend hot liquids in a standard Ninja pitcher. The steam pressure can build up inside the sealed container and force the lid off, causing serious burns. Only blend ingredients that are at room temperature or chilled to ensure the safety of the container seals.
Why does my slushie have chunks of ice?
Chunks of ice usually mean you didn’t pulse the mixture enough before switching to high speed. Start with five short pulses to break the ice into smaller, uniform pieces before running the blender continuously. This ensures the blades can grab the ice effectively during the final blending stage.
What happens if I overfill the blender?
Overfilling prevents the ingredients from cycling through the blades, which causes the motor to work harder and may lead to overheating. Always keep the contents below the “Max Fill” line marked on your pitcher. If the ingredients don’t move, remove some of the mixture and blend in two separate batches.
Does the type of ice matter?
Yes, the shape and size of the ice cubes significantly impact the blending time. Small, soft cubes from a refrigerator door dispenser are much easier to process than large, hard cubes from a traditional ice tray. If you have large cubes, give them a quick crush with a mallet inside a bag before adding them to the pitcher.
What to do next
Start by checking your freezer for fresh ice and your pantry for a liquid base. Once you have gathered your ingredients, follow the steps above to create your first batch and listen for the change in motor pitch that signals your drink is ready.
If the blender fails to turn on or makes a grinding noise without moving the ice, stop immediately and contact the manufacturer’s support line for troubleshooting.
Adding frozen fruit before liquid can cause the ingredients to pack tightly around the blades, preventing proper circulation. Always pour your base—water, juice, or milk—in first. If the mixture stops circulating mid-cycle, use a tamper to push ingredients toward the blades. If you lack a tamper, turn the power off completely before using a silicone spatula to break the air pocket.