How to Put the Chopping Blade in the Ninja Blender Safely
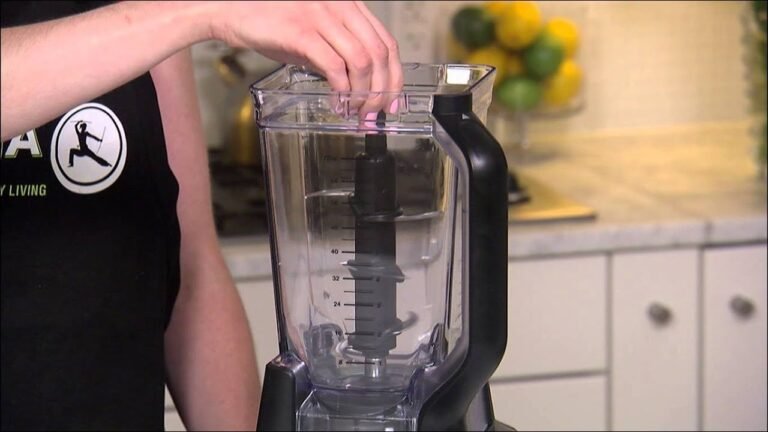
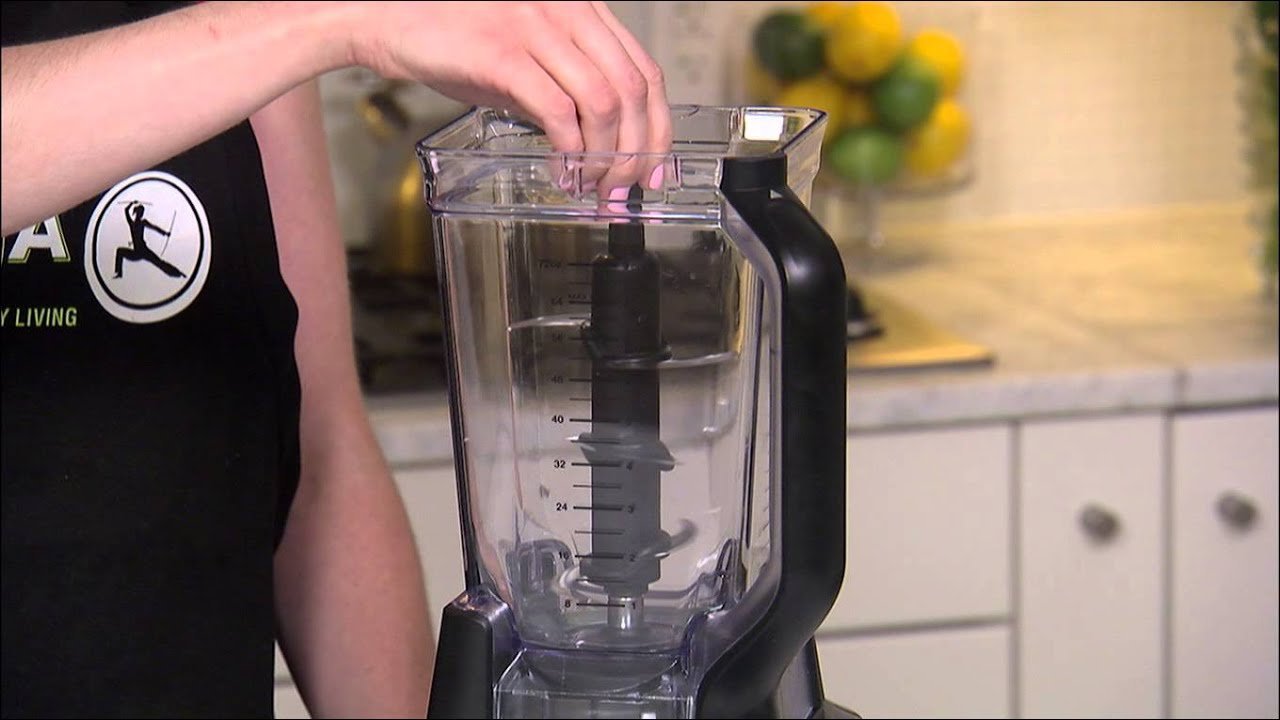
You can safely secure the assembly by placing the base of the blade column directly over the center pin of the pitcher, ensuring the plastic grooves align until the unit sits flat against the bottom. Properly installing the chopping blade in the ninja blender prevents damage to the plastic drive gear and ensures a consistent chop. This process depends on the specific model of your blender, as some Ninja systems use stacked blades while others rely on a single base unit.
Who needs to assemble Ninja chopping blades
This guide serves users who own a Ninja blender system with removable, stackable blade assemblies. It’s designed for those who may have recently purchased a new machine or who are unsure if their blades are seated correctly before starting the motor. If you’re struggling to remove a stuck blade or are dealing with a machine that refuses to start because the safety interlock isn’t engaged, this page provides the necessary steps to resolve the issue.
We assume that you’re using a standard Ninja pitcher and the original blade assembly that came in the box. If you have purchased a third-party replacement blade, the fit might vary significantly. This guide isn’t for users of “personal” bullet-style blenders that use a screw-on blade cap rather than a drop-in assembly.
If you’re currently working with a damaged drive gear or a cracked pitcher base, you should stop immediately, as these parts can’t be repaired at home. You’ll need to contact the Ninja Kitchen support team to order a replacement part to ensure your machine remains safe to operate.
Factors that change the assembly
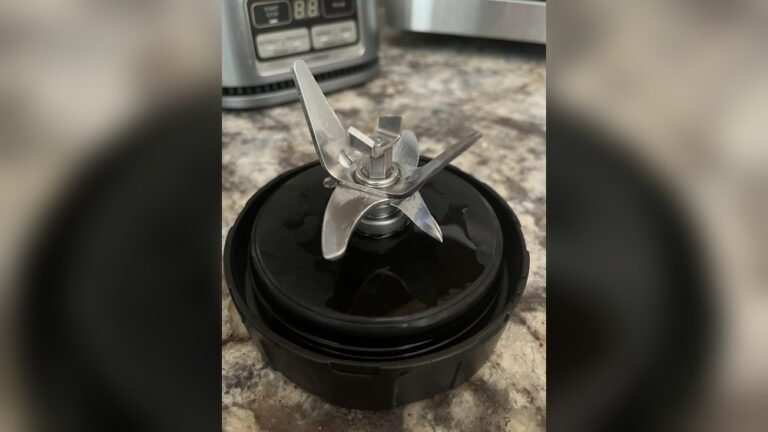
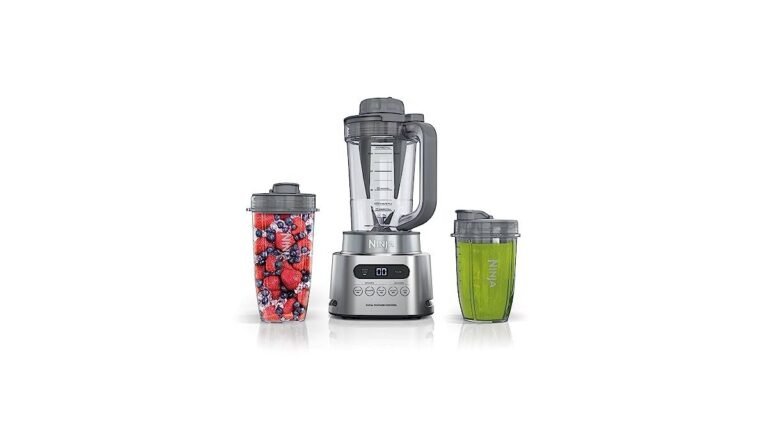
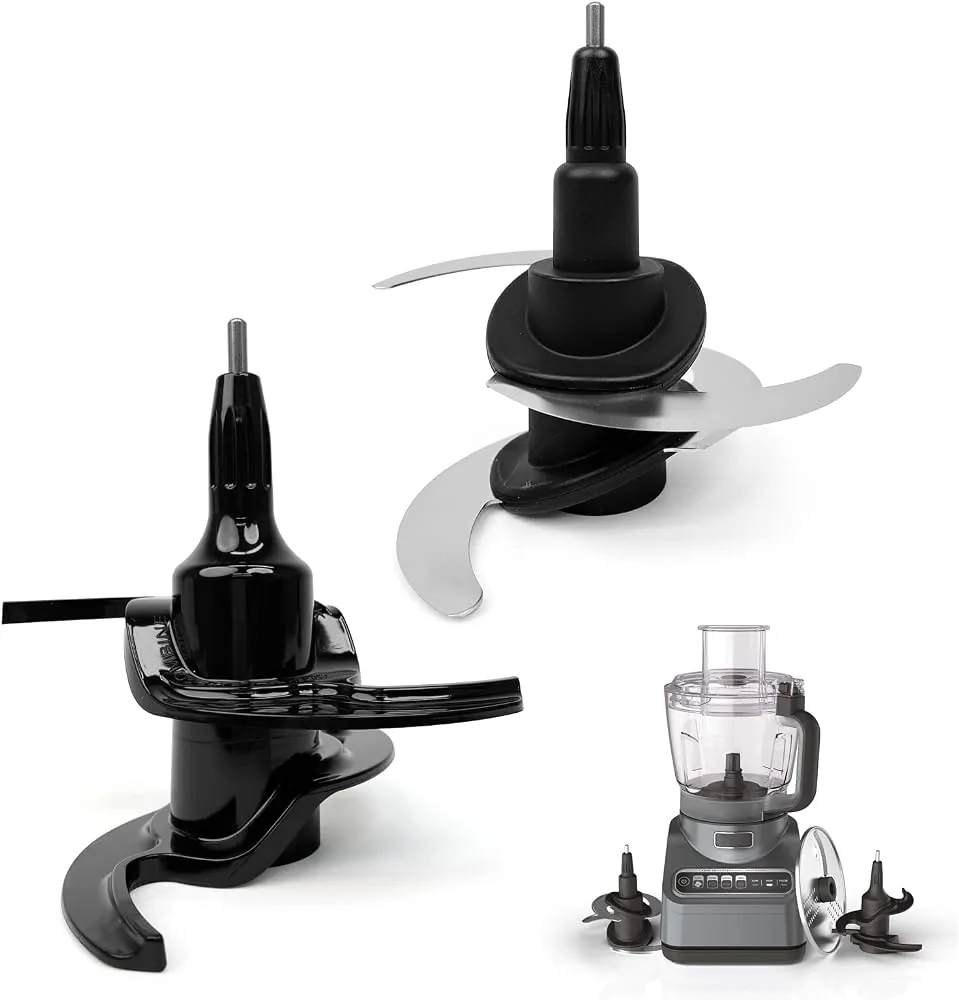
The most important factor is the model of your Ninja blender, as the blade design varies between the Professional, Nutri Ninja, and Auto-iQ series. You should check your user manual to confirm if your specific unit uses a stackable blade tower or a single-blade base. A tower assembly requires you to slide the blades onto a center spindle, while a base-style blade often locks into the bottom of the jar.
The amount of food in the pitcher also changes how you handle the blade. If you’re processing a heavy load of frozen fruit or ice, you must ensure the blade is fully seated before adding any ingredients.
If the blade isn’t flush with the bottom of the pitcher, the motor will struggle, and you risk stripping the plastic coupling that connects the blade to the base. People often make the mistake of adding heavy ingredients first, which can push the blade out of alignment as you try to lock the lid.
Finally, the presence of food debris on the center pin will prevent the blade from seating properly. Even a small amount of dried residue acts as a spacer, keeping the blade elevated. You should wipe the center spindle with a damp cloth before every use to ensure a flush connection. If the blade feels wobbly or loose even when properly placed, check the bottom of the blade assembly for worn plastic teeth or missing rubber seals.
Seating the blade assembly
- Place the empty blender pitcher on a flat, stable surface like your countertop to ensure it doesn’t move while you work.
- Inspect the center pin inside the pitcher to make sure it’s clean and free of any food particles from your last use.
- Hold the blade assembly by the top plastic handle, keeping your fingers away from the sharp edges of the blades.
- Align the hole in the center of the blade assembly with the center pin of the pitcher.
- Lower the assembly straight down until it hits the bottom of the pitcher, ensuring it doesn’t sit at an angle.
- Rotate the blade assembly slightly clockwise or counter-clockwise until you feel it drop into the locked position on the drive gear.
- Attempt to lift the blade assembly gently; if it stays in place and doesn’t lift easily, it’s correctly secured.
- Add your ingredients into the pitcher, making sure they’re evenly distributed around the blade tower to prevent uneven wear.
- Lock the lid onto the pitcher by pressing the release button and pushing the handle down until you hear a distinct click.
The primary judgment call is ensuring the blade doesn’t lift when you pull upward on the plastic handle. If the assembly lifts, the gears aren’t meshed, and the motor will spin without turning the blades, which can cause heat buildup. If you notice a burning plastic smell, stop the machine immediately and check the seating of the blades.
Blade assembly types and requirements
| Situation | Action | Effort | What to watch for |
|---|---|---|---|
| Stacked blade tower | Slide onto center pin | Low | Ensure it sits flat |
| Single base blade | Lock into bottom | Medium | Check for debris |
| Heavy frozen load | Pack around blades | High | Don’t overfill |
| Thin liquid mix | Insert before filling | Low | Blade stability |
| Worn gear teeth | Contact support | High | Replace the assembly |
Stacked blade towers require a perfectly flush seat. If the base wobbles by even a millimeter, the drive shaft will strip within three uses. Always press down until you hear a distinct click.
For single base blades, the most common mistake is ignoring microscopic food particles trapped in the gasket. This debris creates a gap that allows moisture to leak into the motor housing. If you see brown staining on the underside, stop immediately to prevent a short circuit.
When handling frozen loads, never exceed the two-thirds fill line. Overfilling forces the motor to stall, which causes the internal gear teeth to shear. If the motor hums but the blades don’t spin, you have already created a permanent mechanical failure.
Use this decision rule: if the mixture is thinner than heavy cream, the blade must be locked in place before you pour. If the mixture is thick, load the ingredients first to provide necessary weight for a consistent vortex.
Achieving a quality result
Preparing the pitcher
Experienced users always inspect the gear teeth on both the blade assembly and the base of the pitcher before starting. If you see plastic shavings or rounded edges, the assembly is no longer safe to use.
You should always wipe the interior of the pitcher with a dry cloth to ensure the base isn’t slippery, as this helps the blade stay centered during the initial pulse. Never force the blade assembly down if you feel resistance, as this often indicates that a piece of food is trapped underneath the base.
Managing the load
The way you layer ingredients determines how well the blades perform their job. Always place liquids at the bottom and hard items like ice or frozen fruit near the top, unless your specific model manual suggests otherwise.
This order reduces the initial torque required by the motor and prevents the blade assembly from being pushed upward by solid chunks. If you notice the blender making a loud, grinding noise, stop the motor and redistribute the contents to ensure the blade remains fully seated against the bottom.
Troubleshooting blade issues
| What you notice | What it means | What to do first | How to stop it |
|---|---|---|---|
| Blade spins, no chop | Gear not seated | Re-seat the blade | Check gear alignment |
| Loud grinding noise | Debris underneath | Clean center pin | Wipe after every use |
| Blade stuck in pitcher | Vacuum seal or food | Soak in warm water | Clean immediately |
| Burning plastic smell | Stripped gear teeth | Stop the machine | Replace assembly |
| Lid won’t lock | Blade too high | Re-seat the blade | Clear obstruction |
If the blade spins but fails to process food, the drive socket is likely stripped rather than just unseated. Inspect the plastic teeth inside the base; if they look rounded or worn, stop using the unit immediately to prevent motor damage.
A loud grinding noise often indicates that food particles have hardened inside the center pin. If cleaning doesn’t resolve the sound, check for hairline fractures in the blade housing.
When the lid refuses to lock, don’t force it. This usually means a large piece of food is wedged under the blade, pushing it upward. If you force the lid, you risk snapping the plastic locking tabs. Always verify the blade sits flush against the bottom of the pitcher before adding ingredients. If the blade wobbles when touched, the internal bushing is worn and requires a full blade replacement.
Standards for safe operation
Ninja Kitchen specifies that all blade assemblies must be handled with extreme care due to their sharp edges. You should never attempt to sharpen these blades yourself, as the stainless steel is factory-balanced for high-speed rotation. If a blade is dull or damaged, the company advises replacing the entire assembly rather than attempting a repair. An amateur sharpening job creates an uneven weight distribution, which can shatter the plastic housing or burn out the motor bearings within minutes of operation.
The safety interlock system is a critical feature that prevents the motor from engaging unless the lid is fully locked and the blade is seated. If your blender doesn’t start, the most common cause is a failure to fully depress the lid handle until it clicks. Listen for a distinct mechanical snap; if the handle sits flush but fails to click, debris in the locking track is likely obstructing the sensor.
Never attempt to bypass this safety switch, as the high-speed rotation of the blades poses a severe risk of injury. If you have confirmed the lid is locked and the blade is seated but the unit still doesn’t function, consult the troubleshooting section of your specific model’s user manual.
You may have a faulty sensor, which requires professional service through the manufacturer. Don’t attempt to open the motor base, as this voids your warranty and exposes you to live electrical components.
Understanding the costs
The cost of maintaining your blender assembly is primarily measured in time and the price of replacement parts. A new blade assembly is relatively inexpensive compared to the cost of the entire unit, depending on the number of tiers and your specific model. You can find the current price by visiting the official Ninja Kitchen parts store online and entering your model number.
The real cost of improper use is the potential damage to the drive gear of the blender base itself. Replacing the entire motor base is significantly more expensive than replacing a blade assembly, which is a much more affordable component. By ensuring the blade is seated before you add ingredients, you protect the most expensive component of your machine.
If you notice that your blade assembly is becoming difficult to remove or the plastic base is showing signs of wear, it’s cheaper to replace the assembly early than to risk damaging the motor housing.
Use this rule to determine your path: if the blade spins freely by hand but vibrates under load, replace the assembly immediately. If the motor emits a burning smell, the drive gear is likely already stripped. In that case, replacing the blade won’t fix the issue, and you must contact support for a base repair.
Keeping the assembly in condition
To maintain the blade assembly, you should wash it by hand using warm, soapy water and a long-handled brush immediately after each use. Never leave the blade soaking in a sink full of other dishes, as this increases the risk of accidental cuts and can cause hidden food particles to harden in the gear teeth. If you notice the blade assembly isn’t rotating smoothly by hand, it may indicate a failure of the internal bearing.
Check the rubber gasket at the base of the blade assembly regularly for signs of cracking or stretching. If this seal is damaged, liquids will leak into the gear mechanism, which can lead to permanent damage and hygiene issues.
Ninja Kitchen advises that you store the blade assembly separately from the pitcher if you aren’t using it daily, which prevents the base from being knocked and potentially damaging the plastic alignment tabs. If the assembly becomes difficult to clean, use a small bottle brush to reach inside the center column to ensure no food residue remains.
When to seek professional help
If you notice that the plastic coupling on the bottom of the pitcher is cracked or loose, this page is no longer the correct approach. You should stop using the pitcher immediately to prevent liquid from leaking into the motor base, which could cause an electrical short. Contact the manufacturer’s support line to purchase a replacement pitcher, as this part is a structural safety component.
Additionally, if you observe the metal shaft of the blade assembly wobbling or rattling during operation, the internal bearings have failed. Continuing to run the machine in this state can lead to the blades detaching or the motor overheating. Don’t attempt to take the blade housing apart, as it’s sealed at the factory for safety and can’t be reassembled correctly. You must purchase a replacement assembly from an authorized retailer.
If you’re experiencing electrical issues, such as the machine turning on and off randomly, stop using the unit and consult a certified appliance technician. A common mistake is assuming the issue is a faulty power cord; however, internal control board failure is often the culprit. If the unit emits a burning plastic smell, unplug it immediately. This indicates a terminal motor winding failure, which costs more to repair than the unit is worth. In this case, replace the entire machine.
Frequently asked questions
Can I put my ninja blade in the dishwasher?
Most Ninja blade assemblies are top-rack dishwasher safe, but hand washing is recommended to keep the blades sharp for a longer period. Check your user manual, as some older models or specific materials may require hand washing to prevent the plastic from warping under high heat.
Why does my ninja blade get stuck?
A stuck blade is usually caused by food residue drying on the center pin or a vacuum seal forming after processing hot liquids. You can release the blade by soaking the entire pitcher in warm, soapy water for 15 minutes, which softens the debris and helps break the seal.
How long should the blade last?
The lifespan of a blade assembly depends on the frequency of use and the hardness of the ingredients you process. With daily use and proper cleaning, you can expect the assembly to last for a significant period before the plastic gears show signs of wear.
Is it safe to use a chipped blade?
No, it isn’t safe to use a chipped or damaged blade assembly under any circumstances. Small metal fragments can break off into your food, and a damaged blade will vibrate, which risks shattering the plastic pitcher or damaging the internal motor bearings.
What happens if I don’t lock the lid?
The blender won’t turn on because the safety interlock switch won’t be engaged. This is a design feature intended to protect you from the high-speed blades, so never attempt to force the motor to run without the lid fully clicked into the locked position.
Does it matter which way the blade faces?
Yes, the blade assembly is designed to sit in a specific orientation on the center pin. If you force the assembly down at an angle, the teeth won’t mesh, and you’ll hear a loud grinding noise as the motor spins without turning the blade tower.
Conclusion
Begin by ensuring the center pin of your pitcher is clean, then lower the blade assembly until it sits perfectly flat against the bottom. Test the seating by pulling up gently; if it doesn’t lift, you’re ready to add your ingredients and lock the lid. If you hear a grinding sound, stop immediately, as this means the gears aren’t properly aligned.