How To Make Orange Juice With Ninja Blender: Easy Step-by-Step Guide
Making fresh orange juice at home feels exciting and healthy. If you have a Ninja Blender, you already own a powerful tool for juicing. Many people think only juicers can make real juice, but modern blenders like Ninja can create smooth, delicious orange juice with minimal effort. This article walks you step-by-step through making orange juice with your Ninja Blender, shares practical tips, and helps you avoid common mistakes. Whether you want juice for breakfast, a party, or just to refresh yourself, you’ll learn how to get the best results every time.
Why Use A Ninja Blender For Orange Juice?
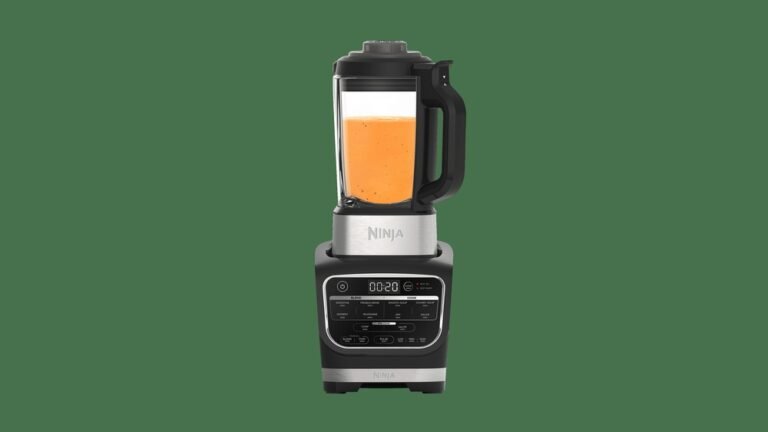
The Ninja Blender is well-known for its strength and versatility. Unlike basic blenders, Ninja models have sharp blades and strong motors, making them ideal for breaking down tough fruit fibers. The Ninja can easily handle oranges, peel (if desired), and other ingredients. It’s also easy to clean and often less expensive than dedicated juicers.
Here are some advantages:
- Efficiency: Ninja blenders turn oranges into juice quickly.
- No Need for Extra Appliances: You don’t have to buy a separate juicer.
- Smooth Texture: You can control pulp levels and texture by blending longer or shorter.
- Easy to Clean: Most parts are dishwasher safe or rinse clean.
- Versatile: Use the blender for other recipes like smoothies, soups, and sauces.
Many homes already have a Ninja Blender, making this method accessible. You don’t need special skills; just follow a few simple steps.
Choosing The Right Oranges
Not all oranges are equal for juicing. The type and quality of your oranges will affect the juice’s taste, sweetness, and yield. Here’s what to look for:
- Juicy Varieties: Navel, Valencia, and Cara Cara oranges are great choices.
- Freshness: Choose oranges that are firm, heavy, and have smooth skin.
- Ripeness: Avoid oranges with soft spots or blemishes.
- Organic if Possible: Organic oranges have fewer pesticides and may taste better.
Comparing Orange Varieties
Here’s a quick look at common orange types for juicing:
| Orange Variety | Juice Yield (ml per orange) | Flavor Profile | Pulp Content |
|---|---|---|---|
| Navel | 70-90 | Sweet, mild | Low |
| Valencia | 80-100 | Sweet, tangy | Medium |
| Cara Cara | 60-80 | Sweet, berry-like | Medium |
| Blood Orange | 60-80 | Rich, slightly bitter | Medium |
Tip: Valencia oranges are popular because they are juicy and available most of the year.

Credit: www.youtube.com
Preparing Your Oranges
Before blending, proper preparation ensures great juice and prevents damage to your blender.
- Wash the Oranges: Clean them under running water to remove dirt and chemicals.
- Peel the Oranges: Remove the outer peel. The peel is bitter and hard for blenders. If you like some zest, add a small piece of peel.
- Remove Seeds: Most common oranges are seedless, but double-check. Seeds can make juice bitter.
- Section the Oranges: Cut them into halves or quarters. This helps the blender work faster and prevents jams.
How Much Orange Juice From Each Orange?
A medium orange yields about 1/3 to 1/2 cup (80-120 ml) of juice. For a glass (250 ml), use 2-3 oranges.
Non-obvious insight: If you refrigerate oranges before juicing, the juice will be naturally cold and refreshing. Also, rolling oranges on the counter before cutting can help release more juice.
Ninja Blender Models: Which One Works Best?
If you already own a Ninja Blender, you can make orange juice with almost any model. However, some models perform better for juicing.
| Ninja Model | Motor Power (Watts) | Juicing Capability | Best For |
|---|---|---|---|
| Ninja Professional BL610 | 1000 | Excellent | Large batches |
| Ninja Nutri Pro BL456 | 900 | Very Good | Single servings |
| Ninja Foodi Power Pitcher | 1400 | Outstanding | Large and small batches |
| Ninja Personal Blender QB3001 | 700 | Good | Small servings |
Tip: Higher wattage means faster blending and smoother juice. If you have a lower-powered model, cut oranges smaller and blend a bit longer.
Essential Ingredients And Equipment
You only need a few basics for orange juice:
- Fresh oranges (2-6, depending on serving size)
- Ninja Blender
- Strainer or fine mesh sieve (optional, for pulp removal)
- Knife and cutting board
- Pitcher or glass
Optional extras:
- Ice cubes (for cold juice)
- Sweetener (like honey or sugar, if needed)
- Mint leaves or lemon juice (for flavor twists)
Step-by-step Guide: Making Orange Juice With Ninja Blender
Follow these steps for the best results:
- Prepare Oranges: Wash, peel, and remove seeds. Cut into quarters.
- Load Blender: Place orange sections in the blender. For a standard blender jar, 4-6 oranges fit comfortably.
- Add Extras: If desired, add a few ice cubes, a teaspoon of honey, or a squeeze of lemon juice.
- Blend: Secure the lid. Start at low speed, then increase to high. Blend for 45-60 seconds until smooth.
- Check Consistency: If juice is too thick, add a little cold water (2-4 tablespoons) and blend again.
- Strain (Optional): For pulp-free juice, pour through a strainer or fine mesh sieve into a pitcher.
- Serve: Pour juice into glasses. Add ice or mint leaves if desired.
Example Recipe: Classic Orange Juice
- 4 medium oranges
- 1/2 cup cold water (if needed)
- 4 ice cubes (optional)
- 1 teaspoon honey (optional)
- Wash and peel oranges.
- Cut into quarters, remove seeds.
- Place oranges, water, ice, and honey in the Ninja Blender.
- Blend for 1 minute.
- Strain if desired.
- Serve immediately.
Non-obvious insight: Don’t blend too long. Over-blending can make juice foamy and change the taste. If you prefer natural sweetness, avoid adding sugar—just choose ripe, sweet oranges.
Credit: exceptionalstaffsolution.com
Adjusting Pulp Levels
Some people like pulp-free juice, while others enjoy a bit of texture. With Ninja Blender, you can control pulp levels easily.
- For less pulp: Strain juice using a fine mesh sieve or cheesecloth.
- For more pulp: Blend longer and skip straining.
- For balanced pulp: Use a medium mesh strainer or pour juice back into the blender with half the pulp.
Tip: If you want extra fiber, keep the pulp. If you have sensitive digestion, strain it well.
Orange Juice Variations And Flavor Additions
Basic orange juice tastes great, but you can customize it. Try these ideas:
- Orange-Mint Juice: Add a few fresh mint leaves to the blender.
- Orange-Lemon Twist: Blend in half a lemon for tangy juice.
- Orange-Carrot Juice: Add 1-2 peeled carrots for extra nutrition and color.
- Orange-Ginger Juice: Include a small piece of fresh ginger for a spicy kick.
- Tropical Orange Juice: Blend in pineapple or mango chunks.
Flavor Comparison Table
Here’s a look at how additions change the taste:
| Addition | Flavor Impact | Nutrition Boost | Recommended For |
|---|---|---|---|
| Mint | Fresh, cool | Antioxidants | Summer drinks |
| Lemon | Tangy, sharp | Vitamin C | Refreshing juice |
| Carrot | Sweet, earthy | Vitamin A | Kids, health fans |
| Ginger | Spicy, warm | Anti-inflammatory | Morning boost |
| Pineapple | Tropical, sweet | Vitamin C | Party drinks |
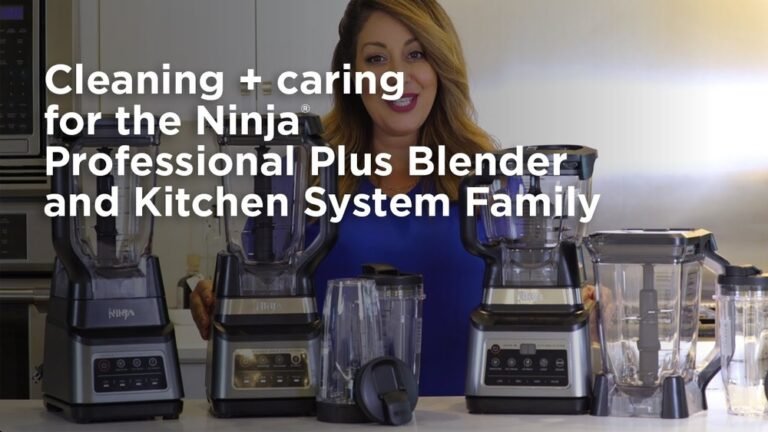
Cleaning And Caring For Your Ninja Blender
After juicing, cleaning is important for taste and hygiene. Ninja Blenders are easy to clean, but a few tricks make the process faster:
- Rinse Immediately: Fill the blender with warm water and a drop of dish soap. Blend for 30 seconds, then rinse.
- Remove Blades Carefully: Blades are sharp. Handle with caution.
- Wash Parts Separately: Most jars, lids, and blades are dishwasher safe.
- Dry Completely: Prevent mold and odor by drying parts before storing.
Non-obvious insight: If you blend citrus fruits often, deep clean your blender every week. Citrus oils can leave a smell or taste if not cleaned properly.
Nutritional Benefits Of Homemade Orange Juice
Fresh orange juice is more than a tasty drink. It’s packed with vitamin C, antioxidants, and minerals. Here are some health benefits:
- Vitamin C: Boosts immunity and skin health.
- Potassium: Helps regulate blood pressure.
- Fiber: Good for digestion (especially with pulp).
- Antioxidants: Protect cells from damage.
- Low Calories: About 110 calories per 8 oz glass.
Store-bought juice often loses nutrients during processing. With your Ninja Blender, you preserve more vitamins and natural flavors.
Orange Juice Vs. Store-bought Juice
Let’s compare homemade vs. packaged juice:
| Type | Vitamin C (mg per 8 oz) | Added Sugar (g) | Preservatives | Flavor |
|---|---|---|---|---|
| Homemade | 110-130 | 0 | No | Fresh, natural |
| Store-Bought | 80-100 | 10-20 | Yes | Processed |
Tip: For the healthiest juice, use fresh oranges and avoid adding sugar.
Common Mistakes And How To Avoid Them
Blending orange juice is simple, but some mistakes can ruin the taste or texture:
- Using Unripe Oranges: They produce sour, watery juice.
- Leaving the Peel On: The peel is bitter and can jam the blender.
- Over-blending: Creates foam and odd taste.
- Ignoring Seeds: Seeds make juice bitter and can damage blades.
- Not Straining: If you don’t like pulp, always strain.
Practical tip: Always taste your juice before serving. If it’s too sour, add a bit of honey. If too thick, add water.
Storing Orange Juice Properly
Fresh orange juice tastes best right after blending. If you need to store it:
- Use a clean, airtight container.
- Refrigerate immediately.
- Drink within 24-48 hours.
Fact: Fresh juice loses vitamin C quickly. The flavor also changes after a day. For the best taste and nutrition, drink your juice soon after making.

Credit: exceptionalstaffsolution.com
Making Orange Juice For Groups Or Parties
If you’re preparing juice for many people, planning helps. You can blend in batches or use a larger Ninja model.
Tips for large batches:
- Prepare all oranges in advance.
- Blend in batches of 4-6 oranges.
- Strain juice into a pitcher after each batch.
- Keep juice cold in the fridge or with ice.
Tip: For parties, add slices of orange, lemon, or mint leaves to each glass for a festive touch.
Sustainability: What To Do With Orange Peels And Pulp
Don’t throw away orange peels and pulp. They have many uses:
- Peels: Dry and use as zest, compost, or natural cleaner.
- Pulp: Add to smoothies, baking, or compost.
Non-obvious insight: Orange peels can be boiled to freshen your kitchen air. The pulp can be mixed into pancake batter or muffins for extra fiber.
Comparison: Ninja Blender Vs. Traditional Juicer
Many wonder if a Ninja Blender can really replace a juicer. Here’s a practical comparison:
| Feature | Ninja Blender | Juicer |
|---|---|---|
| Ease of Use | Simple, fast | Moderate |
| Cleaning | Easy | Usually harder |
| Versatility | High | Low |
| Pulp Control | Customizable | Fixed |
| Cost | Lower | Higher |
Tip: If you want both juice and smoothies, the Ninja Blender is a smarter investment.
Troubleshooting: Fixing Common Issues
If your orange juice isn’t turning out right, here’s how to fix it:
- Juice too thick: Add water or blend longer.
- Juice too bitter: Remove peel completely, check for seeds.
- Juice too foamy: Blend at lower speed or strain after blending.
- Blender jammed: Cut oranges smaller, avoid overfilling.
Practical tip: If you notice any strange taste, deep clean your blender and use only fresh oranges.
Health And Safety Tips
When handling fresh fruit and blenders:
- Wash hands and fruit before starting.
- Never overload your blender jar.
- Always secure the lid tightly.
- Use caution with sharp blades during cleaning.
Fact: According to the CDC, foodborne illnesses often come from improper cleaning of kitchen tools. Always rinse and dry your blender after each use.
Expanding Your Juice Recipes
Once you master orange juice, try blending other citrus fruits:
- Grapefruit
- Tangerines
- Lemons
- Limes
Mix and match for unique flavors. You can also add vegetables like celery or spinach for a green juice boost.
Tip: For kids, use sweet oranges and add a splash of apple juice for extra sweetness.
Orange Juice And Fitness
Orange juice is a popular drink among athletes and health enthusiasts. It helps with hydration, provides energy, and delivers vitamins. After workouts, a glass of juice can refresh and help muscle recovery thanks to potassium and antioxidants.
Fact: Studies show that vitamin C boosts immune function and reduces fatigue after exercise (Healthline).
Saving Money With Homemade Juice
Store-bought juice can be expensive and often contains additives. Making juice at home saves money and lets you control ingredients.
- 1 pound of oranges costs about $1.50 and yields 2-3 glasses of juice.
- Store-bought juice costs $3-4 per bottle (about 4 glasses).
Tip: Buy oranges in bulk during peak season to save even more.
Frequently Asked Questions
Can I Make Orange Juice In A Ninja Blender Without Peeling The Oranges?
It’s not recommended. The orange peel is bitter and tough. Removing it ensures smooth, tasty juice. If you want zest, add a small piece of peel.
How Long Can I Store Homemade Orange Juice?
Best within 24 hours. Store in the fridge, in a clean, airtight container. After 48 hours, both taste and vitamin C decrease.
Is Ninja Blender Juice As Healthy As Juicer-made Juice?
Yes, it’s very healthy. In fact, blending keeps more fiber. Just make sure you use fresh, ripe oranges and avoid adding sugar.
Can I Blend Other Fruits With Oranges In A Ninja Blender?
Absolutely. Try mango, pineapple, carrots, or berries for new flavors and nutrition. Just make sure fruits are peeled and cut.
How Can I Reduce Foam In My Orange Juice?
Blend at low speed, avoid over-blending, and strain juice after blending. Letting juice sit for 2-3 minutes before serving also helps reduce foam.
Making orange juice with your Ninja Blender is easy, quick, and gives you control over taste, texture, and nutrition. By choosing the right oranges, preparing them well, and following simple steps, you can enjoy fresh juice any time. Try different variations, keep your blender clean, and enjoy the health benefits of homemade juice.
Once you’ve mastered the basics, experiment with new flavors and share your delicious juice with family and friends.