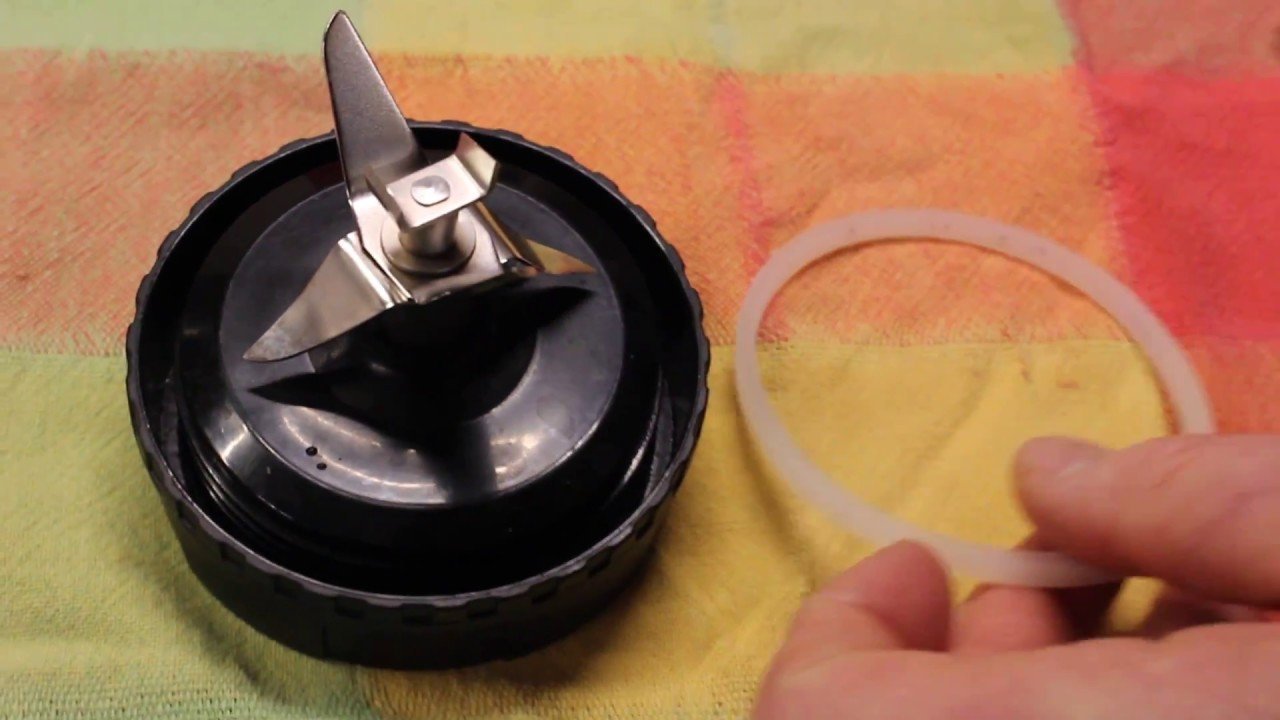
How To Remove Gasket From Ninja Blender: A Simple Guide
You can easily pull the rubber seal out of your blender base by using a small, dull tool to gently lift one edge of the ring. To remove the gasket from your ninja blender, you simply need to pry the silicone ring away from its groove until it pops out. This process depends on the specific model you own, as some seals are designed to be permanent, while others are removable for deep cleaning.
Understanding your blender model
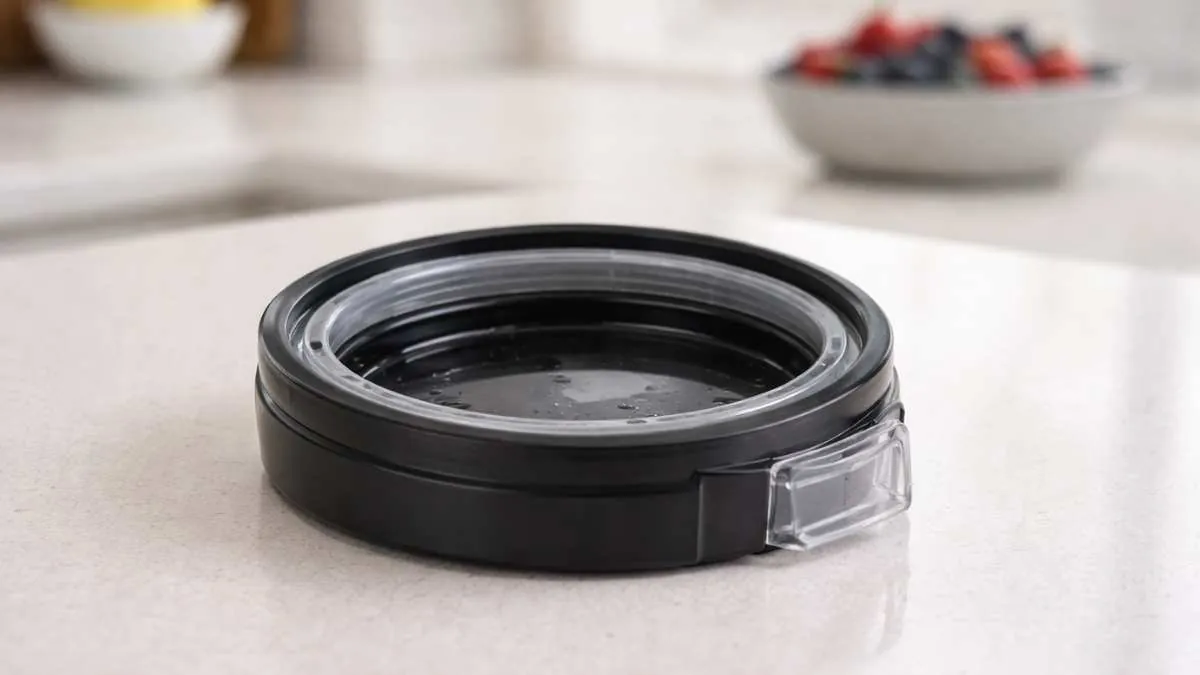
Not every blender base allows you to take out the seal. Some Ninja models use a permanent, factory-sealed gasket that should never be removed. If you try to force a permanent seal off, you’ll likely damage the rubber or the plastic housing.
Before you start, check your owner’s manual to see if the manufacturer lists the gasket as a user-serviceable part. If the manual says it’s fixed, cleaning the area with a soft brush and warm, soapy water is the only safe way to maintain it.
Things that change the process
The shape and age of the gasket will change how difficult the job is. A brand-new seal is often tight and stiff, while an older one might be loose or stretched. If your seal has hardened from years of heat, it may become brittle and snap if you pull too hard.
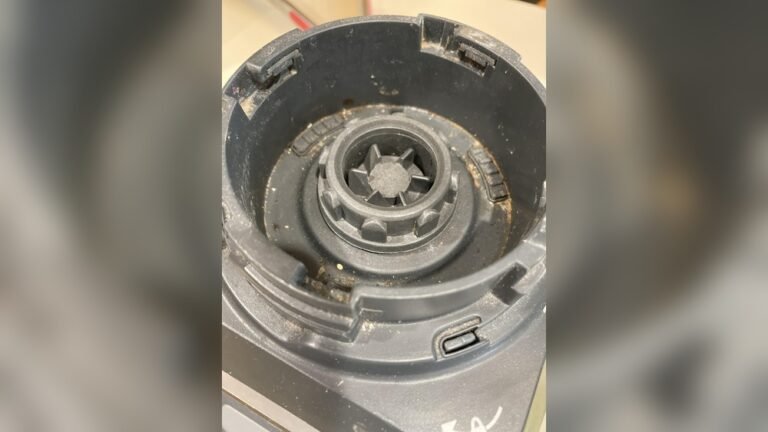
A second factor is the amount of debris trapped underneath. If food has dried and turned into a hard crust, you must soak the blade base in warm water first to soften the gunk. This prevents you from tearing the rubber while you work.
How to remove the Ninja gasket
- Unplug the blender base completely to ensure there’s no risk of accidental activation.
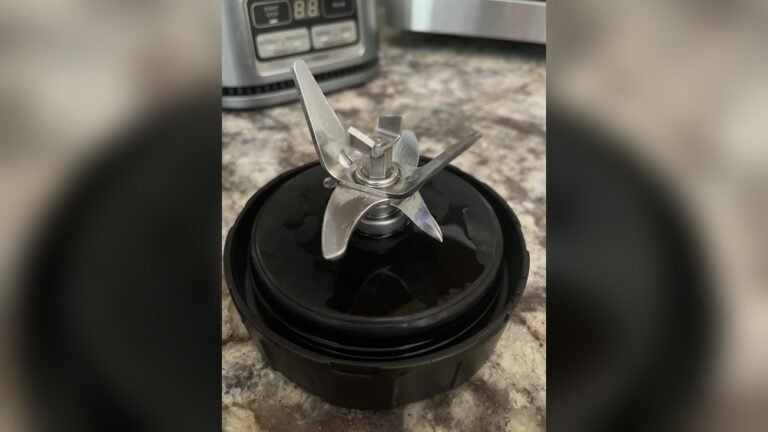
- Place the blade assembly on a flat, stable surface with the blades pointing upward.
- Locate the thin rubber ring sitting inside the circular groove around the blade shaft.
- Slide a dull, flat object like a plastic butter knife or a clean flathead screwdriver under the edge of the gasket.
- Apply gentle upward pressure to lift one section of the seal out of the groove.
- Use your fingers to pull the loosened section, working slowly around the circle until the entire ring comes free.
- Inspect the groove for any trapped food particles and wipe it clean with a damp cloth.
- Wash the gasket in warm, soapy water and let it air dry before you put it back.
The main judgement call is knowing when to stop pulling. If you feel strong resistance and the rubber starts to stretch thin or turn white, stop immediately. A seal that has bonded to the plastic isn’t meant to come out, and forcing it will break the watertight connection required for safe operation. Always consult your specific model’s service guide if you’re unsure about the design.
Comparison of cleaning situations
| Situation | Action | Effort Level | What to Watch |
|---|---|---|---|
| Loose seal | Pull by hand | Low | Ensure it seats flat |
| Stuck debris | Soak in water | Medium | Don’t use bleach |
| Brittle rubber | Replace gasket | High | Order original parts |
| Permanent seal | Clean in place | Low | Avoid sharp tools |
| Torn gasket | Discard unit | Medium | Never reuse broken |
When a seal is merely loose, a simple manual reseat often suffices. If the gasket pops out again within 48 hours, the rubber has likely lost its memory and requires a full replacement rather than another adjustment.
For stuck debris, use a warm water soak for exactly twenty minutes. Avoid bleach at all costs, as it degrades the polymer chains in food-grade silicone, leading to premature cracking. If the debris remains after the soak, use a soft-bristled brush to gently dislodge particles.
Brittle rubber is a binary failure state. Once the material feels stiff or shows fine spider-web cracking, it can no longer maintain a vacuum. Don’t attempt to soften it with oils or lubricants, as these cause silicone to swell and degrade, leading to permanent failure. Always source original manufacturer parts. Generic gaskets often vary by as little as 0.5 millimeters in thickness, which is enough to prevent a proper seal.
Permanent seals require cleaning in place because they’re bonded to the housing. Use a soft-bristled nylon brush to reach into the crevices. If you use a metal pick or screwdriver, you risk damaging the seal or the housing. If you can’t reach the grime with a brush, the seal has reached its end-of-life.
Finally, a torn gasket is a safety hazard. People often attempt to patch these with food-safe silicone sealant, but this creates a porous surface that traps moisture. This mistake costs you the integrity of the entire unit. If you see a tear, replace the gasket or the blade assembly immediately. The cost of a replacement gasket is always lower than the cost of a failed seal.
Signs of a good result
Proper reinstallation
A correctly placed gasket should sit perfectly flat inside its channel without any twists or gaps. After you press the ring back in, run your finger around the entire circumference to confirm it feels even. If you notice any bulges or uneven spots, pull that section out and push it back in carefully. A misaligned seal will cause the blender to leak liquid into the motor base during use, which can lead to permanent machine failure.
Checking for integrity
Experienced users always check the elasticity of the rubber after cleaning. If the material feels sticky, cracked, or refuses to return to its original shape, it’s time to buy a replacement. A stretched gasket can’t form a tight seal, even if it looks like it fits. Using a compromised seal is a mistake that often costs users a new blender base when liquid leaks into the electrical housing.
Troubleshooting common issues
| What you notice | What it means | What to do | How to stop it |
|---|---|---|---|
| Liquid leaking | Seal is loose | Push it down | Check fit monthly |
| Moldy smell | Trapped food | Deep clean | Dry after washing |
| Seal is brittle | Rubber aging | Buy replacement | Keep away from heat |
| Seal won’t fit | Wrong size | Verify model | Buy official parts |
| Vibration noise | Improper seating | Realign seal | Press firmly in |
If you notice liquid pooling around the base, check the gasket for debris before assuming the seal is loose. A single grain of salt or a stray crumb can prevent a vacuum seal, causing leaks even when the rubber looks perfect. If the leak persists after cleaning, the seal has likely lost its elasticity.
A moldy smell usually indicates that moisture is trapped in the crevices. To fix this, soak the seal in a solution of one part distilled white vinegar to three parts warm water for thirty minutes. Never use bleach, as it degrades the rubber compounds and causes premature cracking. Always air-dry the seal completely before reattaching it to the unit.
Brittle rubber is a sign of heat damage. If your seal feels stiff or shows hairline cracks, it will no longer provide an airtight barrier. You must replace it immediately. Using a damaged seal forces the motor to work harder, which can lead to overheating or total mechanical failure.
If you struggle to seat the seal, check the model number stamped on the bottom of the device. Many generic replacements are off by a millimeter, which is enough to cause significant vibration noise during operation. If the seal doesn’t seat into the groove with light pressure, stop forcing it. You’re likely using the wrong part.
Finally, avoid the common mistake of storing the unit with the seal tightly compressed. Over time, constant pressure flattens the rubber, causing it to lose its memory.
Rules for safe maintenance
The manufacturer, SharkNinja, provides specific guidelines for cleaning their products to prevent damage. You must never submerge the motor base in water, as this voids your warranty and creates a significant electrical hazard. If you’re cleaning the blade assembly, be aware that the blades are extremely sharp. Always hold the assembly by the plastic center post, never by the metal blades.
If your gasket requires a replacement, use only official parts sourced from the manufacturer’s website. Generic seals often use different rubber densities that can fail under the high-speed pressure of a Ninja blender.
A failed seal during high-speed blending can cause liquid to spray out from under the jar, creating a mess or causing a short circuit. If you’re in a region with specific safety standards for food-contact plastics, check the official manual to ensure your replacement part meets those requirements.
Costs and effort
The financial cost of this task is usually zero, unless you need to purchase a replacement ring. A new gasket is quite inexpensive compared to the cost of the entire blender.
The real cost is your time and the effort required to clean the groove thoroughly. Expect to spend 20 minutes on the first attempt. You must use a non-abrasive tool, like a wooden toothpick or a soft-bristled brush, to dislodge buildup without scratching the plastic housing.
If you ignore the seal for too long, the cost of replacing the entire blade assembly is much higher than replacing just the rubber ring. A new blade unit is a significant expense compared to the seal. Neglecting a small leak allows acidic liquids to seep into the internal bearings, which causes the motor to seize.
You can check the current price of parts on the official Ninja support site by entering your model number.
Distinguishing between a dirty seal and a failed one is simple. If the gasket is still pliable and holds its shape when removed, it’s likely just dirty. If the rubber feels brittle, cracked, or has stretched so that it no longer sits flush in the channel, it’s time to discard it.
A common mistake is applying petroleum jelly or oil to the gasket to help it seat. Never do this. Lubricants cause the rubber to swell and degrade rapidly, which forces a premature replacement. If the ring refuses to seat, dry the groove completely and use a light dusting of cornstarch to reduce friction. If it still bulges, remove it and ensure it’s seated correctly, or verify you’re using the correct replacement part.
Keeping the seal clean
To keep your blender working well, rinse the blade base immediately after every use. Don’t let food sit in the groove for hours, as the acidity in fruits and vegetables can degrade the silicone over time.
If you notice the seal starting to hold onto odors, soak it in a mixture of one part white vinegar and three parts water for 15 minutes. Always ensure the seal is completely dry before you store the blade assembly to prevent mold growth in the hidden channel.
Most users make the mistake of leaving the assembly to air-dry while still attached to the jar. This traps moisture in the threads, creating a breeding ground for bacteria. Instead, remove the gasket entirely after every wash. If the rubber feels tacky or leaves a dark residue on your finger, the material has begun to break down. At this stage, a soak won’t restore the seal; you must replace it to prevent leaks that can damage the motor base.
Use this decision rule to determine your cleaning frequency: if you process only liquids like smoothies, a thorough rinse suffices for three days. If you process thick, fibrous ingredients like nut butters or kale, you must remove and scrub the gasket after every single use.
The small particles trapped in the groove act as an abrasive, eventually cutting into the silicone. When in doubt, perform a deep clean. It costs only two minutes of your time but adds years to the life of your appliance.
When to seek alternatives
If your model has a permanent seal that’s leaking, don’t attempt a DIY repair with glue or silicone sealant. These substances aren’t food-safe and will contaminate your ingredients. In this case, the only safe option is to contact the manufacturer’s customer service team or purchase a new blade assembly. Attempting to repair a damaged permanent seal is a safety risk that can lead to glass breakage or motor damage.
Distinguishing between a removable gasket and a permanent seal is the most common point of failure for users. Check your manual’s diagram. If you see a distinct rubber ring that can be pried out with a flathead screwdriver, it’s a user-replaceable part. If the seal is flush against the housing with no visible seam, it’s permanent. Don’t force a permanent seal; you’ll likely compromise the waterproof integrity of the motor housing.
The cost of a replacement blade assembly is a notable expense. While this feels steep, compare it to the much higher price required to replace the entire base unit after a liquid leak destroys the motor’s internal bearings. If you notice a faint burning smell or see dark, oily residue beneath the jar, the seal has already failed significantly. Stop using the machine immediately.
If the leak is minor, such as a single drop appearing after a full cycle, verify that you aren’t overfilling the container. Most blenders have a maximum liquid line that sits well below the lid. If you consistently fill past this line, the pressure forces liquid into the seal assembly. If the leak persists at lower volumes, the gasket has hardened due to heat cycles and must be replaced.
Frequently asked questions
Can I use a dishwasher to clean the gasket?
Most Ninja gaskets are dishwasher safe, but check your specific manual to confirm. If you use a dishwasher, place the seal in the top rack to avoid high heat that can warp the rubber. Hand washing with warm, soapy water remains the safest way to prevent accidental damage or shrinking.
How long does a gasket last?
A gasket typically lasts for a period of regular daily use before needing replacement. The lifespan depends on how often you blend and how well you clean the base after each cycle. Watch for signs of cracking or stretching, as these are clear indicators that the material has reached the end of its life.
Is it safe to use the blender without the gasket?
Never use your blender without a properly installed gasket. The seal is necessary to create a vacuum-tight environment inside the jar. Without it, liquid will leak out of the bottom of the jar and into the blender motor, which will cause the unit to fail and potentially create an electrical hazard.
Why is my gasket stretching out?
Silicone gaskets often stretch due to exposure to high heat from the dishwasher or long-term contact with hot liquids. If you notice the ring is loose, it has likely lost its elasticity and will no longer create a secure fit. You should replace it immediately to prevent leaks during your next blend.
What happens if I lose the gasket?
If you lose the gasket, you can’t use the blender safely. The unit will leak immediately because the plastic jar and the blade base won’t form a seal. You must purchase a replacement ring specifically designed for your model before you attempt to use the blender again for any tasks.
Does it matter which side of the gasket faces up?
Yes, the gasket has a specific shape designed to fit into the groove of the blade assembly. If you install it upside down, the seal won’t sit flush, and the blender will leak. Look closely at the shape of the ring and the groove to ensure the flat side and the rounded side are properly aligned.
Conclusion
Start by inspecting your blade assembly for a removable silicone ring. If you can lift the edge with a dull tool, clean it carefully and ensure it’s fully seated before your next use. If you can’t find a removable seal or if the rubber shows signs of cracking, stop using the blender and contact the manufacturer to order the correct replacement part for your specific model.