How To Remove Handle From Ninja Blender: A Simple Guide
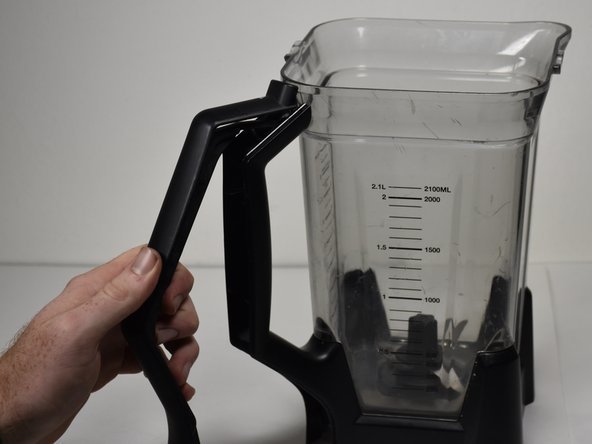
You can remove a handle from a Ninja blender jar by pressing the release tab located at the base of the handle while pulling it firmly away from the pitcher. Most Ninja pitcher models use a snap-fit design that doesn’t require tools, but the specific method to how to remove handle from ninja blender varies based on the series you own. Some older models use hidden screws, while newer ones are permanently fused to the plastic.
Finding your Ninja blender handle model
Users searching for this information usually own a Ninja Professional, Nutri-Ninja, or Auto-iQ blender series. These pitchers look similar, but their construction differs significantly. You need to identify if your handle is removable or integrated into the jar housing.
This page serves users who need to clean trapped debris or replace a damaged handle on a standard Ninja pitcher. If your blender jar has a handle that appears to be part of the main plastic mold, it’s likely not designed to be removed. Attempting to force these integrated handles off will crack the pitcher, causing a leak that makes the jar unsafe for blending.
We assume you’re working with a model that features a visible release tab or screw access points. If you don’t see these features, don’t force the component. This guide isn’t for users with high-speed professional kitchen equipment that requires specialized tools or certified technician disassembly.
Factors That Change The Removal Process
The age of your blender is the primary factor that decides if the handle is removable. Older models often relied on Phillips-head screws hidden behind plastic caps, while modern designs use internal locking clips.
The material of the pitcher also matters. Clear, BPA-free plastic jars are brittle; if your handle is stuck due to dried residue, forcing it will lead to stress fractures. You should soak the base in warm, soapy water to loosen debris before attempting any mechanical removal.
The presence of a locking mechanism is the second major factor. Some Ninja pitchers have a safety interlock that prevents the blender from starting unless the handle is fully seated. If you’re removing the handle to repair this interlock, you must be careful not to lose the tiny spring or pin that keeps the switch functional.
People often make the mistake of using a flat-head screwdriver to pry the handle away from the jar. This almost always results in a chipped plastic edge or a broken tab. If the handle doesn’t release with moderate hand pressure, stop immediately. A broken pitcher can’t be repaired to a safe state, and the cost of a replacement jar is often 30% to 50% of the price of a new blender unit.
Steps to Detach the Handle
- Unplug the Ninja blender base from the wall outlet to prevent accidental activation.
- Inspect the base of the handle where it meets the pitcher for a plastic tab or screw cap.
- If you see a screw cap, use a small flat-head tool to gently pry the cover off to reveal the screw.
- Use a #2 Phillips-head screwdriver to remove the screws holding the handle in place.
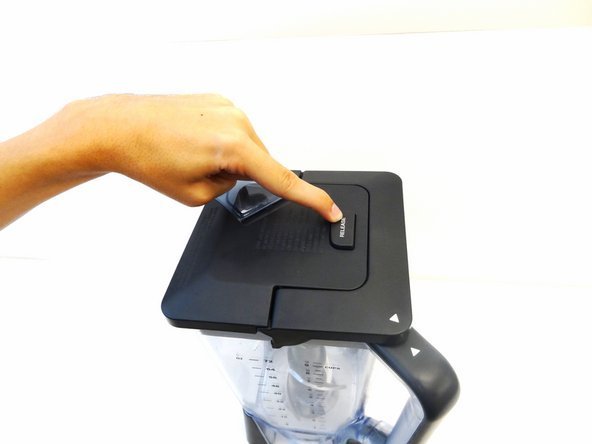
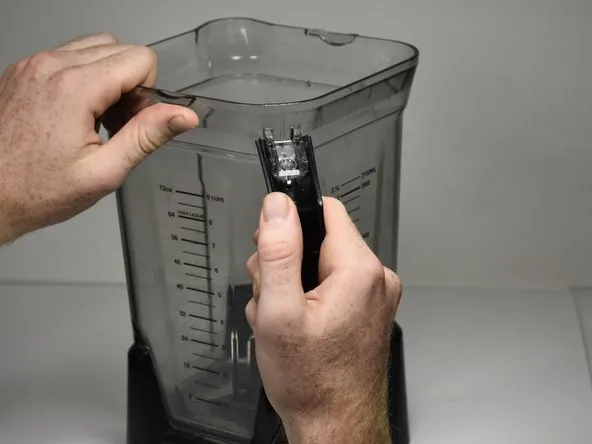
- If there’s no screw, locate the release tab at the bottom of the handle.
- Press the tab firmly with your thumb while pulling the handle upward or outward, depending on the specific model’s track.
- Slide the handle off the rail or snap-fit connector carefully.
- Clean the internal channels with a soft brush and warm water to remove any stuck food.
- Realign the handle with the track and slide it back until you hear a distinct click.
- If screws were removed, replace them and tighten until snug, but don’t overtighten to avoid cracking the plastic.
The judgement call here is the amount of force applied. If you feel strong resistance, there’s likely a secondary locking screw or a hidden latch you missed. Forcing it will destroy the plastic housing. If you find the handle is fused or the locking mechanism is broken, don’t attempt to glue it back together. Food contact surfaces must remain smooth and clean to prevent bacterial growth.
Variations in Handle Designs
| Situation | Action | Effort | Watch For |
|---|---|---|---|
| Screw-based handle | Remove cover and unscrew | Low | Stripped screw heads |
| Tab-release handle | Press tab and slide | Medium | Broken plastic clips |
| Integrated handle | Don’t remove | None | Housing cracks |
| Stuck with residue | Soak in warm water | High | Cracked pitcher walls |
| Loose handle | Tighten existing screws | Low | Misaligned lock switch |
When dealing with screw-based handles, use a manual screwdriver rather than a power drill. Power tools often strip the soft metal heads, turning a five-minute fix into a permanent mechanical failure. If the screw resists, apply a drop of penetrating oil and wait ten minutes before trying again.
For tab-release designs, the primary mistake is applying force directly away from the pitcher. These clips are designed to slide laterally along a track. If you pull outward, you’ll snap the plastic tabs, rendering the handle loose forever. If the tab feels rigid, use a thin plastic pry tool to gently nudge the clip while applying side pressure.
Integrated handles require a different mindset. Because they’re molded into the housing, any attempt to remove them will compromise the structural integrity of the unit. If the handle feels wobbly, check the base where it meets the pitcher body. If you see a hairline fracture, stop using the device immediately. A crack here will widen under the weight of liquid, leading to a sudden, messy failure.
Finally, distinguish between a loose handle and a misaligned lock switch. If the handle wiggles but the machine still operates, tighten the external screws. However, if the handle feels firm yet the motor won’t engage, the issue is likely a misaligned safety switch inside the handle housing. Don’t overtighten these screws, as this often forces the internal switch out of its mounting bracket, permanently disabling the safety sensor.
Maintaining Structural Integrity
Cleaning and Inspection
Experienced users know that the handle isn’t just a grip, but a structural part of the pitcher’s safety system. If you remove it for cleaning, inspect the plastic rails for tiny white stress marks. These marks indicate that the plastic is weakening. If you see them, don’t reattach the handle, as it may break during use, creating a hazard.
Proper Reassembly
Always ensure the handle is fully seated before using the blender again. A handle that isn’t clicked into place will prevent the safety interlock switch from engaging. If the blender doesn’t turn on after you put the handle back, check that the handle is pushed all the way down. Never bypass the safety interlock switch, as this creates a significant risk of injury during operation.
Troubleshooting Common Issues
| What you notice | What it usually means | What to do first | How to stop it |
|---|---|---|---|
| Handle feels wobbly | Loose internal screws | Tighten screws | Check weekly |
| Pitcher leaks at base | Cracked seal or housing | Inspect for cracks | Hand wash only |
| Blender won’t start | Interlock not engaged | Re-seat handle | Align rails perfectly |
| Tab won’t depress | Dried food buildup | Soak in warm water | Rinse after use |
| Plastic sounds creaky | Over-tightened screws | Loosen by half turn | Stop over-tightening |
Legal and Safety Rules
The Ninja blender housing is designed as a sealed unit for safety. According to the SharkNinja official support documentation, the pitcher assembly is intended to be cleaned as a whole. You should check the specific manual for your model on the official SharkNinja website to see if the handle is listed as a user-serviceable part.
If the handle isn’t meant to be removed, doing so voids your warranty. If you’re unsure, contact the manufacturer’s customer service department before using tools on your equipment. Never attempt to modify the handle or the locking switch.
Many users mistakenly believe that removing the handle allows for a deeper clean of hidden food particles. This is a costly error. Once the factory-sealed pressure fit is broken, the structural integrity of the pitcher is compromised. You risk catastrophic leakage during high-speed blending, which can damage the motor base beyond repair.
Use this decision rule to determine your next step: if your pitcher has visible screws on the handle exterior, consult your manual to see if they’re intended for routine maintenance or internal access. If the handle appears molded directly into the plastic housing without visible fasteners, it’s a permanent component.
Attempting to pry open a molded handle will snap the plastic tabs that trigger the safety interlock switch. If those tabs break, the blender will refuse to start, even if the pitcher is correctly seated. Repairing this requires a full pitcher replacement, which is relatively inexpensive compared to buying a new blender. Always prioritize the manufacturer’s design constraints over the desire for manual disassembly.
Financial Costs of Replacement
Replacing a Ninja pitcher handle is usually not possible as a standalone part because most manufacturers sell the handle and pitcher as one assembly. A replacement pitcher is relatively inexpensive compared to buying a new blender depending on the model and capacity.
You can verify the current pricing for your specific model by searching the official parts store on the Ninja Kitchen website. If you break the pitcher while trying to remove the handle, you’ll have to pay the full price of a new jar.
This cost is worth comparing against the price of a complete new blender unit if your current base is also showing signs of age. A simple decision rule applies here: if the replacement pitcher exceeds 40% of the cost of a new system, prioritize a full unit upgrade. You gain a fresh warranty and improved motor technology for a marginal increase in spending.
Many users make the mistake of purchasing third-party “compatible” pitchers to save money. These aftermarket parts often lack the precise locking mechanisms required for safety sensors. If the pitcher fails to seat perfectly, the blender may refuse to start or, worse, develop a leak that ruins the motor base. A damaged motor base is a total loss, costing significantly more than the price of an authentic replacement pitcher.
Before ordering, check the model number printed on the bottom of your motor base. Don’t rely on visual similarities, as internal drive gears vary across generations. If your unit is more than five years old, the cost of a new pitcher is rarely justified. At that age, the internal seals are likely nearing the end of their functional lifespan, making a full system replacement the more economical long-term choice.
Keeping the Handle Secure
After you have successfully removed and cleaned the handle, keep it free of buildup by rinsing the pitcher immediately after every use. Food particles trapped in the grooves act as an abrasive, grinding down the plastic teeth that hold the handle in place.
Don’t put the pitcher through high-heat dishwasher cycles. The intense heat causes the plastic to expand and contract at a different rate than the metal fasteners, which loosens the handle connection over time. If you must use a dishwasher, stick to the top rack and select a low-temperature or air-dry setting.
If you notice the handle wiggling during a blend, stop the machine immediately. Verify that the locking tab is still secure by applying firm pressure to the base. If the tab has lost its springiness or fails to snap back into position with an audible click, the handle will no longer stay locked. In this case, the jar must be replaced for safety reasons.
Using a loose handle risks a catastrophic failure where the jar detaches during high-speed operation. Never attempt to bridge the gap with adhesive or tape; these materials can’t withstand the vibration of the motor and will inevitably fail, potentially causing the heavy pitcher to fall while the blades are still spinning.
When to Seek Professional Support
If your handle is damaged beyond simple cleaning, or if the locking mechanism fails to engage, the pitcher is no longer safe to use. You shouldn’t attempt to repair cracks in the plastic using household adhesives, as these can leach chemicals into your food.
If the handle is broken, contact the manufacturer’s support line to order a certified replacement pitcher. Don’t attempt to use the blender with a compromised handle, as the jar could detach from the base during high-speed operation, creating a hazard.
The most common mistake is assuming a hairline fracture is merely cosmetic. Attempting to bridge this gap with epoxy or superglue introduces toxic compounds that will inevitably flake off into your smoothies during the blending cycle.
Use this decision rule to determine your next step. If the handle shows stress whitening—cloudy, white patches in the plastic—the material has reached its fatigue limit. In this case, stop using the unit immediately. If the handle feels loose but shows no visible cracks, check the mounting screws at the base. If tightening these screws with a torque-limited driver doesn’t restore rigidity, the internal threading is likely stripped.
A stripped mount is a permanent failure. Don’t try to re-thread the plastic, as the high-torque vibrations of the motor will quickly rattle the jar free. Replacing the pitcher is the only way to ensure the safety interlock remains calibrated. If the manufacturer no longer stocks your specific model, retire the base rather than purchasing a third-party “universal” jar, which often lacks the precise tolerances required for a secure lock.
Frequently asked questions
Can I use a dishwasher to clean the handle?
Most Ninja pitchers are top-rack dishwasher safe, but heat can weaken the plastic clips that hold the handle in place. Hand washing the pitcher with warm, soapy water is the best way to prevent the handle from becoming loose or brittle over time.
Why is my handle not clicking back into place?
A handle that fails to click usually has debris trapped in the rail or a broken plastic locking tab. Inspect the rails for food residue, rinse them thoroughly, and ensure the tab isn’t blocked before trying to slide it on again.
How long does a Ninja blender handle last?
A handle lasts as long as the pitcher itself, which is a significant duration with careful use. If you see white stress lines or small cracks in the plastic, the handle is reaching the end of its safe lifespan and should be replaced.
Is it safe to use glue on a broken handle?
Glue is never safe for a blender handle because it can’t withstand the vibrations and torque of the motor. Any adhesive used on the pitcher will eventually fail, creating a risk that the jar will break or detach while the blender is running.
What happens if I lose the screws?
You must replace lost screws with the exact size and length specified in your model’s manual to keep the handle secure. Using the wrong size screw can puncture the plastic housing or fail to hold the handle tightly, which prevents the safety interlock from functioning.
Does it matter if I force the handle?
Forcing the handle will cause the plastic housing to crack or the locking tabs to snap off permanently. Once the plastic is cracked, the jar is no longer safe for use and must be replaced to prevent leaks or mechanical failure during blending.
Conclusion
Start by inspecting the base of the handle for a visible release tab or a screw cap. If you find one, proceed with the steps provided to remove the component gently. If you see no way to safely detach the handle, don’t force it, as the pitcher is likely a sealed unit that should remain intact for your safety.