How To Remove Blade From Ninja Blast Portable Blender: The Truth
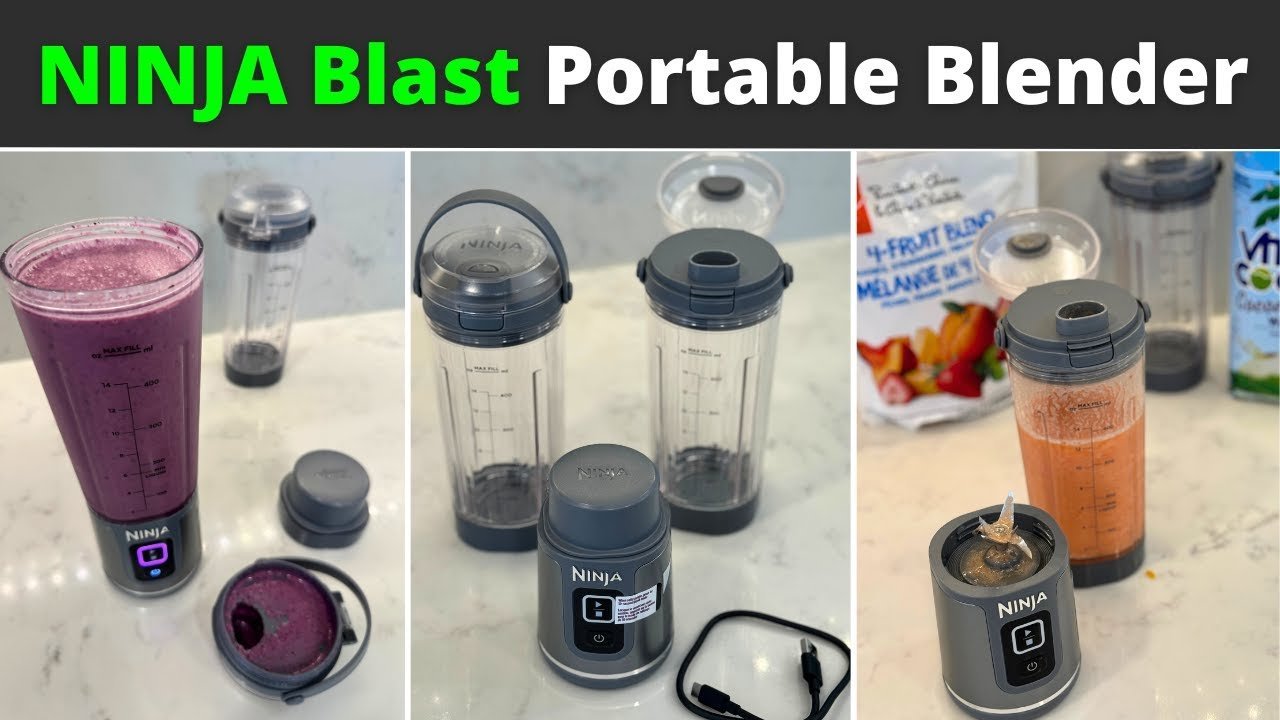
You can’t remove the blade assembly from a Ninja Blast portable blender because it’s permanently built into the base of the jar. Attempting to take the blade out of a ninja blast portable blender is impossible, as the manufacturer designed this unit as a sealed, non-serviceable component to ensure safety and prevent leaks.
Your experience level with small kitchen appliances doesn’t change this mechanical reality. The motor base and the blade unit are a single, integrated piece that should never be disassembled by the user.
Why you can’t remove the Ninja Blast blade
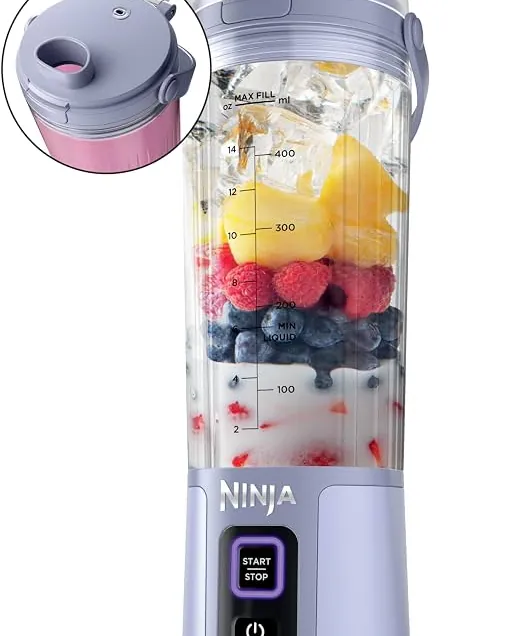
This blender is for individuals who prioritize extreme portability and convenience for making single-serve smoothies or protein shakes on the go. If you’re a student, a commuter, or someone who hits the gym, this device fits your lifestyle because it’s battery-operated and fits into most cup holders. You likely value the ability to blend a drink anywhere without needing to plug into a wall outlet.
This page serves the user who is trying to deep-clean their blender and mistakenly believes the blades must come out to reach trapped food particles. If you’re looking for a blender where the blade assembly is user-removable for heavy-duty cleaning or specialized grinding, this specific Ninja model isn’t the right choice for your needs.
The information here assumes you’re using the standard Ninja Blast portable blender model as sold by SharkNinja. If you own a different Ninja series, such as the Foodi or Professional series, the blade assemblies on those models are often removable. Always check your specific owner’s manual before attempting any maintenance. If you force the base open, you’ll void your warranty and likely cause permanent damage to the watertight seal.
Factors affecting your cleaning outcome
The primary factor that changes your cleaning success is the timing of your wash. If you clean the blender immediately after use, you’ll rarely need more than a drop of soap and water. If you let residue sit for hours, the sugars in fruit or proteins in powders will harden around the blade, making removal of debris difficult.
Another factor is your water temperature. Using warm water helps dissolve sticky residues more effectively than cold water. However, never use boiling water, as this can warp the plastic housing and compromise the integrity of the seals. Stick to water that’s comfortable to touch, which is usually around 100°F to 110°F.
The third factor is the density of the food you blend. If you often use ice or frozen fruit, the blades may develop small scratches or dull edges over time. While you can’t sharpen these blades or replace them, you can prevent extra wear by ensuring your liquid-to-solid ratio is high enough to allow the blades to spin freely without stalling.
The final factor is your choice of cleaning tools. Many people make the mistake of using metal forks or knives to scrape under the blades. This is dangerous and causes the following: * It damages the non-stick coating or plastic housing. * It risks cutting your fingers on the sharp, fixed blades. * It can permanently shift the alignment of the blade shaft.
Always use a soft-bristled brush or a silicone spatula to reach under the blades.
Steps for cleaning the blender
- Fill the blender jar with warm water up to the “max liquid” line indicated on the side of the container.
- Add one drop of mild liquid dish soap into the water.
- Secure the lid tightly by turning it clockwise until it clicks into the locked position.
- Press and hold the power button to run a full 30-second blend cycle.
- Open the lid and pour out the soapy water, then rinse the jar thoroughly with clean, warm water.
- If debris remains stuck under the blades, use a long-handled, soft-bristled bottle brush to gently scrub the area.
- Leave the blender jar upside down on a drying rack until all moisture has evaporated.
The single judgement call that separates a clean unit from a dirty one is your patience during the manual scrubbing phase. If the blender still smells like your previous smoothie, you haven’t removed all the organic material. If you can’t reach the base with a brush, rinse it again with more soap. Never submerge the motor base in water, as this will destroy the battery and electronic components.
Cleaning variations at a glance
| Situation | What to do | What it takes | What to watch for |
|---|---|---|---|
| Fresh residue | Run soap-water cycle | 30 seconds | Soap bubbles |
| Dried smoothie | Soak for 10 minutes | 5 minutes | Sticky residue |
| Protein buildup | Scrub with brush | 2 minutes | Hidden clumps |
| Strong odors | Use baking soda | 10 minutes | Lingering scents |
| Deep stains | Vinegar soak | 30 minutes | Surface discoloration |
If you’re dealing with fresh residue, act immediately. If you wait more than two hours, the sugars in fruit smoothies harden into a film that requires soaking.
For protein buildup, use a nylon-bristle brush rather than metal. Metal tools scratch the interior, creating microscopic grooves where bacteria thrive. If you see white streaks after drying, that’s mineral scale, not dirt. Use a 50/50 vinegar and water solution to dissolve it.
When removing strong odors, avoid bleach. Bleach reacts with plastic components to create permanent, toxic off-gassing. Use a tablespoon of baking soda instead. If the smell persists after ten minutes, the gasket is likely trapped with debris.
You can tell if a stain is deep by the texture. If the surface feels smooth but looks dark, it’s a surface stain that vinegar will lift. If the surface feels pitted or rough, the plastic has degraded. In that case, no amount of soaking will fix the aesthetic, and it’s time to replace the component to prevent bacterial growth. Always rinse with cold water after any chemical treatment to prevent residue buildup.
Details that change your results
Proper preparation
Experienced users always add liquid before adding solids. If you put frozen berries or ice in first, the blades will struggle to start, which puts unnecessary strain on the motor and battery. Adding liquid first creates a vortex that pulls the solids down into the blades, ensuring a smooth blend without the need to shake the unit or stop and start it repeatedly.
Maintenance habits
Successful users never leave the blender sitting in their car or gym bag for long periods. If you can’t wash the unit immediately, at least rinse it with water to prevent food from drying onto the blades and the underside of the lid. This simple habit prevents the growth of bacteria and keeps the seals from becoming sticky or difficult to close properly over time.
Troubleshooting common issues
| What you notice | What it usually means | What to do first | How to stop it |
|---|---|---|---|
| Blades not spinning | Jammed by large food | Remove chunks | Cut food smaller |
| Leaking from bottom | Damaged seal | Stop using unit | Don’t overfill |
| Strange burning smell | Motor overheating | Let it cool | Shorter cycles |
| Cloudy plastic | Mineral buildup | Vinegar soak | Dry after wash |
| Lid stuck closed | Vacuum pressure | Loosen lid | Let air in |
If your blades fail to spin, check the base for small debris like seeds or pits. A common mistake is forcing the motor to restart while jammed, which can strip the drive gear. If you hear a grinding noise, stop immediately; the cost of a replacement motor often exceeds the unit price.
For leaks, confirm the liquid is coming from the gasket and not a hairline crack in the pitcher. If the seal is compromised, you must replace it before further use to prevent moisture from entering the electrical housing.
When you smell burning, check if you have exceeded the maximum capacity line. Running the motor for more than 60 seconds without a break is the primary cause of thermal overload. If the unit shuts down automatically, wait at least 15 minutes before attempting to power it on again.
Cloudy plastic usually indicates hard water deposits. If a vinegar soak doesn’t clear the surface, the plastic has likely suffered micro-abrasions from abrasive sponges. Use only soft cloths to prevent permanent dulling.
Finally, if the lid sticks, don’t apply excessive force. The vacuum seal is strongest when the contents are hot. If the lid remains stubborn, run the base under warm water for 30 seconds to equalize the internal pressure.
The rules that apply
The safety standards for this blender are set by SharkNinja to ensure the device remains waterproof and safe for battery operation. You must follow the user manual’s guidelines regarding cleaning, as the company states that submerging the motor base in water will lead to failure. If you experience a motor failure or a leaking seal, check the warranty information on the official SharkNinja support website to see if your issue is covered.
Any attempt to force the blade assembly out is a violation of the manufacturer’s design. The blades are sharp and fixed, and they aren’t intended to be removed for any reason. If you have a legitimate defect, don’t try to repair the internal electronics yourself.
What it costs you
The real cost of this blender is the time you spend cleaning it correctly. Because you can’t remove the blades, you’re limited to the cycle-and-scrub method. If you use the blender multiple times a day, this adds up to about 10 to 15 minutes of cleaning time each day.
Most users make the mistake of soaking the base in a sink. This is a fatal error. Water inevitably seeps into the bearing housing, corroding the motor coupling and causing a foul, metallic odor that ruins future smoothies. If you notice a dark, gritty residue appearing beneath the jar after a wash, the seal has already failed. You should stop using the unit immediately to avoid electrical shorts.
If you try to force the blades out, the cost is the total replacement of the blender. Since the blade assembly is integrated into the jar, any damage to the seal or the plastic housing means the entire unit is no longer waterproof and must be discarded.
The decision rule is simple: if you’re blending fibrous greens or sticky nut butters, you must run a rinse cycle with hot water and dish soap within sixty seconds of use. If you wait until the residue hardens, you’ll spend triple the time scrubbing, increasing the likelihood of damaging the internal gasket.
Keeping it right afterwards
To keep your blender in good condition, store it in a dry place with the lid slightly loose to allow airflow. This prevents moisture from being trapped inside, which can lead to mold growth in the small gaps around the blade base. If you notice the blender smells, add a teaspoon of baking soda and warm water, then let it sit for 30 minutes before rinsing.
If the battery life starts to decrease, ensure you’re charging it fully using the provided USB-C cable. Avoid using high-voltage fast chargers unless the manual explicitly states they’re compatible, as these can damage the internal battery management system. When the blades stop spinning as quickly as they did when new, it’s usually a sign of battery degradation rather than a blade issue.
Many users mistakenly leave their blenders plugged in overnight once fully charged. This constant trickle charge generates excess heat, which degrades the lithium-ion capacity over time. If your unit takes longer than four hours to reach a full charge, the battery has likely begun to fail.
The decision rule is simple: if the blender pulses or stalls during a light blend, the battery is dying. If the blades spin freely but struggle under a load, the motor is fine, but the power delivery is failing. In that case, stop using it immediately to prevent a short circuit.
When this is the wrong approach
This blender is the wrong choice if you intend to crush large amounts of hard ice, nuts, or coffee beans on a daily basis. For these tasks, you need a high-powered countertop blender with a glass jar and a removable, stainless steel blade assembly. If you try to use this portable model for heavy-duty tasks, the motor will burn out prematurely and the blades will dull quickly.
If your goal is to make large batches for a family, this single-serve device will frustrate you. The capacity is limited to about 18 ounces, which is enough for one person but insufficient for multiple servings. In these cases, look for a traditional blender with a larger capacity and a removable base. These alternatives are built to handle the mechanical stress of frequent, heavy use, whereas the Ninja Blast is specifically engineered for lightweight, on-the-go convenience.
Frequently asked questions
Can I sharpen the blades?
No, you can’t sharpen the blades because they’re fixed and made of thin, stamped stainless steel. Attempting to sharpen them will ruin the factory-set angle and likely damage the plastic housing of the blade base. If the blades become dull, it’s a sign that the unit has reached the end of its functional lifespan.
Is it safe to put the base in the dishwasher?
No, the base containing the motor and battery isn’t dishwasher safe and must never be submerged in water. You must only clean the interior of the jar by hand using the soap-and-water blend cycle. Putting the motor base in a dishwasher will destroy the electronics and create a significant electrical hazard.
How do I remove smells from the jar?
You can remove odors by filling the jar with warm water and two tablespoons of baking soda, then letting it sit for one hour. After the soak, run a standard blend cycle to ensure the solution reaches all the crevices under the blades. Rinse thoroughly until the water runs clear and no scent remains.
What happens if the blade gets stuck?
If the blade gets stuck, turn the unit off immediately and remove the large food pieces causing the jam. The motor has a thermal sensor that will shut it down if it overheats, so wait at least 15 minutes before trying to blend again. Always cut your ingredients into smaller, one-inch pieces to prevent this.
Does the blade rust?
The blade is made of stainless steel, but it can still develop surface rust if left wet or exposed to acidic foods for too long. Always rinse the jar immediately after use and ensure it’s completely dry before storing it. If you see spots, scrub them gently with a non-abrasive sponge and a little vinegar.
How long should the battery last?
The battery typically lasts for about 15 blend cycles on a single full charge, depending on the thickness of your ingredients. You can check the status by looking at the LED indicator lights on the front of the motor base. If the light flashes red, it needs to be recharged via the USB-C port.
Conclusion
Start by rinsing the jar with warm water immediately after each use to prevent residue from hardening. You can expect the blender to remain clean and functional for years if you avoid abrasive tools and never submerge the motor base. If you notice any cracks in the plastic or persistent leaking, stop using the device and contact official customer support for a replacement.