How To Open A Nutribullet Blender: Blade and Base Guide
Opening a Nutribullet blender is a two-part job: you remove the blade assembly from the cup you just blended, and, separately, you learn how to open the motor base if you need to replace a fuse, clear a jam, or troubleshoot a unit that won’t start. Most people searching this question want the first answer, so here it’s in one line: grip the cup in one hand and the blade collar in the other, then twist the collar counterclockwise about a quarter turn until it stops, lift the blade straight up, and set it aside before you drink or pour. Everything below expands that into exact steps, covers the models that differ, explains how to open the base, and walks through the problems that make a Nutribullet feel like it’s locked shut.
Key Takeaways
- Twist counterclockwise to release the blade collar from the cup — roughly a quarter turn — then lift straight up.
- Never twist the cup off the motor base while the blade is attached; remove the blade first, then unscrew the cup.
- If the blade won’t budge, the cause is almost always over-tightening, sticky residue, or a vacuum seal from hot contents.
- The motor base opens differently: most models need the rubber feet or screws removed from the underside before the housing separates.
- Unplug the unit and let it sit for at least 10 minutes before opening the base — capacitors hold a charge.
- If the unit is under its one-year limited warranty, opening the base yourself can void it. Call Nutribullet support first.
How The Nutribullet Assemblies Fit Together
Before you twist anything, it helps to know there are three separate connections on a standard Nutribullet, and only one of them is the one you usually want to open.
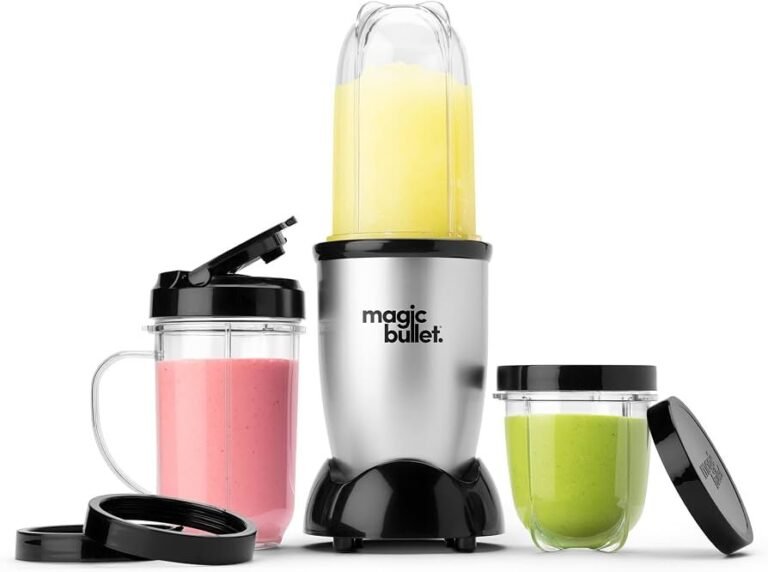
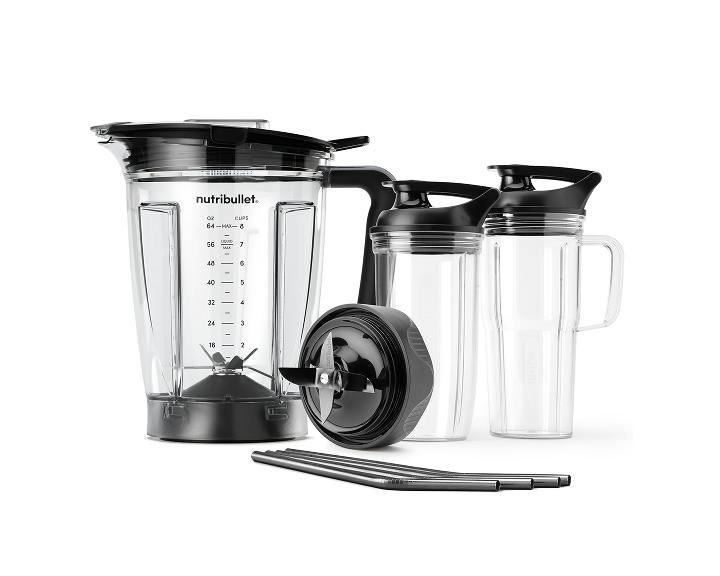
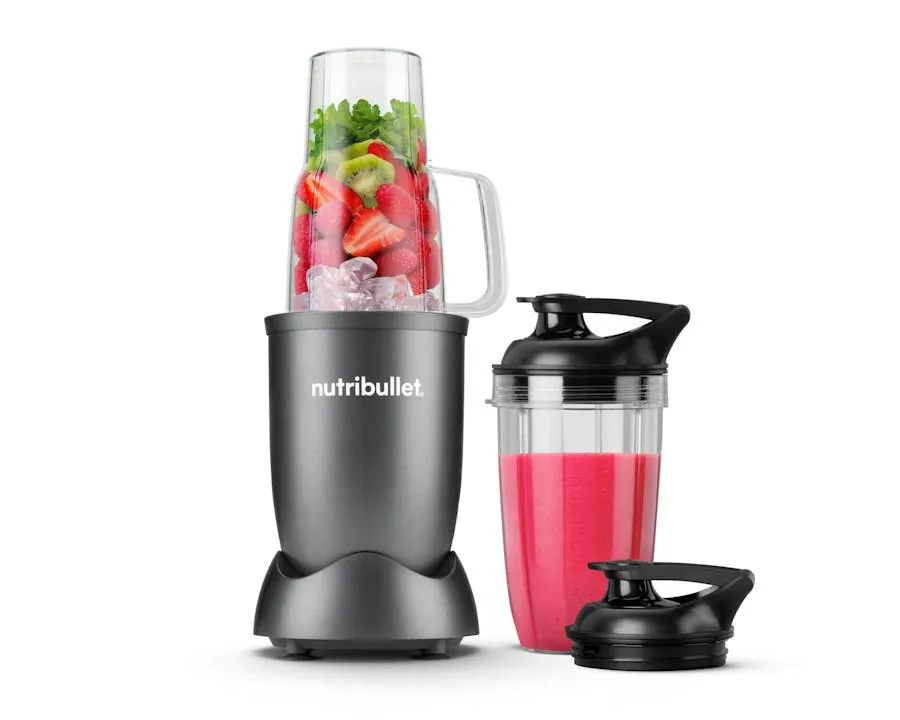
The cup (Nutribullet calls it a cup or a tumbler, depending on the model) has threads on its rim. The blade assembly — a plastic collar with stainless steel blades set into it — screws onto those threads. The motor base is the tall unit with the button on top; the cup-plus-blade combination presses down onto it, but it doesn’t screw on. It seats into three or four tabs and locks by downward pressure, not by rotation.
That distinction matters because people often try to unscrew the whole loaded cup from the base, which does nothing, or they try to twist the blade off while the cup is still seated on the base, which can splash whatever is inside.
| Part | How it attaches | How to open it |
|---|---|---|
| Blade collar to cup | Screw threads | Twist counterclockwise ~¼ turn |
| Cup to motor base | Pressure tabs, no threads | Lift straight up |
| Motor base housing | Screws or press-fit clips | Remove feet/screws, then separate halves |
| Extractor blade from collar | Press-fit, not user-serviceable | Don’t attempt; replace the assembly |
Pro Tip: If you own a Nutribullet Pro, Nutribullet 600, or Nutribullet 900, all three use the same cup-to-blade thread direction. The technique doesn’t change between them.
How To Open A Nutribullet After Blending
This is the core procedure, and it takes about five seconds once you have the motion down.
- Turn the motor off and unplug the base. Even after the blades stop, the safest habit is to cut power before your hands go anywhere near the blade.
- Lift the entire cup off the base. Grip the cup body, not the blade collar, and pull straight up. There’s no twist here. If it resists, press down slightly and lift again — you’re clearing the locking tabs.
- Set the cup on a flat counter. Don’t hold it in the air while you work the blade off; a slip sends blended contents across the kitchen.
- Grip the cup in one hand and the blade collar in the other. Your non-dominant hand should hold the cup firmly near its middle, not near the rim where your fingers could meet the blades if the collar releases suddenly.
- Twist the blade collar counterclockwise. A quarter turn is typical. You’ll feel it stop against a hard limit rather than spin freely.
- Lift the blade assembly straight up and off. Don’t angle it; lifting straight keeps drips inside the collar.
- Set the blade assembly down on its flat top, blades pointing down and away from you, or straight into the sink if you’re washing it immediately.
At this point the cup is open and you can drink from it, pour it, or screw on a to-go lid if your set came with one.
Opening It Without Making A Mess
The blade collar holds a small pool of liquid in its underside after you remove it. Two habits prevent the mess.
First, remove the blade over the sink or over a bowl, not over the counter, and not over your phone. Second, once the blade is off, immediately set it flat-side-down so the residual liquid stays trapped in the recess instead of running down your wrist.
If you blended something thick like nut butter or a protein shake with frozen fruit, expect more residue. Let the blade assembly sit in warm soapy water for five minutes before you rinse it — this softens the film so you aren’t scrubbing around sharp edges.
Opening The Cup If The Blade Is Already Off
If you already removed the blade and now need to open the cup itself, there’s nothing to open. The cup is a single open-topped vessel once the blade collar is off. What people usually mean here is that they want to get the cup off the base, which is the lift-straight-up motion described above.
Why Your Nutribullet Feels Stuck Shut
A blade collar that won’t turn is the single most common complaint, and it almost never means the unit is broken.
| Symptom | Likely cause | Fix |
|---|---|---|
| Collar spins but never releases | Cross-threaded on last assembly | Press down firmly while twisting counterclockwise |
| Collar won’t move at all | Over-tightened by hand | Wrap a rubber band or dish glove around the collar for grip |
| Feels glued | Dried smoothie or nut butter in the threads | Soak the whole cup upside down in warm water 10 min |
| Suction resistance | Hot contents created a vacuum as they cooled | Run warm water over the outside of the collar |
| Collar cracked or stripped | Threads deformed from dishwasher heat | Replace the blade assembly; don’t force it |
Warning: Never run the blade assembly through a heated dishwasher dry cycle if the manufacturer’s manual for your model says hand-wash only. Heat warps the collar threads, and a warped collar is the number-one reason a Nutribullet stops sealing.
The Rubber Band Trick
If your hands are slipping, stretch a wide rubber band around the blade collar, or put on a rubber dishwashing glove. The added friction is usually enough to break a stuck thread without applying dangerous force. Twist with steady pressure rather than a sharp jerk — a sudden release with a blade in your hand is how cuts happen.
When To Stop And Call Support
Stop forcing it if you hear plastic cracking, if the collar visibly deforms, or if the cup rim itself is cracked. A cracked cup rim will never seal again, and continuing to twist can shatter it. Nutribullet sells replacement cups and blade assemblies separately, so replacing a damaged part is usually cheaper than replacing the whole unit.
Opening The Motor Base Safely
Some people searching this question want to get inside the motor base itself — to check a fuse, reseat a loose connection, or clean out leaked liquid. This is a different procedure and a more serious one.
Unplug the unit. Then let it sit for at least 10 minutes. The motor base contains a capacitor that can hold a charge after power is cut, and the blades aren’t the only hazard in the machine.
On most Nutribullet models, the base housing is held together by screws hidden under the rubber feet on the underside. You peel back or pry out the feet, remove the screws, and the two halves of the housing separate. Some newer models use internal clips instead, which require prying along the seam with a plastic spudger — metal tools scratch the housing and can crack it.
Warning: Opening the motor base voids the warranty on most Nutribullet models. The standard warranty runs one year from purchase for the base and blade, and the company explicitly excludes damage from disassembly. If your unit is still covered, call support before you pick up a screwdriver.
What You Will Find Inside
Inside the base you’ll typically see the motor, a thermal reset or fuse, the switch assembly under the button, and the wiring harness. If the unit died mid-blend and won’t restart, a thermal cutoff is a common culprit — it trips when the motor overheats and, on some models, resets on its own after 15 to 30 minutes of cooling.
If your model has a resettable thermal switch, letting the base cool completely often restores function with no disassembly at all. Try that first.
Step-By-Step: Opening The Base
If you have decided to open the base, work on a clean, well-lit surface with a small dish for screws so nothing rolls away.
- Unplug the unit and wait 10 minutes.
- Remove the cup and blade assembly and set them aside.
- Turn the base upside down on a towel.
- Locate the rubber feet — usually three or four.
- Pry each foot out gently with a plastic tool or a flathead wrapped in tape.
- Remove the screws revealed underneath.
- Check the seam for additional screws hidden under labels or the cord wrap.
- Gently separate the housing halves, keeping the seam vertical so nothing falls out.
- Photograph the wiring before you touch anything.
- Make your repair, then reassemble in reverse order.
Pro Tip: Take the photo before you disconnect anything. Reassembly is where most DIY repairs fail, and a single photo of the original wiring layout prevents it.
Models And Their Differences
Nutribullet has sold several generations, and the opening procedure varies slightly.
| Model | Blade release | Base access | Notes |
|---|---|---|---|
| Nutribullet 600 / Pro 900 | Counterclockwise ¼ turn | Screws under feet | Most common, well documented |
| Nutribullet Pro 1000 / Pro 1200 | Counterclockwise ¼ turn | Screws under feet | Slightly larger cup threads |
| Nutribullet Rx | Counterclockwise ¼ turn | Screws under feet | Includes a heating cycle; let cool longer |
| Nutribullet Baby | Counterclockwise ¼ turn | Screws under feet | Smaller cups, same thread direction |
| Nutri Ninja (different brand) | Counterclockwise ¼ turn | Varies | Not a Nutribullet; don’t assume parts swap |
The thread direction is consistent across the Nutribullet line: counterclockwise to loosen, which is the standard right-hand thread most people already expect. If a collar feels like it’s tightening when you twist counterclockwise, stop — you may be holding the assembly upside down, or you may have a different brand in hand.
Cleaning Before You Reassemble
Opening the blender is also the moment to clean the parts you can’t reach when it’s assembled.
Hand-wash the cup, blade collar, and lid in warm soapy water. Use a bottle brush for the cup and a small brush for the underside of the blade collar, where pulp collects in the recess around the shaft. Rinse thoroughly — soap residue tastes terrible in your next smoothie.
For the motor base, wipe the exterior with a damp cloth only. Never submerge the base, and never run water into the vents or the button housing. If liquid leaked into the base, that’s a legitimate reason to open it, but let everything dry completely — 24 hours isn’t excessive — before you plug it back in.
Warning: Don’t put the blade assembly in the dishwasher unless your model’s manual specifically says it’s dishwasher-safe. Even then, top-rack only. Heat and harsh detergent degrade the collar and dull the blades.
Common Problems After Opening
Once you have the unit open, a few issues come up repeatedly.
The Collar Will Not Thread Back On
You have almost certainly cross-threaded it. Set the collar on the cup rim and turn it clockwise while pressing down lightly. If it catches immediately and turns smoothly, it’s seated correctly. If it binds within the first few degrees, back it off and start again. Never force it — you’ll strip the plastic threads and the cup will leak from then on.
The Base Will Not Reassemble Flush
Check that no wires are pinched along the seam and that the gasket, if your model has one, is seated in its channel. A base that won’t close flush usually has a wire trapped between the halves.
The Unit Still Will Not Start
If you opened the base to fix a dead unit and it still doesn’t run, the problem may be the wall outlet, the cord, or the switch assembly rather than the fuse. Test the outlet with another appliance first. If the outlet is fine and the unit is under a year old, contact Nutribullet support — the warranty replacement process is usually straightforward.
Related guides
- How To Charge a Nutribullet Portable Blender
- How To Open Ninja Blender Base: Step-by-Step Removal Guide
Frequently Asked Questions
Does a Nutribullet blade unscrew or pull off?
It unscrews. Grip the cup in one hand and the blade collar in the other, then twist the collar counterclockwise about a quarter turn until it stops. After that, lift the blade assembly straight up and off the cup. Don’t pull before you have twisted — pulling a threaded collar damages the threads.
Why can’t I get my Nutribullet blade off?
The usual reasons are over-tightening, dried residue in the threads, or a vacuum formed by hot contents cooling inside a sealed cup. Soak the cup upside down in warm water for ten minutes, wear a rubber glove for grip, and twist counterclockwise with steady pressure rather than a sudden jerk.
Can I open the Nutribullet motor base myself?
Yes, on most models, but it voids the warranty. You unplug the unit, wait at least ten minutes for the capacitor to discharge, pry out the rubber feet on the underside, and remove the screws hidden beneath them. Some newer models use internal clips instead of screws, which are harder to release without cracking the housing.
How do I open a Nutribullet that’s stuck on the base?
The cup doesn’t screw onto the base, so there’s nothing to unscrew. Grip the cup body and pull straight up. If it resists, press down slightly first to clear the locking tabs, then lift. Never twist the cup while the blade is attached — that only loosens the blade collar.
Is it safe to put the blade assembly in the dishwasher?
Only if your specific model’s manual says it’s dishwasher-safe, and then only on the top rack. Heat and harsh detergent warp the plastic collar and dull the blades over time. Hand-washing in warm soapy water takes about a minute and keeps the assembly sealing properly for years.
How long should I wait before opening the base after unplugging?
At least ten minutes. The motor base contains a capacitor that can retain a charge after the cord is pulled. Ten minutes is a reasonable minimum; if you’re opening the base to deal with leaked liquid, wait longer and make sure everything is completely dry before reassembling and plugging back in.
Conclusion
Once you have the blade collar off, the hard part is done — rinse the cup, hand-wash the blade assembly in warm soapy water, and set both upside down to dry before your next blend. If the collar fought you on the way off, thread it back on loosely next time rather than cranking it down, and it will release with a quarter turn every time.