How To Make Cold Foam With Immersion Blender: Easy Guide
If you love cold coffee drinks, you’ve probably seen cold foam on top of iced lattes and cold brew at popular cafes. This smooth, creamy topping makes any iced drink feel special—like a treat. The good news? You don’t need expensive machines or fancy equipment to make cold foam at home. An immersion blender is all you need, and it’s a tool many kitchens already have.
Making cold foam with an immersion blender is easy, fast, and gives you café-level results. In this guide, you’ll learn exactly how to do it, why immersion blenders work so well, and how to make your cold foam even better.
You’ll find step-by-step instructions, ingredient tips, troubleshooting advice, and ideas for customizing your foam. Whether you’re a coffee beginner or a home barista, you’ll soon be whipping up cold foam like a pro—without spending extra money or wasting time.
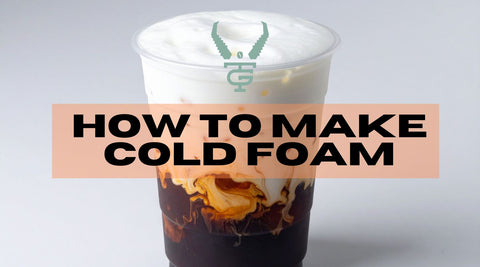
What Is Cold Foam?
Cold foam is a silky, airy topping made from milk or cream. It’s used mostly for iced coffee and tea drinks. Unlike hot foam, which is made with steam and used for lattes or cappuccinos, cold foam is created without heat. This keeps your drink cool and gives a refreshing texture.
The key to cold foam is frothing milk so it becomes thick and holds its shape. The foam floats on top of cold drinks, adding a creamy layer that slowly mixes in as you sip. It tastes slightly sweet and feels light, not heavy. Many cafes use special machines to make cold foam, but you can get similar results with an immersion blender.
Why Use Cold Foam?
- It makes cold drinks smoother and richer.
- It adds a visual “wow” factor.
- It can be flavored for more variety.
- It’s a lower-calorie option compared to whipped cream.
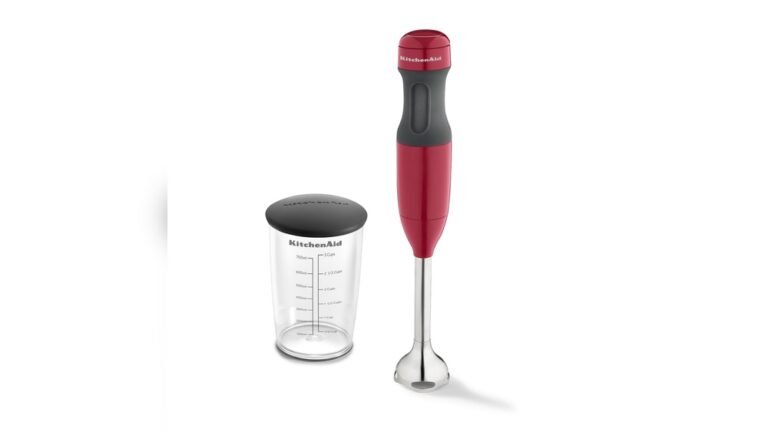
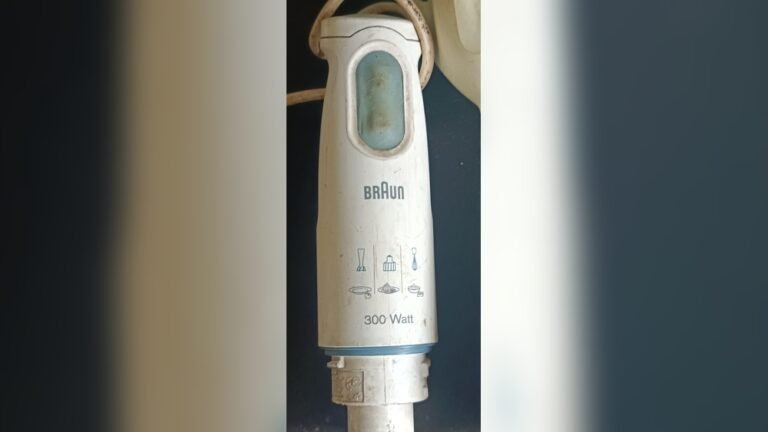
Why Choose An Immersion Blender?
Immersion blenders are sometimes called stick blenders or hand blenders. They’re simple devices with a blade at the end. You hold the blender and dip it into the food or drink you want to mix.
Key Advantages
- Affordable: You can find good models for $20–$40.
- Easy to clean: Most blades and shafts are dishwasher-safe.
- Versatile: Useful for soups, sauces, smoothies, and more.
- Fast: Froths milk in less than a minute.
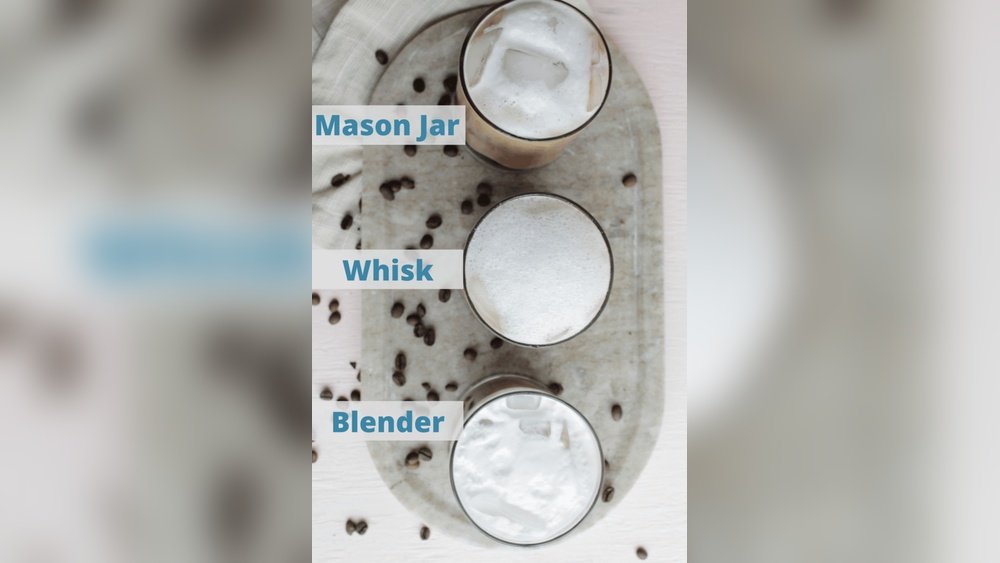
How Does It Compare To Other Tools?
Let’s look at how immersion blenders stack up against other common milk frothing tools.
| Tool | Ease of Use | Foam Quality | Cost | Cleaning |
|---|---|---|---|---|
| Immersion Blender | Easy | Excellent | Low | Simple |
| Milk Frother Wand | Easy | Good | Low | Simple |
| French Press | Moderate | Good | Low | Moderate |
| Blender | Easy | Very Good | Medium | Moderate |
| Steam Wand | Hard | Excellent | High | Hard |
Immersion blenders are a smart choice because they balance foam quality, price, and convenience. They make foam quickly and reliably, and you can use them for many other kitchen tasks.
Choosing The Right Ingredients
The main ingredient for cold foam is milk, but not all milk types give the same results. To get the best foam, you need to know which milk works and what extras you can add.
Milk Options
Here’s a quick comparison of popular milk types:
| Milk Type | Foam Quality | Flavor | Calories (per 1/2 cup) |
|---|---|---|---|
| Skim Milk | Excellent | Light | 40 |
| 2% Milk | Good | Creamy | 60 |
| Whole Milk | Moderate | Rich | 75 |
| Non-Dairy (Oat, Almond) | Varies | Depends | 30–80 |
| Heavy Cream | Very Thick | Very Rich | 200 |
Skim milk foams best because it has more protein and less fat. Fat makes foam collapse faster. If you want richer flavor, try 2% or whole milk—but the foam will be softer. Non-dairy milks like oat or almond can work, but results depend on the brand. Look for “barista” versions, which are made to foam.
Sweeteners And Flavors
You can add sweetness and flavors to your cold foam. Here are common options:
- Simple syrup: Dissolves easily.
- Sugar: Use superfine sugar for best results.
- Honey: Adds mild sweetness.
- Vanilla extract: Classic café flavor.
- Cinnamon or cocoa powder: Sprinkle for extra aroma.
Some cafes use flavored syrups (like caramel or hazelnut) for variety. Just add a small amount to avoid thinning the foam.
Temperature Matters
Cold foam must be made with chilled milk. If milk is warm, it won’t foam well. Keep your milk in the fridge until you’re ready to blend. For best results, use milk between 35–40°F (2–4°C).
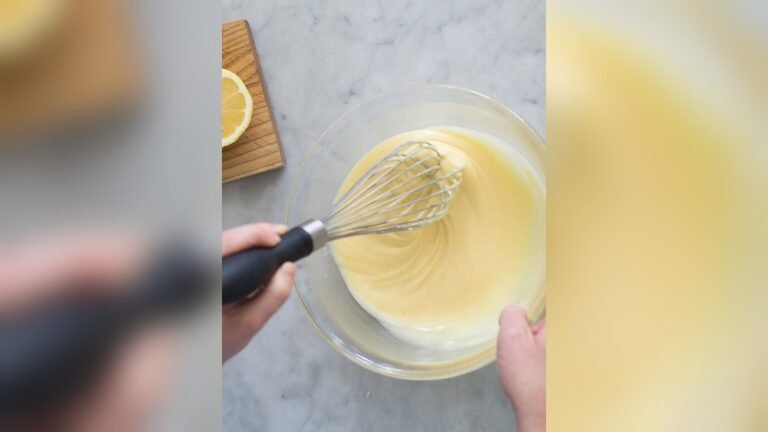
Step-by-step: Making Cold Foam With An Immersion Blender
Let’s get practical. Here’s the exact process for making cold foam at home.
Ingredients
- ½ cup chilled milk (skim milk recommended)
- 1–2 teaspoons sweetener (optional)
- ½ teaspoon vanilla extract (optional)
- Ice (for serving with coffee)
Equipment
- Immersion blender
- Tall, narrow container (a drinking glass works)
- Measuring cups/spoons
Instructions
- Pour chilled milk into your container. Use a tall glass to prevent splashing.
- Add sweetener and flavorings if desired. Mix gently with a spoon.
- Insert the immersion blender into the milk. Make sure the blade is fully submerged.
- Blend on low speed first. Move the blender up and down slowly. This pulls in air and starts foam formation.
- Increase speed to high for 30–45 seconds. Continue moving the blender up and down. You’ll see thick foam forming.
- Stop blending when the foam is thick and glossy. It should hold its shape for a few seconds.
- Spoon the foam onto your iced coffee or tea. Add ice if desired.
Practical Tips
- If your foam is thin, blend a bit longer.
- For extra thickness, add a tablespoon of heavy cream.
- Clean the blender immediately after use to prevent milk from sticking.
- Use a glass with straight sides. Rounded bowls make blending harder.

Credit: www.amazon.sg
Common Mistakes And Troubleshooting
Cold foam is easy, but beginners sometimes run into trouble. Here are common mistakes—and how to fix them.
Mistake 1: Foam Is Too Thin
Why it happens: Milk is not cold enough, or you used whole milk.
Solution: Use very cold skim or 2% milk. Chill your container before blending.
Mistake 2: Foam Collapses Quickly
Why it happens: Too much fat, or not enough blending.
Solution: Blend longer. Try skim milk. Avoid adding too much syrup or cream.
Mistake 3: Blender Splashes Milk Everywhere
Why it happens: Container is too wide or shallow.
Solution: Use a tall glass. Keep the blender head under the milk.
Mistake 4: No Foam Forms At All
Why it happens: Milk is warm, or blender speed is too low.
Solution: Use milk straight from the fridge. Start blending on low, then go to high.
Mistake 5: Foam Tastes Bland
Why it happens: No sweetener or flavor added.
Solution: Add a small amount of vanilla or syrup.
Customizing Your Cold Foam
Cold foam doesn’t have to be plain. You can make many creative versions with simple tweaks.
Flavor Variations
- Vanilla cold foam: Add ½ teaspoon vanilla extract.
- Caramel cold foam: Mix in 1 teaspoon caramel syrup.
- Chocolate cold foam: Add 1 teaspoon cocoa powder and a pinch of sugar.
- Cinnamon cold foam: Sprinkle cinnamon and sugar before blending.
- Matcha cold foam: Mix in ½ teaspoon matcha powder.
Dairy-free Options
Many people want dairy-free cold foam. Here’s how to make it work.
- Use oat milk barista blend for best results.
- Almond and soy milk can foam, but results vary.
- Add a pinch of xanthan gum (1/8 teaspoon) to thicken non-dairy foam.
Extra Rich Foam
For special occasions, you can make extra creamy foam.
- Blend ¼ cup heavy cream with ¼ cup milk.
- Add a dash of salt for depth.
- Sweeten to taste.
Fun Toppings
Cold foam can be topped with extras:
- Chocolate shavings
- Crushed cookies
- Sea salt flakes
- Toasted coconut
These add texture and flavor, making your drink feel like a dessert.
Using Cold Foam In Drinks
Cold foam is most popular with iced coffee, but it works for many drinks.
Best Drinks For Cold Foam
- Iced coffee: Classic pairing.
- Cold brew: The smooth taste is perfect with foam.
- Iced latte: Adds creaminess without extra milk.
- Iced tea: Try with black or green tea.
- Iced matcha: Makes matcha less bitter.
- Milkshakes: Float cold foam for a fun twist.
- Cocktails: Some bartenders use cold foam for layered drinks.
How To Layer Cold Foam
To get the café look, pour cold foam slowly over ice. Use a spoon to float foam on top. The foam should sit above the drink, then gradually mix in as you sip.
Cleaning And Maintenance Tips
An immersion blender is easy to clean, but milk can stick if you wait too long.
Cleaning Steps
- Unplug the blender.
- Remove the blending shaft.
- Rinse immediately with warm water.
- Wash with dish soap and a sponge.
- For tough spots, use a brush or dishwasher.
Extra Tips
- If you use flavored syrups, clean the shaft extra well to prevent sticky residue.
- Dry all parts fully before storing.
- Check for cracks or loose parts regularly.
Proper cleaning keeps your blender working longer and prevents bad smells.
Comparing Immersion Blender Brands
If you don’t have an immersion blender yet, here’s a comparison of popular brands.
| Brand | Power (Watts) | Price (USD) | Features | Durability |
|---|---|---|---|---|
| Breville | 240 | $99 | Variable speed, ergonomic grip | High |
| KitchenAid | 200 | $60 | Easy twist, dishwasher safe | Medium |
| Hamilton Beach | 175 | $35 | Basic, lightweight | Medium |
| Mueller | 500 | $40 | Turbo mode, stainless steel | Medium |
| BLACK+DECKER | 150 | $30 | Compact, budget | Low |
If you’re buying new, look for powerful motors, comfortable grips, and easy cleaning features.
Cold Foam Vs. Whipped Cream
You might wonder how cold foam compares to whipped cream. Both add creaminess, but they’re very different.
Key Differences
- Calories: Cold foam is lower calorie (40–75 per serving) vs whipped cream (100–200).
- Texture: Cold foam is light and airy, whipped cream is thick and rich.
- Taste: Cold foam is mildly sweet; whipped cream is sweeter.
- Stability: Cold foam melts into drinks, whipped cream floats longer.
Cold foam is a healthier choice for everyday drinks. Whipped cream is best for desserts.

Credit: www.homegrounds.co
Non-obvious Insights
- Protein matters more than fat: Many beginners think more fat means better foam. Actually, milk proteins are what trap air and create lasting foam. That’s why skim milk foams best.
- Blend in short bursts: Instead of blending for a long time, use short pulses with the immersion blender. This creates tighter, more stable bubbles.
- Chill your blending container: Not just the milk—chill the glass or cup too. This helps foam stay thick.
- Xanthan gum for non-dairy: A tiny pinch of xanthan gum makes oat or almond milk foam like dairy. Most home baristas don’t know this trick.
- Don’t over-blend: If you blend too long, foam becomes dry and separates. Stop when it’s shiny and thick.
Cold Foam For Parties And Large Batches
Making cold foam for one drink is easy. But what if you want to serve a group?
How To Scale Up
- Use a larger container (like a pitcher).
- Blend in batches, no more than 2 cups at a time.
- Keep foam chilled in the fridge until serving.
- Serve within 1 hour for best texture.
Serving Tips
- Spoon foam onto each drink right before serving.
- Offer flavored syrups so guests can customize.
- Use clear glasses to show off the layers.
Cold Foam For Kids
Kids love cold foam, especially on chocolate milk or fruit drinks. You can make kid-friendly foam by:
- Using chocolate milk or strawberry milk as a base.
- Adding sprinkles or mini marshmallows.
- Avoiding caffeine and using fruit juice.
This makes healthy, fun drinks for parties or after school.
Cold Foam For Health-conscious Drinkers
Cold foam is a smart choice for those watching calories or sugar. Here’s how to make it healthier:
- Use skim or low-fat milk.
- Skip syrup; use a drop of vanilla for flavor.
- Add stevia or monk fruit instead of sugar.
- Try unsweetened almond milk for fewer calories.
One serving of cold foam can be as low as 35 calories.
Storage And Shelf Life
Cold foam is best used right away. If you need to store it:
- Keep in the fridge for up to 2 hours.
- Foam will start to collapse after 1–2 hours.
- Stir gently before using.
Don’t freeze cold foam—it loses texture and separates.
Science Behind Cold Foam
Cold foam is possible because milk proteins form a network that traps air. This structure is stronger when milk is cold. Fat can weaken the foam, so lower fat milks are better. Immersion blenders force air into the milk quickly, creating a stable foam.
A study from the Journal of Dairy Science showed that milk foams are most stable at 35°F and with skim milk. Non-dairy milks need added stabilizers like xanthan gum to foam well.
Credit: twistedgoatcoffee.com
How Cafes Make Cold Foam
Cafes use special machines called aerators or frothers. These spin milk at high speed, injecting air. Some machines use pressure to make foam even thicker. Most cafes use skim milk and add flavored syrups.
You can get similar results at home with an immersion blender, especially if you use chilled milk and pulse the blender.
Environmental Impact
Making cold foam at home is more eco-friendly than buying drinks at cafes:
- Less packaging waste
- No disposable cups or lids
- You can choose organic or plant-based milks
This small change helps reduce your carbon footprint.
Cost Savings
Buying cold foam drinks at a café costs $4–$6 per drink. Making cold foam at home costs less than $0. 50 per serving.
If you make cold foam 3 times a week, you save $600–$900 per year.
Fun Cold Foam Recipes
Here are three unique cold foam recipes to try:
1. Salted Caramel Cold Foam
- ½ cup skim milk
- 1 teaspoon caramel syrup
- Pinch of sea salt
- Blend and spoon onto cold brew
2. Honey Cinnamon Cold Foam
- ½ cup oat milk (barista blend)
- 1 teaspoon honey
- ½ teaspoon cinnamon
- Blend and spoon onto iced latte
3. Matcha Vanilla Cold Foam
- ½ cup almond milk (barista blend)
- ½ teaspoon matcha powder
- ½ teaspoon vanilla extract
- 1 teaspoon sugar
- Blend and spoon onto iced green tea
Cold Foam For Specialty Diets
Cold foam can fit many diets:
- Vegan: Use oat or almond milk and plant-based sweeteners.
- Low sugar: Use unsweetened milk and stevia.
- Keto: Use heavy cream and monk fruit sweetener.
- Gluten-free: Most milks are gluten-free, but check labels on flavored syrups.
Cold Foam For Home Baristas
If you want café-level drinks at home, master cold foam. Here’s how:
- Practice with different milk types.
- Experiment with flavorings.
- Use clear glasses for visual appeal.
- Take photos for social media—cold foam looks impressive.
Advanced Tips For Perfect Cold Foam
Use The Right Container
Tall, narrow containers work best. Wide bowls make blending harder and foam less stable.
Start Slow, Then Go Fast
Begin blending at low speed, then increase. This helps form small bubbles.
Use Short Pulses
Don’t blend continuously. Short pulses create tighter foam.
Stop At The Right Time
Foam should be thick and glossy. Stop blending as soon as it holds shape.
Cold Foam As A Dessert Topping
Cold foam isn’t just for drinks. Try it on:
- Fruit salads
- Pudding
- Ice cream
- Cakes
It adds lightness without being too rich.
Cold Foam Around The World
Cold foam is mostly popular in the US and Canada, but other countries are starting to use it. In Europe, cafés serve it with iced espresso. In Asia, matcha cold foam is common. Each region uses different flavors and milks.
Frequently Asked Questions
How Long Does Cold Foam Last?
Cold foam is best used right away. You can store it in the fridge for up to 2 hours, but it will lose thickness and start to separate. For best texture, make fresh foam each time.
Can I Make Cold Foam Without An Immersion Blender?
Yes, you can use a milk frother wand, French press, or regular blender. Each tool gives slightly different results. Immersion blenders make foam quickly and are easy to clean.
Is Cold Foam Healthier Than Whipped Cream?
Usually yes. Cold foam is made with milk and has fewer calories and less sugar than whipped cream. You can make cold foam with skim milk for even fewer calories.
What’s The Best Milk For Cold Foam?
Skim milk is best for stable, thick foam. 2% milk gives a creamier taste. For dairy-free options, oat milk barista blend works well. If you want extra richness, mix milk with a little heavy cream.
Can I Use Flavored Syrups In Cold Foam?
Yes. Add flavored syrups like vanilla, caramel, or hazelnut before blending. Start with a small amount to keep foam thick. Too much syrup can make foam collapse.
If you want more science on milk foaming, check the Journal of Dairy Science.
Whether you’re making cold foam for yourself or impressing guests, an immersion blender makes the process quick and easy. With the right milk, flavors, and technique, you’ll have café-style cold foam in less than a minute—and your drinks will taste better than ever.
Cold foam is one of those small upgrades that changes your coffee routine, saves money, and adds fun to your kitchen. Try it today and see the difference for yourself.