How To Use An Immersion Blender Without Making A Mess: Pro Tips
Using an immersion blender seems simple—just plug it in and blend. But if you’ve ever ended up with soup on your walls or smoothie on your shirt, you know it’s not always that easy. Many people struggle to use this handy kitchen tool without making a mess.
Whether you’re blending soups, sauces, or smoothies, splatters can turn cooking into a cleaning nightmare. Understanding how to use an immersion blender correctly can save you time, keep your kitchen clean, and make your food taste better.
This guide will show you how to use an immersion blender without making a mess. You’ll learn the best techniques, smart tips, and common mistakes to avoid. We’ll cover everything from choosing the right container to cleaning up after blending.
By the end, you’ll feel confident using your immersion blender—no matter what you’re making.
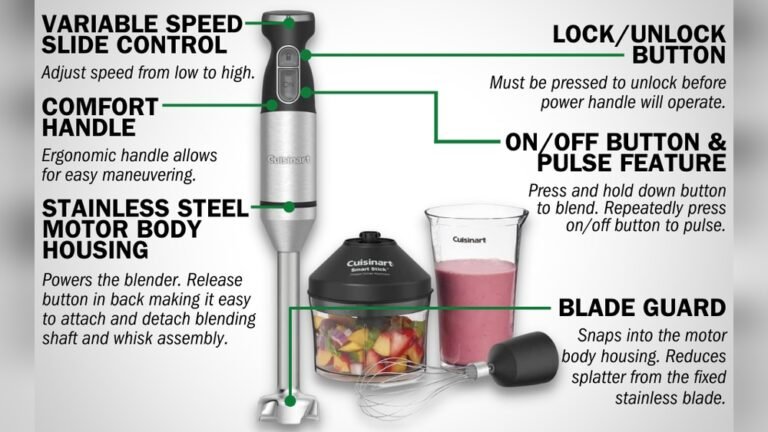
What Is An Immersion Blender?
An immersion blender, also called a stick blender or hand blender, is a kitchen tool for blending, pureeing, or mixing food directly in the container. Unlike a traditional blender, it has a long stick shape with blades at the end. You hold it in your hand and dip it into the food.
The main advantage is convenience. You don’t need to transfer hot soup or sauce to another blender. Instead, you can blend directly in the pot or bowl. This saves time and reduces dishes.
Common Uses
- Pureeing soups right in the pot
- Making smoothies in a glass or pitcher
- Mixing sauces, dressings, and mayonnaise
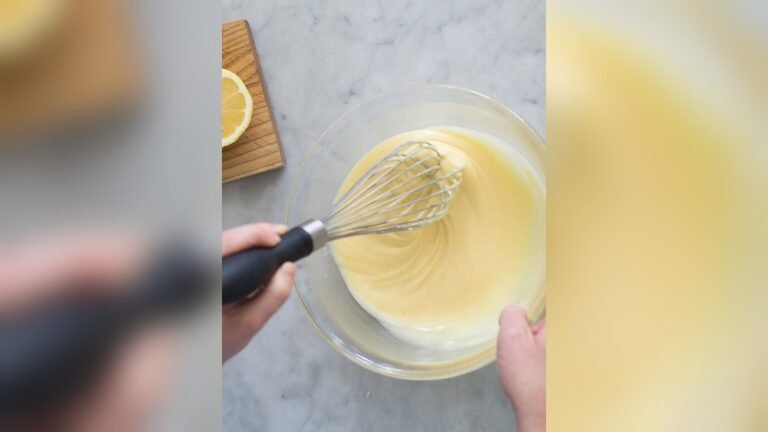
- Whipping cream or eggs
Why Mess Happens
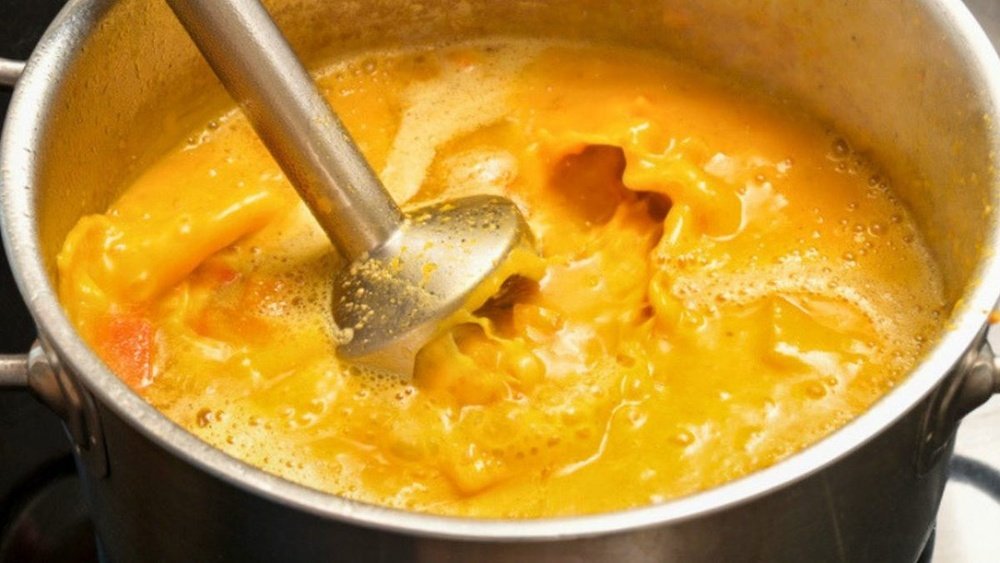
Immersion blenders can create splatters if the blades move too fast or if you use the wrong container. The blades spin quickly, pushing liquid outward. If the container is shallow or you move the blender up and down too fast, food can splash everywhere.
Choosing The Right Container
Using the correct container is the first step to prevent mess. The shape and size matter more than you might think.
Container Depth
A deep container keeps food from splattering. For most blending tasks, choose a container that is at least twice as deep as the amount of food you’re blending. This gives enough space for the liquid to move without overflowing.
Container Shape
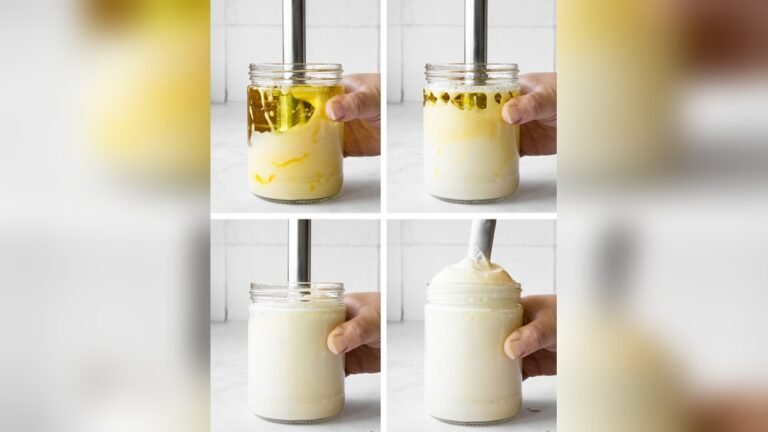
Wide, shallow bowls are not ideal. Instead, use narrow, tall containers. Many immersion blenders come with a blending cup designed for this purpose. If you’re blending soup in a pot, make sure it’s deep enough.
Material
Glass, stainless steel, or heavy plastic containers are best. Thin plastic can crack or move while blending. Avoid lightweight bowls—they can tip over.
Comparison Table: Container Options
| Container Type | Depth | Mess Risk | Best For |
|---|---|---|---|
| Deep Pot | High | Low | Soup, sauces |
| Blending Cup | Medium | Low | Smoothies, dressings |
| Wide Bowl | Low | High | Light mixing |
| Glass Jar | Medium | Medium | Small batches |

Credit: kitchenaid.com.au
Preparing Food Before Blending
Proper preparation reduces splatter and helps your blender work better.
Cut Food Into Small Pieces
Large chunks can jam the blades and cause the blender to jerk, leading to spills. Cut vegetables, fruits, or other ingredients into bite-sized pieces before blending.
Avoid Overfilling
Fill containers only halfway. Overfilling increases the risk of splatter because there’s less space for the liquid to move.
Remove Excess Liquid
If your mixture is very watery, blend in short bursts. Too much liquid can splash easily.
Temperature Matters
Hot liquids can splatter more than cold ones. If you’re blending hot soup, let it cool slightly before blending, or blend in small batches.
Setting Up Your Immersion Blender
Before you start, check a few things to make blending safe and clean.
Assemble Properly
Make sure the blade attachment is locked in place. Loose attachments can cause accidents.
Check Cord Placement
Keep the cord away from the container. If it hangs over the pot, it can drag food or get wet.
Start With The Blender Off
Place the blender in the food before turning it on. If you turn it on above the food, it will spray.
Positioning And Holding The Blender
How you hold and move the immersion blender matters for both safety and cleanliness.
Keep Blades Submerged
Always keep the blades fully under the surface of the food while blending. If you lift the blender while it’s spinning, it will spray.
Hold Steady
Hold the blender straight up and down. Tilted blades can splash food sideways.
Use Gentle Movements
Move the blender slowly. If you need to blend different parts, lift it out of the mixture with the power off, then reposition.
Grip Control
Many blenders have speed control buttons. Start with the lowest speed. Higher speeds can create more splatter.
Blending Techniques To Avoid Mess
Technique makes the difference between a clean kitchen and a disaster.
Start Slow
Begin at the lowest speed and increase gradually if needed. Sudden high speed can push food outward.
Pulse Instead Of Continuous Blending
Use the pulse function (short bursts) instead of running the blender nonstop. This lets you control the process and reduce splatter.
Keep The Blender Vertical
Keep the blender straight up and down. Angling the stick can push food to the sides.
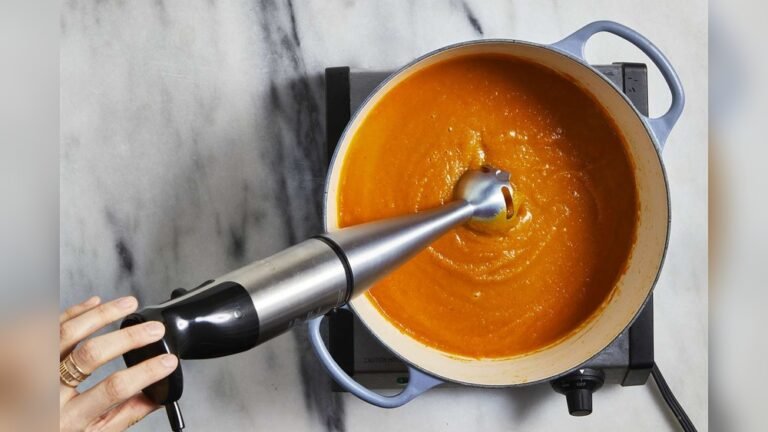
Blend From The Center
Start blending in the center of the container. This keeps splatter away from the edges.
Don’t Overblend
Stop as soon as you reach the desired texture. Overblending heats up the mixture and may cause bubbling and splashing.
Avoid Up-and-down Motions
Quick up-and-down movements cause splatter. If you need to move the blender, turn it off before lifting.
Managing Splatter With Accessories
Some immersion blenders come with accessories designed to reduce mess.
Splash Guards
A splash guard is a cover that fits over the blade. It keeps food from splashing up. If your blender has one, use it for liquids.
Blending Cups
Many brands include a tall blending cup. These cups are sized to minimize splatter. For smoothies or dressings, use the cup that came with your blender.
Comparison Table: Accessories
| Accessory | Mess Prevention | Best Use |
|---|---|---|
| Splash Guard | High | Soups, sauces |
| Blending Cup | Medium | Smoothies |
| Whisk Attachment | Low | Eggs, cream |
Cleaning Up After Blending
Even with the best technique, some small mess is almost unavoidable. Cleaning up quickly prevents stains and keeps your kitchen safe.
Unplug First
Always unplug the blender before cleaning. This prevents accidents.
Clean Attachment Immediately
Remove the blade attachment and wash it right away. Food dries quickly, making it harder to clean later.
Wipe Surfaces
Use a damp cloth to wipe any splatter on the counter, stove, or walls. Don’t let food dry—clean it immediately.
Deep Cleaning
Some blade attachments are dishwasher safe. Check your manual. If not, wash with hot water and soap.
Tips For Hard-to-clean Areas
Food can get stuck under the blade guard. Use a small brush to reach these areas. Avoid soaking the whole blender—water can damage the motor.
Common Mistakes And How To Avoid Them
People often make the same errors when using immersion blenders. Knowing these mistakes helps you avoid them.
1. Starting With The Blender Above The Food
Turning on the blender before it’s in the food sprays everything. Always start with the blades submerged.
2. Using Too Shallow A Container
A shallow bowl gives food room to escape. Use a deep container.
3. Overfilling The Container
Too much food means less space for movement. Fill containers halfway.
4. Lifting While Blending
If you lift the blender while it’s on, splatter happens. Turn off before moving.
5. Using High Speed From The Start
High speed creates turbulence. Start slow and increase as needed.
6. Not Cutting Food Small Enough
Large chunks block the blades. Cut food small.
7. Not Using Accessories
Splash guards and blending cups help. Use them if available.
8. Ignoring Cleanup
Letting splatter dry makes cleaning harder. Clean up right away.
Advanced Tips For Mess-free Blending
If you want to go beyond basic blending, try these advanced tips.
Use A Lid With A Hole
Some containers have lids with holes for the blender. This reduces splatter and keeps your kitchen clean.
Cover With A Towel
If you don’t have a lid, cover the container with a kitchen towel. Leave a gap for the blender stick. This blocks splatter.
Blend In Batches
For large amounts, blend in smaller batches. This gives more control and reduces mess.
Let Hot Liquids Cool
Heat increases splatter risk. Let soup or sauce cool for 5–10 minutes before blending.
Use The Right Speed
Different foods need different speeds. For thick mixtures, higher speed is fine. For thin liquids, stick to low speed.
Check Blade Guard Design
Some immersion blenders have blade guards with holes or slots. These designs help reduce suction and splatter.
Credit: www.thekitchn.com
Real-life Examples And Data
Mess-free blending isn’t just theory. Many users report big differences when they follow these tips.
A survey by Consumer Reports found that immersion blenders are among the top 3 most-used kitchen appliances for soup and smoothies. Yet, 61% of users said they had experienced splatter problems at least once.
One food blogger tested blending soup in a deep pot versus a shallow bowl. The deep pot had almost no mess, while the shallow bowl left splatter on the counter and clothes.
Professional chefs use immersion blenders daily. They always blend in deep containers, start slow, and use accessories. This saves them cleaning time and keeps kitchens running smoothly.
How To Use Your Immersion Blender Step By Step
Here’s a simple step-by-step guide for mess-free blending:
- Choose a deep container (pot, blending cup, or jar).
- Cut food into small pieces and fill the container halfway.
- Assemble the blender and check blade attachment.
- Place the blender in the food with blades fully submerged.
- Start at the lowest speed and pulse in short bursts.
- Blend from the center and avoid up-and-down motions.
- Increase speed only if needed for thicker mixtures.
- Turn off before lifting or moving the blender.
- Clean blade attachment immediately after use.
- Wipe any splatter on surfaces right away.
Following these steps will keep your kitchen clean and your food smooth.
:max_bytes(150000):strip_icc()/sea-primary-immersion-blenders-sep-24-rkilgore-0658-89167e1e4bd44afb93d9c847674b09e4.jpeg)
Credit: www.seriouseats.com
Comparing Immersion Blender Models For Mess Control
Different brands and models offer features that help reduce mess. Here’s a comparison of some popular options:
| Model | Speed Settings | Splash Guard | Blending Cup Included | Ease of Cleaning |
|---|---|---|---|---|
| Breville Control Grip | 15 | Yes | Yes | Easy |
| Cuisinart Smart Stick | 2 | No | Yes | Medium |
| KitchenAid KHB1231 | 2 | Yes | No | Easy |
| Hamilton Beach 59765 | 2 | No | Yes | Easy |
Features like splash guards and blending cups make a big difference. Models with more speed settings let you start slow and increase as needed.
Safety Tips When Using An Immersion Blender
Safety is as important as cleanliness. Immersion blenders have sharp blades and powerful motors.
Unplug Before Cleaning
Always unplug before removing or cleaning the blade attachment.
Don’t Touch The Blades
The blades are sharp. Avoid touching them, even when the blender is off.
Avoid Immersing The Motor
Never put the motor part in water. Only the blade attachment is washable.
Keep Children Away
Children should not use immersion blenders without supervision.
Use Heat-resistant Containers
For hot foods, use containers that can handle heat. Some plastics can melt or crack.
Immersion Blender Maintenance For Mess-free Use
Regular maintenance keeps your blender working well and helps prevent mess.
Check Blade Guard
Inspect the blade guard for cracks or buildup. Clean thoroughly to keep food from sticking.
Lubricate Moving Parts
Some models need lubrication. Check the manual.
Replace Worn Parts
If the blades get dull or the guard is cracked, replace parts. Sharp blades blend faster and cleaner.
Store Properly
Store attachments and accessories together. This prevents loss and makes setup easier.
Benefits Of Mess-free Blending
Mess-free blending isn’t just about cleanliness—it brings several benefits:
- Saves cleaning time: Less splatter means less wiping and washing.
- Keeps your kitchen safe: Wet floors or counters can cause slips.
- Improves food quality: No lost ingredients, better texture.
- Reduces waste: Less food wasted due to spills.
Non-obvious Insights For Beginners
Some things aren’t obvious when you first use an immersion blender:
- Blade guard shape matters: Guards with slots reduce suction and splatter, while solid guards can trap food and create mess.
- Blending order affects results: For layered mixtures, blend liquids first. This keeps solids submerged and reduces mess.
- Container stability is key: If your container moves while blending, it can tip and spill. Place a damp towel underneath to prevent slipping.
- Let thick mixtures rest: If blending thick soup or sauce, let it sit for a minute after blending. Bubbles settle, and splatter risk drops when you stir.
When Mess Is Unavoidable
Sometimes, mess happens even with perfect technique. Blending very hot liquids, thin soups, or large batches can still lead to splatter.
If you must blend something risky, take extra precautions:
- Use a towel or lid to cover the container.
- Blend in small batches.
- Let liquids cool before blending.
Immersion Blender Vs Traditional Blender: Mess Comparison
Immersion blenders are often less messy than traditional blenders, especially for hot foods.
| Aspect | Immersion Blender | Traditional Blender |
|---|---|---|
| Hot Food Blending | Low mess | High mess risk |
| Cleanup | Quick | More parts to wash |
| Splatter Risk | Low if used correctly | High if overfilled |
| Ease of Use | Easy | Medium |
Immersion blenders allow you to blend directly in the cooking container, reducing transfers and spills.
Practical Advisor’s Guide To Mess-free Immersion Blender Use
If you want a practical approach, here’s how to stay mess-free:
- Always choose a deep, narrow container.
- Cut food small and avoid overfilling.
- Start with blades submerged and use low speed.
- Pulse instead of blending nonstop.
- Clean attachments right away.
- Use accessories when possible.
- Cover the container if blending risky mixtures.
- Blend in batches for large amounts.
- Keep your workspace clean and organized.
A Few Words On The Right Immersion Blender
Buying the right immersion blender makes a big difference. Look for:
- Multiple speed settings: Lets you start slow.
- Splash guard: Reduces mess.
- Easy-clean design: Dishwasher-safe attachments.
- Included blending cup: Sized to prevent splatter.
Brands like Breville, KitchenAid, and Cuisinart are popular for their mess-control features. For more information, see Consumer Reports.
Frequently Asked Questions
How Do I Avoid Splatter When Blending Hot Soup?
Let the soup cool for a few minutes before blending. Use a deep pot and keep the blades submerged. Start at low speed and pulse. Cover the pot with a towel if needed.
Can I Use An Immersion Blender In Any Container?
No. Always use a container that is deep and stable. Avoid shallow bowls or lightweight containers. Tall blending cups or deep pots work best.
What Should I Do If Food Gets Stuck Under The Blade Guard?
Turn off and unplug the blender. Use a small brush or toothpick to remove food. Avoid soaking the motor. Clean blade attachments immediately after use.
Is It Safe To Blend Hot Liquids With An Immersion Blender?
Yes, but take precautions. Let liquids cool slightly, use heat-resistant containers, and start blending slowly. Cover the container with a towel if needed.
Can I Clean The Blade Attachment In The Dishwasher?
Many blade attachments are dishwasher safe, but check your manual. If not, wash by hand with hot water and soap. Never immerse the motor in water.
Mess-free blending with an immersion blender is possible with the right techniques and tools. Choose the right container, prepare your food, start slow, and clean up quickly. With practice, you’ll enjoy smooth soups, sauces, and smoothies—without the mess.