How To Put Pan Guard On Kitchenaid Immersion Blender Easily
If you love cooking, you know how helpful an immersion blender can be. Whether you’re making soups, sauces, or smoothies, the KitchenAid immersion blender is a favorite tool in many kitchens. But there’s one big worry: scratching your pots and pans. That’s where the pan guard comes in. It’s a simple plastic or silicone attachment that fits on the blade end of your immersion blender. This guard helps prevent scratches, chips, and scuffs on nonstick, stainless steel, or enamel cookware. If you’ve just bought a pan guard (sometimes called a blade guard or pot protector), you might be wondering how to put it on correctly—and how to use your blender safely afterward.
This guide will take you through every step of installing a pan guard on your KitchenAid immersion blender. You’ll also learn how to use it properly, the reasons it matters, common mistakes to avoid, tips for better blending, and even how to clean and maintain your pan guard for long life.
We’ll compare different types of pan guards, answer real user questions, and offer insights many beginners miss. By the end, you’ll feel confident using your immersion blender on any surface, without fear of damage.
Why Use A Pan Guard On Your Kitchenaid Immersion Blender?
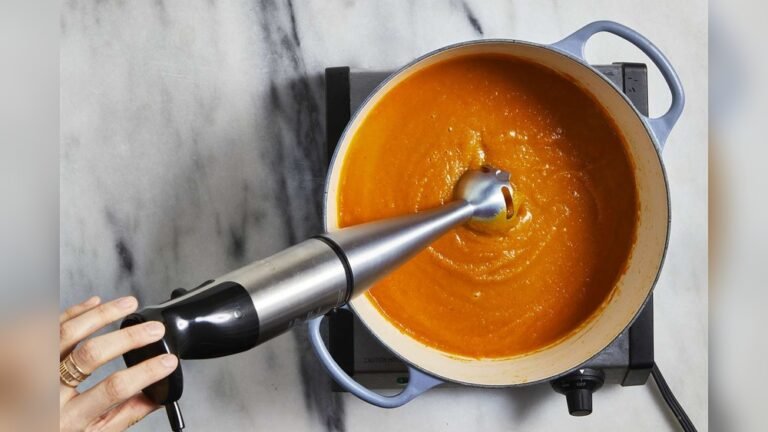
The main reason for using a pan guard is to protect your cookware. Immersion blenders have metal blades and housings that can scratch the bottom and sides of your pots and pans. This is a special problem with nonstick coatings, which can be ruined by sharp or hard tools. Even stainless steel and enamel pots can get scuffed. Once damaged, these surfaces are harder to clean and may not cook food as evenly.
But a pan guard does more than just protect your cookware:
- Prevents Scratches: The guard forms a soft barrier between the metal blender and your pan.
- Prolongs Cookware Life: By avoiding scratches, your pots and pans last longer.
- Reduces Noise: The guard dampens the sound of metal hitting metal or ceramic.
- Improves Safety: Less chance of the blender “catching” on the pan and splattering hot food.
- Easier to Use: The blender can move more smoothly across the pan’s surface.
Many people don’t realize that using an immersion blender without a guard can void the warranty on some cookware brands. Always check your pan’s care instructions. Even if you’re careful, an unguarded blender can leave tiny scratches that slowly grow into bigger problems.
A pan guard is a cheap, simple solution that protects your investment.
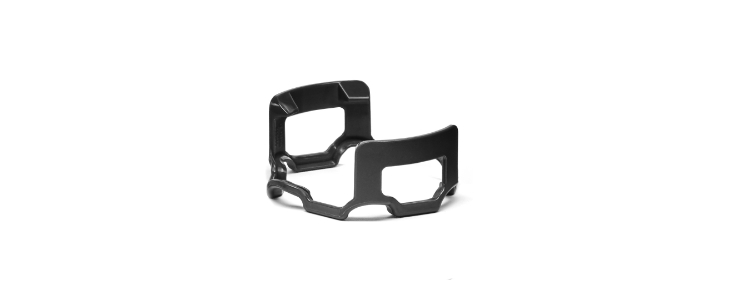
Types Of Pan Guards For Kitchenaid Immersion Blenders
Pan guards come in several styles, materials, and shapes. Not every pan guard fits every blender, so you need to choose the right one for your model. Here’s a quick look at the main types you’ll find:
| Type | Material | Fit | Pros | Cons |
|---|---|---|---|---|
| Clip-on Guard | Plastic/Silicone | Snaps onto blade housing | Easy to attach/remove, fits many models | May loosen over time |
| Twist-lock Guard | Plastic | Twists onto special grooves | Very secure fit, won’t slip | Must match exact model |
| Wrap-around Guard | Silicone | Wraps around blade bell | Flexible, good for odd shapes | Can be tricky to install |
KitchenAid makes official pan guards for their newer immersion blender models. Some third-party brands offer universal guards that fit several brands. Always check the packaging or product description to confirm compatibility with your KitchenAid model. If you’re not sure, look for the model number on your blender or check the KitchenAid website.
Credit: www.kitchenaid.com
What You Need Before Installation
Before you start, make sure you have everything ready:
- KitchenAid Immersion Blender: Unplug it before working.
- Pan Guard: Make sure it fits your model.
- Clean Workspace: A dry, flat surface is best.
- Soft Cloth: For cleaning parts if needed.
- User Manual: Optional, but helpful for checking model details.
It’s important to have clean hands and a dry area to work. If your pan guard or blender bell is dirty, wash and dry them first. Any food residue can make the guard slip or not fit well. If you lost your manual, you can find most models’ guides online at the KitchenAid support page.
How To Put A Pan Guard On Your Kitchenaid Immersion Blender
Attaching a pan guard is a simple process, but it’s easy to make mistakes if you rush or skip steps. Follow these instructions for a safe, secure fit.
Step 1: Unplug The Blender And Remove Attachments
Safety comes first. Make sure the immersion blender is unplugged. If your model has a removable blending arm, detach it from the motor unit. This makes it easier to handle and safer to work with.
Step 2: Inspect The Blade Housing
Check the bottom part of your blender (the bell-shaped housing where the blade sits). Make sure it’s clean and dry. Any leftover food or moisture can keep the guard from snapping on tightly.
- Use a soft cloth to wipe away crumbs or liquid.
- If the blade has thick residue, wash and dry it before continuing.
Step 3: Identify Guard Orientation
Most pan guards have a specific way they fit on the blender. Look for:
- Tabs or clips: These line up with notches or slots on the blender.
- Openings: Some guards have wider areas that should face the same way as the blade opening.
- Brand markings: Official KitchenAid guards often have arrows or instructions molded into the plastic.
Check the instructions that came with your guard. If there aren’t any, look at how the guard fits over the bell. It should cover the metal edges but not block the blade itself.
Step 4: Attach The Pan Guard
How you attach the guard depends on the type:
For Clip-on Guards
- Hold the pan guard in one hand and the blending arm in the other.
- Line up the tabs on the guard with the notches on the blender’s bell.
- Press the guard firmly onto the bell until you hear or feel a “click.”
- Check that the guard is secure and doesn’t move or slip.
For Twist-lock Guards
- Align the guard’s grooves with the matching ridges on the blender bell.
- Push the guard up onto the bell.
- Twist the guard gently until it locks into place.
- Test to make sure it won’t twist off easily during use.
For Wrap-around Guards
- Stretch the silicone guard slightly with both hands.
- Place it around the bell, making sure it covers all metal edges.
- Let go slowly so the guard snaps into place.
- Smooth out any bumps or folds for a snug fit.
Tip: Never force the guard too hard. If it won’t fit, double-check that you have the right size or model. Forcing a guard can break it or damage your blender.
Step 5: Double-check The Fit
Before using your blender, look closely at the pan guard:
- Is it snug, with no gaps?
- Is the blade fully exposed, with no obstruction?
- Does the guard move or wiggle? If so, try attaching it again.
A loose guard can fall off into your food or jam the blade. A guard that covers the blade will stop the blender from working well.
Step 6: Reattach Blending Arm (if Needed)
If you removed the blending arm earlier, reattach it to the motor unit. Make sure it clicks or locks into place.
Step 7: Test The Blender (without Food)
Plug in the blender and hold it over a bowl or sink. Run the blender for a few seconds to check:
- The blade spins freely without hitting the guard.
- The guard stays in place.
- There’s no strange noise or vibration.
If everything looks and sounds right, you’re ready to use your blender with confidence.
Using Your Kitchenaid Immersion Blender With A Pan Guard
Now that your pan guard is installed, you might notice some small changes in how your blender feels. The guard adds a bit of thickness, so the blender won’t sit quite as close to the bottom of your pot. That’s a good thing—it protects your pan.
But you may need to adjust your technique slightly for the best results.
Here are some practical tips for using your immersion blender with a pan guard:
- Keep the Blade Submerged: Always make sure the blade is fully covered by food or liquid. This prevents splashing and helps the blender work smoothly.
- Use a Gentle Up-and-Down Motion: Move the blender gently around the pot. Don’t force it hard against the bottom or sides.
- Avoid Overfilling Pots: Leave enough room at the top so food doesn’t splash out when you blend.
- Watch for Food Build-Up: Sometimes, food can get trapped between the guard and the blade. Stop and clean if you notice this.
- Check the Guard During Use: If the guard loosens or starts to slip, stop and reattach it.
Pro Tip: When blending hot liquids, always start on the lowest speed. Increase speed slowly. The pan guard helps prevent splashing, but you should still be careful.
Common Mistakes To Avoid
Even experienced cooks can make mistakes when using a new tool. Here are some errors to watch out for when installing or using a pan guard:
- Using the Wrong Guard Size: Not all guards fit all blenders. A loose or tight guard can fall off or break.
- Blocking the Blade: If the guard covers the blade opening, your blender won’t work well.
- Not Cleaning First: Food or oil on the blender can keep the guard from fitting right.
- Forgetting to Test: Always test the blender for a few seconds before blending food.
- Ignoring Noise or Vibration: If you hear rattling or grinding, stop and check the guard.
One less obvious mistake is storing the blender with the pan guard still attached, especially if the guard is wet. This can cause mold or bad smells over time. Always dry the guard and blender before storing.
How To Clean And Maintain Your Pan Guard
Keeping your pan guard clean is important for food safety and for keeping it working well. Most guards are dishwasher safe, but always check your product’s instructions.
Cleaning Steps
- Remove the Guard: Unplug the blender and take off the pan guard.
- Wash by Hand: Use warm, soapy water and a soft brush to clean all surfaces. Pay special attention to the inside, where food can get trapped.
- Dishwasher (if allowed): Place the guard on the top rack of your dishwasher.
- Dry Completely: Air-dry or towel dry before reattaching or storing.
Tip: If you blend sticky foods (like mashed potatoes or thick soups), check for buildup after each use. Silicone guards can stain or absorb smells, so clean them promptly.
Maintenance Tips
- Inspect for Damage: Look for cracks or tears, especially if the guard is plastic.
- Replace When Worn: If the guard no longer fits tightly, buy a new one.
- Avoid High Heat: Don’t leave silicone or plastic guards near open flames or hot pans.
Many people forget that even a small crack in the guard can let sharp edges poke through. Replace the guard at the first sign of damage.
Comparing Pan Guards: Official Vs. Third-party Options
You might be wondering whether to buy an official KitchenAid pan guard or a cheaper third-party option. Here’s a direct comparison to help you decide:
| Feature | KitchenAid Official Guard | Third-Party Guard |
|---|---|---|
| Fit | Exact match for model | Universal, may be loose/tight |
| Material Quality | High-grade plastic/silicone | Varies; may be thinner |
| Warranty Support | Usually covered | Not covered |
| Price | Higher | Lower |
| Availability | KitchenAid website, major stores | Online marketplaces |
Insider tip: If you use your immersion blender often and want guaranteed fit and safety, choose the official guard. If you have several brands of blenders or use it rarely, a third-party guard could save money—but always check reviews for fit and quality.
Troubleshooting: Pan Guard Problems And Solutions
Even with careful use, you might have issues with your pan guard. Here are some common problems and how to fix them:
The Guard Won’t Fit
- Check model compatibility: Some guards only fit certain models.
- Warm the silicone: If it’s a silicone guard, soak it in warm water to make it more flexible.
- Clean surfaces: Remove any oil or food from the blender bell.
The Guard Keeps Falling Off
- Inspect for damage: Cracks or stretched clips can stop the guard from gripping.
- Try a different brand: Some third-party guards just don’t fit well.
Food Gets Stuck In The Guard
- Blend in smaller batches: Too much food at once can clog the guard.
- Stir food first: Make sure large chunks are broken up before blending.
- Clean after each use: Don’t let food dry inside the guard.
The Blender Works Less Effectively
- Check blade clearance: A thick guard can lift the blade too far from the pan, making blending slower.
- Try a thinner guard: Some guards are bulkier than others.
Guard Warps Or Melts
- Avoid using on hot surfaces: Let pans cool slightly before blending.
- Replace warped guards: Heat-damaged guards can’t protect properly.
Non-obvious insight: If your guard warps after dishwasher use, try washing by hand. High dishwasher heat can deform some plastics over time.
Safety Tips When Using A Pan Guard
Using a pan guard makes your immersion blender safer for cookware, but you should still follow basic kitchen safety:
- Always unplug before attaching or removing the guard.
- Don’t touch the blade, even with the guard on.
- Keep children away while blending.
- Never leave the blender running unattended.
- Watch for hot splashes, especially with soups or sauces.
If you notice any change in the sound or feel of your blender, stop and check the guard. A broken or loose guard can create a safety hazard.
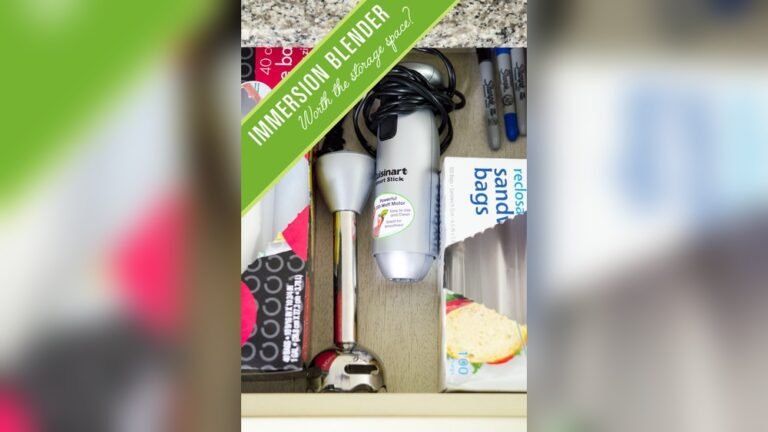
Upgrading Your Kitchen: Other Useful Immersion Blender Accessories
If you like your KitchenAid immersion blender, there are more ways to make it even better:
- Whisk Attachments: Great for beating eggs or making whipped cream.
- Chopper Bowls: Turn your blender into a mini food processor.
- Measuring Jugs: Designed for easy, splash-free blending.
- Storage Cases: Keep all your parts clean and organized.
These accessories can help you use your blender for more recipes and keep your kitchen tidy. For more information about blender accessories and care, check the official KitchenAid site.
Real-world Examples: When Pan Guards Save The Day
Sometimes, the value of a pan guard is only clear after you need it. Here are a few examples from real users:
- Saving a Nonstick Pot: “I used my immersion blender without a guard and scratched my favorite soup pot. Now, with the pan guard, I blend right in the pot with no worries.”
- Protecting an Heirloom Dutch Oven: “My enamel Dutch oven was a wedding gift. The pan guard lets me blend sauces right in the pan without chips.”
- Quieter Blending in Stainless Steel: “The guard reduced the clanging noise when making hot chocolate in a steel saucepan.”
Some users also say that the guard helps them avoid splashing when blending thick foods, because the guard keeps the blade from “suctioning” to the pot.

Credit: www.amazon.com
Statistics: Cookware Damage And Pan Guard Benefits
Did you know that:
- More than 60% of home cooks report scratches on their nonstick cookware after using metal tools.
- Nonstick coatings can lose up to 20% of effectiveness with just a few deep scratches.
- The average lifespan of a good nonstick pan is 3–5 years, but scratches can cut this in half.
- Replacing a single high-end Dutch oven can cost over $300—much more than a pan guard.
Using a pan guard is a small step that can save a lot of money and frustration in the long run.
Cleaning Up: Aftercare And Storage
Once you’re done blending, it’s important to store your equipment properly:
- Remove and clean the pan guard after each use.
- Dry all parts thoroughly before putting them away.
- Store the guard in a dry, cool place, separate from sharp tools.
If you use your blender every day, keep the pan guard in an easy-to-reach spot. Some people store the guard on the blender, but only if both are clean and dry.

Credit: www.amazon.com
Frequently Asked Questions
How Do I Know If A Pan Guard Will Fit My Kitchenaid Immersion Blender?
Check your blender’s model number, usually found on the shaft or in your user manual. Most official KitchenAid guards list the compatible models on the package or website. If you buy a third-party guard, look for one labeled “universal” but check user reviews for fit.
When in doubt, measure the diameter of your blender’s bell and compare it to the guard specs.
Can I Use My Immersion Blender In Nonstick Pans Without A Pan Guard?
Technically, you can, but it’s risky. The metal edges of the blender can scratch nonstick coatings, even with gentle use. Over time, these scratches make the coating peel or stop working. A pan guard is a small investment that protects your pans and keeps them looking new.
Is The Pan Guard Dishwasher Safe?
Most pan guards are made from dishwasher-safe plastic or silicone. However, high heat in some dishwashers can warp or damage them. Check your product’s instructions. If in doubt, wash by hand with warm soapy water and dry thoroughly before reuse.
What Should I Do If My Pan Guard Gets Stained Or Smells Bad?
Silicone guards, in particular, can absorb food colors and odors. Soak the guard in a mix of baking soda and water, or use a mild vinegar solution. Rinse well and air dry. Avoid using harsh chemicals, which can damage the material.
How Often Should I Replace My Pan Guard?
Replace your pan guard if you see cracks, tears, or if it no longer fits tightly. Most quality guards last several years with normal use. Regular inspection after each cleaning can help you spot problems early.
Putting a pan guard on your KitchenAid immersion blender is a simple step that protects your cookware, saves money, and makes blending safer and easier. With this guide, you now know how to choose, install, use, and care for your pan guard. Enjoy smooth soups, sauces, and more—without worrying about scratches or damage. Cooking should be fun, not stressful. With the right tools and habits, your kitchen can stay beautiful for years to come.