What Bowl To Use With Immersion Blender: Best Options Revealed
Choosing the right bowl for your immersion blender seems simple, but it can make or break your blending experience. If you’ve ever splattered soup across your kitchen or struggled to reach the last bit of smoothie, you know how important the bowl shape and material are.
This guide shows you exactly what type of bowl works best, why it matters, and how to avoid common mistakes. Whether you’re pureeing vegetables, whipping up sauces, or making baby food, you’ll find practical tips for safe, smooth blending every time.
Why Bowl Selection Matters For Immersion Blenders
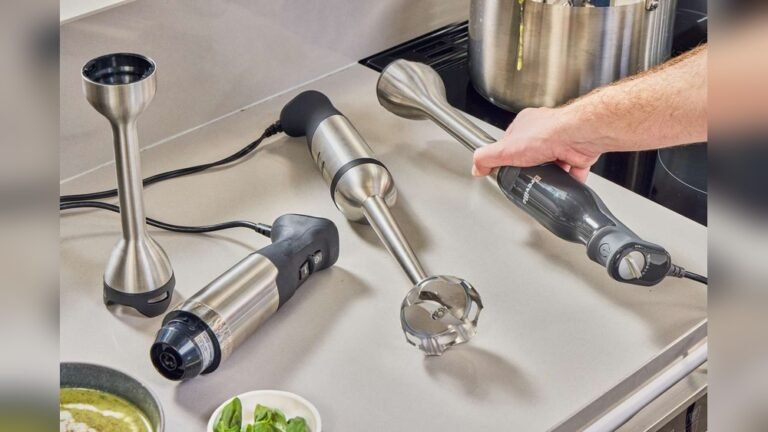
Immersion blenders, also called stick blenders or hand blenders, are popular for their convenience. Unlike countertop blenders, you use them directly in the bowl, pot, or container. This flexibility is great, but it means the container’s shape and material strongly affect blending quality and safety.
A poorly chosen bowl can cause:
- Splattering (messy kitchen)
- Uneven blending (chunks left)
- Scratched surfaces (damaging cookware)
- Difficulty reaching ingredients (waste)
The right bowl lets you blend faster, cleaner, and safer. Understanding why these problems happen helps you avoid them.
How Bowl Shape Affects Blending
A bowl’s shape guides the flow of ingredients. Wide, shallow bowls make it hard to submerge the blender head. Narrow, deep bowls force ingredients up, sometimes leading to splashing. The best bowls balance depth and width, allowing you to move the blender freely while keeping food contained.
The Role Of Bowl Material
Immersion blenders can scratch delicate surfaces. Glass, stainless steel, and thick plastic are safest. Thin plastic or ceramic can crack or chip. Some bowls even absorb food odors or stain, which affects future recipes. Picking the right material prevents damage and keeps your kitchenware lasting longer.
Types Of Bowls You Can Use With Immersion Blenders
Not all kitchen bowls work equally well. Let’s break down the main options.
| Type | Material | Best For | Key Advantages | Drawbacks |
|---|---|---|---|---|
| Mixing Bowl | Plastic, Glass, Stainless Steel | General blending | Easy to clean, sturdy, available in many sizes | Some plastics can stain, glass may chip |
| Measuring Cup | Plastic, Glass | Small portions | Marked measurements, usually tall | May be too narrow for large batches |
| Soup Pot | Stainless Steel, Enamel | Hot liquids | Can blend directly after cooking | Heavy, must be deep enough |
| Dedicated Blender Jar | Plastic, Glass | Smoothies, sauces | Designed for blending, fits blender head well | May not be large enough for some recipes |
| Mixing Pitcher | Plastic, Glass | Pourable recipes | Easy to pour, tall sides | Can be slippery |
Mixing Bowl
A mixing bowl is the most common choice. Look for one with a flat base and tall sides. Stainless steel is durable and resists stains. Glass is easy to see through, helping you monitor blending, but it can chip if you bang the blender against it. Thick plastic bowls are lightweight and safe but may absorb odors.
Measuring Cup
A measuring cup works well for small batches. The tall, narrow shape prevents splashing. Look for cups with wide mouths so the blender fits easily. Glass measuring cups are microwave safe, handy for warming ingredients before blending.
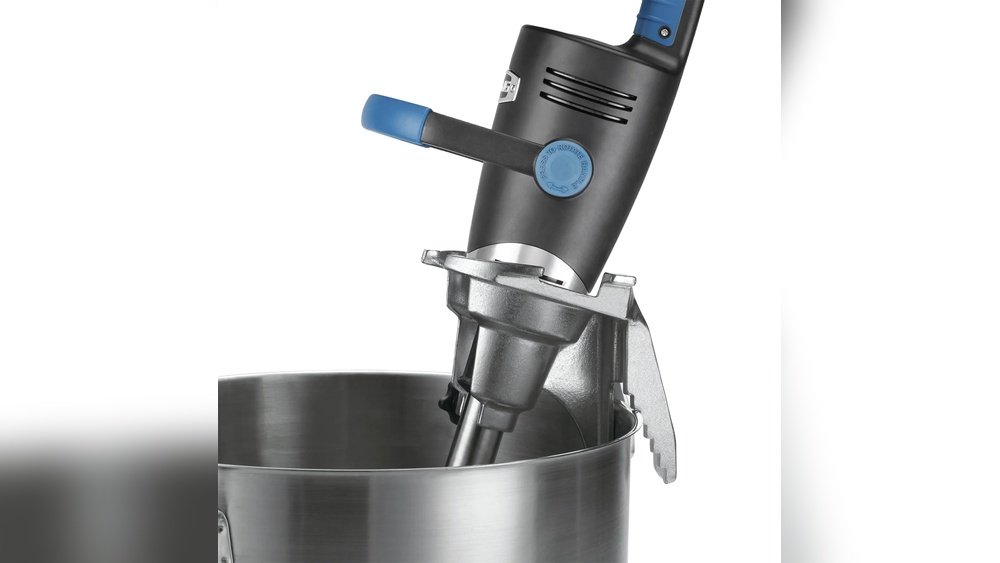
Soup Pot
You can blend directly in a soup pot after cooking. Stainless steel pots are ideal—they don’t stain, crack, or scratch easily. Enamel pots work too, but avoid scraping the blender along the bottom. Be careful with nonstick pots; immersion blenders can damage coatings.
Blender Jar
Some immersion blenders come with a dedicated jar. These are designed for the blender’s head, minimizing splatter and maximizing efficiency. If your blender includes a jar, it’s usually the safest option. However, capacity is often limited.
Mixing Pitcher
A mixing pitcher is useful for recipes you want to pour, like pancake batter. The tall sides reduce mess, and the spout makes pouring easy. Choose pitchers with non-slip bases to avoid accidents.
What Makes A Bowl “immersion Blender Friendly”?
Not every bowl is safe or practical for immersion blenders. Here’s what to look for:
- Flat Bottom: Prevents tipping. Keeps blender stable.
- Tall Sides: Reduces splashing. Contains ingredients.
- Wide Opening: Fits blender head easily. Allows movement.
- Sturdy Material: Resists scratches and chips.
- Non-Slip Base: Stops bowl from sliding.
Size Matters
A bowl that’s too small leads to spills. Too large, and you may not submerge the blender head, causing uneven blending. Aim for a bowl that holds at least twice the volume of your ingredients to allow space for blending motion.
Depth Vs. Width
The ideal bowl is deep enough for the blender head to submerge but not so narrow that ingredients get trapped. For most recipes, a bowl about 6–8 inches deep and 8–10 inches wide works well.
Material Safety
Not all materials are equal. Stainless steel is best for durability. Glass is good for visibility but can chip. Thick plastic is lightweight but may stain. Avoid thin ceramics and light plastics—they can crack or splinter.
| Material | Durability | Odor Resistance | Scratch Resistance |
|---|---|---|---|
| Stainless Steel | Excellent | High | High |
| Glass | Good | High | Moderate |
| Thick Plastic | Good | Moderate | High |
| Thin Plastic | Poor | Low | Poor |
| Ceramic | Poor | High | Low |
Common Mistakes When Choosing A Bowl
Many people make simple but costly mistakes. Avoid these pitfalls:
- Using shallow bowls: Causes splatter and mess.
- Choosing fragile materials: Risk of cracking or chipping.
- Ignoring size: Too small, spills; too big, uneven blending.
- Overfilling: Ingredients overflow when blending.
- Non-stick surfaces: Can scratch or damage coating.
Non-obvious Insight: Bowl Weight
A lightweight bowl can slip or tip as you blend. Heavier bowls stay stable, especially when blending thick mixtures. If using a lightweight bowl, place a damp towel underneath for grip.
Non-obvious Insight: Bowl Color
White or light-colored bowls show stains easily. If you blend colorful ingredients (beets, berries), choose darker bowls or stainless steel to keep your kitchenware looking clean.
How To Blend Safely And Efficiently
Proper technique matters as much as bowl choice. Here’s how to get the best results:
- Submerge the blender head before turning it on. This prevents splatter.
- Move the blender slowly up and down and around the bowl for even blending.
- Pulse in short bursts for thick mixtures.
- Tilt the bowl slightly to pool ingredients in one area if needed.
- Stop blending if you hear scraping—you may be hitting the bottom.
Handling Hot Ingredients
When blending hot soups or sauces, use a heat-resistant bowl. Glass and stainless steel are safest. Never use thin plastic or ceramic with hot liquids—they can crack from temperature shock.
Best Bowls For Specific Recipes
Different recipes need different bowls. Here’s what works best for common foods:
Smoothies
Use a tall, narrow measuring cup or dedicated blender jar. These contain splashes and make it easy to pour into glasses.
Soups
A deep soup pot is ideal. Blend directly after cooking. Stainless steel is best; avoid non-stick pots.
Sauces
A mixing bowl with tall sides works well. Stainless steel or glass lets you see texture changes.
Baby Food
Choose a small, deep glass bowl or a measuring cup. Easy to clean and safe for heating.
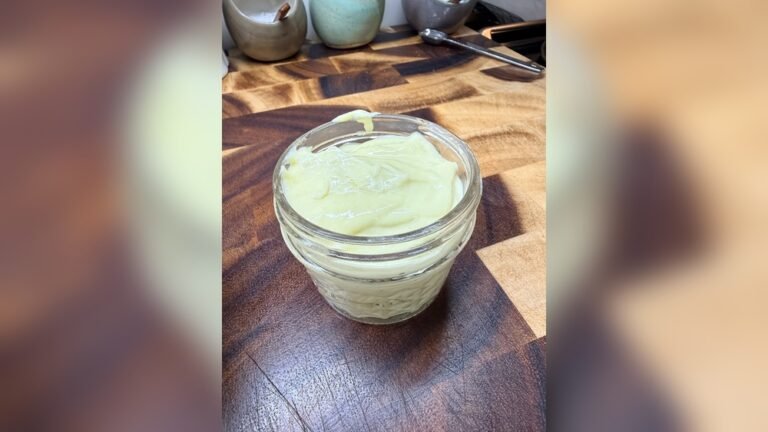
Whipped Cream Or Egg Whites
A wide mixing bowl allows air to circulate, helping with fluffiness. Stainless steel is preferred for stability.

Credit: www.breville.com
How Bowl Shape Influences Texture
The bowl’s shape doesn’t just affect splashing—it changes the texture of your food.
- Tall, narrow bowls: Force ingredients toward the blade, creating smoother blends.
- Wide, shallow bowls: Allow more air in, which can make whipped foods fluffier.
- Curved sides: Help ingredients slide back toward the blade, reducing missed chunks.
If you notice chunks left behind, switch to a narrower bowl. For whipped recipes, use a wider bowl.
Comparing Popular Bowl Brands For Immersion Blending
Many brands offer bowls designed for immersion blenders. Here’s a comparison of top choices:
| Brand | Material | Capacity | Features | Price Range |
|---|---|---|---|---|
| OXO Good Grips | Stainless Steel | 5 qt | Non-slip base, pouring spout | $20–$30 |
| Pyrex | Glass | 4 qt | Microwave safe, clear sides | $15–$25 |
| KitchenAid | Plastic | 3.5 qt | Lightweight, dishwasher safe | $10–$18 |
| Cuisinart | Stainless Steel | 6 qt | Extra deep, rolled rim | $25–$35 |
| Anchor Hocking | Glass | 2 qt | Thick glass, easy to clean | $12–$20 |
When picking a brand, focus on material quality, capacity, and features like non-slip bases or pouring spouts. Price varies, but durability is key.
Cleaning And Maintaining Your Blending Bowl
Blending bowls get dirty fast. Here’s how to keep them clean and safe:
- Rinse immediately after use to prevent food from sticking.
- Use gentle detergents to avoid damaging the surface.
- Avoid abrasive scrubbing—it scratches plastic and glass.
- Check for chips or cracks before each use.
- Dry thoroughly to prevent odor buildup.
Removing Stains And Odors
For stubborn stains, soak the bowl in a mix of baking soda and water. For odors, rub with lemon juice and rinse. Stainless steel rarely stains, but glass and plastic can.
When To Replace Your Blending Bowl
Kitchen bowls last for years, but certain signs mean it’s time for a new one:
- Visible cracks or chips
- Persistent stains or odors
- Warping or melting (for plastic)
- Loose or slippery base
Replacing a damaged bowl protects your blender and keeps food safe.

Credit: bakinghermann.com
Safety Tips For Using Immersion Blenders In Bowls
Immersion blenders are powerful. Follow these safety tips:
- Turn off before removing the blender from the bowl.
- Keep hands clear of the blade at all times.
- Avoid sudden jerks—move the blender gently.
- Don’t overload the bowl; blend in batches if needed.
- Secure the bowl on a damp towel to prevent slipping.
Electrical Safety
Never immerse the motor part of the blender in liquid. Only the blending shaft is safe. Unplug after use.
Choosing A Bowl For Immersion Blender: Key Decision Factors
When shopping for a bowl, consider these factors:
- Material: Stainless steel, glass, thick plastic.
- Size: At least twice your recipe’s volume.
- Shape: Tall sides, flat bottom, wide opening.
- Non-slip base: Prevents accidents.
- Heat resistance: Important for hot recipes.
Practical Example
If you make smoothies often, a 4-cup glass measuring cup works well. For soup, a 6-quart stainless steel pot is best. For sauces, a 3-quart mixing bowl with tall sides is ideal.

Credit: muellerliving.com
Real World Data: Kitchen Bowl Preferences
A recent survey by Consumer Reports found that:
- 57% of home cooks prefer stainless steel bowls for blending
- 28% use glass bowls
- 15% use thick plastic bowls
Stainless steel is the top choice because of durability and ease of cleaning.
Where To Buy Immersion Blender-friendly Bowls
You can find suitable bowls at most kitchen stores. Look for brands like OXO, Pyrex, and KitchenAid. Online retailers offer more size and material options.
For more tips on choosing kitchenware, see Consumer Reports.
Frequently Asked Questions
What Size Bowl Is Best For An Immersion Blender?
A bowl holding at least twice your recipe’s volume works best. For most recipes, a 4–6 quart bowl is ideal. This gives you enough space to move the blender and prevents splashes.
Can I Use A Ceramic Bowl With An Immersion Blender?
It’s possible, but not recommended. Ceramic bowls can chip or crack if hit by the blender. Choose stainless steel, glass, or thick plastic instead.
Is It Safe To Blend Hot Soup In A Plastic Bowl?
Only if the plastic is heat-resistant and thick. Thin plastics can warp or melt. Glass or stainless steel is safer for hot liquids.
How Do I Prevent Splashing When Using An Immersion Blender?
Use a bowl with tall sides and a flat bottom. Always submerge the blender head before turning it on. Move the blender slowly and blend in batches if needed.
Why Does My Immersion Blender Scratch My Bowl?
Scratches usually happen with delicate materials like thin plastic or non-stick coatings. Use stainless steel, glass, or thick plastic bowls. Avoid scraping the blender along the bottom.
Choosing the right bowl for your immersion blender is more than just picking what’s handy. It improves blending quality, protects your kitchenware, and makes cleanup easier. With the right bowl, you’ll enjoy smoother textures, less mess, and safer blending every time.